1. はじめに
The Flashpoint XPLOR 600 SE AD600BMII R2 is a high-performance 600Ws outdoor studio flash strobe, an upgraded version of the Godox AD600BM. Designed for professional photographers and videographers, this unit offers exceptional speed, precision, and versatility for various shooting environments, from fast-paced events to studio sessions and outdoor portraits.
This manual provides detailed instructions to help you maximize the potential of your Flashpoint XPLOR 600 SE, ensuring optimal performance and longevity.

Figure 1.1: Flashpoint XPLOR 600 SE AD600BMII R2 with accessories.
2. 箱の中身
開梱したら、以下の品目がすべて揃っていることを確認してください。
- Flashpoint XPLOR 600 SE (Special Edition) R2 Manual HSS Battery-Powered All-In-One Outdoor Flash
- 10.8V/ 8940mAh Lithium battery pack
- バッテリー充電器
- 600 Ws 5600K (±200K) Flash Tube
- Reflector and Cap
- Compartment Case
- 取扱説明書

Figure 2.1: Included items in the Flashpoint XPLOR 600 SE packaging.
3.コンポーネントオーバーview
Familiarize yourself with the main components and controls of your Flashpoint XPLOR 600 SE unit.

Figure 3.1: Key components of the Flashpoint XPLOR 600 SE.
- 1. Bowens Mount Reflector & Flashtube: The front section housing the flash tube and compatible with Bowens mount modifiers.
- 2. Manual Control with Custom Functions: The control panel featuring a 2.8-inch TFT color screen and various buttons for adjusting settings.
- 3. Interchangeable Lithium-Ion Battery: The rear compartment for the high-capacity battery pack.
4. セットアップ
4.1. バッテリーの取り付けと充電
Insert the 10.8V/8940mAh Lithium battery pack into the designated slot at the rear of the flash unit. Ensure it clicks securely into place. Use the provided battery charger to fully charge the battery before first use. The battery provides approximately 500 full-power flashes on a single charge.
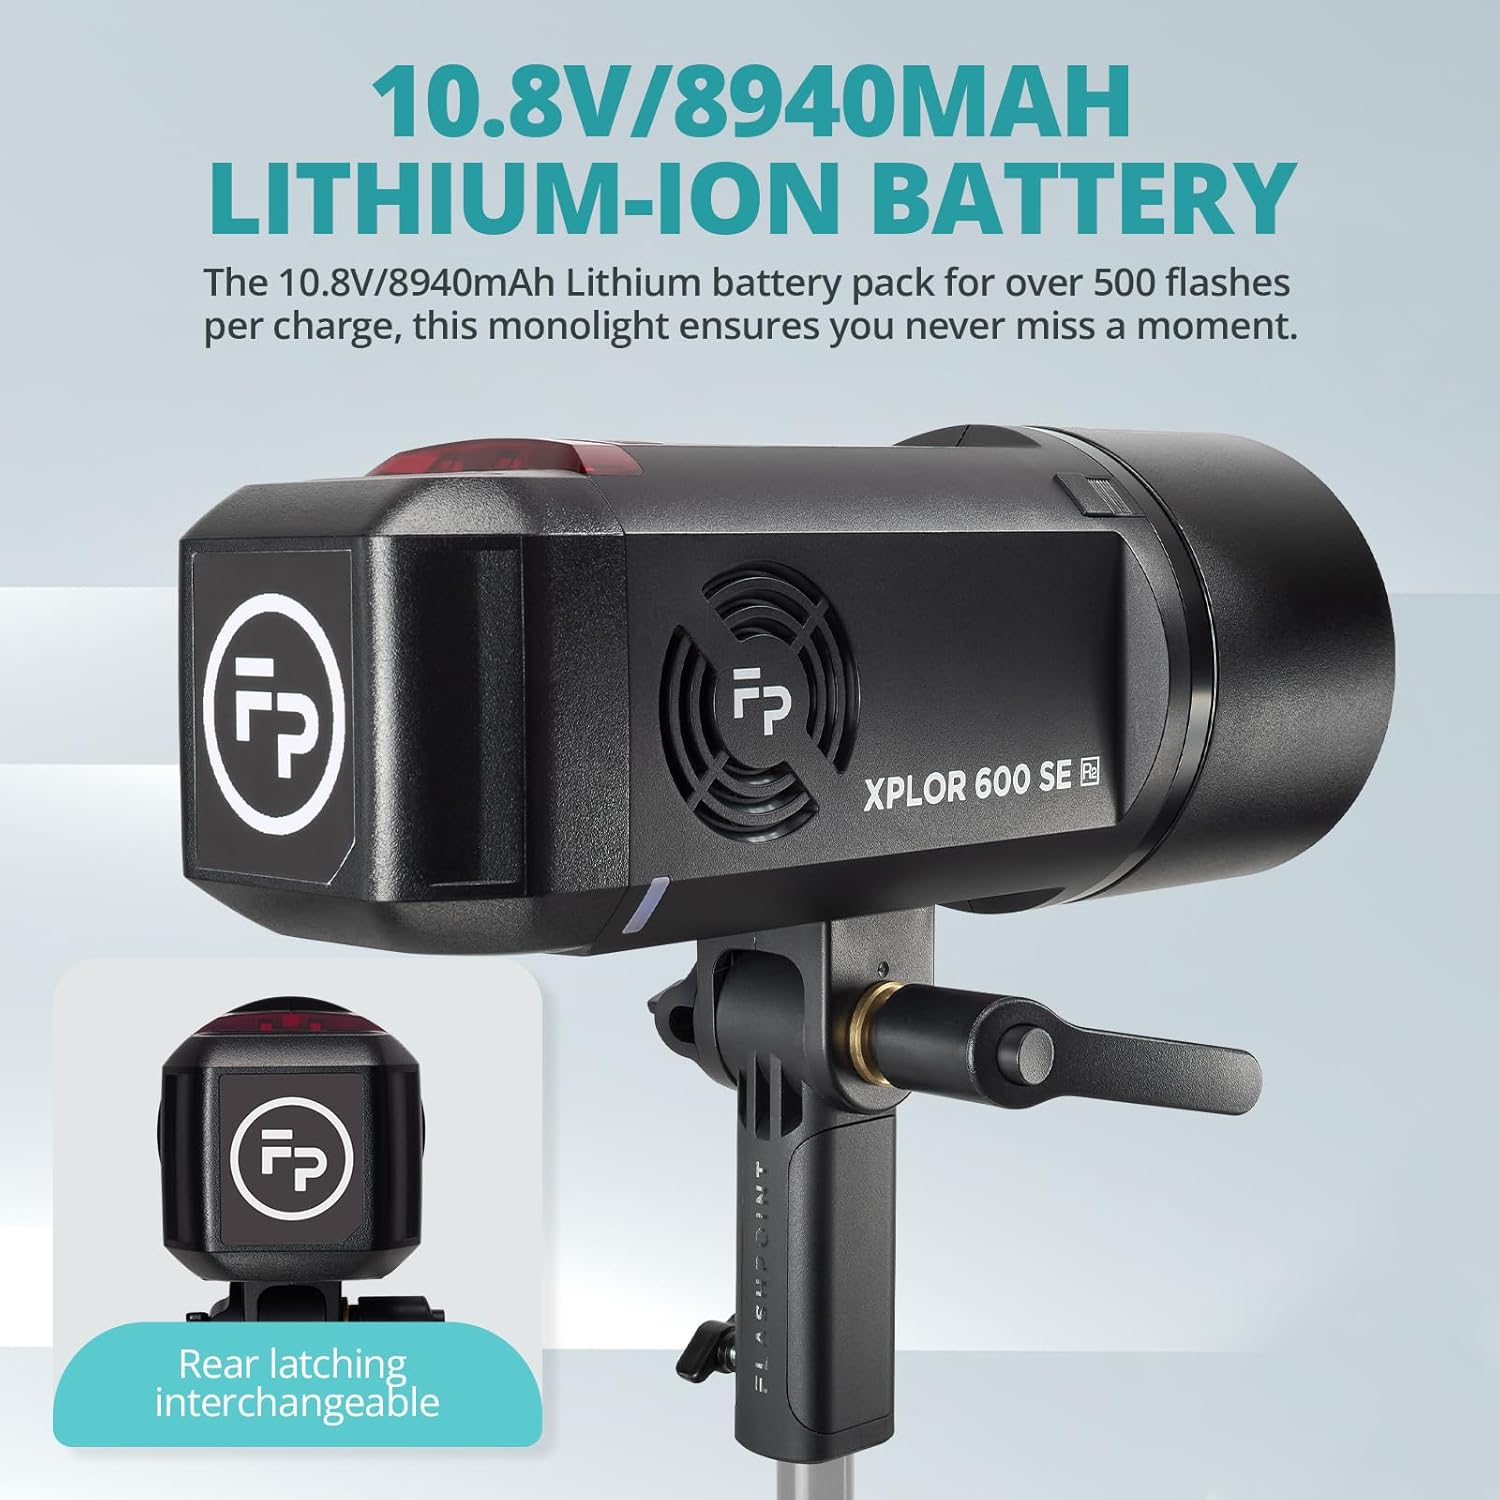
Figure 4.1: Rear latching interchangeable Lithium-Ion Battery.
4.2. フラッシュチューブとリフレクターアタッチメント
Carefully attach the 600 Ws 5600K (±200K) Flash Tube to the front of the unit. Then, secure the reflector and cap. The unit features a Bowens mount, allowing for seamless integration with a wide variety of light modifiers such as softboxes, beauty dishes, and reflectors.

Figure 4.2: Bowens Mount compatibility for light modifiers.
4.3. ユニットの取り付け
The Flashpoint XPLOR 600 SE can be mounted on a light stand using its integrated mount. For greater flexibility and lighter setups, the optional H600P Extension Head (2-meter cable) allows you to mount the flash head separately from the main unit.
5. 操作モードとコントロール
5.1. 電源のオン/オフとディスプレイ
Press and hold the power button to turn the unit on or off. The 2.8-inch TFT color screen provides an intuitive and user-friendly interface, displaying settings clearly even in bright daylight.
5.2. Manual HSS and Power Control
The XPLOR 600 SE supports Manual High-Speed Sync (HSS) photography, ideal for freezing motion and balancing ambient light. Adjust flash intensity with 10-step precision power control, ranging from full power (1/1) to ultra-low (1/512).
5.3. 40W LED Modeling Lamp
Utilize the powerful 40W LED modeling lamp (5600K stable color temperature) for consistent, natural daylight color. This dual-purpose light source functions as both a high-powered flash strobe and a continuous LED light for video shooting and portrait photography.

Figure 5.1: High-Speed Sync (HSS) and 40W LED Modeling Lamp 使用中。
5.4. Wireless Control and 16-Color ID System
The unit features a 2.4GHz R2 radio remote system for reliable communication. Achieve instant synchronization with the X3 Trigger via one-tap pairing. It is also compatible with Godox XproII, X2T, and X1 Triggers for multi-light setups. The 16-Color ID System allows you to easily manage multiple flash units by assigning a unique color ID to each light.

Figure 5.2: The Flashpoint R2 Radio System for wireless control.
ビデオ5.1: 終了view of the Godox AD600ProII Strobe Light, demonstrating features and controls relevant to the XPLOR 600 SE.
Video 5.2: Demonstration of the NEEWER Q6 600Ws Outdoor Flash, showcasing its features and use in various settings.
6.電力管理
The Flashpoint XPLOR 600 SE offers dual power options for maximum flexibility:
- 内蔵リチウム電池: Provides up to 500 full-power flashes, ideal for long sessions and outdoor locations.
- Optional AD-AC Power Adapter: Allows direct connection to AC power for continuous shooting, perfect for studio use.
7. Accessories and Compatibility
The unit's Bowens mount ensures compatibility with a vast range of light modifiers. Additionally, the optional H600P Extension Head provides enhanced flexibility for off-camera lighting setups.

Figure 7.1: Included compartment case for transport and storage.
8. 仕様
| 特徴 | 詳細 |
|---|---|
| 製品寸法 | 16 x 7.3 x 9.4インチ |
| 商品型番 | XPLOR 600 SE |
| メーカー | 引火点 |
| ブランド | 引火点 |
| 互換性のある取り付け | Universal (Bowens Mount) |
| バッテリー寿命 | Approx. 500 full-power flashes (8940mAh battery) |
| カメラのフラッシュタイプ | Outdoor flash |
| フラッシュ同期速度 | 1/200 or 1/250 (HSS up to 1/8000s) |
| リサイクル時間 | 0.01-1.9秒 |
| モデリングLamp | 40W LED, 5600K |

Figure 8.1: Detailed specifications of the XPLOR 600 SE.
9. メンテナンス
To ensure the longevity and optimal performance of your Flashpoint XPLOR 600 SE, follow these maintenance guidelines:
- クリーニング: Use a soft, dry cloth to clean the exterior of the unit. For the flash tube and reflector, use a lens cleaning cloth and solution if necessary, ensuring no residue is left.
- ストレージ: Store the unit in its compartment case in a cool, dry place away from direct sunlight and extreme temperatures. Remove the battery if storing for extended periods.
- バッテリーのケア: Avoid fully discharging the battery. Recharge it regularly, even if not in use, to maintain battery health.
- 取り扱い: フラッシュチューブとモデリングlを扱うamp with care as they are delicate. Avoid touching the flash tube directly with bare hands to prevent oil residue.
10。 トラブルシューティング
If you encounter issues with your Flashpoint XPLOR 600 SE, please refer to the following common troubleshooting steps:
- ユニットの電源が入っていない: Ensure the battery is fully charged and correctly inserted. If using the AC adapter, check the power connection.
- フラッシュが発光しない: Verify that the unit is powered on and the flash mode is correctly set. Check the wireless trigger connection and settings (channel, group).
- 一貫性のないフラッシュ出力: Ensure the battery is adequately charged. Check for any obstructions to the flash tube or reflector.
- 過熱: If the unit becomes excessively hot, it may automatically shut down to prevent damage. Allow it to cool down before resuming use. Avoid rapid, consecutive full-power flashes.
For persistent issues, please contact Flashpoint customer support.
11. 保証とサポート
For warranty information and technical support, please refer to the official Flashpoint web当サイトをご覧いただくか、正規販売店にお問い合わせください。保証請求の際は、購入証明としてレシートを保管してください。
Manufacturer: Flashpoint
さらにサポートが必要な場合は、次のサイトを参照してください。 Flashpoint Store on Amazon.