
1. はじめに
Thank you for choosing the TURN RAISE AT040 210° Two-Way Articulating Borescope. This industrial endoscope is designed for detailed visual inspection in hard-to-reach areas, featuring a dual-lens system, a 7-inch IPS display, and a flexible articulating probe. This manual provides essential information for the safe and effective operation, maintenance, and troubleshooting of your device. Please read it thoroughly before use.
2.製品オーバーview
2.1 主な特徴
- 210° Two-Way Articulating Probe: Allows precise control and locking of the probe tip for optimal view角度を変える。
- デュアルレンズシステム: Front and side cameras for comprehensive inspection, supporting split-screen display.
- 7インチIPSディスプレイ: Provides a wide and clear view of inspection areas.
- 0.25-inch (6.5mm) Slim Probe: Designed for access into small diameter gaps.
- 調整可能なLED照明: Integrated lights on the probe with adjustable brightness for clear visibility in dark environments.
- 写真とビデオの録画: Capture images and videos to a 32GB memory card.
- 人間工学に基づいたデザイン: Facilitates comfortable one-hand operation.
- 4000mAhバッテリー内蔵: 最大 4 時間の連続動作を実現します。
- IP67 Rated Probe: Water-resistant for use in damp または濡れた状態。
2.2 パッケージ内容
- Borescope with light (Main Unit) x1
- キャリングケースx1
- タイプC充電ケーブルx1
- ユーザーマニュアル x1
- 32GB Memory Card (pre-installed or separate) x1
2.3 デバイスコンポーネント

Figure 1: Main components of the TURN RAISE AT040 Borescope, including the display unit, articulating probe, and protective carrying case.
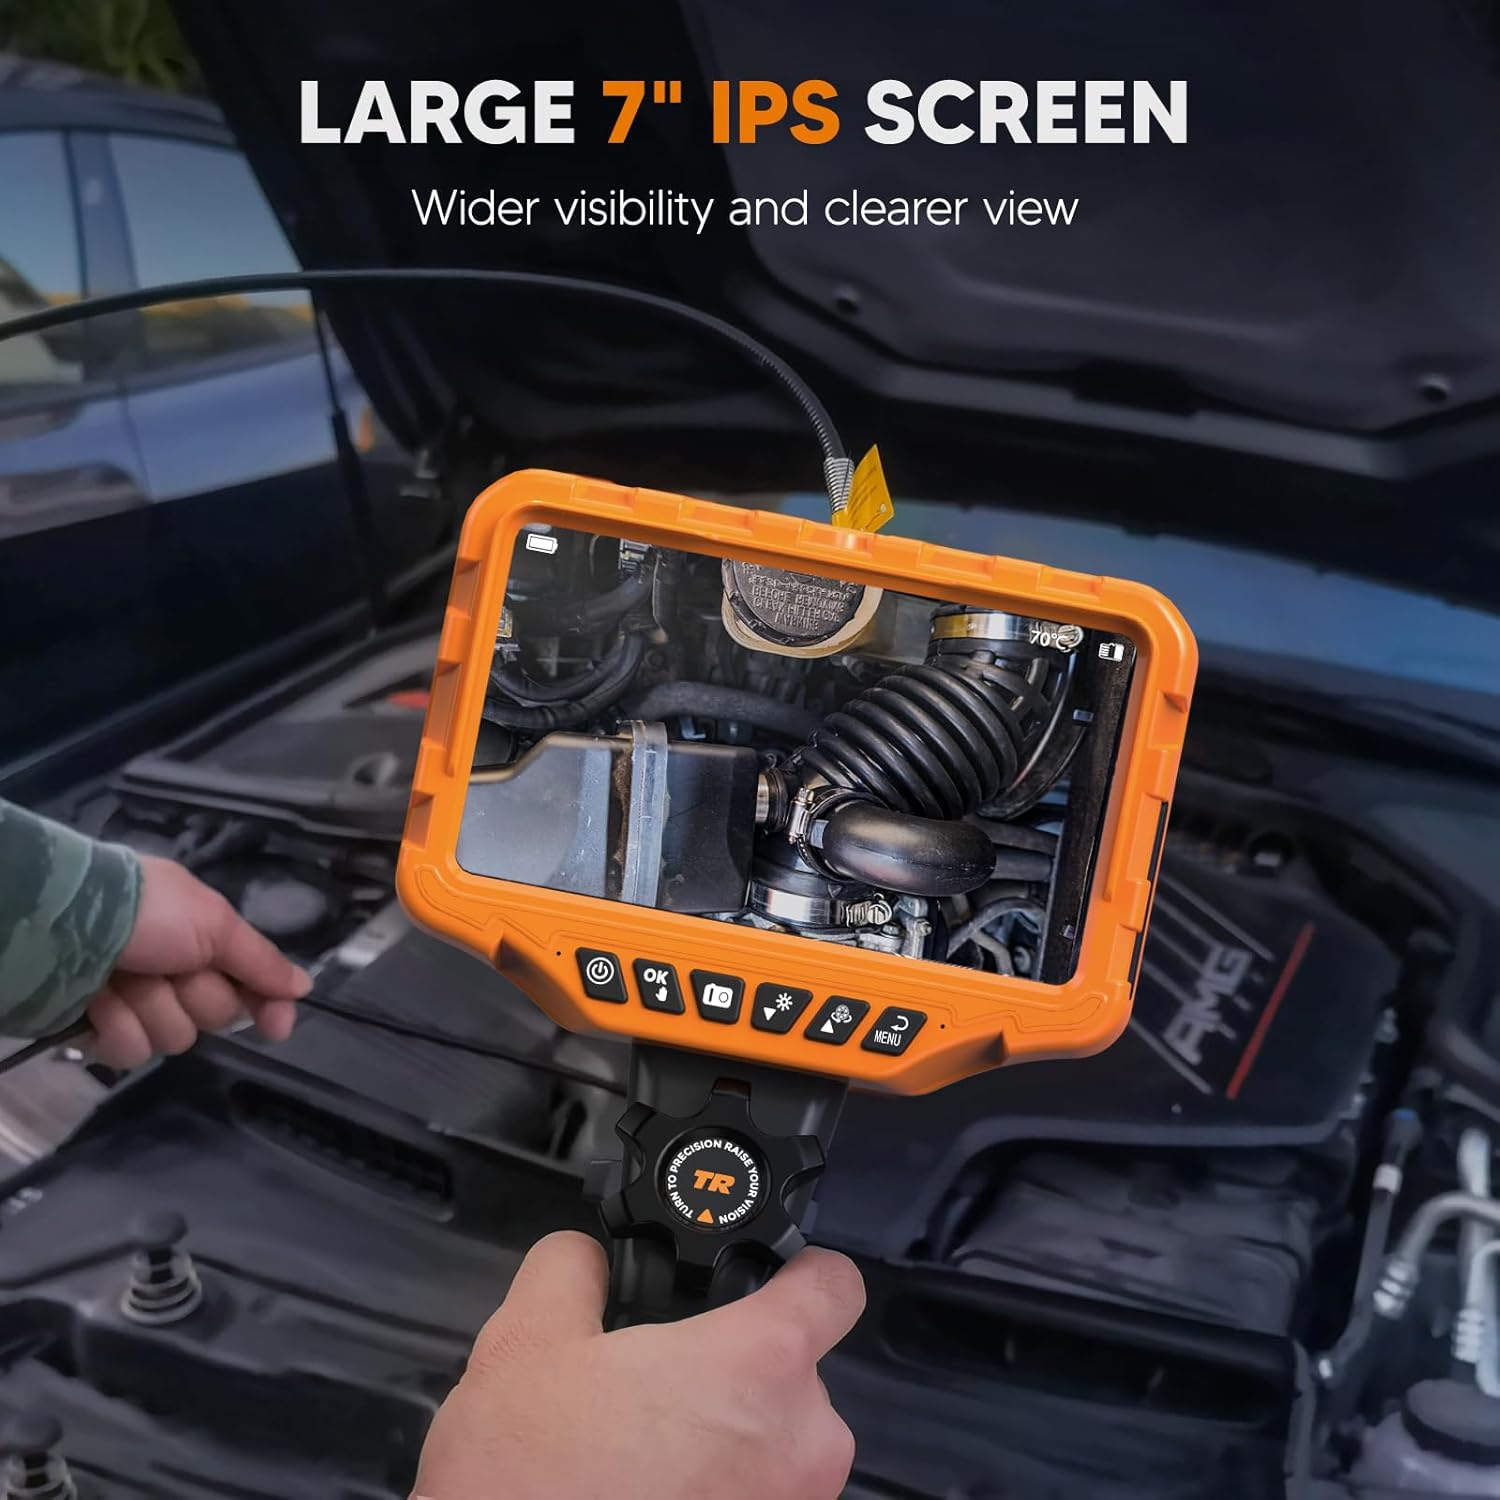
Figure 2: The large 7-inch IPS screen provides a clear and detailed view 検査中。
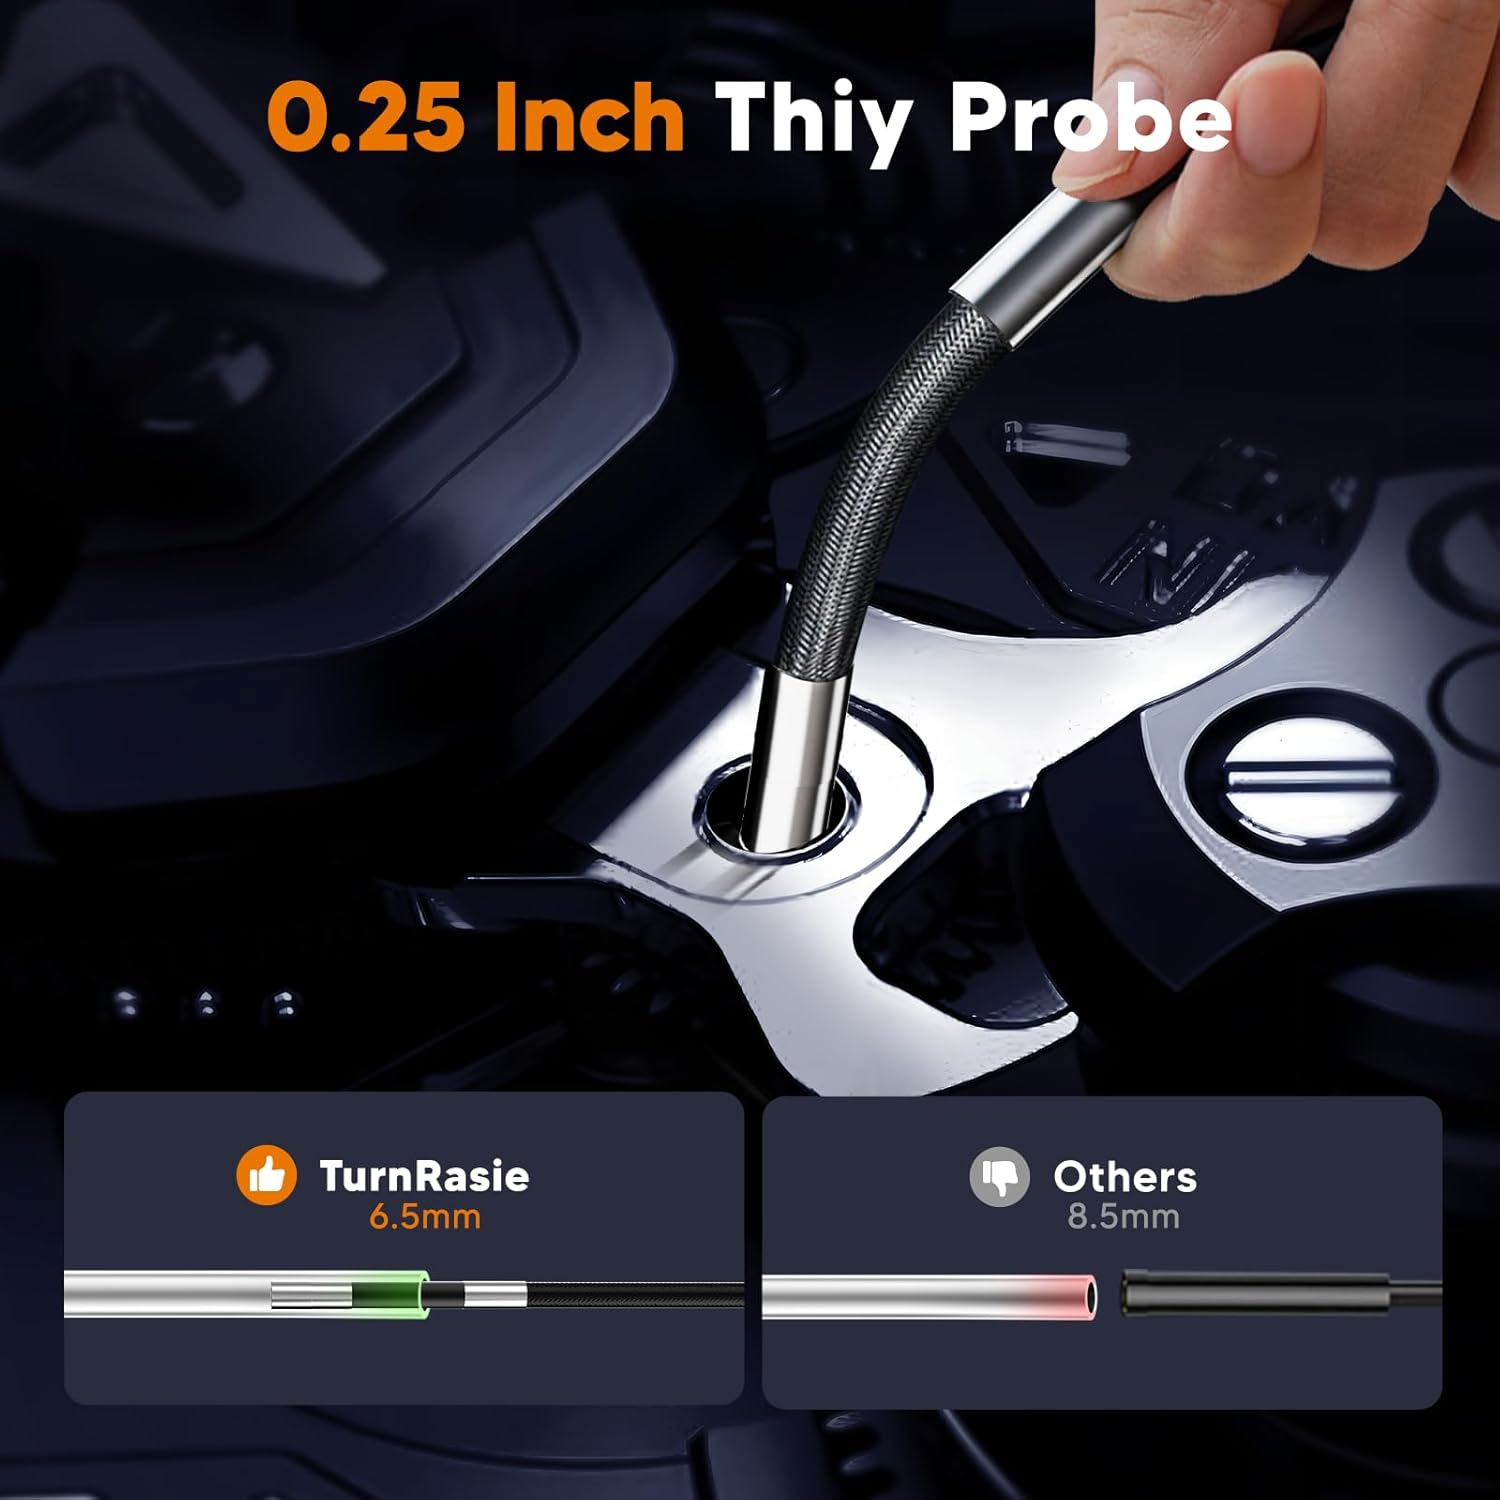
Figure 3: The ultra-slim 0.25-inch (6.5mm) probe allows access into very narrow spaces.
3. セットアップ
3.1デバイスの充電
- Connect the provided Type-C charging cable to the charging port on the borescope unit.
- ケーブルのもう一方の端を標準の USB 電源アダプター (別売) またはコンピューターの USB ポートに接続します。
- The charging indicator will illuminate. A full charge typically takes approximately 4 hours. Ensure the device is fully charged before first use for optimal battery life.
3.2メモリーカードの挿入
The device supports a 32GB memory card for storing images and videos. If not pre-installed, locate the memory card slot (usually on the side of the display unit) and gently insert the card until it clicks into place. Ensure the card is inserted in the correct orientation.
3.3 プローブの取り付け
The articulating probe is typically pre-attached. If it needs to be connected, align the connector on the probe cable with the port on the main unit and secure it firmly. Do not force the connection.
4. 操作手順
4.1 電源オン/オフ
- 電源を入れるには: 電源ボタン (⏻)を数秒間押し続けます。画面が点灯するまで押し続けます。
- 電源を切るには: 電源ボタン (⏻)をもう一度押して、画面が消えるまで待ちます。
4.2 Basic Navigation and Menu
Use the directional buttons and the 'OK' button to navigate through menus and confirm selections. The 'Menu' button typically accesses settings such as resolution, date/time, and language.
4.3 関節式プローブ制御
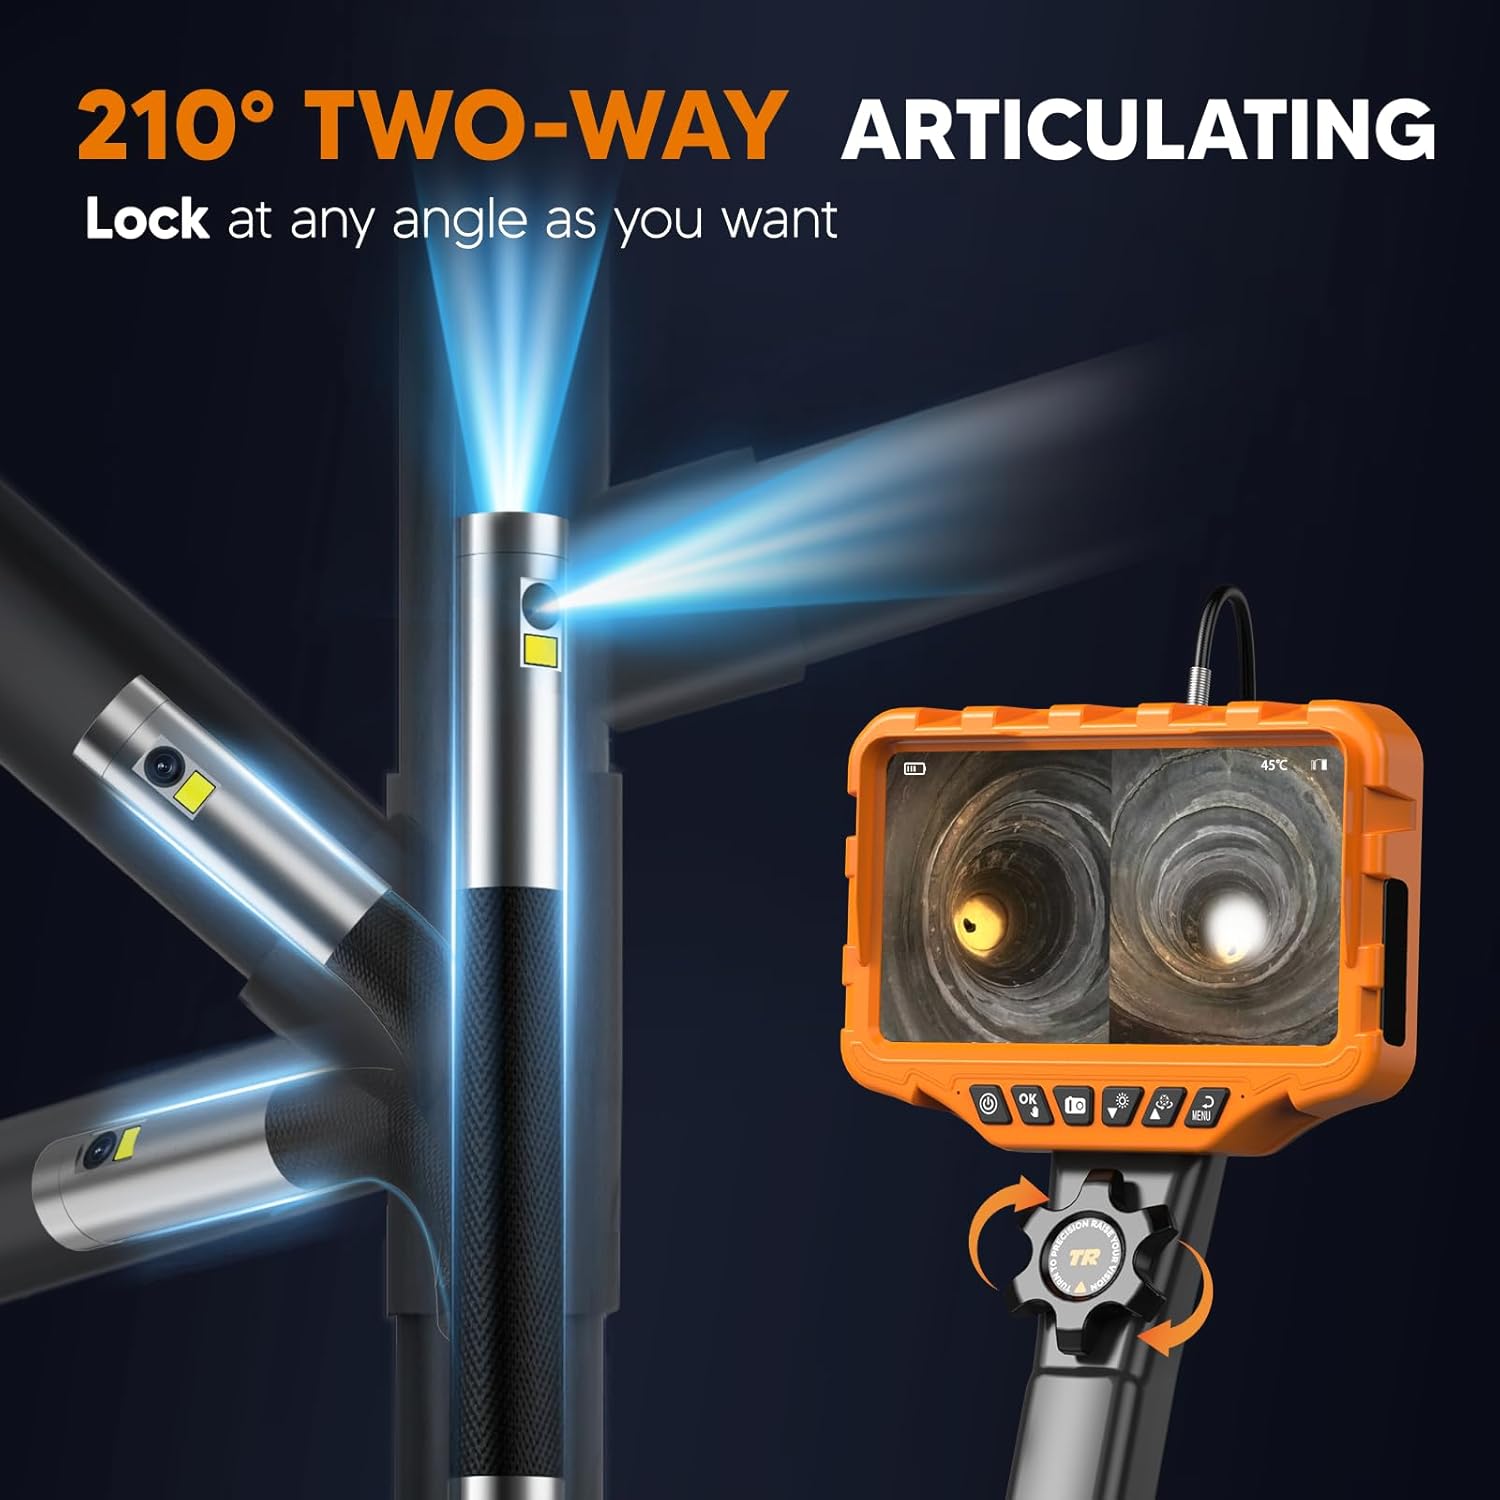
Figure 4: The probe tip can be articulated up to 210 degrees in two directions using the control wheel.
The AT040 features a 210° two-way articulating probe. To control the probe tip:
- Locate the control wheel on the handle of the borescope.
- Rotate the wheel to bend the probe tip in the desired direction.
- The probe tip can be locked at any angle by holding the wheel in position, allowing for stable viewing。
4.4 Dual-Lens and Split-Screen Functionality

図 5: 分解 view of the dual-lens camera system, providing 1080P HD imaging.
The borescope is equipped with both a front-facing and a side-facing lens. To utilize this feature:
- Press the dedicated dual-lens button (refer to device interface for icon, typically two overlapping squares or similar) to switch between single front view, single side view、または分割画面表示。
- In split-screen mode, both camera feeds are shown simultaneously on the 7-inch IPS screen, enhancing inspection efficiency.
4.5 LEDの明るさの調整
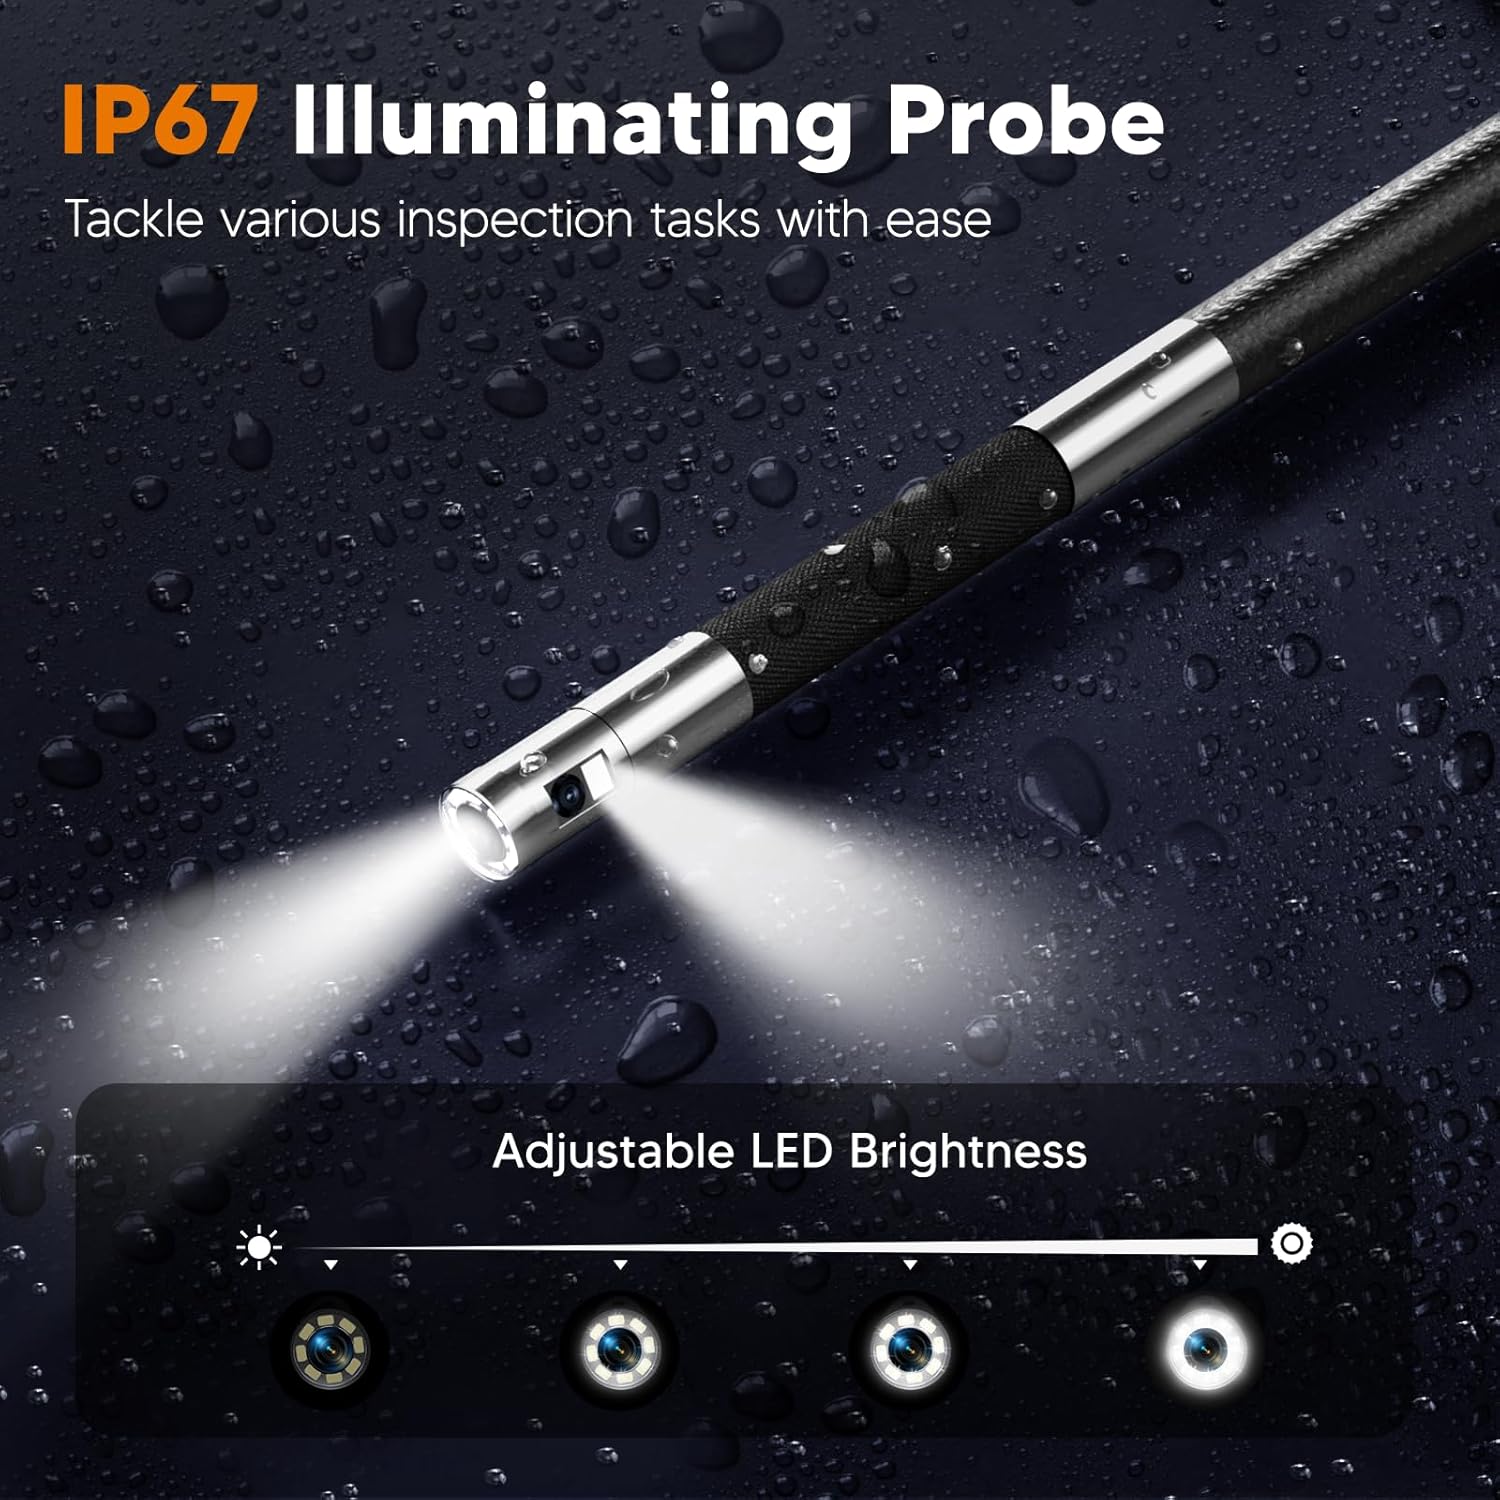
Figure 6: The IP67 rated probe features adjustable LED lights for optimal illumination in various conditions.
To adjust the brightness of the LED lights on the probe tip:
- Locate the LED brightness control button (often indicated by a light bulb icon).
- Press the button repeatedly to cycle through different brightness levels or use a dedicated dial if available.
4.6 写真とビデオの撮影
The borescope supports capturing JPG images and AVI video recordings.
- 写真を撮るには: Press the 'Photo' button (typically a camera icon). The image will be saved to the inserted memory card.
- ビデオを録画するには: Press the 'Video' button (typically a video camera icon) to start recording. Press it again to stop recording. Videos are saved to the memory card.
- The device also supports audio recording via a built-in microphone during video capture.
4.7 Flexible Rigid Gooseneck

Figure 7: The flexible rigid gooseneck probe can be bent and shaped to suit various inspection needs.
The probe cable is designed to be flexible yet rigid enough to hold its shape. This allows you to bend, shape, and extend the probe to navigate complex pathways and maintain the desired viewing angle during inspection.
5. メンテナンス
5.1 クリーニング
- Probe and Lens: After each use, especially in dirty environments, gently wipe the probe and camera lenses with a soft, dry cloth. For stubborn dirt, a slightly damp cloth can be used, followed by drying. Ensure no liquid enters the probe tip.
- 表示画面: Clean the IPS screen with a soft, lint-free cloth. Avoid abrasive cleaners.
- 本体: 本体を乾いた布か軽く拭いてください。amp 布で拭いてください。本体を水に浸さないでください。
5.2バッテリーケア
- バッテリーの寿命を延ばすには、バッテリーを頻繁に完全に放電しないようにしてください。
- バッテリーの状態を維持するために、使用していない場合でも定期的にデバイスを充電してください。
- 長期間使用しない場合は、デバイスを涼しく乾燥した場所に保管してください。
5.3 ストレージ
Store the borescope and its accessories in the provided carrying case to protect it from dust, impacts, and environmental damage. Keep it away from extreme temperatures and direct sunlight.
6。 トラブルシューティング
| 問題 | 考えられる原因 | 解決 |
|---|---|---|
| デバイスの電源が入らない | バッテリー残量が少ない; 電源ボタンが正しく押されていない | Charge the device fully. Press and hold the power button for several seconds. |
| 画質が悪い | レンズの汚れ、照明不足、焦点距離の誤り | Clean the camera lens. Adjust LED brightness. Ensure the object is within the camera's optimal focal range. |
| プローブの関節が機能しない | Control wheel jammed; Internal damage | Check for obstructions around the control wheel. If the issue persists, contact support. |
| 写真/ビデオを録画できません | Memory card full or not inserted; File システムエラー | Check if the 32GB memory card is correctly inserted and has free space. Format the card if necessary (this will erase all data). |
| バッテリー寿命が短い | Battery not fully charged; High brightness settings; Aging battery | Ensure the device is fully charged. Reduce LED brightness if possible. Battery performance may degrade over time. |
7. 仕様
| 特徴 | 仕様 |
|---|---|
| モデル | AT040 |
| プローブ径 | 0.25インチ(6.5mm) |
| 関節角度 | 210°双方向 |
| 画面サイズ | 7インチIPSディスプレイ |
| カメラ解像度 | 1080P HD (for both lenses) |
| ケーブル長さ | 5.3フィート(約1.6メートル) |
| バッテリー容量 | 4000mAh |
| 動作時間 | 最大4時間(フル充電後) |
| メモリーカード | 32GB(付属) |
| 画像フォーマット | 画像 |
| ビデオフォーマット | 動画 |
| Probe Water Resistance | IP67 |
| 動作温度 | Refer to device for specific range (often includes temperature sensor at tip) |
| 重さ | 1.78 kg(約3.9ポンド) |
| メーカー | ターンレイズ |
8. 保証とサポート
For warranty information, technical support, or service inquiries, please refer to the documentation included with your purchase or contact the TURN RAISE customer support directly. Keep your purchase receipt as proof of purchase.