
1. はじめに
This manual provides detailed instructions for the installation, operation, and maintenance of the Novastar TU15PRO LED Vision Controller. Please read this manual thoroughly before using the device to ensure proper and safe operation. The TU15PRO is designed for controlling LED displays, offering robust performance and versatile connectivity.
2. 安全情報
- 電源: Use only the specified power adapter (AC100-240V 50/60Hz). Ensure the power source is stable and matches the device's requirements.
- 環境: Operate the device in a dry, well-ventilated area. Avoid exposure to extreme temperatures, humidity, dust, or direct sunlight.
- 取り扱い: Do not drop, disassemble, or modify the device. Refer all servicing to qualified personnel.
- ケーブル: Ensure all cables are securely connected. Avoid placing heavy objects on cables or bending them sharply.
- クリーニング: 清掃する前に電源を切ってください。柔らかく乾いた布を使用してください。液体洗剤やエアゾール洗剤は使用しないでください。
3. パッケージ内容
開梱後、パッケージの内容をご確認ください。不足品や破損品がございましたら、すぐに販売店までご連絡ください。
- Novastar TU15PRO LED Vision Controller
- 電源アダプター
- USBケーブル
- ユーザーマニュアル(このドキュメント)
4.製品オーバーview
The Novastar TU15PRO is a compact and powerful LED vision controller designed for various display applications. It features multiple input and output ports for flexible connectivity.
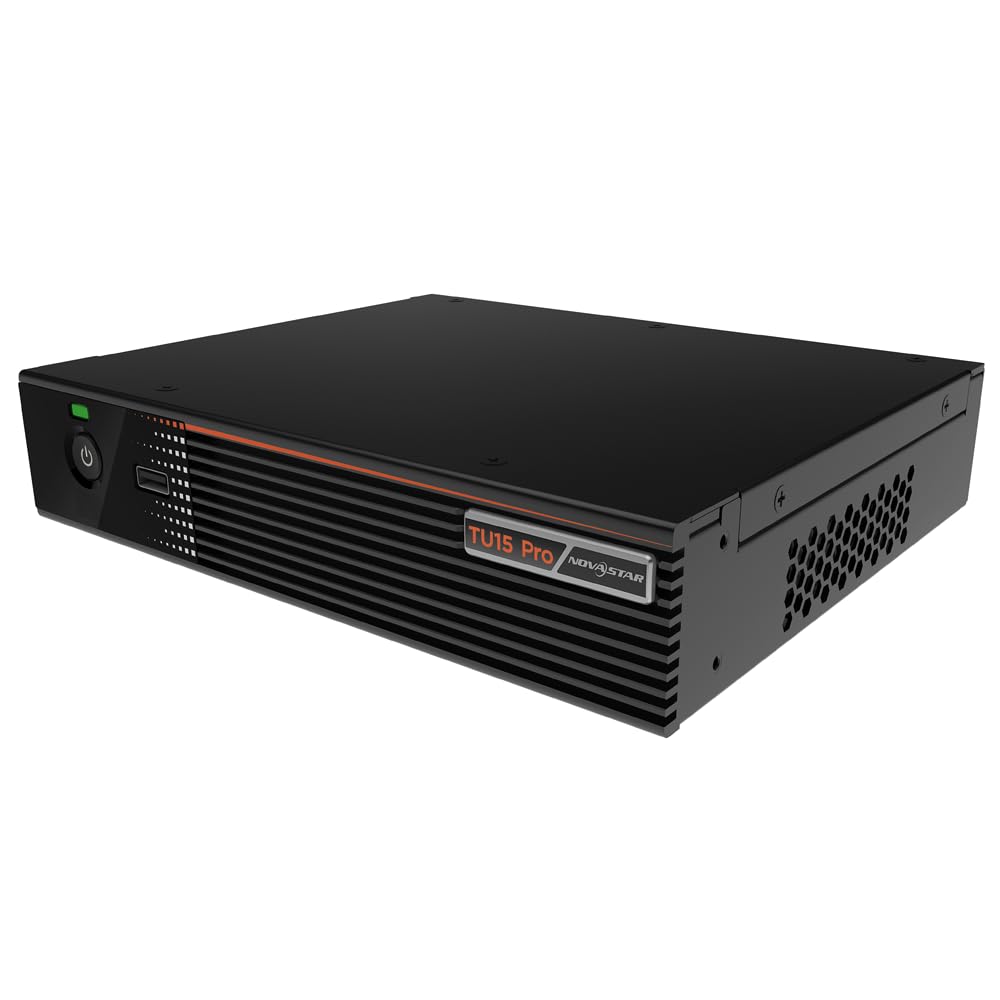
図4.1: 角度付き view of the Novastar TU15PRO LED Vision Controller, highlighting the rear panel with various input and output ports.

図4.2: トップダウン view of the Novastar TU15PRO, showing the front panel with power button and USB port, and a detailed view 背面パネルの接続。
4.1。 フロントパネル
- 電源ボタン: デバイスの電源をオンまたはオフにするために使用します。
- USB 2.0ポート: For connecting USB devices, such as a mouse or keyboard for control, or for firmware updates.
4.2.リアパネル
- WIFI-AP (1, 2): Wi-Fi Access Point antennas for wireless control or network extension.
- WIFI-STA: Wi-Fi Station antenna for connecting the device to an existing Wi-Fi network.
- センサー: Port for connecting an external sensor.
- IR / I/O G RELAY: Input/Output General Purpose Relay terminal block for external control signals.
- イーサネット: Ethernet port for network connection and control.
- USB 2.0 (x2): Additional USB ports for peripherals or data transfer.
- HDMI入力(×2): HDMI input ports for video sources.
- HDMI出力: HDMI output port for monitoring or cascading.
- オーディオ: デジタルオーディオ出力。
- AUDIO 12V === 3A: Power input port (DC 12V, 3A).
5. セットアップ
- 開梱: Carefully remove the TU15PRO controller from its packaging.
- アンテナを接続する: Attach the Wi-Fi antennas to the WIFI-AP and WIFI-STA ports on the rear panel.
- ビデオソースを接続します: Connect your video source (e.g., computer, media player) to one of the HDMI IN ports using an HDMI cable.
- LEDディスプレイに接続します: Connect the controller's Network Ports (1-4) to your LED display receiving cards using Ethernet cables.
- 接続電源: 付属の電源アダプターを AUDIO 12V === 3A port and then plug it into a power outlet.
- 電源オン: 前面パネルの電源ボタンを押してデバイスの電源をオンにします。
- Network Configuration (Optional): For network control, connect an Ethernet cable to the イーサネット port or configure Wi-Fi settings.
6. 操作手順
Once the device is set up, you can begin operating it. Detailed operation typically involves using dedicated software on a connected computer or through a web インタフェース。
- ソフトウェアのインストール: Install the Novastar control software on your computer. Refer to the software's documentation for installation and usage.
- デバイス認識: Ensure the software recognizes the TU15PRO controller. This may require network configuration or direct USB connection.
- 画面構成: Configure your LED screen parameters within the software, including resolution, cabinet layout, and connection method.
- 入力ソースの選択: Select the desired HDMI input source within the control software.
- 表示内容: Use the software to manage and display content on your LED screen.
7. メンテナンス
- 定期清掃: Keep the device free from dust. Use a soft, dry cloth to wipe the exterior. Do not use harsh chemicals or abrasive materials.
- 換気: 過熱を防ぐために通気口が塞がれていないことを確認してください。
- ファームウェアの更新: Novastarの公式ウェブサイトを定期的にチェックしてください website for firmware updates to ensure optimal performance and access to new features. Follow the update instructions carefully.
- ケーブル管理 Keep cables organized and free from kinks or damage to prevent signal loss or power issues.
8。 トラブルシューティング
- 電源なし:
- 電源アダプタがデバイスと電源コンセントの両方にしっかりと接続されているかどうかを確認します。
- 電源コンセントが機能していることを確認します。
- ディスプレイ出力なし:
- Ensure HDMI input source is active and correctly connected.
- Verify Ethernet cables to the LED display are properly connected.
- Check screen configuration in the control software.
- Device Not Recognized by Software:
- Confirm network settings (IP address, subnet mask) are correct if using Ethernet.
- Ensure USB cable is connected if using direct USB control.
- Temporarily disable firewall or antivirus software to check for interference.
- 断続的な信号:
- すべてのケーブル接続に緩みや損傷がないか確認してください。
- Ensure cables are of appropriate quality and length for the signal type.
9. 仕様
| 特徴 | 説明 |
|---|---|
| ブランド | ノヴァスター |
| モデル | TU15PRO |
| 入力電力 | AC100-240V 50 / 60Hz |
| Body Size (L×W×H) | 211.7mm × 185.0mm × 50.6mm |
| Control Dots | 2,600,000 |
| Output LAN | Network Port × 4 |
| 最大出力幅 | 4096ピクセル |
| 最大出力高さ | 1920ピクセル |
| ASIN | B0D791C3C7 |
10. 保証とサポート
保証情報およびテクニカルサポートについては、公式Novastarをご覧ください。 webご購入の際は、サイトをご覧いただくか、正規販売店にお問い合わせください。保証請求の際は、購入証明としてレシートを保管してください。
オンラインリソース: For the latest drivers, software, and additional documentation, please visit the official Novastar support page.