
1. はじめに
The Walfront XY507 is an intelligent PID temperature controller designed for precise temperature management in various industrial and scientific applications. It supports both heating and cooling control, offering a wide input range of 0-1300℃. This manual provides essential information for the safe and effective installation, operation, and maintenance of your device.
2. 安全情報
- 電源のボリュームを確認してくださいtage (100-240VAC, 50/60Hz) matches the device specifications before connection.
- 感電やデバイスの損傷を防ぐため、配線作業はすべて有資格者が行う必要があります。
- 過度の湿気、ほこり、腐食性ガスが発生する環境ではコントローラを操作しないでください。
- メンテナンスや配線の変更を行う前に、電源を切ってください。
- This device is intended for industrial control applications. Use it only as specified in this manual.
3.製品オーバーview
The XY507 features a clear dual-line, four-digit display for process value (PV) and set value (SV), along with intuitive control buttons.
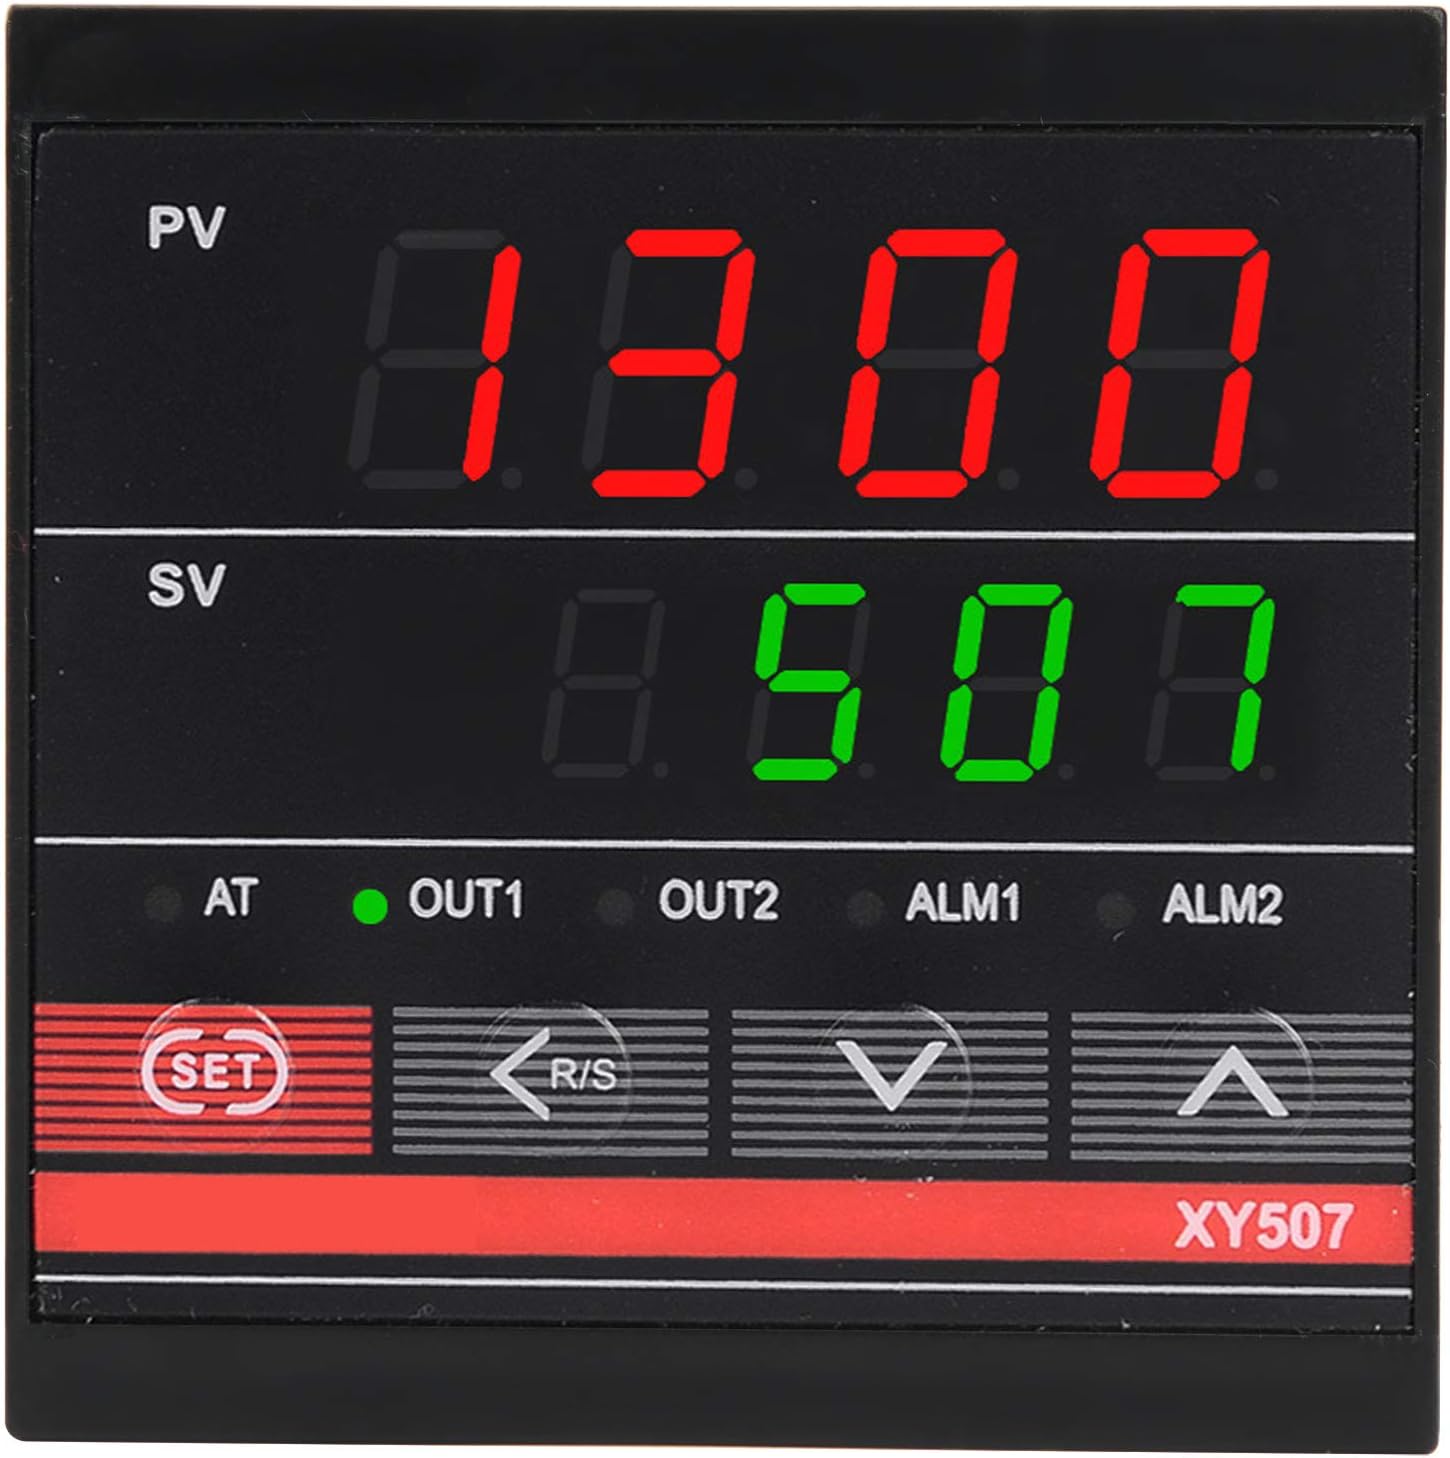
図3.1: Front panel of the XY507 controller. The top red display shows the Process Value (PV), and the bottom green display shows the Set Value (SV). Below the displays are indicator lights for AT, OUT1, OUT2, ALM1, and ALM2, and control buttons including SET, R/S, Down, and Up arrows.

図3.2: 角度付き view of the controller, highlighting the front display and the side panel which typically contains the wiring diagram and model information.

図3.3: Dimensional drawing of the XY507 controller, indicating its approximate size of 72mm x 72mm x 78mm (2.8 x 2.8 x 3.1 inches).
4. 仕様
| パラメータ | 仕様 |
|---|---|
| モデル | XY507 |
| 電源 | 100-240VAC、50/60Hz |
| 最大入力範囲 | 0-1300℃ (Adjustable) |
| 画面 | Dual-line, four-digit Celsius temperature |
| 制御方法 | PID, On/Off |
| アラーム | ALM1 |
| 出力タイプ | 一般的な |
| 寸法(約) | 72 x 72 x 78mm / 2.8 x 2.8 x 3.1in |
5. セットアップとインストール
The XY507 controller is designed for panel mounting. Follow these general steps for installation:
- パネルカットアウト: Create an appropriate cutout in your control panel according to the controller's dimensions (72x72mm).
- Insert Controller: Carefully insert the controller into the panel cutout from the front.
- Secure with Mounting Frames: Use the provided mounting frames to secure the controller from the rear of the panel. Slide the frames onto the sides of the controller and tighten the screws (if applicable) to hold it firmly in place.

図5.1: The two mounting frames included for securing the controller into a panel cutout.
5.1配線接続
Refer to the wiring diagram located on the side of the controller for specific connection points. Ensure all connections are secure and correctly polarized.
- 電源: Connect 100-240VAC power to the designated terminals.
- センサ入力: Connect your thermocouple or RTD sensor to the input terminals. The controller supports 10 different types of thermocouple and RTD inputs.
- 出力: Connect your heating or cooling device to the output terminals (OUT1, OUT2).
- アラーム出力: If an alarm function is utilized, connect the alarm device to the ALM1 terminals.
6. 操作手順
The XY507 controller provides both PID and On/Off control methods. The display shows the current process temperature (PV) and the desired set temperature (SV).
6.1 基本操作
- 電源オン: Once wired correctly, apply power to the controller. The PV and SV displays will illuminate.
- Process Value (PV): The upper red display shows the current measured temperature.
- Set Value (SV): The lower green display shows the target temperature.
6.2 目標温度(SV)の設定
- を押す セット ボタンを一度押します。SVディスプレイが点滅を始めます。
- 使用 ▲ (上)と ▼ (Down) arrow buttons to adjust the SV to your desired temperature.
- を押す セット button again to confirm the new SV. The display will stop flashing.
6.3 Auto-Tuning Function
The auto-tuning function automatically calculates and sets the optimal PID parameters for your specific system, ensuring stable and accurate temperature control.
- To initiate auto-tuning, refer to the detailed instructions in the full user manual (if provided separately) or consult the device's specific menu navigation. Typically, this involves pressing and holding a combination of buttons or navigating through a menu.
- During auto-tuning, the controller will cycle the output to analyze the system's response. The AT indicator light may illuminate.
- Once auto-tuning is complete, the controller will automatically save the new PID parameters.
6.4 Control Mode (PID / On/Off)
The controller supports both PID and On/Off control. The selection of the control method is typically done through the device's parameter settings menu. PID control offers more precise and stable temperature regulation, while On/Off control is simpler and suitable for less critical applications.
7. メンテナンス
- クリーニング: Clean the controller's front panel with a soft, dry cloth. Do not use abrasive cleaners or solvents.
- 検査: Periodically inspect wiring connections for looseness or damage.
- 環境: デバイスの寿命を延ばすには、動作環境が指定された温度と湿度の範囲内に保たれていることを確認してください。
8。 トラブルシューティング
- 電源なし: 電源の接続を確認し、電圧を確認してくださいtageは指定された範囲内です。
- 温度の読み取りが不正確: Verify sensor connections and ensure the correct sensor type is selected in the controller's settings. Check for sensor damage.
- 出力がアクティブ化されない: Confirm that the set temperature (SV) is correctly configured and that the control mode (PID/On/Off) is appropriate for the application. Check output wiring.
- 不安定な温度: If using PID control, consider running the auto-tuning function to optimize PID parameters. For On/Off control, adjust hysteresis if available.
9. パッケージ内容
パッケージには以下のアイテムが含まれています:
- 1 x Walfront XY507 Intelligent PID Temperature Controller
- 2 x Mounting Frame
- 1 x User Manual (this document or similar)