CREWORKS 9" x 24"
CREWORKS Mini Metal Lathe 9" x 24" Instruction Manual
Model: 9" x 24" | Brand: CREWORKS
1. はじめに
Thank you for choosing the CREWORKS 9" x 24" Mini Metal Lathe. This manual provides essential information for the safe operation, maintenance, and troubleshooting of your new machine. Please read this manual thoroughly before operating the lathe to ensure proper use and to prevent injury or damage.
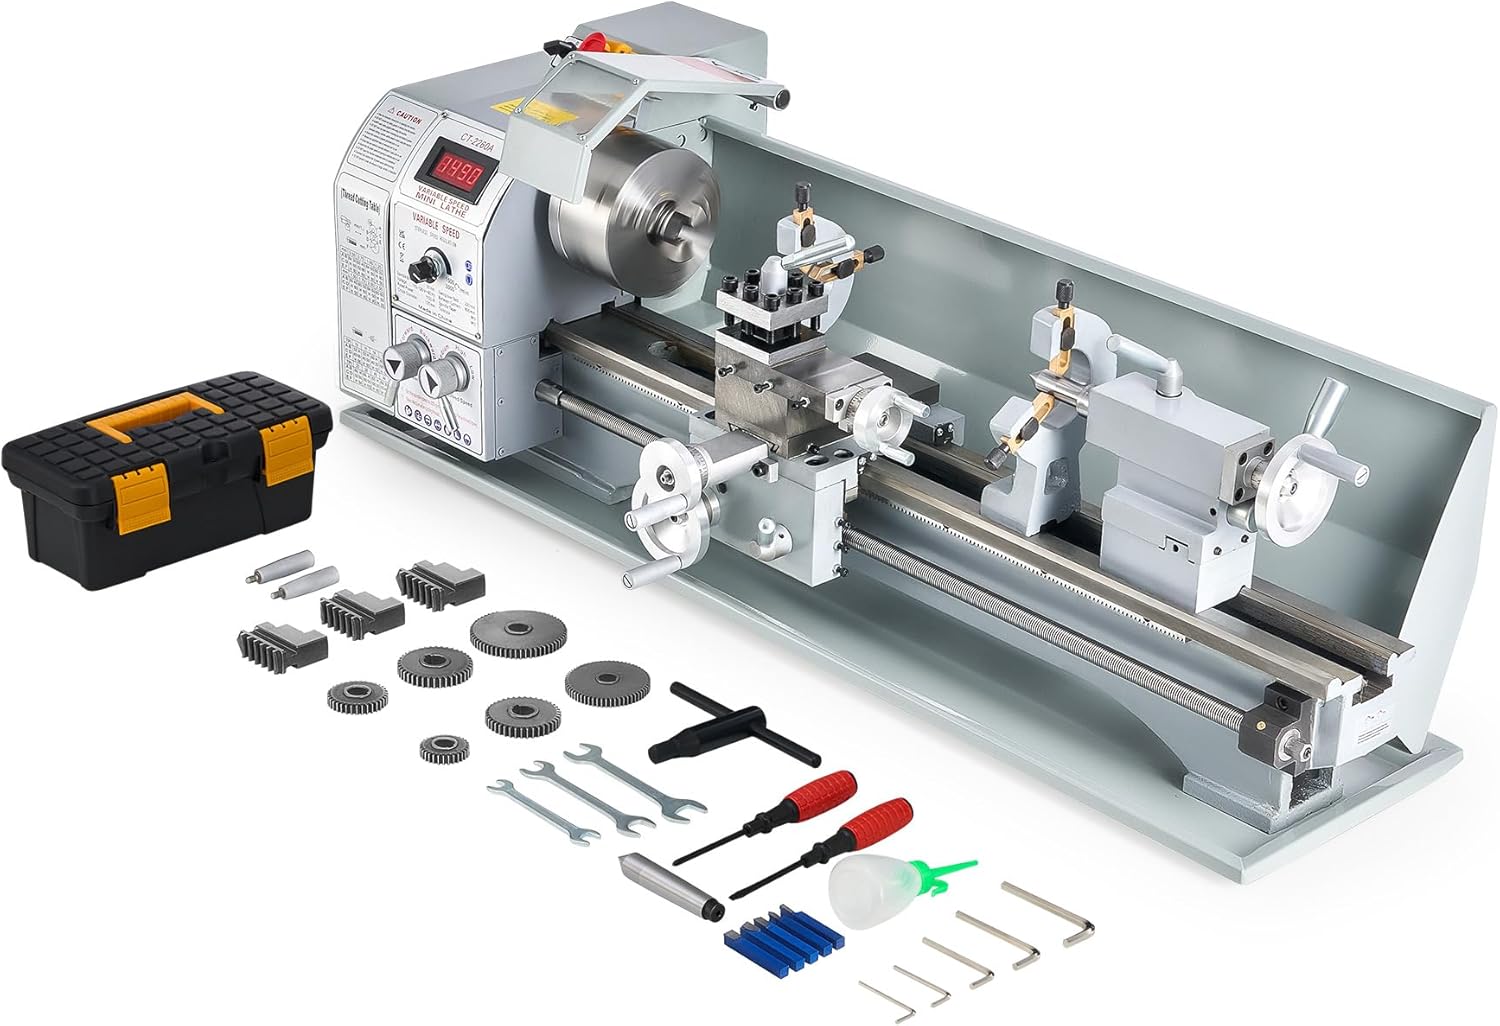
Figure 1.1: CREWORKS 9" x 24" Mini Metal Lathe with included accessories.
2. 安全に関する注意事項
Always prioritize safety when operating machinery. Failure to follow these instructions may result in serious injury or death.
- マニュアルを読む: 操作前にすべての指示と警告を理解してください。
- 個人用保護具(PPE): Always wear safety glasses or a face shield. Use hearing protection. Do not wear loose clothing, gloves, ties, or jewelry that can get caught in moving parts. Tie back long hair.
- 作業エリア: 作業場は清潔に保ち、明るく、散らかっていない状態を保ちます。機械の周囲には十分なスペースを確保してください。
- 機械の状態: Inspect the lathe for damage or loose parts before each use. Do not operate if damaged.
- 電源接続: Ensure the machine is properly grounded. Disconnect power before making adjustments, changing tools, or performing maintenance.
- ワークピースのセキュリティ: ワークピースがしっかりと固定されていることを常に確認してくださいamped in the chuck or collet.
- チップ除去: Never remove chips by hand while the machine is running. Use a brush or hook.
- 緊急停止: 緊急停止ボタンの位置と操作方法をよく理解しておいてください。
- 監督: 稼働中は絶対に機械から目を離さないでください。

図2.1:以上view of the lathe components, including the emergency stop button.
3. コンポーネントとコントロール
Understanding the various parts of your lathe is crucial for effective and safe operation.
3.1 主なコンポーネント
- ヘッドストック: Houses the main spindle, motor, and gear train.
- チャック: Holds the workpiece securely. The CREWORKS lathe features a 3-jaw chuck.
- キャリッジ: クロススライドとツールポストを運びながらベッドに沿って移動します。
- クロススライド: Moves perpendicular to the bed, allowing for facing operations.
- 複合レスト: Rotates and slides to allow for angled cuts and fine adjustments.
- ツールポスト: 切削工具を収納します。
- テールストック: 長いワークピースの端を支えたり、ドリル/リーマ工具を保持したりします。
- ベッド: The main frame of the lathe, providing precision guide rails for the carriage and tailstock.
- 送りねじ: 自動送りおよび糸通し操作に使用されます。
3.2 コントロール
- 電源と緊急停止: Main power switch and immediate shutdown button.
- 前進/後進スイッチ: Controls spindle rotation direction.
- 速度調整ノブ: Varies the spindle speed.
- デジタル速度表示: Shows the current spindle RPM.
- キャリッジハンドホイール: Manual movement of the carriage along the bed.
- クロススライドハンドホイール: Manual movement of the cross slide.
- 複合コントロールホイール: Manual movement of the compound rest.
- テールフィードハンドホイール: Advances the tailstock quill.
- ハーフナットレバー: Engages the lead screw for threading.
Figure 3.1: Detailed diagram showing the main components and controls of the lathe.
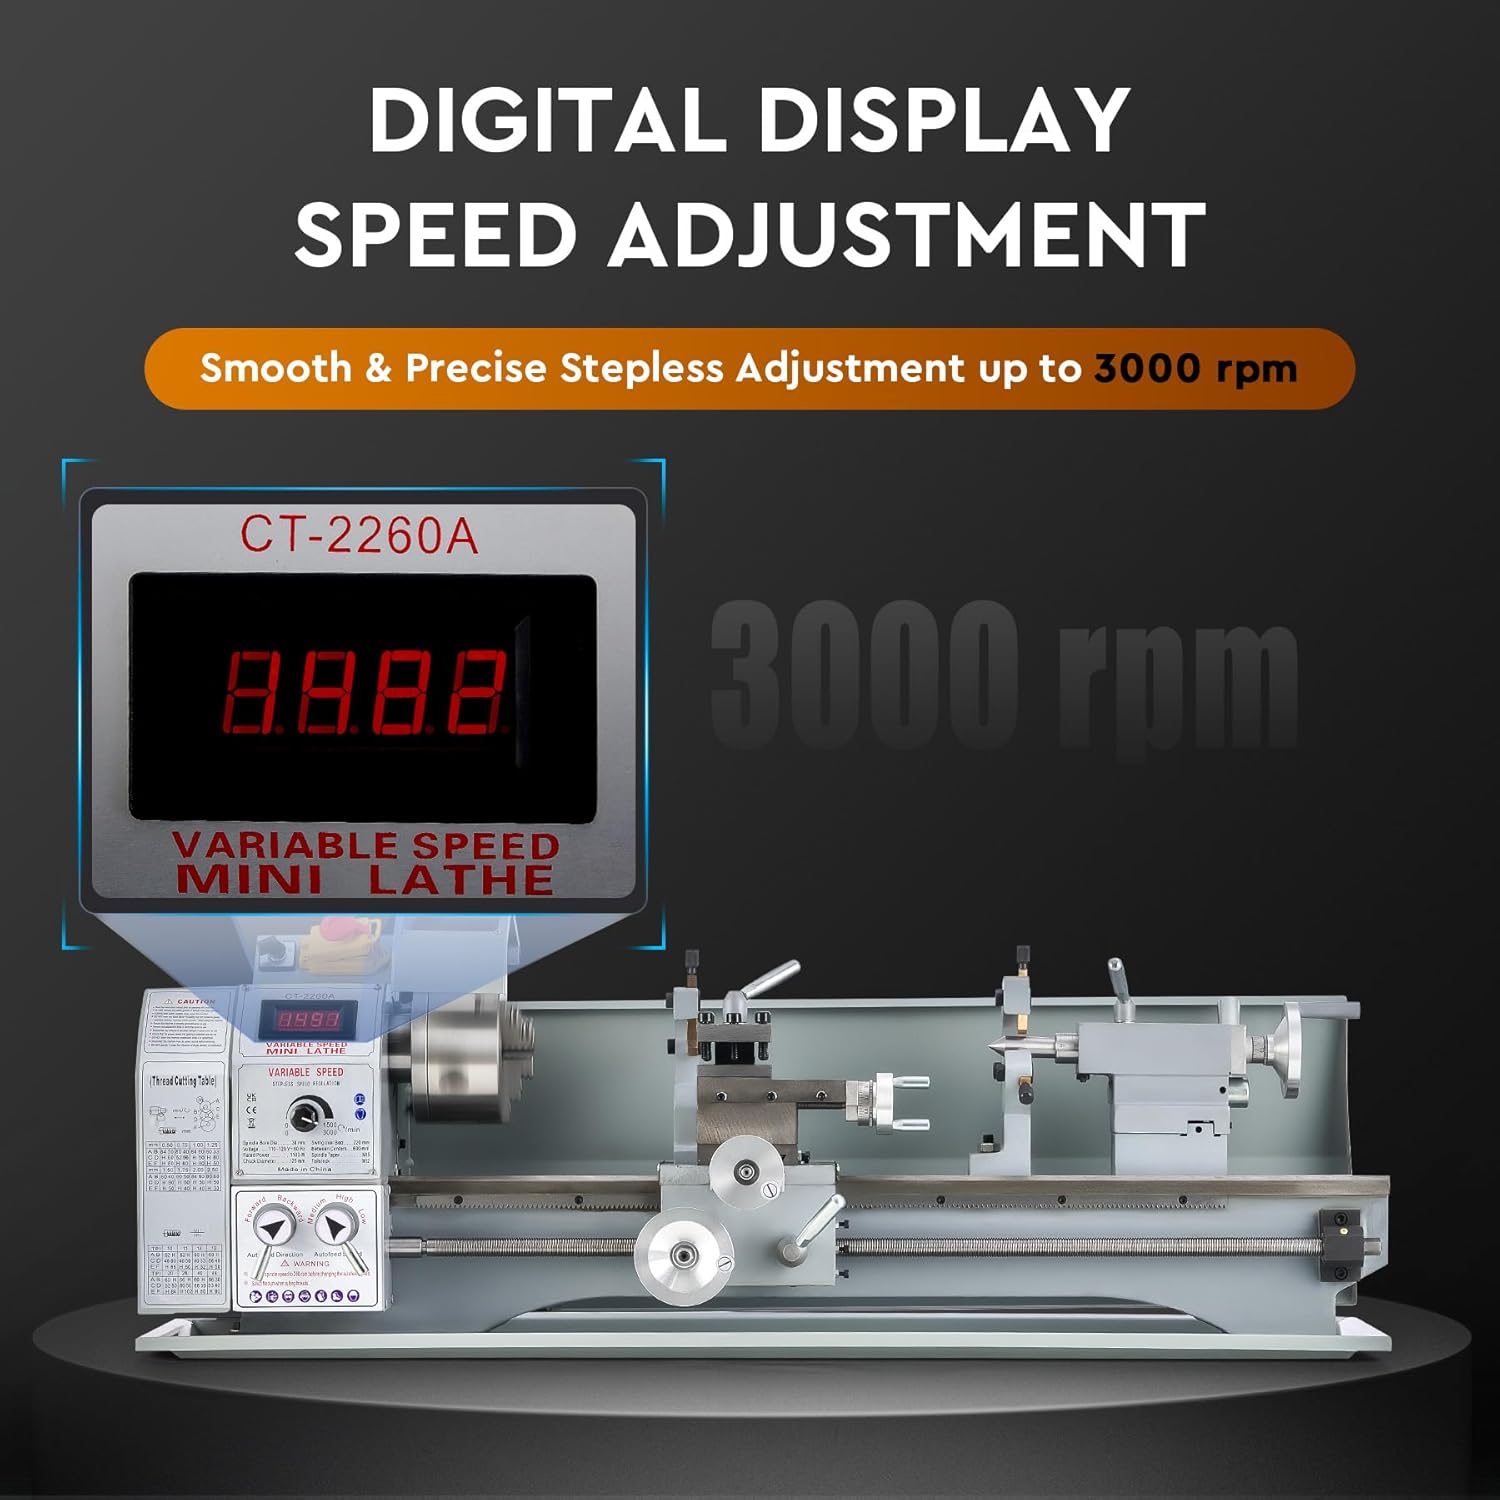
Figure 3.2: The digital display provides real-time spindle speed readings.
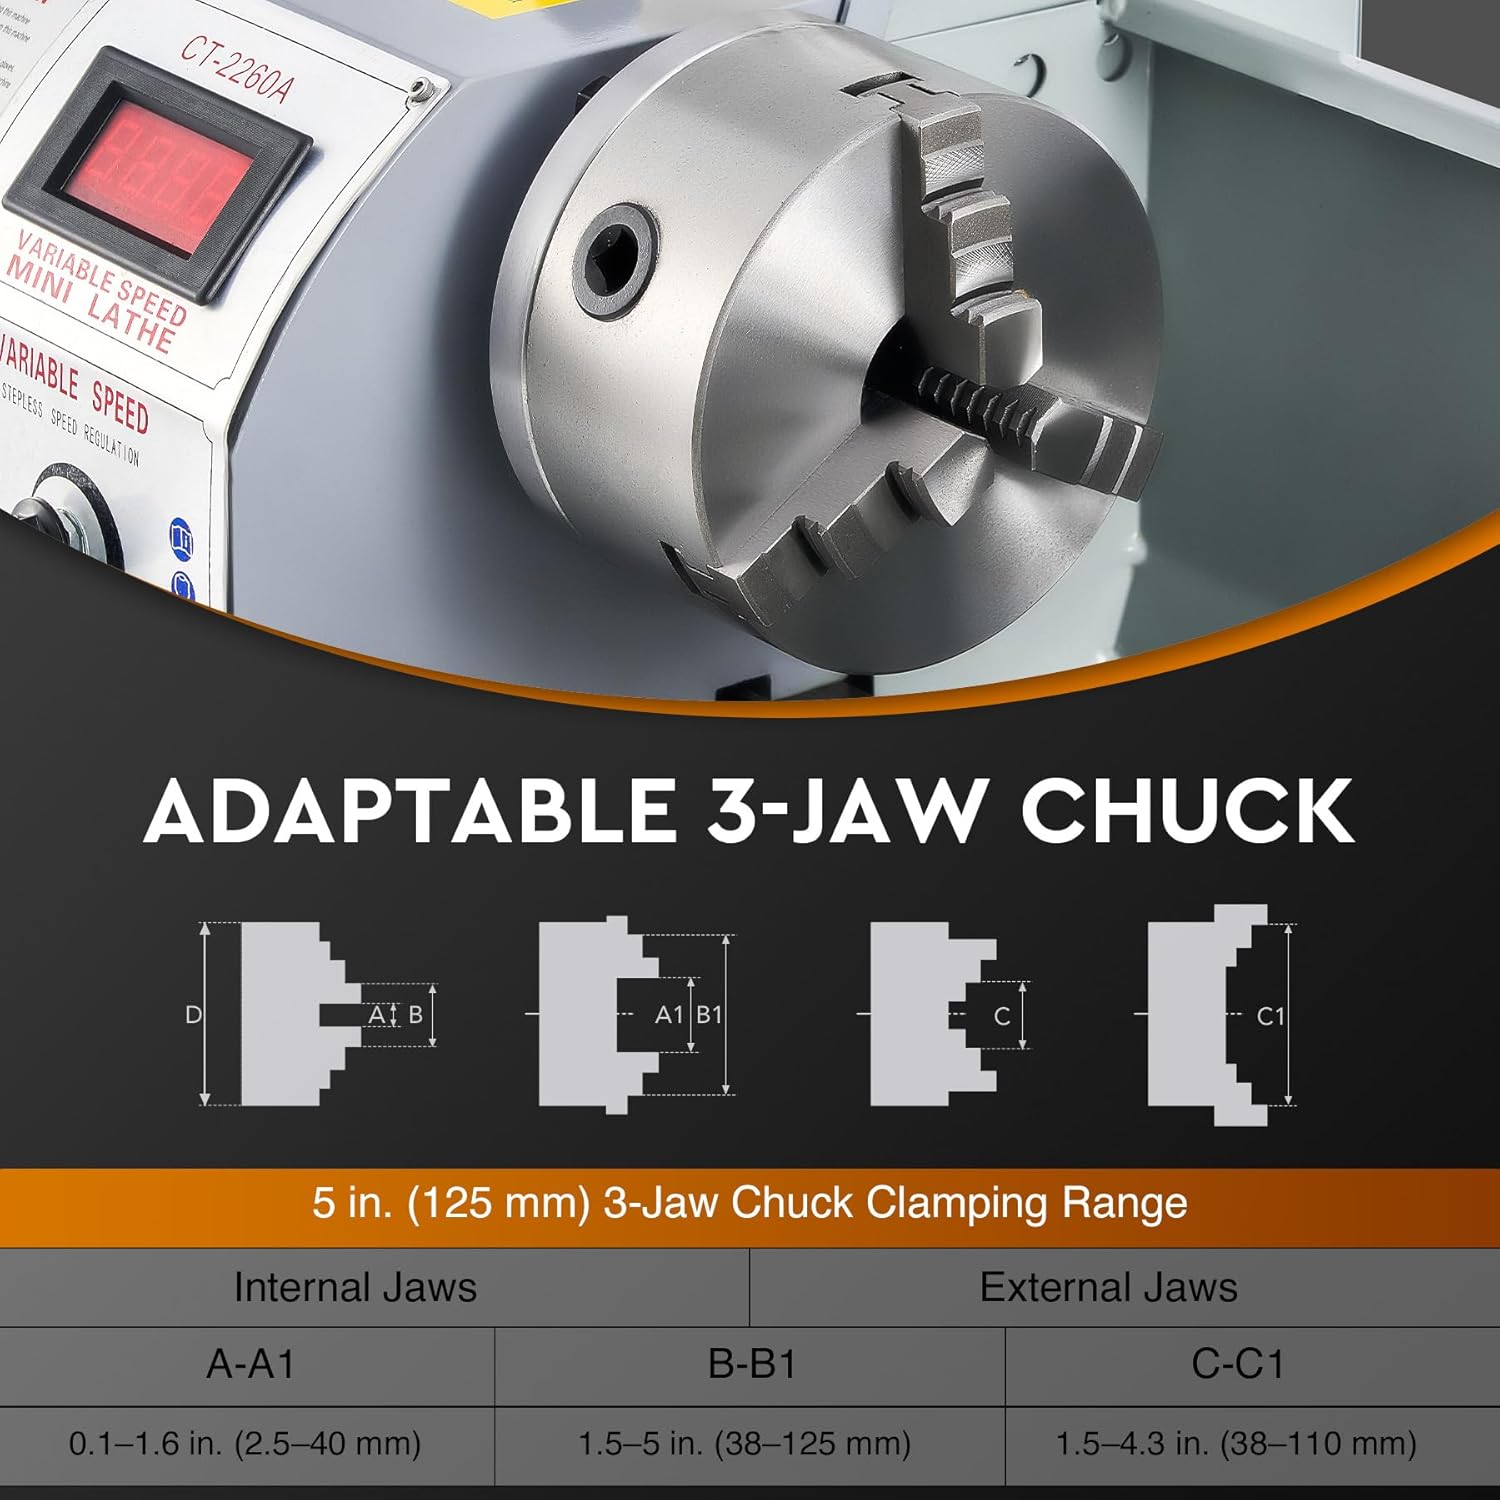
Figure 3.3: The 5-inch 3-jaw chuck is adaptable for various workpiece sizes.
4. セットアップ
4.1開梱と配置
- 旋盤とすべての付属品を梱包から慎重に取り出してください。梱包は将来の輸送や保管のために保管してください。
- Clean off any protective grease or oil from the machine surfaces using a suitable degreaser.
- Place the lathe on a sturdy, level workbench capable of supporting its weight (approximately 159 lbs / 72 kg). Ensure the workbench is stable and does not wobble.
- Secure the lathe to the workbench using appropriate fasteners through the mounting holes in the base.
4.2 初期チェック
- Verify all moving parts move freely without excessive play or binding.
- すべての留め具がしっかり締まっていることを確認してください。
- Ensure the chuck guard is properly installed and functions correctly.
- 電源コードを接地されたコンセントに接続します。
5. 操作
5.1 基本操作
- 電源オン: 主電源スイッチをオンにします。デジタルディスプレイが点灯します。
- ワークピースの取り付け: Open the chuck jaws using the chuck key. Insert the workpiece, ensuring it is securely centered and clamped. Remove the chuck key before starting the machine.
- ツールのインストール: Loosen the tool post locking screw. Insert the cutting tool, ensuring it is at the correct height relative to the workpiece center. Tighten the locking screw.
- 速度調整: Use the speed adjustment knob to set the desired spindle RPM. The digital display will show the current speed. The lathe supports speeds from 0 to 3000 rpm.
- Spindle Direction: Select forward or reverse rotation using the direction switch.
- Engage Feed: For manual operation, use the carriage, cross slide, and compound handwheels. For automatic feed or threading, engage the half-nut lever (refer to threading charts for gear setup).
- 切断: Slowly advance the cutting tool into the workpiece. Monitor the cut and adjust feed rate as needed.
- 電源を切る: After completing the operation, turn off the spindle, then the main power switch.
5.2 アプリケーション
This mini metal lathe is versatile and can perform various operations on materials such as wood, plastics, brass, and aluminum.
- 旋回: ワークピースの直径を小さくする。
- 直面している: Creating a flat surface on the end of a workpiece.
- 掘削: Creating holes along the center axis using the tailstock.
- スレッド: Cutting external or internal threads.
- 切断: Parting off sections of material.

Figure 5.1: The lathe is suitable for a wide range of metalworking and other material applications.
6. メンテナンス
Regular maintenance ensures the longevity and precision of your CREWORKS Mini Metal Lathe.
6.1 クリーニング
- After each use, clean all chips and debris from the machine, especially from the bedways, lead screw, and chuck. Use a brush or shop vacuum.
- すべての表面をきれいな布で拭いてください。
6.2 潤滑
- Regularly apply a thin coat of machine oil to the bedways, lead screw, and other sliding surfaces to prevent rust and ensure smooth operation.
- Consult the lubrication points diagram (if available in a more detailed manual) for specific oiling requirements.
6.3 Adjustments and Inspections
- Periodically check the tension of the drive belts.
- チャックジョーの摩耗や損傷を検査します。
- Ensure the tailstock is aligned correctly.
- Check the condition of the metal gear set for any signs of wear or damage.
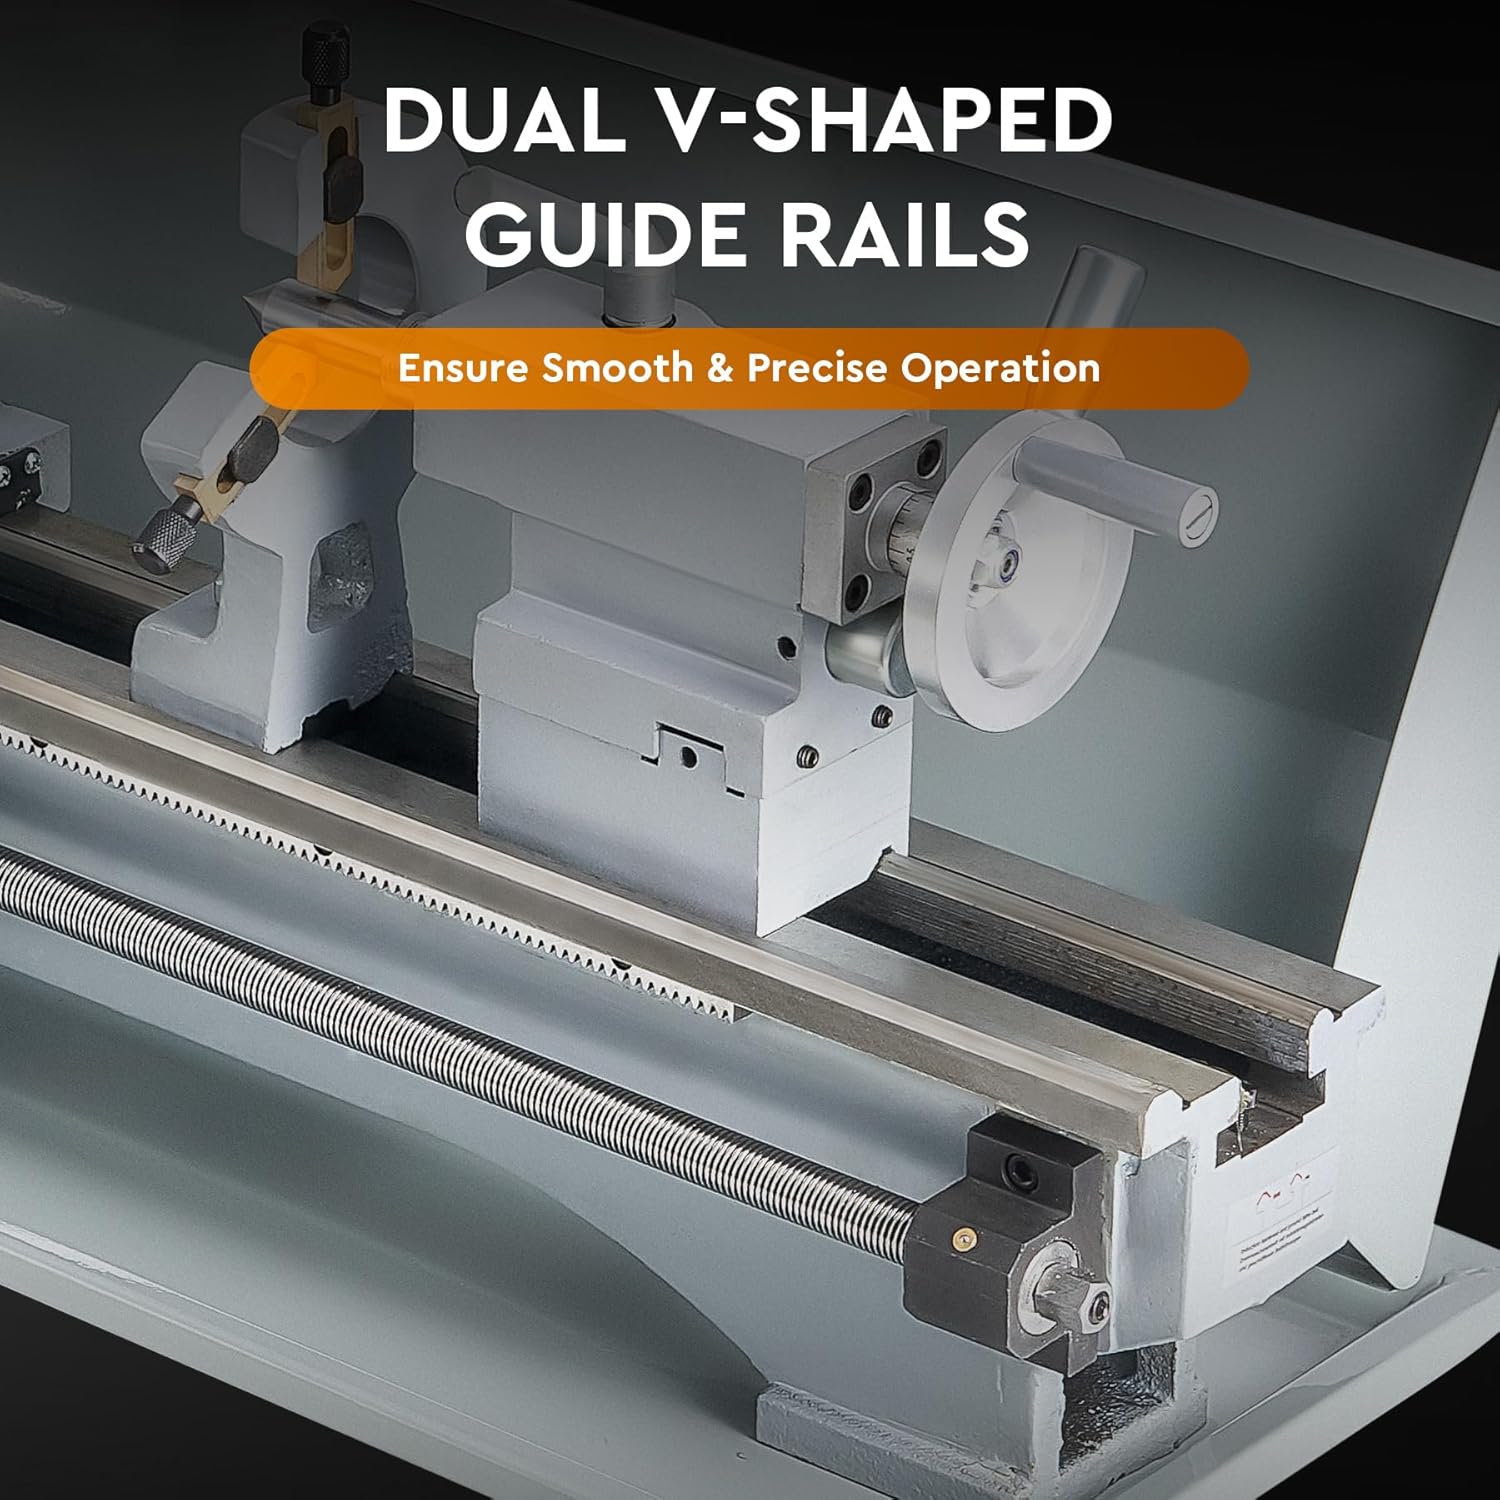
Figure 6.1: The dual V-shaped guide rails require regular cleaning and lubrication for smooth and precise operation.

Figure 6.2: The metal gear set ensures strong and efficient power transmission and should be inspected periodically.
7。 トラブルシューティング
このセクションでは、旋盤で発生する可能性のある一般的な問題について説明します。
| 問題 | 考えられる原因 | 解決 |
|---|---|---|
| 旋盤の電源が入りません。 | No power supply; Emergency stop engaged; Loose wiring. | Check power cord and outlet; Disengage emergency stop; Inspect wiring (if qualified). |
| スピンドルが回転しません。 | Speed knob set to zero; Direction switch not engaged; Motor fault. | Increase speed; Select forward/reverse; Contact support if motor fault suspected. |
| 過度の振動またはノイズ。 | ワークピースのバランスが悪い、部品が緩んでいる、ベアリングが摩耗している、潤滑が不十分である。 | Ensure workpiece is balanced and secure; Tighten all fasteners; Lubricate moving parts; Contact support for bearing issues. |
| ワークピースの表面仕上げが悪い。 | Dull cutting tool; Incorrect speed/feed rate; Workpiece not rigid; Lathe not level. | Sharpen/replace tool; Adjust speed/feed; Ensure workpiece is secure; Level the lathe. |
8. 仕様
Technical specifications for the CREWORKS 9" x 24" Mini Metal Lathe.
| 特徴 | 仕様 |
|---|---|
| モデル | 9インチ×24インチ |
| 定格出力 | 1.5HP(1100W) |
| スイングオーバーベッド | 8.7インチ(220 mm) |
| 中心間の距離 | 23.6インチ(600 mm) |
| スピンドルボア | 1.5インチ(38 mm) |
| チャック直径 | 5インチ(125 mm) |
| 最大スピンドル速度 | 3000回転 |
| テールストックテーパー | MT#2 |
| スピンドルテーパー | MT#5 |
| メートルねじ範囲 | 0.3~3ミリメートル |
| インチねじ範囲 | 8~44 tpi |
| 製品寸法(長さ x 幅 x 高さ) | 39.57 x 13.78 x 16.93インチ |
| 正味重量 | 158.7ポンド(72kg) |
| 材料 | 鋳鉄、ステンレス鋼、ABS |

図 8.1: 主要な仕様と寸法の視覚的表現。
9. 保証とサポート
For warranty information or technical support, please refer to the contact details provided at the point of purchase or visit the official CREWORKS webサイト。
- カスタマーサポート: For assistance with product issues, setup, or operation, please contact CREWORKS customer service.
- 戻り値: この製品には通常30日間の返品ポリシーが適用されます。具体的な条件については、購入の詳細をご確認ください。
注記: Any unauthorized modifications or repairs to the machine may void the warranty.
Ask a question about this manual
Ask about setup, troubleshooting, compatibility, parts, safety, or missing instructions. Manuals+ will review the question and use this page’s manual context to help answer it.