
ファンフリックス
Mini Outdoor Projector 852WH Instruction Manual
ブランド: FunFlix
製品終了view
This FunFlix 852WH Mini Outdoor Projector is designed for portable entertainment, supporting 1080P resolution and offering 9500 lumens brightness. Its compact design allows for easy setup and use in various environments, from home theaters to outdoor movie nights. It features multiple connectivity options including HDMI, USB, and AV, making it compatible with a wide range of devices.
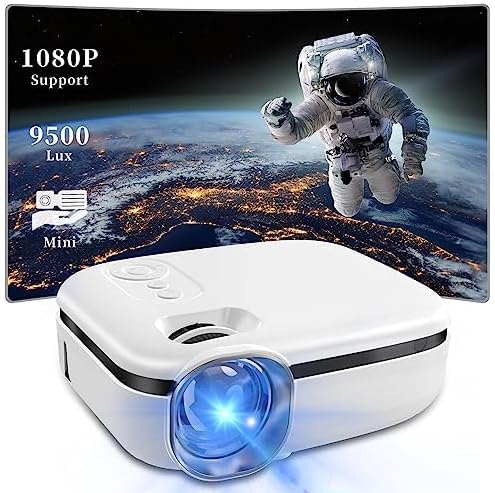
Image: The FunFlix Mini Outdoor Projector, showcasing its compact size and a vibrant projected image with 1080P support and 9500 Lux brightness.
セットアップガイド
1. 開梱と配置
Carefully remove all components from the packaging. Place the projector on a stable, flat surface. Ensure there is adequate ventilation around the projector to prevent overheating.
2. 電源接続
- 電源アダプタをプロジェクターの電源入力ポートに接続します。
- 電源アダプタを標準のコンセントに差し込みます。
3. 入力デバイスの接続
The projector supports multiple input sources. Choose the appropriate cable for your device (HDMI, USB, or AV).

Image: The projector highlighting its versatile connectivity options, including AV, USB, and HDMI ports, for connecting various devices like laptops, gaming consoles, and smartphones.
- HDMI: Connect your laptop, game console, TV stick, or other HDMI-enabled device to the projector's HDMI port.
- USB: メディアを再生するにはUSBドライブをUSBポートに挿入します file直接。
- AV: DVD プレーヤーなどの古いデバイスを接続するには、付属の AV ケーブルを使用します。
4. 初回電源投入とフォーカス調整
- プロジェクターまたはリモコンの電源ボタンを押して電源を入れます。
- Adjust the focus ring on the lens until the projected image appears clear and sharp.
5. 台形補正
If the projected image appears trapezoidal (wider at the top or bottom), use the keystone correction dial to adjust it to a rectangular shape.

Image: Illustration of the projector's ±15° vertical keystone correction feature, showing how to adjust the image shape using a dedicated dial for a perfectly rectangular display.
6. 投影サイズの調整
The projection size can be adjusted by moving the projector closer to or further from the screen/wall. The projector supports screen sizes from 35 to 270 inches.
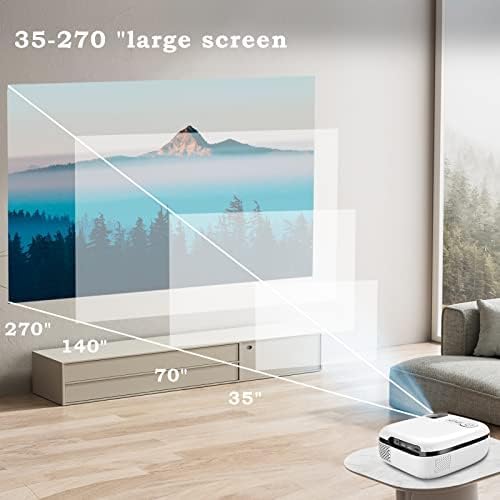
Image: A visual representation demonstrating the projector's capability to produce large screen sizes, ranging from 35 inches up to 270 inches, depending on the projection distance.
操作手順
1. 電源のオン/オフ
- 電源オン: プロジェクターまたはリモコンの電源ボタンを押します。
- 電源を切る: 電源ボタンをもう一度押します。プロンプトが表示されたらシャットダウンを確認します。
2.ソースの選択
Use the "Source" button on the projector or remote control to cycle through available input sources (HDMI, USB, AV).
3. 音量コントロール
Adjust the volume using the volume buttons on the remote control. The projector features a built-in Hi-Fi speaker for audio output.

Image: The projector positioned in a living room setting, illustrating its integrated Hi-Fi speaker system providing immersive audio for a home cinema experience.
4. メニューナビゲーション
Use the arrow keys and OK button on the remote control to navigate through the projector's on-screen menu for advanced settings like picture mode, aspect ratio, and sound settings.
メンテナンス
1. レンズのクリーニング
プロジェクターレンズは、光学面専用の柔らかく糸くずの出ない布で優しく拭いてください。研磨剤入りのクリーナーを使用したり、無理な力で拭いたりしないでください。レンズに傷がつく可能性があります。
2. 防塵
The projector features an enclosed optical system designed to be super dustproof, minimizing dust accumulation on internal components. However, regularly clean the exterior of the projector with a soft, dry cloth to prevent dust from entering ventilation openings.
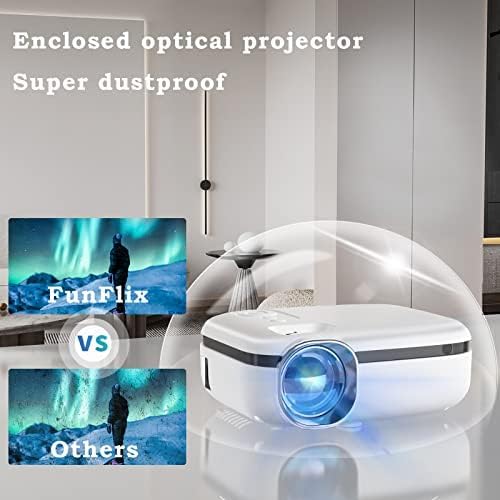
Image: The projector encased in a protective, transparent dome, visually representing its "Super dustproof" enclosed optical design, which helps maintain image clarity by preventing dust ingress.
3. ストレージ
長期間使用しない場合は、プロジェクターを直射日光や極端な温度を避け、涼しく乾燥した場所に保管してください。元の梱包箱または保護ケースの使用をご検討ください。
トラブルシューティングガイド
| 問題 | 考えられる原因 | 解決 |
|---|---|---|
| 画像が投影されない |
|
|
| 画像がぼやけている |
|
|
| 音が出ない |
|
|
| プロジェクターがオンにならない |
|
|
製品仕様
| 特徴 | 詳細 |
|---|---|
| ブランド | ファンフリックス |
| モデル番号 | 852WH |
| 輝度 | 9500ルーメン |
| サポートされている解像度 | 1080P 高画質 |
| フォームファクター | ポータブル |
| 色 | 白 |
| 製品寸法 | 2.36 x 1.56 x 1.6インチ |
| アイテム重量 | 2.2ポンド |
| 対応デバイス | Laptop, Gaming Console, Smartphone, TV Stick |
| 接続性 | HDMI、USB、AV |
保証情報
This product comes with a standard manufacturer's warranty. Please refer to the warranty card included in your product packaging for specific terms, conditions, and duration. Retain your proof of purchase for warranty claims.
カスタマーサポート
For technical assistance, troubleshooting beyond this guide, or warranty inquiries, please contact FunFlix customer support. Contact details can typically be found on the product packaging, the official FunFlix website, or the purchase platform.
Ask a question about this manual
Ask about setup, troubleshooting, compatibility, parts, safety, or missing instructions. Manuals+ will review the question and use this page’s manual context to help answer it.