
導入
This manual provides detailed instructions for the installation, operation, and maintenance of the IXITAB STC-3008, STC-3018, and STC-3028 series of digital temperature and humidity controllers. These devices are designed for precise control in various applications, including aquariums, terrariums, incubators, and industrial temperature/humidity control systems.
製品バリエーション
- STC-3008: Dual Digital Temperature Controller with two temperature probes.
- STC-3018: Dual Digital Temperature Controller with two temperature probes.
- STC-3028: Digital Temperature and Humidity Controller with one combined temperature and humidity sensor.
主な特徴
- Dual display for simultaneous monitoring of two temperatures or temperature and humidity.
- Two independent relay outputs for controlling heating/cooling or humidification/dehumidification devices.
- Wide range of power supply options (AC 110V/220V, DC 12V/24V) depending on the model.
- High precision sensors for accurate readings.
- User-friendly interface for setting parameters.
安全上の注意
安全な操作を確保し、デバイスの損傷を防ぐために、次の注意事項を守ってください。
- 配線やメンテナンスを行う前に必ず電源を切ってください。
- 電源電圧がtage matches the requirements of your specific controller model.
- Strictly distinguish the interface of the relay, sensor, and power connections to avoid short circuits or damage.
- すべての配線接続が安全かつ適切に絶縁されていることを確認してください。
- Keep the sensor and power wires separate and maintain a proper distance to prevent interference.
- デバイスを水や過度の湿気にさらさないでください。
 画像: 上 view of the STC-3018 controller showing the display, buttons, and a label with wiring instructions and safety notes. The label indicates power supply options (110-220VAC, 12V, 24V) and relay outputs (10A/220VAC). A temperature probe is connected to the device.
製品終了view
コンポーネント
- Main Controller Unit (with digital displays and control buttons)
- Temperature Sensor (for STC-3008/3018 models)
- Temperature and Humidity Sensor (for STC-3028 model)
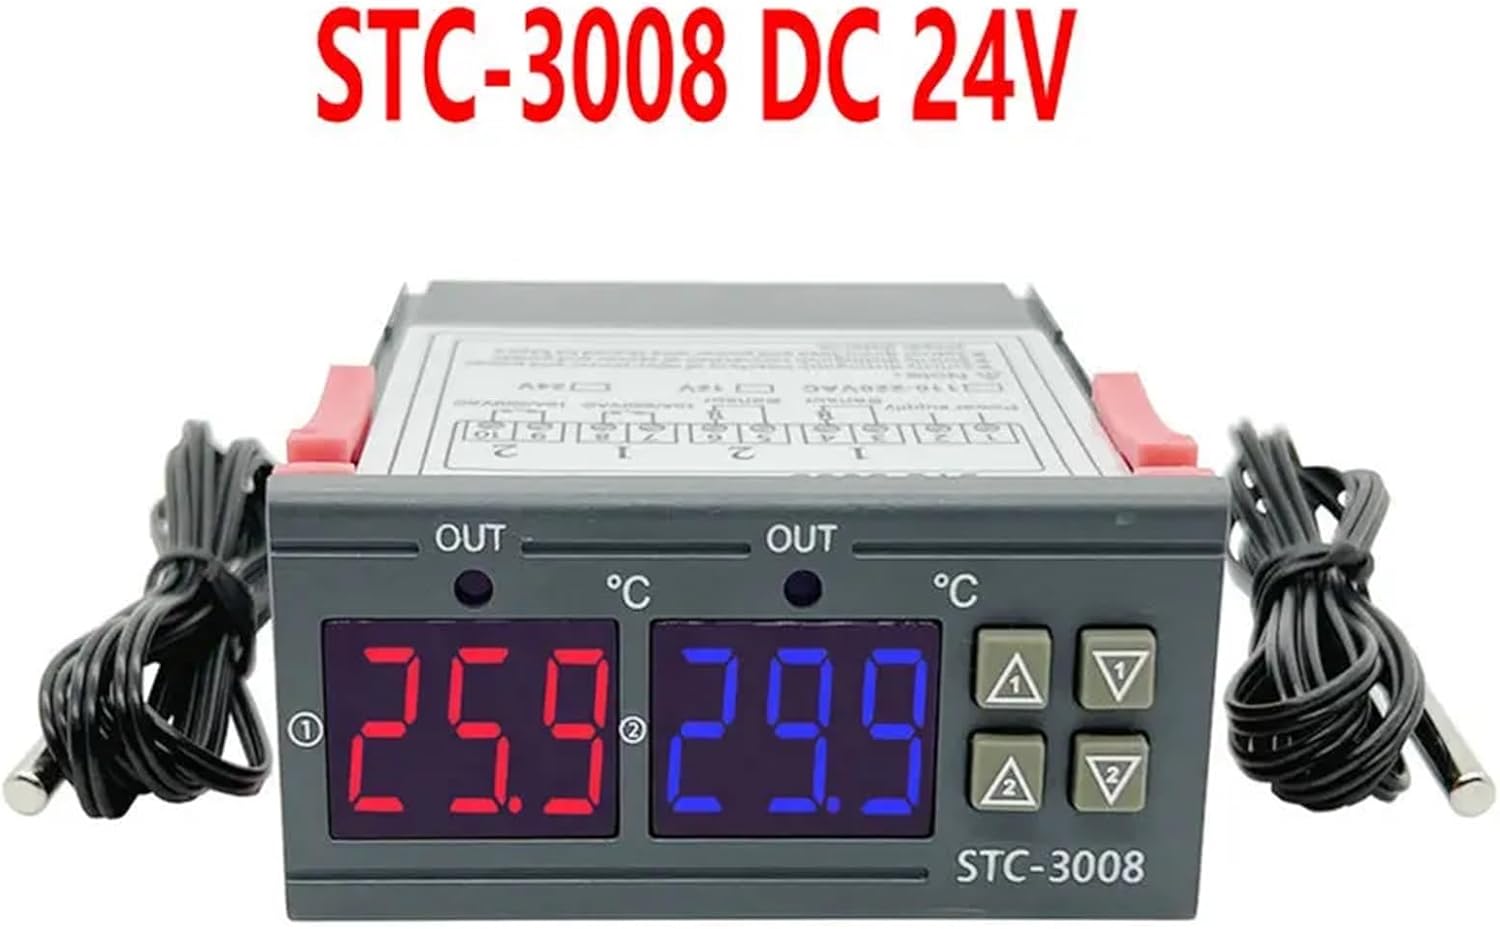 画像: 正面 view of the STC-3008 DC 24V model, featuring two digital displays (red and blue) showing temperature readings, and two connected temperature probes. The model name "STC-3008" is visible on the front panel.
 Image: A collage showing three different models: STC-3018 (top left), STC-3008 (top right and bottom left), and STC-3028 (bottom right). Each model is shown with its respective sensor, highlighting the visual differences and sensor types (temperature probe for 3008/3018, combined temperature/humidity sensor for 3028).
 画像: クローズアップ view of the STC-3028 model, showcasing its dual digital display for temperature and humidity, along with the connected combined temperature and humidity sensor.
仕様
| パラメータ | 価値 |
|---|---|
| モデル | STC-3008, STC-3018, STC-3028 |
| 電源 | AC 110V/220V, DC 12V/24V (model dependent) |
| 温度測定範囲 | -50°C ~ 110°C (-58°F ~ 230°F) |
| Humidity Measurement Range (STC-3028) | 0% RH ~ 99% RH |
| 出力リレー容量 | 10A/220VAC |
| センサータイプ | NTC sensor (temperature), integrated sensor (humidity for STC-3028) |
| 寸法 | Approx. 1.18 x 0.79 x 0.39 inches (main unit) |
| アイテム重量 | 約1.76オンス |
| 原産国 | 中国 |
設置と配線
重要: Ensure power is disconnected before performing any wiring to prevent electric shock or damage to the device.
配線図
 Image: Detailed wiring diagram for the STC-3018 model. It illustrates connections for power supply (110V/AC220V, 12V, 24V), two sensor inputs, and two relay outputs (10A/220VAC). Examples of connected loads like a refrigerator, fan, and water heater are shown.
配線手順
- 電源: Connect the appropriate power supply (AC 110V/220V or DC 12V/24V) to terminals 1 and 2. Verify that the voltage matches your specific controller model.
- センサー: Connect the temperature sensors to terminals 3 and 4, and 5 and 6 (for STC-3008/3018). For the STC-3028, connect the combined temperature/humidity sensor to its designated terminals.
- 出力リレー: Connect your heating/cooling or humidification/dehumidification devices to terminals 7 and 8 (Relay 1) and 9 and 10 (Relay 2). These are dry contacts, meaning they act as switches, and your load will require its own power source.
- 取り付け: The controller is designed for panel mounting. Insert the unit into a suitable cutout and secure it using the integrated clips on the sides.
操作手順
ボタンの機能
- 設定ボタン: パラメータ設定モードに入り、選択内容を確認するために使用します。
- 上(▲)ボタン: Increases values, navigates through menu options.
- 下(▼)ボタン: Decreases values, navigates through menu options.
- Rstボタン: 短押しして view current settings; long press (3 seconds) to reset to factory default settings.
Temperature/Humidity Setting
 Image: A visual guide demonstrating the temperature and humidity setting process on the STC-3028 model. It shows how to set starting and stopping values for both temperature (heating/cooling) and humidity (humidification/dehumidification) using the control buttons.
- Setting Starting Temperature/Humidity: 長押し 上へ(▲) button for 3 seconds. The starting value on the display will flash. Use the 上へ(▲) or 下へ(▼) buttons to adjust to your desired starting value. Press the セット 確認して終了するボタン。
- Setting Stopping Temperature/Humidity: 長押し 下へ(▼) button for 3 seconds. The stopping value on the display will flash. Use the 上へ(▲) or 下へ(▼) buttons to adjust to your desired stopping value. Press the セット 確認して終了するボタン。
- 工場設定にリセット: 長押し 最初 button for 3 seconds until the display shows "888" or similar indication of reset.
The controller will automatically activate or deactivate the connected relays based on the set starting and stopping values to maintain the desired temperature or humidity range. For temperature control, if the starting temperature is lower than the stopping temperature, it operates in heating mode. If the starting temperature is higher than the stopping temperature, it operates in cooling mode. Similar logic applies to humidity control for humidification/dehumidification.
メンテナンス
Proper maintenance ensures the longevity and accuracy of your controller:
- デバイスを清潔に保ち、ほこりやゴミを取り除いてください。清掃には柔らかく乾いた布を使用してください。
- 過熱を防ぐために、ユニットの周囲に十分な換気を確保してください。
- すべての配線接続が安全で腐食がないことを確認するために定期的に点検してください。
- Avoid exposing the unit or sensors to extreme temperatures, high humidity, or corrosive environments outside their specified operating ranges.
- Do not attempt to disassemble the unit beyond what is described in this manual.
トラブルシューティング
If you encounter issues with your controller, refer to the table below for common problems and solutions:
| 問題 | 考えられる原因 | 解決 |
|---|---|---|
| ディスプレイが機能しない | No power, incorrect wiring, faulty unit. | Check power supply connections. Verify wiring against the diagram. If problem persists, contact support. |
| リレーが切り替わらない | Incorrect temperature/humidity settings, faulty relay, load issue. | Review your set starting and stopping values. Check the wiring to the load device. Test the load device independently. |
| 不正確な測定値 | Sensor damaged, sensor not properly placed, environmental interference. | Inspect sensor for physical damage. Ensure sensor is in the correct environment and not obstructed. Avoid placing sensor near heat sources or drafts. |
| 「LLL」または「HHH」と表示される | Sensor open circuit (LLL) or short circuit (HHH). | Check sensor connection for looseness or damage. Replace sensor if it appears faulty. |
| ディスプレイに「---」と表示される | Sensor not connected or faulty. | Ensure sensor is securely connected. Replace sensor if necessary. |
保証とサポート
For warranty information or technical support regarding your IXITAB STC-3008, STC-3018, or STC-3028 controller, please refer to the documentation provided with your product at the time of purchase or contact IXITAB customer service through the platform where you purchased the item.
When contacting support, please be prepared to provide your product model number (STC-3008, STC-3018, or STC-3028) and details of your purchase.