1. はじめに
This manual provides essential information for the safe and effective operation of your GOXAWEE 3-in-1 Portable Inverter Welder, model MIG-250. This versatile machine supports MMA (Manual Metal Arc), MIG (Gas Metal Arc), and LIFT TIG (Tungsten Inert Gas) welding processes, making it suitable for various metal materials including copper, iron sheets, steel pipes, galvanized pipes, and stainless steel.
The welder is designed for both professional and home use, accommodating welding rods from 1.6 mm to 3.2 mm.
2. 安全上の注意
WARNING: Welding can be dangerous. Always follow safety guidelines to prevent injury or damage.
- Always wear appropriate Personal Protective Equipment (PPE) when operating the welding machine. This includes a welding helmet with a suitable shade lens, welding gloves, protective clothing, and safety shoes.
- 溶接エリアの換気を十分に行い、煙を吸い込まないようにしてください。
- To ensure product longevity and prevent overheating, allow the machine to rest for 10-15 minutes after 20-30 minutes of continuous operation. Regularly check the machine's performance.
- 溶接機をdで操作しないでくださいamp または濡れた状態。
- 溶接エリアに子供や関係者以外の人を近づけないでください。
- 溶接機の接地が適切であることを確認してください。
3.製品オーバーview およびコンポーネント
3.1 主な特徴
- Three-in-One Welding Modes: Supports MMA, MIG (Gasless Flux-cored), and LIFT TIG welding.
- Synergic and Manual Control: MIG mode offers automatic wire feed speed and voltage adjustment based on wire diameter, alongside manual control for experienced users.
- ユーザーフレンドリーなコントロールパネル: Features a clear digital current display and voltage adjustment knob for simple operation.
- 高度なIGBTインバータ技術: Provides stable output current, smooth welding arc, and protection against overload or short circuit.
- 効率的な放熱: Equipped with a high-power cooling fan and built-in protection against overcurrent, overvoltage、過熱。
- ポータブルデザイン: Weighs approximately 4.6 kg (10 lbs) with a compact body and carrying handle for easy transport.
3.2 含まれるコンポーネント
The following items are included with your GOXAWEE MIG-250 Welder:
- 1 x MIG Welding Machine (MIG-250)
- 1 x 175mm MIG Welding Torch
- 1 x 164mm Electrode Holder (MMA Clamp)
- 1 x 118mm Earth Clamp
- 1 x Pair of Welding Gloves
- 1 x 0.8mm / 0.5kg Flux-cored Welding Wire
- 1 x Welding Mask
- 1 x Welding Mask Lens
- 2 x Brushes (e.g., wire brush, chipping hammer)
- 5 x Conductive Nozzles (3 x 0.8mm, 2 x 1.0mm)
- 5 x Electrodes (various sizes)
Note: A TIG argon arc welding torch is required for LIFT TIG welding and is not included in this package. It must be purchased separately.

Image 1: GOXAWEE MIG-250 Welder showing overall dimensions and a visual representation of the included accessories such as the MIG torch, earth clamp, electrode holder, welding wire, gloves, mask, and various nozzles and electrodes.
4. 仕様
| メーカー | ゴクサウィー |
| モデル | ミグ250 |
| 電源 | 電気 |
| 入力ボリュームtage | 110V |
| 入力電流範囲 | 20A - 250A |
| 定格入力容量 | 6.6KVA |
| 溶接方法 | MIG (Flux-cored), LIFT TIG, MMA (ARC) |
| Applicable Welding Wire Diameter | 0.8 mm - 1.0 mm (MIG) |
| Applicable Electrode Size | 1.6 mm - 3.2 mm (MMA) |
| Maximum Welding Thickness | 6ミリメートル |
| 製品寸法(長さ x 幅 x 高さ) | 36 cm x 16 cm x 18.5 cm |
| 製品重量 | 4.6 kg(約10ポンド) |
| 電池が必要 | いいえ |
5. セットアップ
Before beginning any welding operation, ensure the machine is placed on a stable, level surface in a well-ventilated area, away from flammable materials.
5.1初期検査
- すべてのコンポーネントを解凍し、「含まれるコンポーネント」リストと照合します。
- Inspect the welder and all accessories for any signs of damage during shipping. Do not use if damaged.
- Ensure the power cord and plug are intact.
5.2 アース線を接続するamp
アース線を接続するamp cable to the appropriate terminal on the front panel of the welder. Securely attach the earth clamp to the workpiece or welding table, ensuring good electrical contact. The workpiece must be clean and free of rust, paint, or grease.
5.3電源接続
Plug the welder's power cord into a grounded 110V power outlet. Ensure the power supply meets the welder's requirements (110V, 20A-250A capacity).
5.4 Wire Feed Mechanism (MIG Mode)

Image 2: Internal structure of the welder illustrating the wire feed mechanism, including the spool lock, spring, spool, and spool spacer, designed for easy adjustment of wire feeding speed.
- 溶接機のサイドパネルを開いて、ワイヤ供給コンパートメントにアクセスします。
- Place the 0.8mm / 0.5kg flux-cored welding wire spool onto the spool holder. Ensure it is seated correctly and secured with the spool lock and spacer.
- 溶接ワイヤをガイドチューブを通して駆動ローラー機構に送ります。
- Close the drive roller tension arm and adjust the tension according to the wire diameter. The tension should be firm enough to feed the wire without slipping, but not so tight as to deform the wire.
- Connect the MIG welding torch to the appropriate connector on the front panel.
- With the welder powered on (but not in welding mode), press the wire feed button on the control panel or torch to feed the wire through the MIG torch liner and out of the nozzle. Trim any excess wire.
6. 操作手順

Image 3: Visual representation of the three welding modes: MMA (stick welding), MIG Gasless (flux-cored welding), and LIFT TIG, demonstrating the versatility of the GOXAWEE MIG-250 welder.
6.1コントロールパネルオーバーview
The front panel features a digital display for current, a voltage adjustment knob, and mode selection switches. Familiarize yourself with these controls before operation.

Image 4: The GOXAWEE MIG-250 welder's control panel with digital display and adjustment knobs, highlighting features like IGBT technology, high-speed cooling fan, and various protections.
6.2 MMA(ARC)溶接
- 電極ホルダーをプラス(+)端子とアース端子に接続します。amp to the negative (-) terminal (or vice-versa, depending on electrode type).
- コントロールパネルでMMAモードを選択します。
- Insert an appropriate electrode (1.6mm - 3.2mm) into the electrode holder.
- 溶接電流を調整する(Amperage) using the control knob based on the electrode type and thickness of the material.
- Strike an arc by lightly touching and quickly lifting the electrode from the workpiece. Maintain a consistent arc length and travel speed.
6.3 MIG (Flux-cored) Welding

画像5: 元ample of MIG Fluxcore welding in progress, suitable for automotive bodywork and general fabrication, demonstrating the machine's capability for spot welding.
- Ensure the flux-cored wire is correctly loaded as per Section 5.4.
- Connect the MIG torch to the appropriate terminal and the earth clamp ワークピースに。
- コントロール パネルで MIG モードを選択します。
- Choose between Synergic Control (automatic adjustment of wire feed speed and voltage based on wire diameter) or Manual Control (adjust current and voltage independently).
- 電流と音量を調整するtage settings according to the material thickness and wire type.
- Press the trigger on the MIG torch to start welding. Maintain a consistent torch angle and travel speed.
6.4 リフトTIG溶接
Note: A separate TIG torch and argon gas cylinder are required for LIFT TIG welding.
- TIGトーチをマイナス(-)端子とアース端子に接続します。amp プラス(+)端子に。
- Connect the argon gas hose from the regulator to the TIG torch.
- Select LIFT TIG mode on the control panel.
- 溶接電流を調整する(Amperage) for the material being welded.
- Initiate the arc by gently touching the tungsten electrode to the workpiece and then lifting it slightly. The arc will start without high-frequency interference.
- 短いアーク長を維持し、必要に応じてフィラーロッドを手動で送ります。
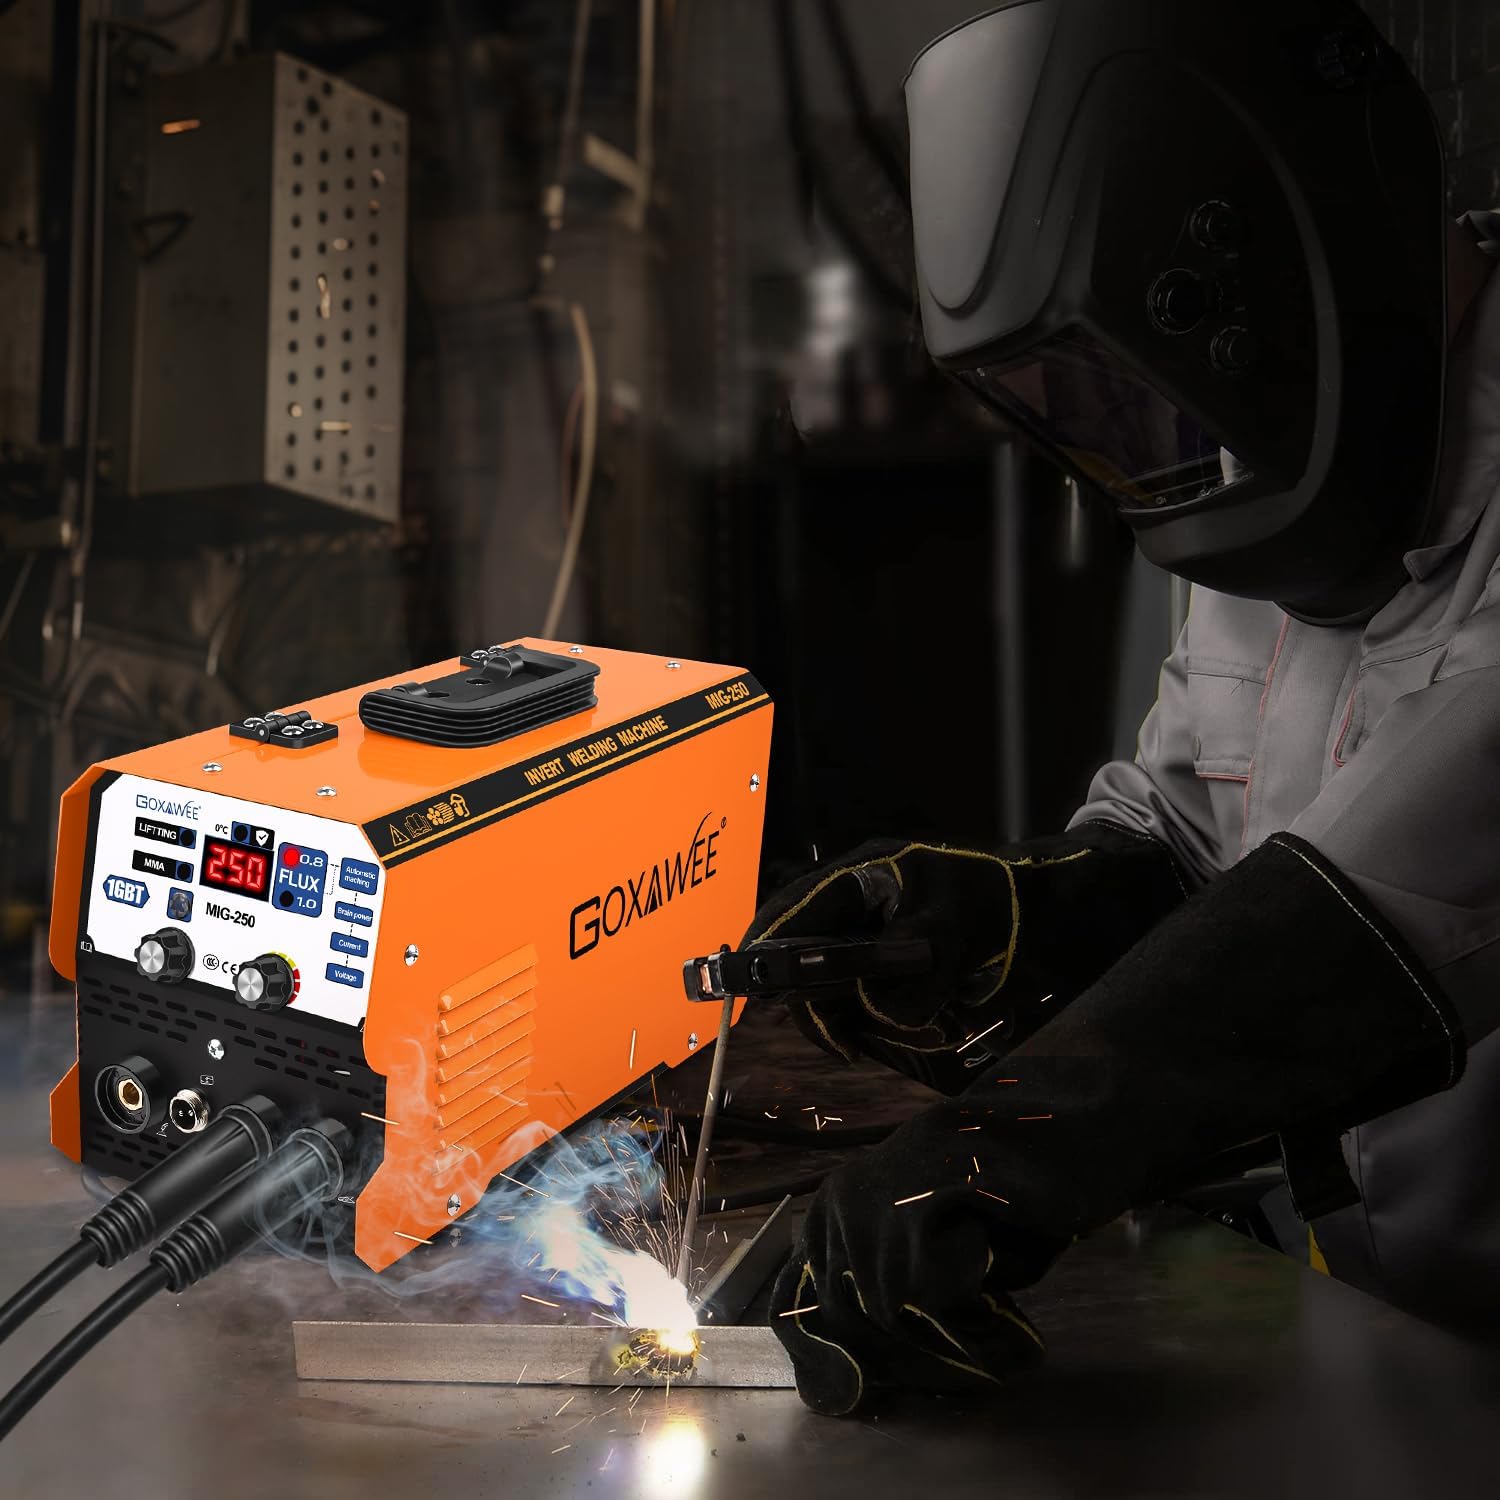
Image 6: A welder using the GOXAWEE MIG-250 machine, demonstrating its application in a typical welding environment.
7. メンテナンス
定期的なメンテナンスにより、溶接機の寿命が長くなり、最適なパフォーマンスが確保されます。
- クリーニング: Periodically clean the exterior of the machine with a dry, soft cloth. Use compressed air to blow out dust and debris from the cooling vents. Ensure the machine is unplugged before cleaning.
- トーチとケーブルの検査: Regularly inspect the welding torch, electrode holder, earth clampすべてのケーブルに摩耗、切断、損傷がないか確認してください。損傷した部品は直ちに交換してください。
- Wire Feed Mechanism (MIG): Clean the drive rollers and wire guide tubes to prevent wire feeding issues. Check the tension of the drive rollers.
- Nozzle and Contact Tip (MIG): Clean or replace the MIG nozzle and contact tip as needed to ensure proper wire feeding and gas flow (if using gas).
- 電極ホルダー(MMA): Ensure the electrode holder jaws are clean and provide good electrical contact.
- ストレージ: 使用していないときは、溶接機を乾燥した清潔な環境に保管してください。
8。 トラブルシューティング
このセクションでは、発生する可能性のある一般的な問題について説明します。ここに記載されていない問題については、カスタマーサポートにお問い合わせください。
| 問題 | 考えられる原因 | 解決 |
|---|---|---|
| 溶接機の電源が入りません。 | No power supply; faulty power cord/plug; internal fuse blown. | Check power outlet and circuit breaker. Inspect power cord. Contact customer support if fuse is suspected. |
| No arc in MMA/TIG mode. | Poor earth connection; incorrect current setting; faulty electrode/tungsten. | アースCLを確認してくださいamp has good contact. Adjust current. Replace electrode/tungsten. |
| Wire feeding issues in MIG mode. | Incorrect drive roller tension; clogged liner; wrong contact tip size; wire tangled. | Adjust drive roller tension. Clean or replace liner. Use correct contact tip. Untangle wire spool. |
| 機械が過熱して停止します。 | Exceeded duty cycle; blocked cooling vents; prolonged continuous use. | Allow machine to cool down. Clear cooling vents. Adhere to recommended rest periods (10-15 min after 20-30 min use). |
| 溶接品質が悪い(例:気孔、スパッタ)。 | 設定が正しくありません(電流/音量tage/wire speed); dirty workpiece; improper technique. | Adjust settings. Clean workpiece thoroughly. Review 溶接技術。 |
9. 保証とサポート
If you have any questions or require assistance with your GOXAWEE MIG-250 Welder, please do not hesitate to contact our customer service team. We are committed to providing support and will respond to your inquiries within 24 hours to offer a solution.
具体的な保証条件については、購入書類を参照してください。
連絡先:
- (Specific contact details such as email or phone number would be listed here if available, but are not provided in the source data.)
- For general inquiries, please visit the official GOXAWEE store on Amazon: GOXAWEE Amazon Store