
導入
ご購入ありがとうございますasing the ThermoPro TP60-2 Digital Wireless Indoor Outdoor Thermometer and Hygrometer. This device is designed to provide accurate temperature and humidity readings for both indoor and outdoor environments. It features a wireless remote sensor with a long transmission range, allowing you to monitor conditions in various locations from a central display unit. Please read this manual thoroughly before using the device to ensure proper operation and to maximize its lifespan.
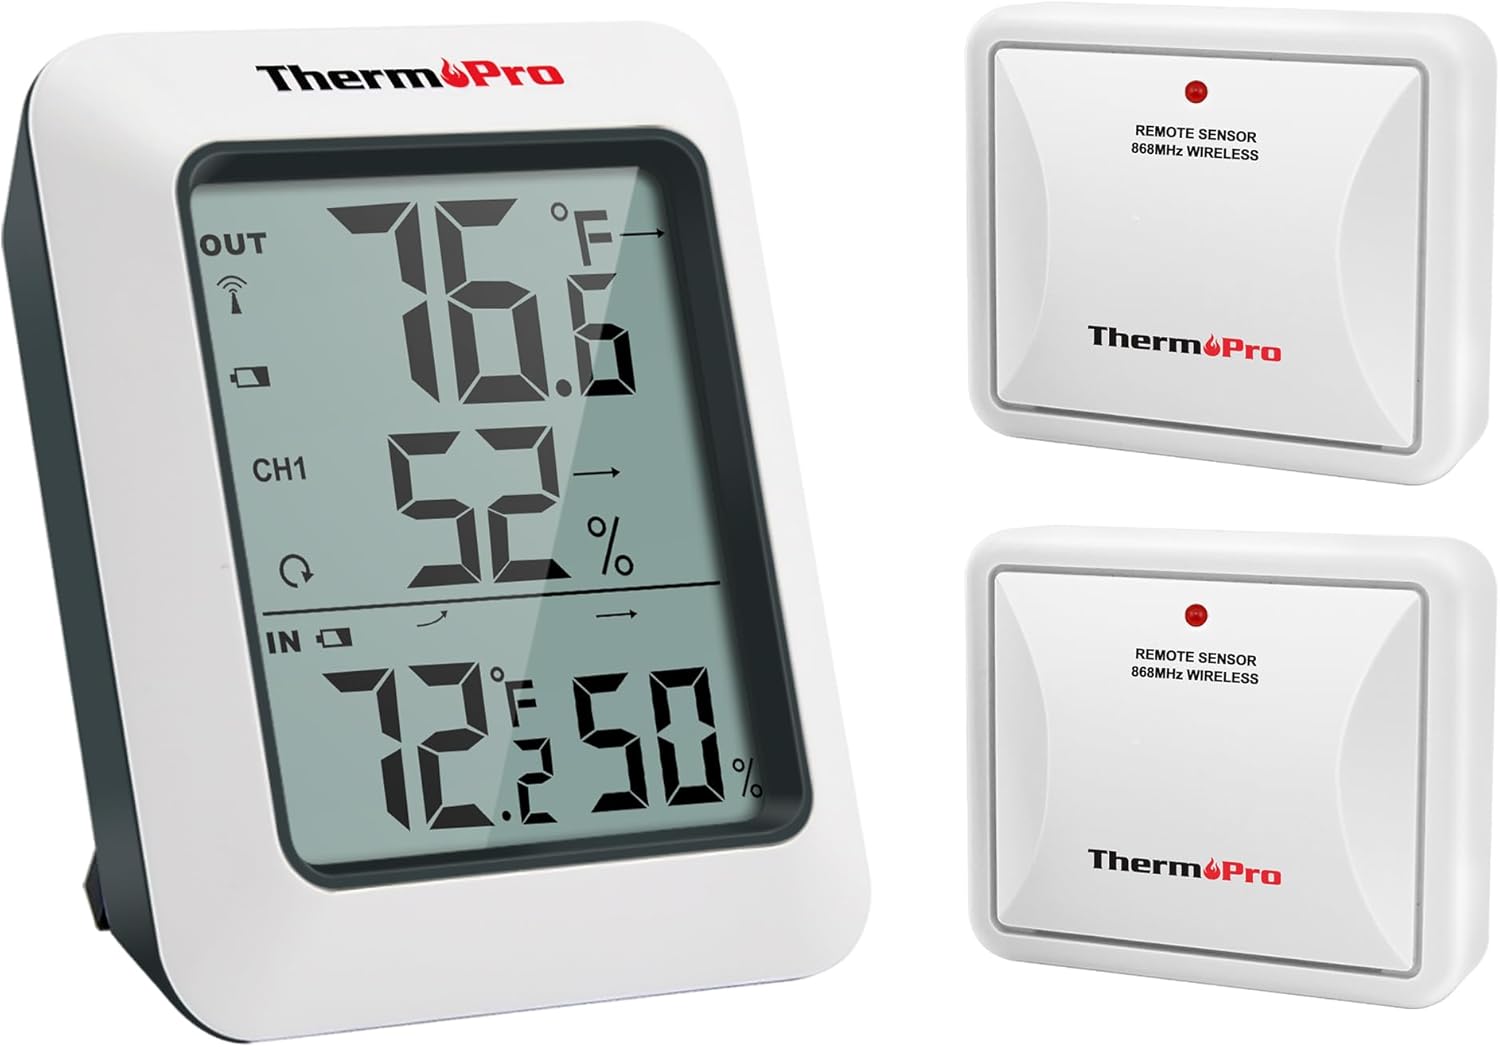
The image displays the ThermoPro TP60-2 main display unit alongside two wireless remote sensors, illustrating the complete product package.
パッケージ内容
- 1 x Base Station (Receiver)
- 2 x Remote Sensors (Transmitters)
- 6 x AAA Size Batteries (included)
- ユーザーマニュアル x 1
主な特徴
- 室内と屋外の温度と湿度を同時に表示します。
- Wireless transmission range of up to 500ft (150m) in open areas.
- 全時間および 24 時間の最高と最低の温度と湿度の測定値を記録します。
- Temperature trend arrows indicate whether conditions are rising, falling, or stable.
- Supports up to 3 remote sensors (two included, additional sensors sold separately).
- 読みやすい大型LCDディスプレイ。
- 切り替え可能な温度単位(°F/°C)。
- Low battery indicator for both main unit and remote sensors.

This diagram shows the wireless remote sensor transmitting data to the main unit over a distance of up to 500 feet (150 meters), highlighting its long-range capability.

The image demonstrates the main unit's ability to connect with and display readings from up to three remote sensors, allowing monitoring of multiple areas simultaneously.
設定
1. バッテリーの取り付け
- 本体と各リモートセンサーの背面にある電池ボックスを開きます。
- Insert the provided AAA batteries, ensuring correct polarity (+ and -).
- 電池ケースをしっかりと閉めてください。
2. リモートセンサーのペアリング
The main unit and remote sensors are pre-paired at the factory. If they do not connect automatically, follow these steps:
- Place the main unit and remote sensor(s) close to each other.
- Ensure batteries are correctly installed in all units.
- On the main unit, press and hold the 'CHANNEL' button for 3 seconds to initiate pairing. The 'OUT' section on the display will flash.
- On each remote sensor, press the 'TX' button once. The sensor's LED indicator will flash.
- The main unit should receive signals from the sensor(s) within a few minutes. Once connected, the outdoor temperature and humidity will appear on the display, and the flashing will stop.
- If pairing fails, remove batteries from both units, wait a few seconds, and repeat the steps.
手術
1. メインディスプレイ終了view

詳細な view of the main display unit, clearly showing current indoor and outdoor temperature and humidity, channel information, and trend arrows indicating changes.
- で: 室内の温度と湿度。
- 外: Outdoor temperature and humidity from the selected channel.
- CH1 / CH2 / CH3: Indicates the active remote sensor channel.
- トレンド矢印: Indicates temperature/humidity trends (rising, falling, stable).
- 最大/最小: Displays maximum/minimum recorded values.
2. 温度単位の選択(°F/°C)
Press the '°F/°C' button on the back of the main unit to switch between Fahrenheit and Celsius temperature display.
3. View最大/最小記録
Press the 'MAX/MIN' button once to display the maximum temperature and humidity recorded since the last reset. Press it again to display the minimum values. Press a third time to return to current readings.
4. Resetting Max/Min Records
その間 viewing MAX or MIN records, press and hold the 'MAX/MIN' button for 3 seconds to clear the recorded data. The display will show current readings, and new MAX/MIN values will begin recording.
5. トレンド指標

This graphic explains how the temperature and humidity trend indicators on the display show whether conditions are rising, falling, or remaining stable.
- 上矢印(↑): 気温・湿度が上昇しています。
- 下矢印(↓): 気温・湿度が下がっています。
- 水平矢印(→): 温度・湿度が安定しています。
配置ガイドライン
1. メインユニットの配置
The main unit can be placed on a tabletop using its integrated stand or mounted on a wall using the keyhole slot on its back. Choose a location indoors that is easily visible and away from direct sunlight, heat sources, or drafts that could affect indoor readings.
2. Remote Sensor Placement
The remote sensor is designed for outdoor use but should be protected from direct precipitation and prolonged direct sunlight for accurate readings and extended lifespan. Ideal locations include under an eaves, beneath a porch, or inside a sheltered area. Ensure the sensor is within the 500ft (150m) wireless range of the main unit and that there are minimal obstructions (thick walls, large metal objects) between the units for optimal signal strength.

This image illustrates the versatile placement options for the main unit and remote sensor, including a built-in tabletop stand and a keyhole for wall mounting.
メンテナンス
1. バッテリーの交換
When the low battery indicator appears on the display for either the main unit or a remote sensor, replace the batteries promptly. Use new AAA batteries and ensure correct polarity. After replacing batteries in a remote sensor, you may need to re-pair it with the main unit by following the 'Pairing Sensors' steps.
2. 清掃
柔らかくて乾いた布でデバイスを清掃してください。amp cloth. Do not use abrasive cleaners or solvents, as these may damage the plastic components or the display. Avoid submerging the units in water.
トラブルシューティング
- No outdoor reading or flashing dashes on the display:
a. Ensure the remote sensor is within range of the main unit.
b. Relocate the main unit or remote sensor to reduce interference from electronic devices or large metal objects.
c. Check if the batteries in the remote sensor are low or need replacement. Re-pair the sensor if necessary. - 温度/湿度の測定値が不正確:
a. Ensure both units are placed away from direct sunlight, heat sources, or drafts.
b. Allow the units to stabilize for at least 30 minutes after initial setup or relocation. - ディスプレイが暗い、または空白です:
a. Replace the batteries in the main unit.
仕様
| 特徴 | 詳細 |
|---|---|
| 室内温度範囲 | -4°F ~ 158°F (-20°C ~ 70°C) |
| 屋外の温度範囲 | -4°F ~ 158°F (-20°C ~ 70°C) |
| 湿度範囲 | 10%から99% |
| 無線伝送範囲 | 屋外では最大500フィート(150メートル) |
| 電源(本体) | 単2電池XNUMX本 |
| 電源(リモートセンサー) | 単2電池XNUMX本 |
| 表示タイプ | デジタルLCD |
| 応答時間 | 10秒 |
| 材料 | プラスチック |

The image provides a visual representation of the main unit's dimensions, indicating its compact size.
保証とサポート
ThermoPro provides a 3-year warranty for this product from the date of purchase. This warranty covers defects in materials and workmanship under normal use. For warranty claims or technical support, please contact ThermoPro customer service. You may find contact information on the ThermoPro official webサイトまたは小売店を通じてご購入いただけます。
Registering your product on the ThermoPro website may extend your warranty period. Please refer to the official ThermoPro website for the most current warranty terms and registration details.