1.製品オーバーview
The Thermalright TL-P9W-S is a high-performance 92mm CPU PWM fan designed for efficient cooling in PC cases and with CPU coolers. It features automatic speed control, low noise operation, and customizable ARGB lighting effects.
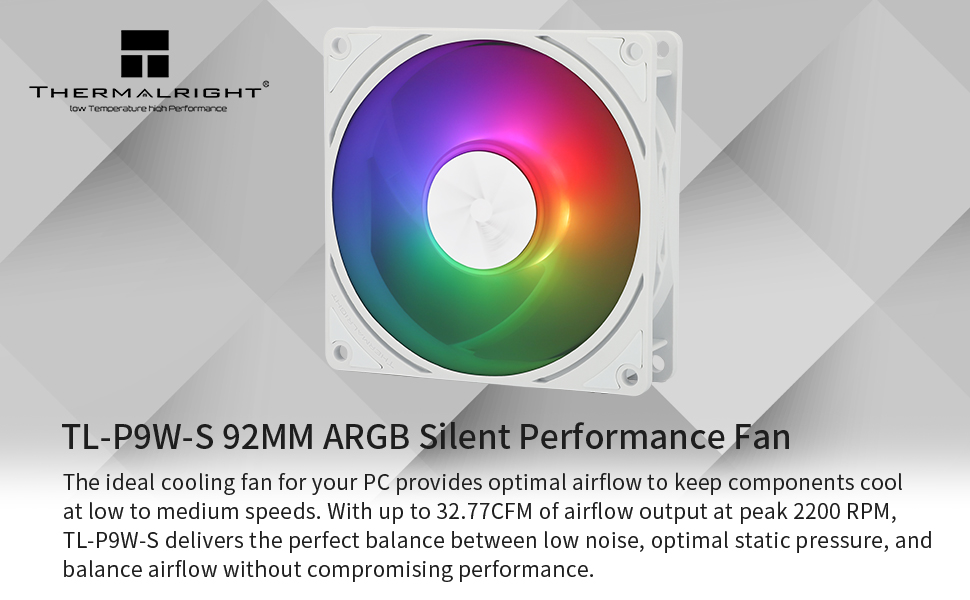
Image: Thermalright TL-P9W-S fan highlighting key features.
- 高性能冷却: Automatic speed control via 4-pin PWM interface, reaching a maximum speed of 2200 RPM for effective heat dissipation.
- 低騒音動作: 4つの振動dを装備amping pads to reduce friction and noise, ensuring quiet performance.
- ARGB照明: High brightness LED atomized ARGB fan blades provide soft, customizable lighting effects. Connects to a 3-pin ARGB port on the motherboard for control.
- 耐久性のある構造: Fan blades and frame are made from industrial-grade PBT+PC material for strength and stability.
- Long-lasting Bearing: Features a maintenance-free S-FDB (Fluid Dynamic Bearing) with magnetic assist for low friction and extended lifespan.
2. セットアップとインストール
Follow these steps to properly install your Thermalright TL-P9W-S fan. Ensure your system is powered off and unplugged before beginning installation.
2.1 ファンの接続
- PWM接続: Connect the 4-pin PWM fan cable to an available 4-pin fan header on your motherboard. This allows the motherboard to control the fan speed based on system temperature.
- ARGB接続: Connect the 3-pin ARGB connector to a +5V ARGB header on your motherboard. This enables control over the fan's lighting effects. If connecting multiple ARGB devices, utilize the daisy-chain feature by connecting additional ARGB connectors to the sharing header.

Image: PWM fan speed control connector.
2.2 ファンの取り付け
The TL-P9W-S fan can be used as a case fan or mounted on compatible CPU coolers. Use the provided screws to secure the fan in your desired location. The soft silicone feet at each corner help reduce vibration.

画像: Examples of fan installation in a PC case and on CPU coolers.
2.3 インストールビデオガイド
For a visual guide on installation, please refer to the official video below:
Video: Thermalright case fan quick start guide. This video demonstrates the connection process for the fan's PWM and ARGB cables to a motherboard.
3. 操作手順
3.1 ファン速度制御(PWM)
The 4-pin PWM connector allows your motherboard to automatically adjust the fan speed based on the CPU or system temperature. This ensures optimal cooling performance while minimizing noise when high airflow is not required. You can typically configure fan curves in your motherboard's BIOS/UEFI settings or through manufacturer-provided software.
3.2 ARGB照明制御
The 3-pin ARGB connector enables synchronization and control of the fan's lighting effects through your motherboard's ARGB software (e.g., ASUS Aura Sync, MSI Mystic Light Sync, Gigabyte RGB Fusion, ASRock Polychrome Sync). This allows you to customize colors, patterns, and brightness to match your system's aesthetic.
Image: Fan displaying various ARGB lighting effects.
4. メンテナンス
The Thermalright TL-P9W-S fan utilizes an S-FDB (Fluid Dynamic Bearing) which is designed for long-term, maintenance-free operation. Therefore, ファンを分解しないでください as this may damage the bearing and void any potential warranty.
最適なパフォーマンスと寿命を保証するには:
- Periodically inspect the fan blades for dust accumulation.
- Gently clean any dust from the fan blades and frame using compressed air or a soft brush. Ensure the fan is powered off during cleaning.

Image: Detail of the S-FDB bearing and vibration dampパッドを装着します。
5。 トラブルシューティング
If you encounter issues with your Thermalright TL-P9W-S fan, consider the following troubleshooting steps:
- ファンが回転しない:
- 4 ピン PWM コネクタがマザーボードのファン ヘッダーにしっかりと差し込まれていることを確認します。
- マザーボードの BIOS/UEFI 設定をチェックして、ファン ヘッダーが有効になっていて、正しく構成されていることを確認します。
- 電源が正しく機能していることを確認します。
- ARGB照明なし:
- Confirm the 3-pin ARGB connector is correctly attached to a +5V ARGB header on your motherboard. Note that this is different from a +12V RGB header.
- マザーボードの ARGB ソフトウェアをチェックして、照明効果が有効になって設定されていることを確認します。
- デイジー チェーン接続する場合は、すべての接続が安全であることを確認してください。
- 過度の騒音:
- Ensure the fan is securely mounted and not vibrating against other components. The rubber damping pads should help mitigate this.
- ファンブレードに干渉するケーブルや障害物がないか確認します。
- Adjust the fan speed curve in your motherboard's BIOS/UEFI or software. Running the fan at 100% speed continuously can generate more noise. Tuning to 50-60% for typical loads often provides a good balance of cooling and quietness.
- ファンブレードに蓄積したほこりを取り除きます。
- 冷却性能が低い:
- Ensure the fan is oriented correctly for optimal airflow (intake or exhaust, depending on your system's needs).
- Verify that there are no obstructions blocking airflow to or from the fan.
- Check fan speed settings; increase speed if temperatures are too high.
6. 仕様
| 特徴 | 仕様 |
|---|---|
| モデル | TL-P9W-S |
| 製品寸法(長さ x 幅 x 高さ) | 3.62インチ x 0.98インチ x 3.62インチ (92mm x 25mm x 92mm) |
| 電源コネクタタイプ | 4ピンPWM |
| ARGBコネクタタイプ | 3-Pin (+5V) |
| 巻tage | 12ボルト |
| ワットtage | 9ワット |
| 冷却方法 | 空気 |
| 対応デバイス | Desktop PCs (Case, CPU Coolers) |
| 騒音レベル | 23.85デシベル(最大) |
| 材料 | PBT+PC、シリコン |
| 最高回転数 | 2200 回転 |
| 風量 | 32.77 立方フィート/分 (CFM) |
| ベアリングタイプ | S-FDB(流体動圧軸受) |
7. 保証とサポート
保証情報とテクニカルサポートについては、Thermalrightの公式ウェブサイトをご覧ください。 web当サイトをご覧いただくか、販売店にお問い合わせください。保証請求の際に必要となりますので、購入証明書を保管してください。
Manufacturer: THERMALRIGHT


