
1. はじめに
This manual provides detailed instructions for the installation, operation, and maintenance of your EVTSCAN Digital Thermoregulator. This device is designed to precisely control heating equipment, such as wall-mounted boilers and gas boilers, ensuring a stable and energy-efficient temperature environment. Please read this manual thoroughly before installation and use to ensure proper function and safety.
2. 安全情報
デバイスの損傷や人的傷害を防ぐために、常に次の安全上の注意事項を守ってください。
- 設置またはメンテナンスの前に、電源が切断されていることを確認してください。
- 電気配線について不明な点がある場合は、資格のある専門家が設置を行う必要があります。
- デバイスを水や過度の湿気にさらさないでください。
- Use only the specified battery type (2 AA batteries) and ensure correct polarity.
- デバイスを可燃物から遠ざけてください。
3.製品オーバーview
The EVTSCAN Digital Thermoregulator features a clear LCD display for easy monitoring and a simple interface for temperature control. Its compact design allows for discreet integration into your living space.

図3.1: 前面 view of the Digital Thermoregulator. The LCD screen displays current settings and room temperature, with a rotary knob below for adjustments.
主要コンポーネント:
- LCDディスプレイ: Shows set temperature, room temperature, time, and operational icons.
- Control Knob/Button: メニューを移動したり設定を調整したりするために使用されます。
- バッテリーコンパートメント: Located on the rear or side for 2 AA batteries.
- 配線端子: For connection to the heating system.
4. 仕様
| 特徴 | 仕様 |
|---|---|
| モデル | EVTSCANok0g9ct2zq |
| パワーモード | 単三電池2本(別売) |
| Screen Accuracy | 0.5℃ |
| プローブセンサー | NTC (10k) 1% |
| 接触容量 | Greater than 30-230 V DC working voltage, lower current. Reference: 5 A 30 V (HF relay) or 2 A 30 V (NEC relay) |
| 温度表示範囲 | 1~40℃ |
| Default Temperature Adjustment Range | 5~35℃ |
| 動作温度範囲 | 0~50℃ |
| 実行中のプログラム | Set once a week |
| 出力 | スイッチングリレー |
| 材料 | 難燃性ポリカーボネート |
| 重さ | 170グラム |
5. セットアップとインストール
The EVTSCAN Digital Thermoregulator is designed for simple installation. Follow these steps carefully:
5.1。 開梱と検査
すべての部品をパッケージから慎重に取り出してください。パッケージの内容物に記載されているすべてのアイテムが揃っていて、損傷がないことを確認してください。
- 1 Digital Temperature Controller
- ネジ2本
5.2. バッテリーの取り付け
The device requires 2 AA batteries for operation. These are not included in the package.
- Locate the battery compartment on the back of the thermoregulator.
- 電池ボックスのカバーを開きます。
- 正しい極性 (+/-) を確認して、単三電池 2 本を挿入します。
- 電池カバーをしっかりと閉じてください。

図5.1: 角度付き view of the thermoregulator, illustrating its compact size and potential location for battery access or mounting points.
5.3. 取り付けと配線
The thermoregulator is designed for wall mounting. Ensure the power to your heating system is turned off before proceeding with wiring.
- Choose a suitable location on an interior wall, away from direct sunlight, drafts, or heat sources that could affect temperature readings.
- Mount the backplate (if detachable) to the wall using the provided screws.
- Connect the thermoregulator to your boiler or heating system according to the wiring diagram provided with your boiler and the thermoregulator's terminal markings. This typically involves connecting the switching relay output to the boiler's control input.
- Secure the thermoregulator onto the mounted backplate.
注記: For wiring, consult a qualified electrician if you are unfamiliar with electrical installations.
6. 操作手順
The EVTSCAN Digital Thermoregulator uses a microcomputer control technology to maintain your desired temperature efficiently.
6.1. Powering On and Initial Display
Once batteries are installed, the LCD display will illuminate, showing the current room temperature, set temperature, and time.
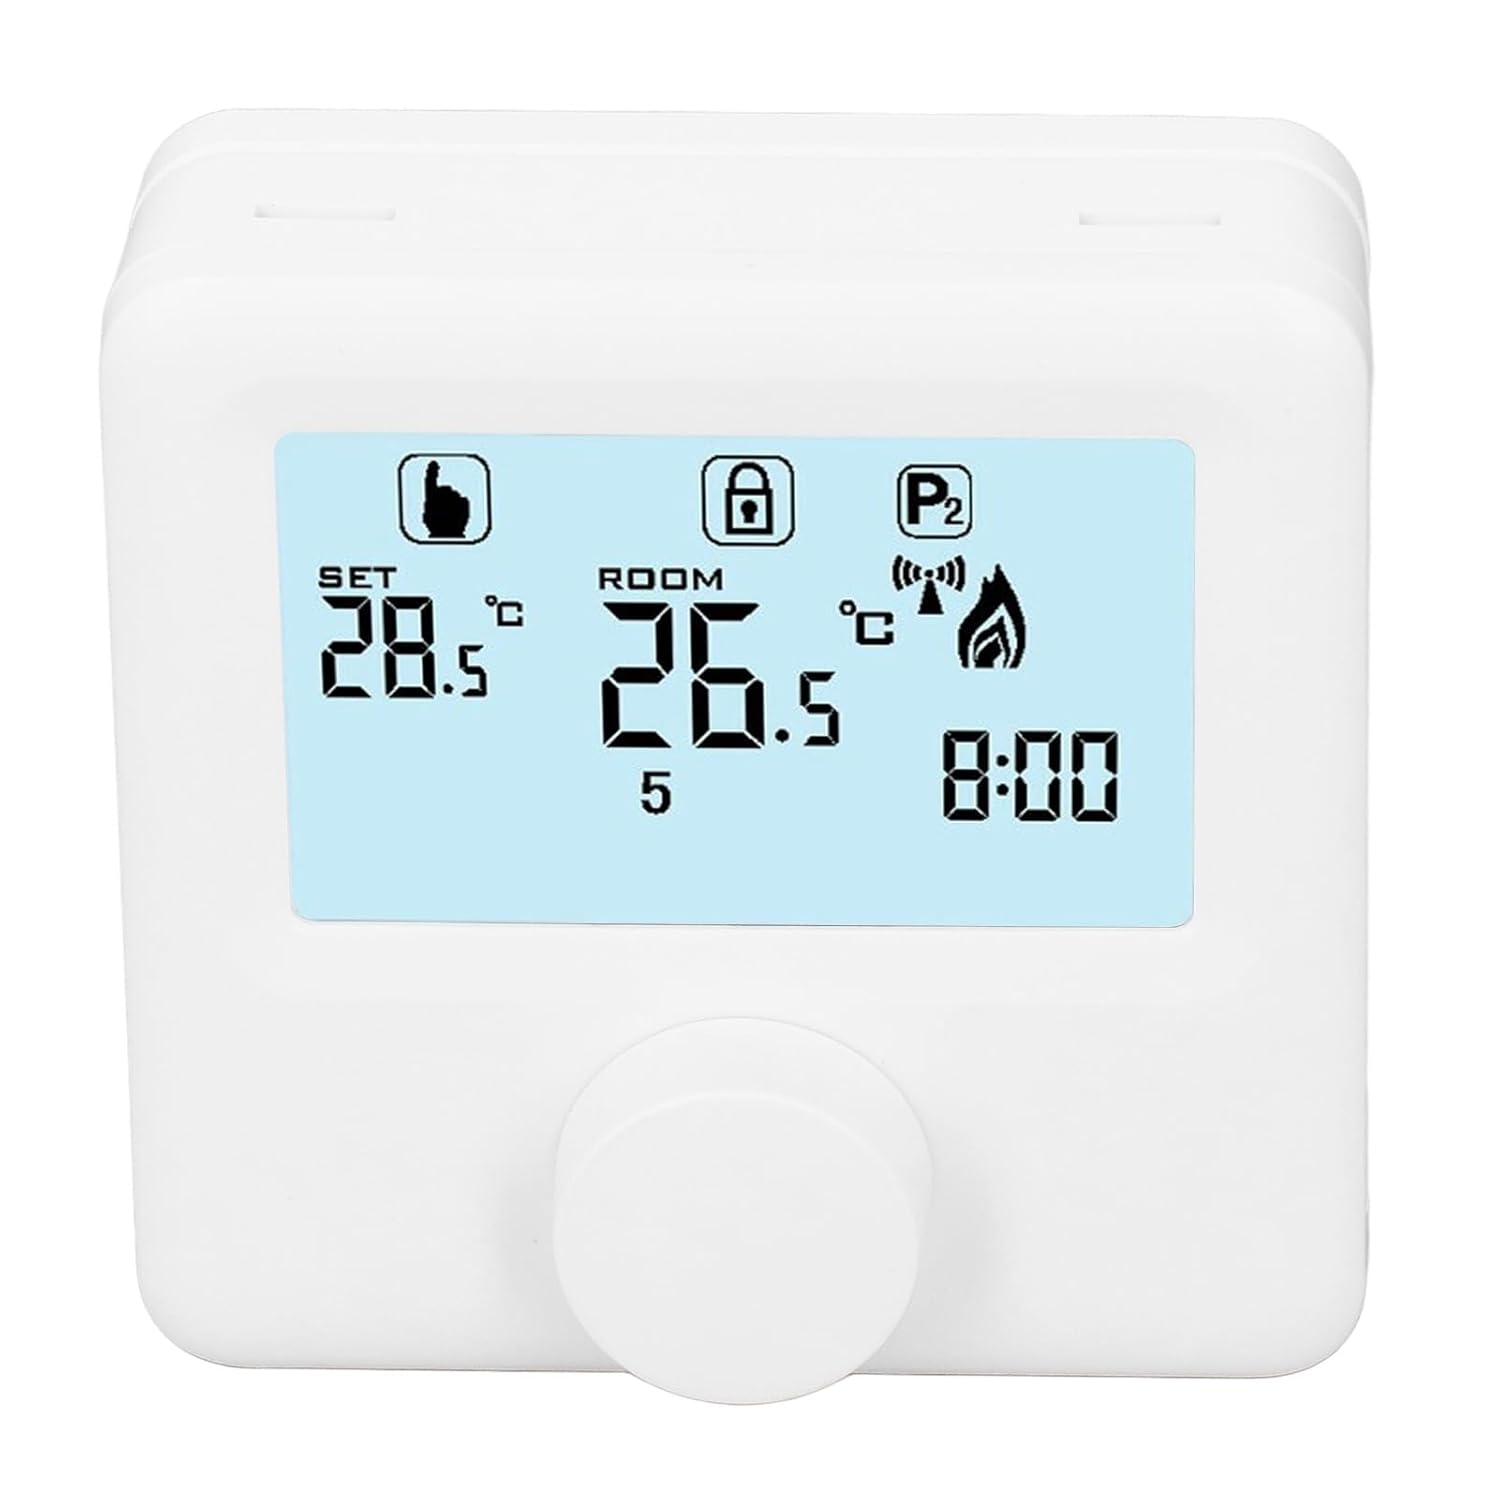
図6.1:詳細 view of the LCD display. It shows the set temperature (SET), room temperature (ROOM), a lock icon, a program icon (P2), a signal icon, a flame icon indicating heating, and the current time.
6.2.温度の設定
希望の温度を調整するには:
- Rotate the control knob to increase or decrease the set temperature. The "SET" value on the display will change accordingly.
- The device will automatically activate or deactivate the heating system to maintain the set temperature within the range of 1 to 40 ℃. The default adjustment range is 5 to 35 ℃.
6.3. プログラミング週間スケジュール
The thermoregulator supports a weekly programming schedule. This allows you to set different temperatures for various times of the day across the week.
- Press and hold the control knob (or a designated button, if available) to enter programming mode.
- Use the control knob to navigate through days of the week and time slots.
- Adjust the desired temperature for each programmed period.
- Confirm your settings to save the weekly program. The device will then operate according to this schedule.
6.4. Understanding Display Icons
- セット: Indicates the target temperature you have set.
- 部屋: 現在の室温を表示します。
- 炎のアイコン: 暖房システムが作動しているときに点灯します。
- ロックアイコン: May indicate a keypad lock feature to prevent accidental changes.
- P1/P2 Icon: Indicates the current program mode (e.g., P1 for comfort, P2 for economy, or specific weekly program segments).
- 信号アイコン: May indicate wireless communication status if applicable.
7. メンテナンス
Regular maintenance ensures the longevity and optimal performance of your thermoregulator.
- クリーニング: 柔らかく乾いた布で拭いてください。研磨剤入りの洗剤や溶剤は使用しないでください。
- バッテリー交換: Replace batteries when the low battery indicator appears on the display. Always replace both batteries simultaneously with new AA batteries.
- センサーエリア: Ensure the temperature sensor area (usually a small vent on the device) is free from dust and obstructions for accurate readings.
8。 トラブルシューティング
If you encounter issues with your EVTSCAN Digital Thermoregulator, refer to the following common problems and solutions:
- 表示が空白です:
- 電池が正しく取り付けられているか確認してください。
- 古い電池を新しいものと交換してください。
- 暖房システムが応答しない:
- Ensure the thermoregulator is powered on and the flame icon is displayed when heating is expected.
- Verify wiring connections to the boiler are secure and correct.
- Check the boiler's power supply and status.
- 設定温度が現在の室温よりも高いことを確認してください。
- 不正確な温度測定値:
- Ensure the device is not exposed to direct sunlight, drafts, or heat sources.
- Clean any dust or debris from the sensor area.
- Cannot change settings:
- Check if the lock icon is displayed. If so, refer to the operating instructions to unlock the keypad.
問題が解決しない場合は、カスタマー サポートにお問い合わせください。
9. 保証とサポート
Specific warranty information for this product is not provided in the available data. Please refer to the product packaging or the retailer's web保証詳細サイト。
For technical support or further assistance, please contact EVTSCAN customer service through their official channels or the retailer from whom you purchased the product.
You can visit the EVTSCAN store on Amazon for more information: EVTSCAN Store