
1. はじめに
ご購入ありがとうございますasing the CLAYMORE Heady3 CLC-500 Headlight. This versatile headlight is designed for various outdoor activities, offering multiple lighting modes, a motion sensor, and flexible mounting options. Please read this manual carefully before use to ensure proper operation and maintenance.
2. 安全情報
- 目の損傷を避けるため、光線を直接見ないでください。
- Keep the device away from water and moisture unless specifically designed for waterproof use (check specifications).
- Do not attempt to disassemble or modify the headlight. This may void the warranty and pose safety risks.
- 指定された充電容量のみを使用してくださいtage (USB 5V 1A).
- お子様の手の届かない場所に保管してください。
- 極端な温度や直射日光を避けてください。
3. パッケージ内容
すべての項目が揃っていることを確認してください:
- CLAYMORE Heady3 CLC-500 Headlight
- USB-C充電ケーブル
- ヘッドバンド
- ユーザーマニュアル(このドキュメント)
4.製品オーバーview
Familiarize yourself with the components of your CLAYMORE Heady3 CLC-500 Headlight.
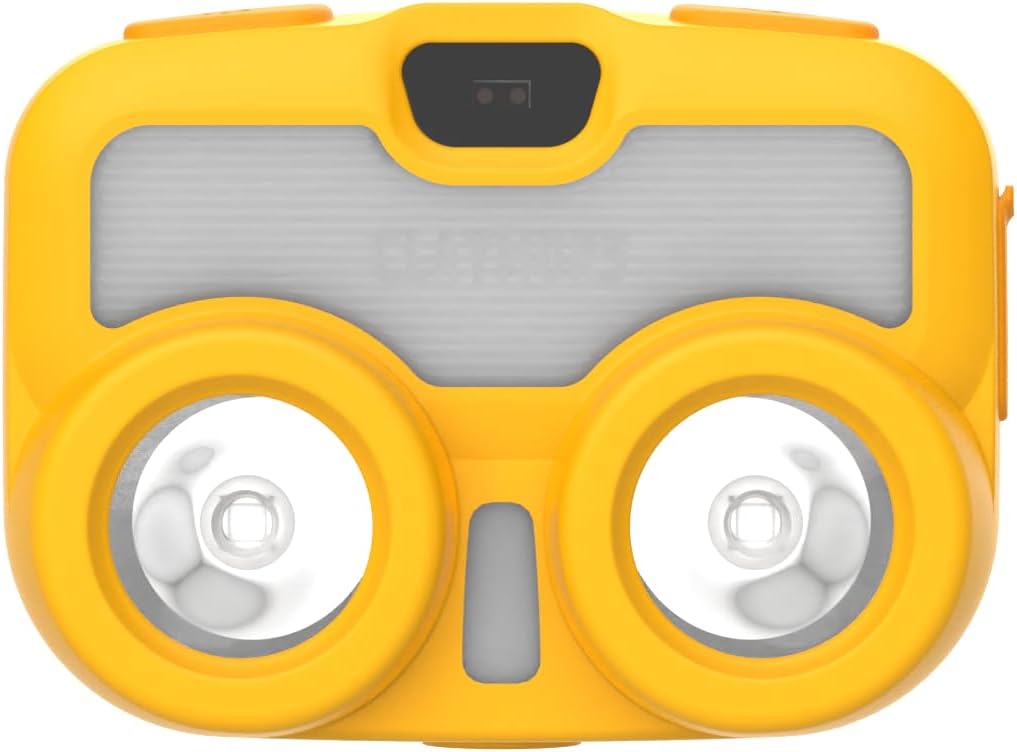
図4.1: 前面 View. This image shows the front of the CLAYMORE Heady3 CLC-500 Headlight, highlighting the two main light sources and the central sensor area.

図4.2:上 View. This image displays the top side of the headlight, featuring the power button (left), the P-SENSOR label, and the mode/motion sensor button (right).

図4.3:側面 View. This image illustrates the side of the headlight, clearly showing the USB-C charging port with its protective cover.
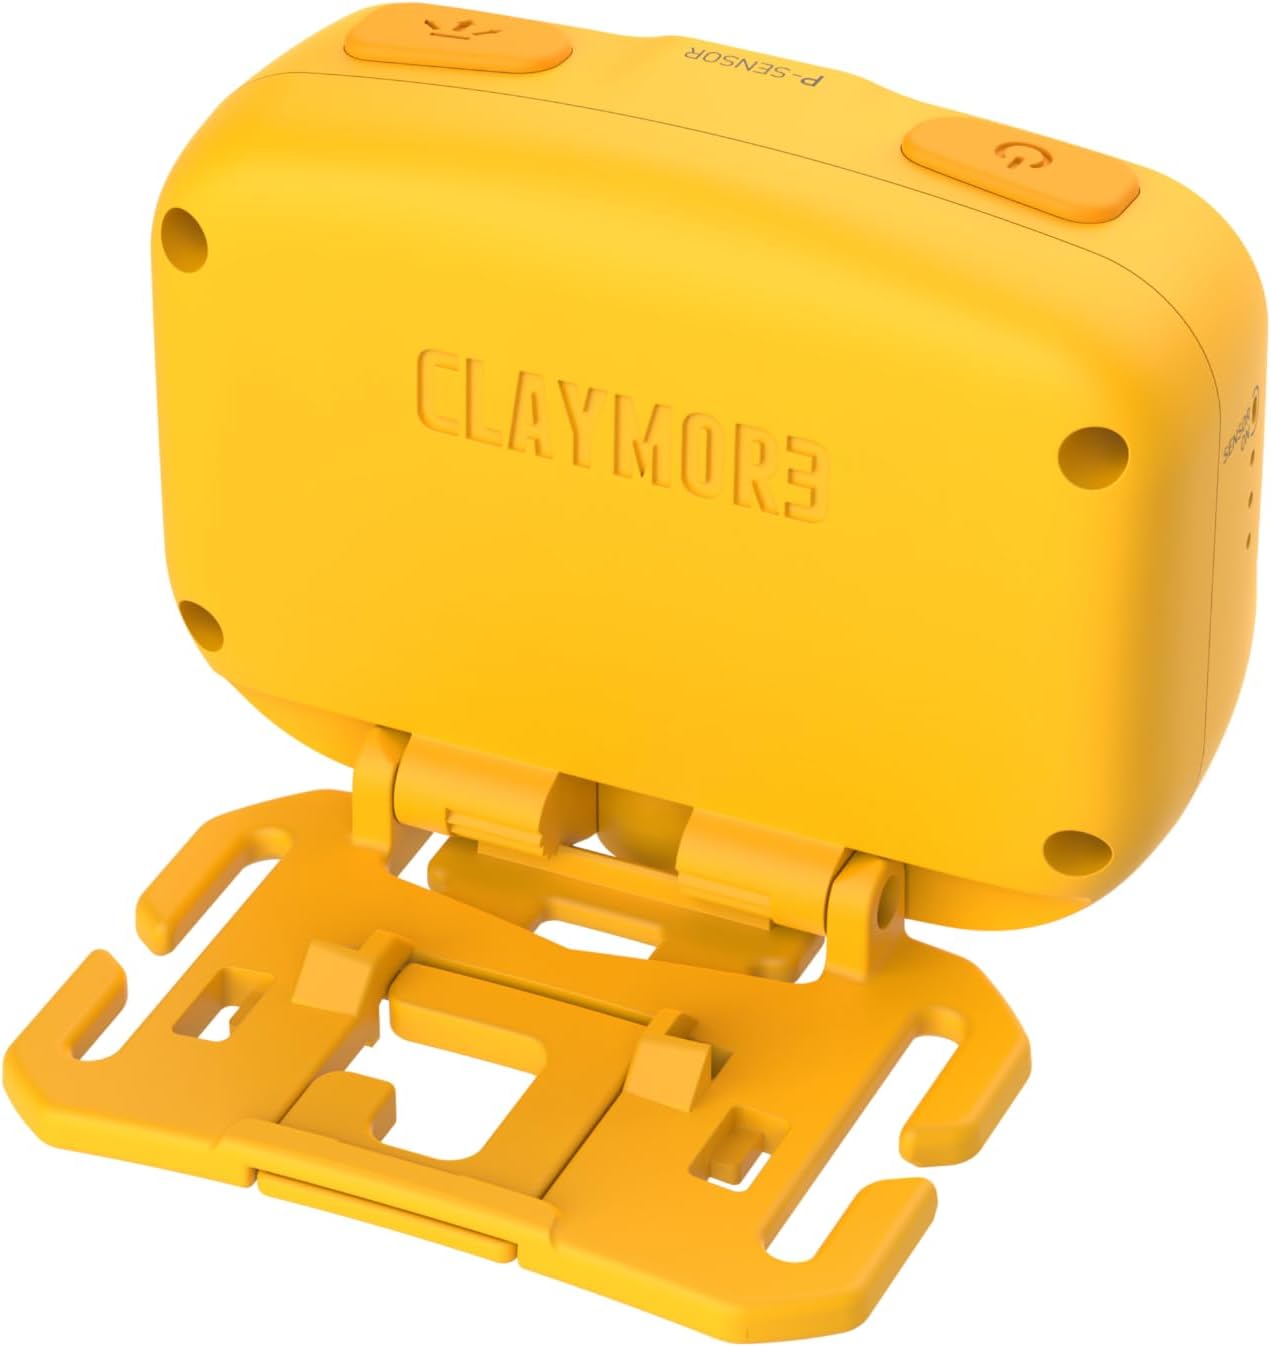
図4.4:戻る View. This image presents the rear of the headlight, showing the CLAYMORE branding and the integrated mounting bracket for various attachments.
5. セットアップ
5.1 ヘッドライトの充電
- Locate the USB-C port on the side of the headlight (refer to Figure 4.3).
- Connect the provided USB-C cable to the headlight and the other end to a USB power source (e.g., wall adapter, power bank, computer USB port). Ensure the power source provides 5V 1A.
- 充電インジケータ ライトは充電状態を示します (例: 充電中は赤、完全に充電されている場合は緑)。
- フル充電には通常数時間かかります。
5.2取り付けオプション
The CLAYMORE Heady3 offers multiple ways to attach and use the light:
- ヘッドバンド: Attach the headlight to the included headband for traditional headlamp 使用。
- フック: Utilize the integrated hook on the mounting bracket to hang the light from tents, branches, or other suitable fixtures.
- ワニ口クリップ: Attach the light to a bag, pocket, or other gear using an alligator clip (may require an additional accessory, not specified as included).
- 三脚ネジ穴: The headlight features a tripod screw hole for mounting on standard tripods or other compatible accessories, offering stable positioning.
6. 操作手順
6.1 電源オン/オフ
- To turn on the headlight, press and hold the power button (left button on top, refer to Figure 4.2).
- ヘッドライトをオフにするには、電源ボタンをもう一度押し続けます。
6.2 照明モードの変更
The CLC-500 features 6 lighting modes:
- Cool White (5700K, 6500K): Bright, clear light for general illumination.
- White (4200K): Neutral white light.
- ウォームホワイト (3000K): Softer, warmer light for comfortable ambiance.
- 赤信号: Preserves night vision and is less disruptive in dark environments.
- Diffused Light: Provides a wide, even spread of light.
- 集中した光: 集中ビームで長距離照射。
To cycle through the lighting modes, short press the mode button (right button on top, refer to Figure 4.2) while the light is on.
6.3 明るさ調整(調光)
The brightness can be adjusted from 15 lumens to 500 lumens.
- While the light is on in any mode, press and hold the mode button to continuously adjust the brightness. Release the button when the desired brightness level is reached.
6.4 モーションセンサー機能
The motion sensor allows for hands-free operation, enabling you to turn the light on/off or dim it with a wave of your hand.
- To activate the motion sensor, double-press the mode button. An indicator light (if present, not specified) may confirm activation.
- Once activated, wave your hand in front of the sensor (located centrally on the front, refer to Figure 4.1) to toggle the light on/off or to dim it, depending on the specific mode.
- To deactivate the motion sensor, double-press the mode button again.
7. メンテナンス
- クリーニング: Wipe the headlight with a soft, dry cloth. Do not use abrasive cleaners or solvents.
- バッテリーのケア: To prolong battery life, charge the device regularly, even if not in frequent use. Avoid fully discharging the battery for extended periods. Store in a cool, dry place.
- ストレージ: When storing for long periods, ensure the battery is partially charged (around 50%) and recharge every 3-6 months.
8。 トラブルシューティング
- ライトが点灯しない:
- バッテリーが充電されていることを確認してください。電源に接続し、充電インジケーターを確認してください。
- 電源ボタンを数秒間押し続けて、短く押しただけではないことを確認します。
- ライトが充電されない:
- USB-C ケーブルに損傷がないか確認し、正しく接続されていることを確認します。
- 別の USB 電源または壁のアダプターを試してください。
- モーションセンサーが応答しません:
- Ensure the motion sensor function is activated (double-press mode button).
- Clean the sensor area on the front of the headlight.
- 手とセンサーの間に障害物がないことを確認してください。
9. 仕様
| モデル | CLC-500 |
| 寸法(約) | 68 x 51 x 37 mm (2.7 x 2.0 x 1.5 インチ) |
| 重量(約) | 82 g (2.9 オンス) |
| 輝度 | 15~500ルーメン |
| 光の色温度 | Cool: 5700K, 6500K / White: 4200K / Warm: 3000K / Red |
| 入力 | USB 5V 1A |
| 電池のタイプ | リチウムポリマー(1個付属) |
| 材料 | アルミニウム |
| 特集 | モーションセンサー |
10. 保証とサポート
This product comes with a standard manufacturer's warranty. For specific warranty terms and conditions, please refer to the documentation provided at the time of purchase or contact your retailer. For technical support or service inquiries, please contact the manufacturer or your local distributor.


