JMT 007
JMT M.2 RGB SSD Enclosure
モデル: 007 - 取扱説明書
1. はじめに
Thank you for choosing the JMT M.2 RGB SSD Enclosure, Model 007. This enclosure is designed to provide a high-speed, portable storage solution for your M.2 NVMe and SATA SSDs. It supports both M-Key and B+M Key SSDs in the 2280 form factor, offering versatile compatibility for your storage needs.
The Model 007 features a robust all-aluminum design for optimal heat dissipation and durability. It utilizes a Master Control 9210B chip, enabling dual-protocol support for NVMe (up to 10Gbps) and SATA (up to 6Gbps) drives via a USB 3.2 interface. This model does not include a touch screen.

図1: 前面 view of the JMT M.2 RGB SSD Enclosure (Model 007), showcasing its sleek design and integrated RGB light bar.
2. セットアップとインストール
This section guides you through the process of installing your M.2 SSD into the enclosure and connecting it to your device.
2.1. SSDのインストール
- エンクロージャを準備する: Gently slide open the enclosure cover. The Model 007 typically has a sliding mechanism or screws to access the internal PCB.
- SSDを挿入します。 Align your M.2 2280 NVMe or SATA SSD with the M-Key or B+M Key slot on the enclosure's circuit board. Insert the SSD firmly but carefully into the slot at an angle.
- SSD を保護する: Once inserted, gently push down the SSD until it is flat against the PCB. Secure it with the provided screw or rubber fastener at the end of the SSD.
- エンクロージャを閉じます: Slide the cover back onto the enclosure until it clicks into place or secure it with the screws. Ensure it is fully closed to protect the internal components.
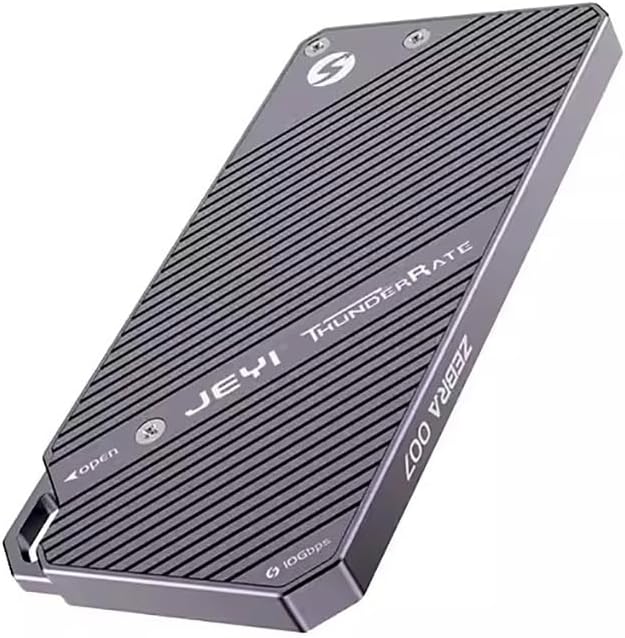
図2:背面 view of the enclosure, indicating the access points for SSD installation. Note the "JEYI ThunderRate ZEBRA 007" branding.
2.2. デバイスへの接続
- USBケーブルを接続します: Use the provided USB-C to USB-C or USB-C to USB-A cable to connect the enclosure's USB-C port to a compatible USB port on your computer or device.
- デバイス認識: Your operating system should automatically detect the new storage device. For new SSDs, you may need to initialize and format the drive through Disk Management (Windows) or Disk Utility (macOS) before it appears as a usable drive.

図3:側面 view of the enclosure, highlighting the USB-C port for connection and the "10Gbps" speed indicator.
3. 操作手順
Once connected, the JMT M.2 RGB SSD Enclosure functions as an external storage device. You can drag and drop files, or use it for backups and other data management tasks.
3.1. データ転送
- 高速パフォーマンス: The enclosure supports USB 3.2, providing data transfer speeds of up to 10Gbps with NVMe drives and up to 6Gbps with SATA drives. Ensure your computer's USB port also supports USB 3.2 (or higher) for optimal performance.
- RGBインジケーター: The integrated RGB light bar indicates activity and status. Its dynamic lighting provides visual feedback during operation.

Figure 4: The enclosure with its RGB light bar illuminated, indicating operational status.
3.2. Read and Write Protection
The enclosure supports read and write protection features to safeguard your data. Consult your operating system's disk management tools for options to enable or disable write protection for the drive, if applicable. This feature helps prevent accidental data deletion or modification.
4. メンテナンス
Proper maintenance ensures the longevity and optimal performance of your SSD enclosure.
- クリーニング: 筐体の外側を拭く際は、柔らかく乾いた布をご使用ください。液体クリーナーや研磨剤の使用は避けてください。
- 放熱: The all-aluminum design is optimized for heat dissipation. Ensure the enclosure is placed in a well-ventilated area during prolonged use to prevent overheating, especially during large data transfers.
- ストレージ: 使用していないときは、直射日光や極端な温度を避け、涼しく乾燥した場所に保管してください。
- 安全な排出: Always safely eject the enclosure from your operating system before disconnecting the USB cable to prevent data corruption.
5。 トラブルシューティング
If you encounter issues with your JMT M.2 RGB SSD Enclosure, refer to the following common troubleshooting steps:
- Enclosure Not Detected:
- USB ケーブルがエンクロージャとコンピュータの両方にしっかりと接続されていることを確認します。
- コンピュータの別のUSBポートを試してください。
- 別の USB ケーブルでテストします。
- Verify that the M.2 SSD is correctly seated and secured within the enclosure.
- ディスクの管理 (Windows) またはディスク ユーティリティ (macOS) をチェックして、ドライブが検出されているが初期化/フォーマットされていないかどうかを確認します。
- 転送速度が遅い:
- Ensure you are using a USB 3.0/3.1/3.2 port on your computer. Connecting to a USB 2.0 port will result in significantly slower speeds.
- Verify the type of SSD installed (NVMe drives are faster than SATA drives).
- システム リソースやディスク I/O を消費している可能性のあるバックグラウンド プロセスを確認します。
- Ensure the enclosure is not overheating during large transfers.
- RGB Light Not Illuminating:
- エンクロージャが電源付き USB ポートに正しく接続されていることを確認します。
- If the drive is detected and functioning, the light issue might be minor and not affect functionality.
問題が解決しない場合は、セクション 7 に記載されているサポート情報を参照してください。
6. 仕様
| 特徴 | 詳細 |
|---|---|
| モデル | 007 |
| マスターコントロールチップ | 9210B |
| サポートされているSSDタイプ | M.2 NVMe / SATA (2280 form factor only) |
| Supported Keys | M-Key, B+M Key |
| インタフェース | USB 3.2 タイプC |
| NVMe転送速度 | 最大10Gbps |
| SATA転送速度 | 最大6Gbps |
| 材料 | アルミニウム |
| 特集 | RGB Light Bar, Read/Write Protection |
| 画面 | None (Model 007) |
7. 保証とサポート
JMT products are designed for reliability and performance. For specific warranty details, please refer to the documentation included with your purchase or visit the official JMT webサイト。
For technical support, troubleshooting assistance, or inquiries regarding your JMT M.2 RGB SSD Enclosure, please contact JMT customer service. You can often find contact information on the official JMT brand store or product packaging.
JMT Brand Store: Visit the JMT Store on Amazon
Ask a question about this manual
Ask about setup, troubleshooting, compatibility, parts, safety, or missing instructions. Manuals+ will review the question and use this page’s manual context to help answer it.