ソロフィッシュ SL-1071
SOLOFISH SL-1071 450 Lumens Light and Green Beam Combo Instruction Manual
Model: SL-1071 | Brand: Solofish
1.製品オーバーview
The SOLOFISH 450 Lumens Light and Green Beam Combo is a compact and durable accessory designed for enhanced visibility and targeting. It features a powerful 450-lumen white light and a Class IIIa green laser with less than 5mW output. This combo unit is rechargeable via USB-C and offers multiple tactical modes for various operational needs. It is constructed from aluminum and fiber-reinforced polymer, ensuring high strength and light weight.
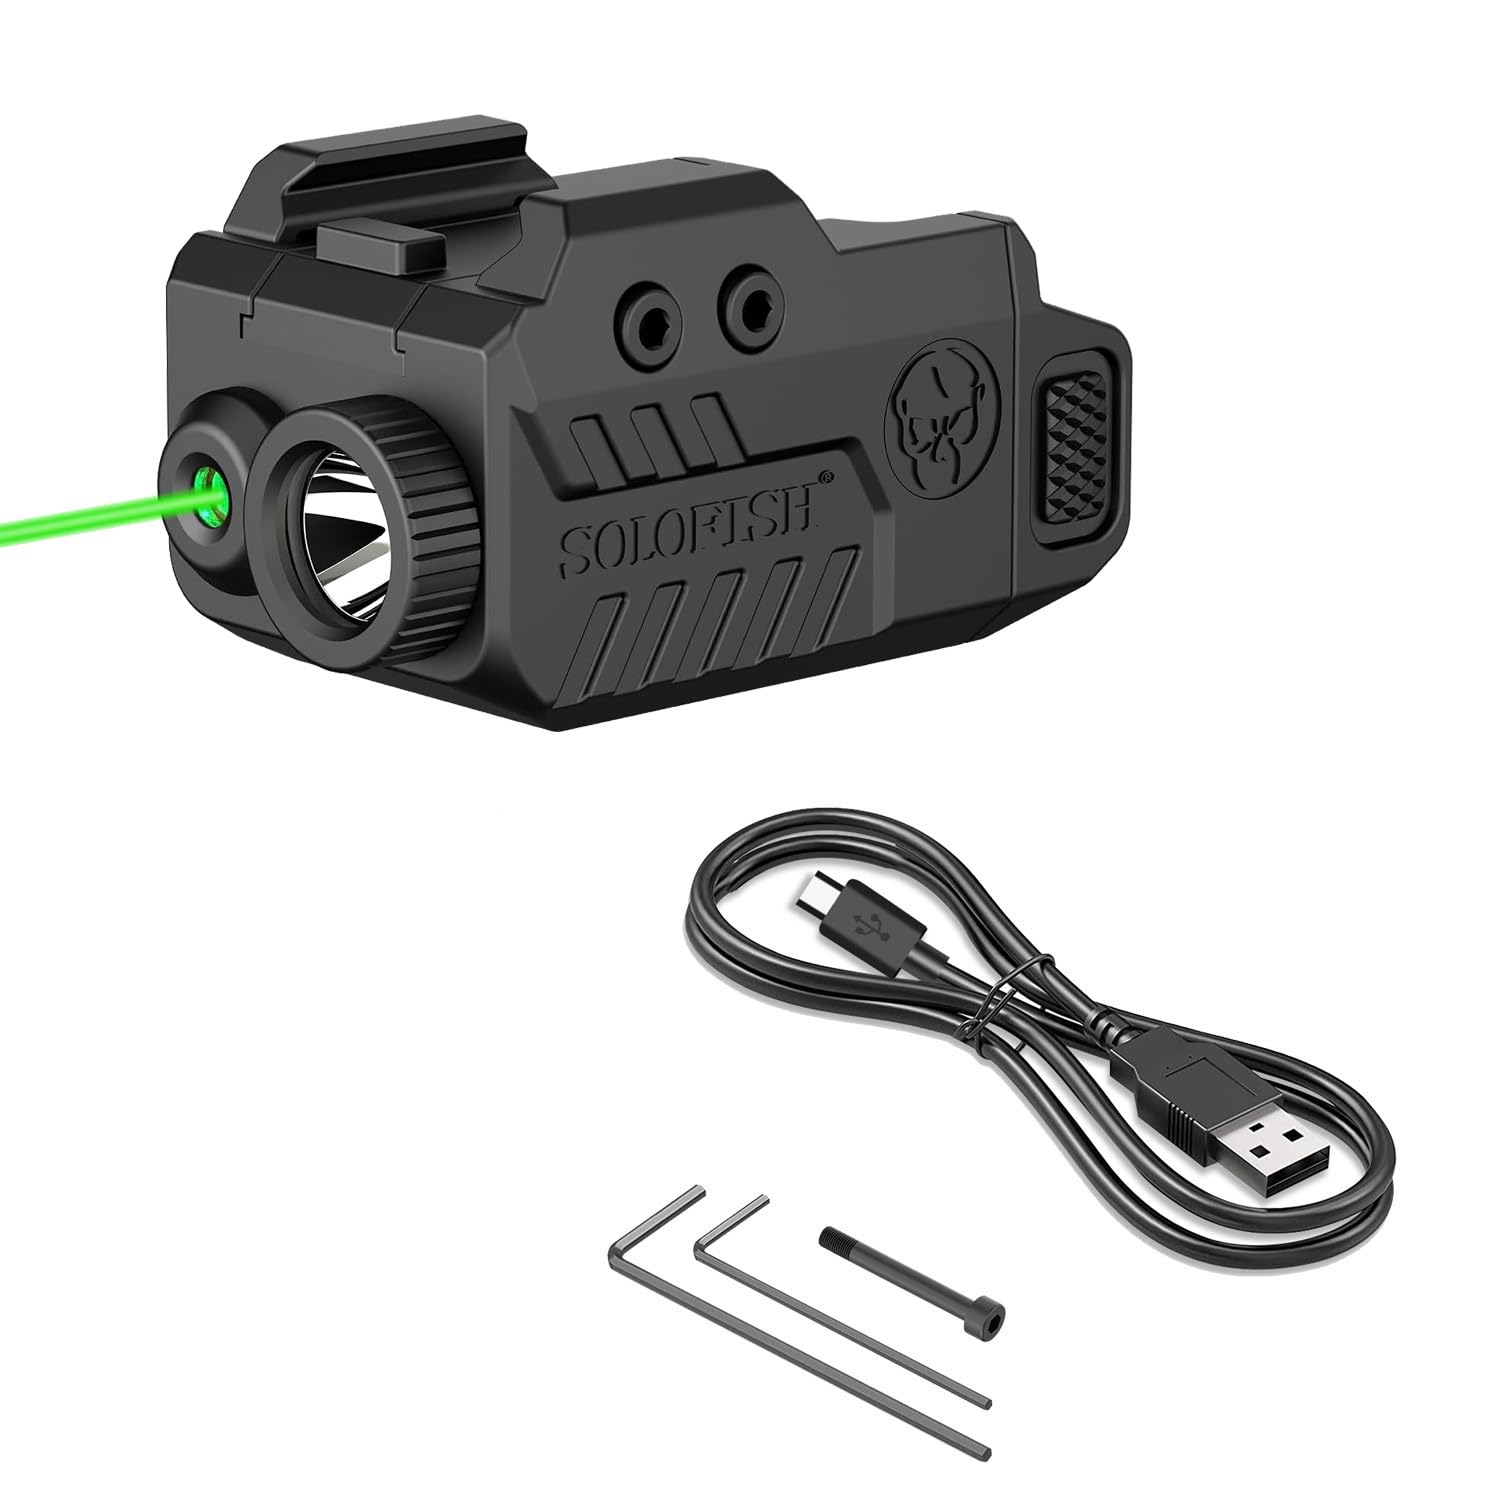
Image 1: The SOLOFISH 450 Lumens Light and Green Beam Combo unit, showcasing its compact design and green laser beam.
2.重要な安全上の警告
FAILURE TO FOLLOW ANY OF THE FOLLOWING WARNINGS MAY RESULT IN SEVERE INJURY OR DEATH TO YOU OR OTHERS.
- Prior to installing SOLOFISH products, ensure that the firearm is unloaded, the magazine is removed, safety is on, and finger(s) are off the trigger.
- DO NOT install or use SOLOFISH products if the installation of the product in any way affects the safe function of the firearm.
ALWAYS FOLLOW THE 4 RULES OF FIREARM SAFETY:
- すべての銃器は、装填されているかのように扱ってください。
- Never let the muzzle cover anything that you are not willing to destroy.
- Keep your finger off the trigger until your sights are on the target and you are ready to fire.
- Be sure of your target and what is beyond.
Remember, the user is ALWAYS responsible for the safe use of a firearm. Solofish recommends that every gun owner take a gun safety course from a certified NRA instructor before handling or firing your firearm.
3. 箱の中身
Your SOLOFISH 450 Lumens Light and Green Beam Combo package includes the following items:
- SOLOFISH Light and Green Beam Combo Unit
- USB-C Cable (for models SL-1091/ 1071/ 1085/ 1108/ 1039/ 1121 Series)
- 追加ネジ
- Laser Adjustment Hex Wrench
- Screw Hex Wrench
- ユーザーマニュアル
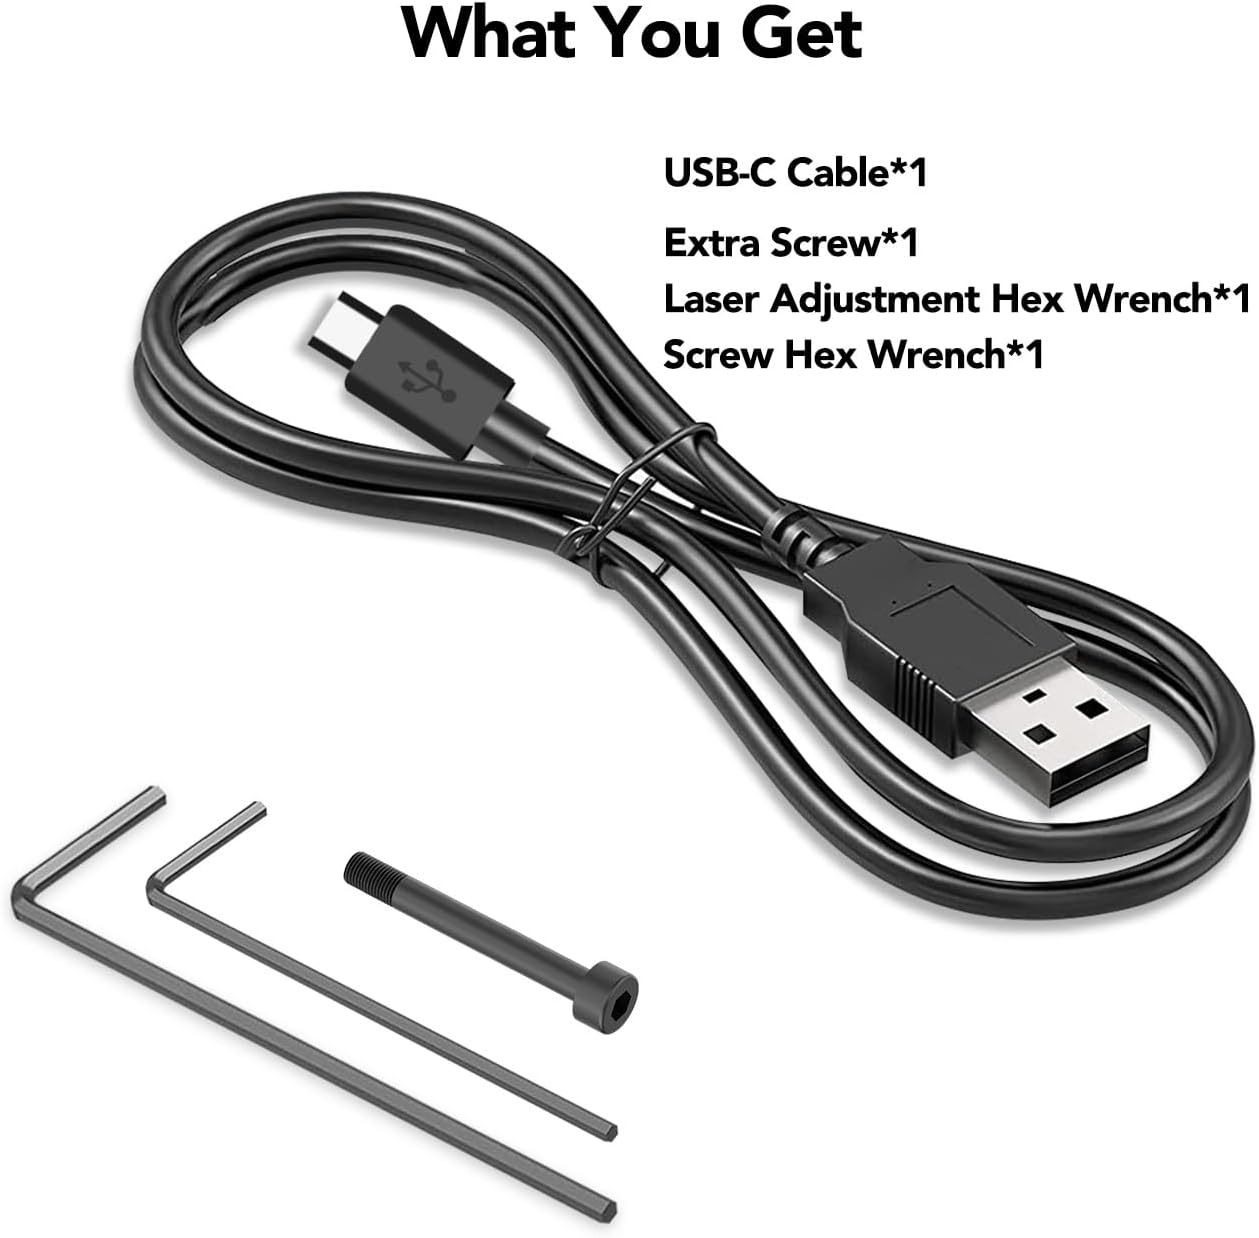
Image 2: Included accessories: USB-C cable, extra screw, laser adjustment hex wrench, and screw hex wrench.
4. 製品仕様
| 特徴 | 仕様 |
|---|---|
| モデル番号 | SL-1071 (and other compatible models in series) |
| 最大光出力 | 450ルーメン |
| 最大レーザー出力 | < 5mW (Class IIIa) |
| レーザー波長 | 520nm(緑色ビーム) |
| Laser Visible Distance | Approx. 200 meters (day), 2000 meters (night) |
| バッテリーソース | ポリマーバッテリー(内蔵) |
| 充電時間 | 50分(約) |
| 実行時間(ライトのみ) | 70 minutes |
| 実行時間(レーザーのみ) | 3時間 |
| Run Time (Light + Laser) | 60 minutes |
| 防水等級 | IP65 |
| 重さ | 81g / 2.86オンス |
| サイズ | 68x33x30mm / 2.7x1.3x1.2inch |

Image 3: Detailed dimensions and key specifications of the device.
5. セットアップとインストール
5.1. 互換性
The SOLOFISH Light and Green Beam Combo is designed to be compatible with various full-size and compact pistols featuring a Picatinny rail (21±0.5MM) and a cross slot. Two different rail keys are provided to ensure a secure fit for your specific pistol model (e.g., Glock or 1913 Picatinny rail).

Image 4: Visual representation of the light's compatibility with different pistol types and the USB-C charging port.
5.2. ユニットの取り付け
- Select the Correct Rail Key: The unit comes with two rail keys. One is pre-installed for Glock-style rails, and the other is a 1913 Picatinny key. Choose the key that matches your pistol's rail.
- Attach to Pistol Rail: レールclを緩めますamp bolt on the bottom of the unit. Slide the unit onto your pistol's accessory rail until it is in the desired position.
- ユニットを固定する: レールを締めるclamp bolt using the provided screw hex wrench until the unit is firmly secured to the rail. Ensure it does not wobble.
For a visual guide on fitment, please refer to the video below:
Video 1: Demonstrates how to check if the SOLOFISH light and laser combo fits your pistol, highlighting the rail requirements.
5.3. Laser Adjustment (Zeroing)
To ensure accuracy, the green laser beam needs to be adjusted (zeroed) to align with your pistol's sights. Use the provided laser adjustment hex wrench for this process.
- 風偏調整: The windage adjustment screw is located on the side of the unit. Turn this screw to move the laser beam horizontally (left/right).
- 標高調整: The elevation adjustment screw is located on the top/bottom of the unit. Turn this screw to move the laser beam vertically (up/down).
Perform adjustments in a safe environment, following all firearm safety rules. It is recommended to perform fine adjustments at a shooting range.

Image 5: Diagram showing the location of elevation and windage adjustment screws, charging port, and switches.
6. 操作手順
The SOLOFISH combo unit features ambidextrous switches for easy operation by both left and right-handed users. There are separate buttons for the flashlight and the laser, each offering multiple modes.
6.1. 電源のオン/オフとモードの選択
- Flashlight (Bottom Button):
- Single press: Activates constant-on flashlight mode.
- Double press: Activates strobe flashlight mode.
- Press and hold: Activates momentary-on flashlight mode (light stays on as long as button is held).
- Laser (Top Button):
- Single press: Activates constant-on green laser mode.
- Double press: Activates strobe green laser mode.
- Press and hold: Activates momentary-on green laser mode (laser stays on as long as button is held).
- Light + Laser Combo: Activate both the flashlight and laser independently to use them simultaneously.

Image 6: Illustrates the different tactical modes: Steady Flashlight, Strobe Flashlight, Green Laser Only, and Green Laser & Flashlight.
For a demonstration of the operating modes, please watch the video below:
Video 2: Shows the various 3-in-1 tactical modes including constant on, momentary on, and strobe for both light and laser functions.
7. メンテナンス
7.1. バッテリーの充電
The SOLOFISH combo unit features a built-in polymer battery that is rechargeable via the included USB-C cable. The charging port is magnetic for easy connection.
- Connect the USB-A end of the charging cable to an external USB power source (e.g., wall adapter, power bank, computer).
- Attach the magnetic end of the charging cable to the magnetic charging port on the light unit.
- 充電中は充電インジケータ ライトが赤く点灯し、完全に充電されると緑色に変わります。
- フル充電には通常約 50 分かかります。
注記: Some power banks are equipped with overcharge protection. In such cases, the charging indicator might turn off instead of turning green when fully charged by the power bank.
7.2. 清掃
To maintain optimal performance, regularly clean the lens of the flashlight and laser emitter with a soft, lint-free cloth. Avoid using abrasive materials or harsh chemicals that could damage the optics or the unit's finish.
8。 トラブルシューティング
- ユニットの電源が入らない: バッテリーが完全に充電されていることを確認してください。USB-Cケーブルを接続し、充電インジケーターを確認してください。
- Laser not visible or dim: Check battery level. Ensure the laser emitter is clean. Adjust laser zeroing if the beam is off-target.
- 明るさが足りない: Check battery level. Ensure the flashlight lens is clean.
- Unit loose on rail: Re-tighten the rail clamp bolt using the provided hex wrench. Ensure the correct rail key is installed for your pistol.
9. 保証とサポート
For warranty information, technical support, or service inquiries, please contact SOLOFISH customer service through the retailer where the product was purchased or visit the official Solofish webサイトでご確認ください。保証請求に備えて購入証明書を保管してください。
詳細情報や製品のアップデートについては、 Solofish Store on Amazon.
Ask a question about this manual
Ask about setup, troubleshooting, compatibility, parts, safety, or missing instructions. Manuals+ will review the question and use this page’s manual context to help answer it.