1. はじめに
This manual provides detailed instructions for the installation, operation, maintenance, and troubleshooting of the Fydun ZL-7901A Incubator Controller. This device is designed for precise and automatic control of temperature and humidity in various incubation environments, ensuring optimal conditions for successful hatching.
2.製品オーバーview
The Fydun ZL-7901A is a high-precision digital incubator controller capable of managing both temperature and humidity. It features a clear display and intuitive controls for easy programming and monitoring.
主な特徴:
- 正確な制御: High-accuracy temperature and humidity regulation for stable incubator environments.
- Strong Anti-interference: Designed for reliable operation in various conditions.
- High Stability and Accuracy: Ensures consistent performance for critical incubation processes.
- 幅広い用途: Suitable for a variety of eggs including chicken, duck, goose, pigeon, quail, parrot, and peacock.
- 自動操作: Fully automatic control reduces manual intervention.
コンポーネント:

図2.1: フロント view of the Fydun ZL-7901A Incubator Controller, showing the display and control buttons.

図2.2: The ZL-7901A controller packaged with its temperature and humidity sensors and connecting cables.

図2.3: The ZL-7901A controller shown in an incubator environment, demonstrating its application for egg incubation.
3. 安全情報
- インストールと操作の前に、すべての指示を注意深くお読みください。
- 電源のボリュームを確認してくださいtage matches the controller's requirements (100V-240V).
- 電気による危険を防止するために、すべての配線作業は資格のある専門家が行う必要があります。
- コントローラーを水や過度の湿気にさらさないでください。
- デバイスを可燃物から遠ざけてください。
- メンテナンスや配線の変更を行う前に、電源を切ってください。
- このデバイスはおもちゃではありません。 小児の手の届かない場所に保管。
4. セットアップとインストール
4.1コントローラーの取り付け
The ZL-7901A controller is designed for panel mounting. Ensure a secure and stable location within your incubator setup.

図4.1: 側 view illustrating the mounting bracket for panel installation.
4.2配線接続
Carefully connect the power supply, sensors, and output devices (heater, humidifier, fan, egg turner) to the appropriate terminals on the back of the controller. Refer to the wiring diagram provided with your product for specific connections. Ensure all connections are tight and secure.

図4.2: 後方 view of the controller, showing the terminal blocks for electrical connections.
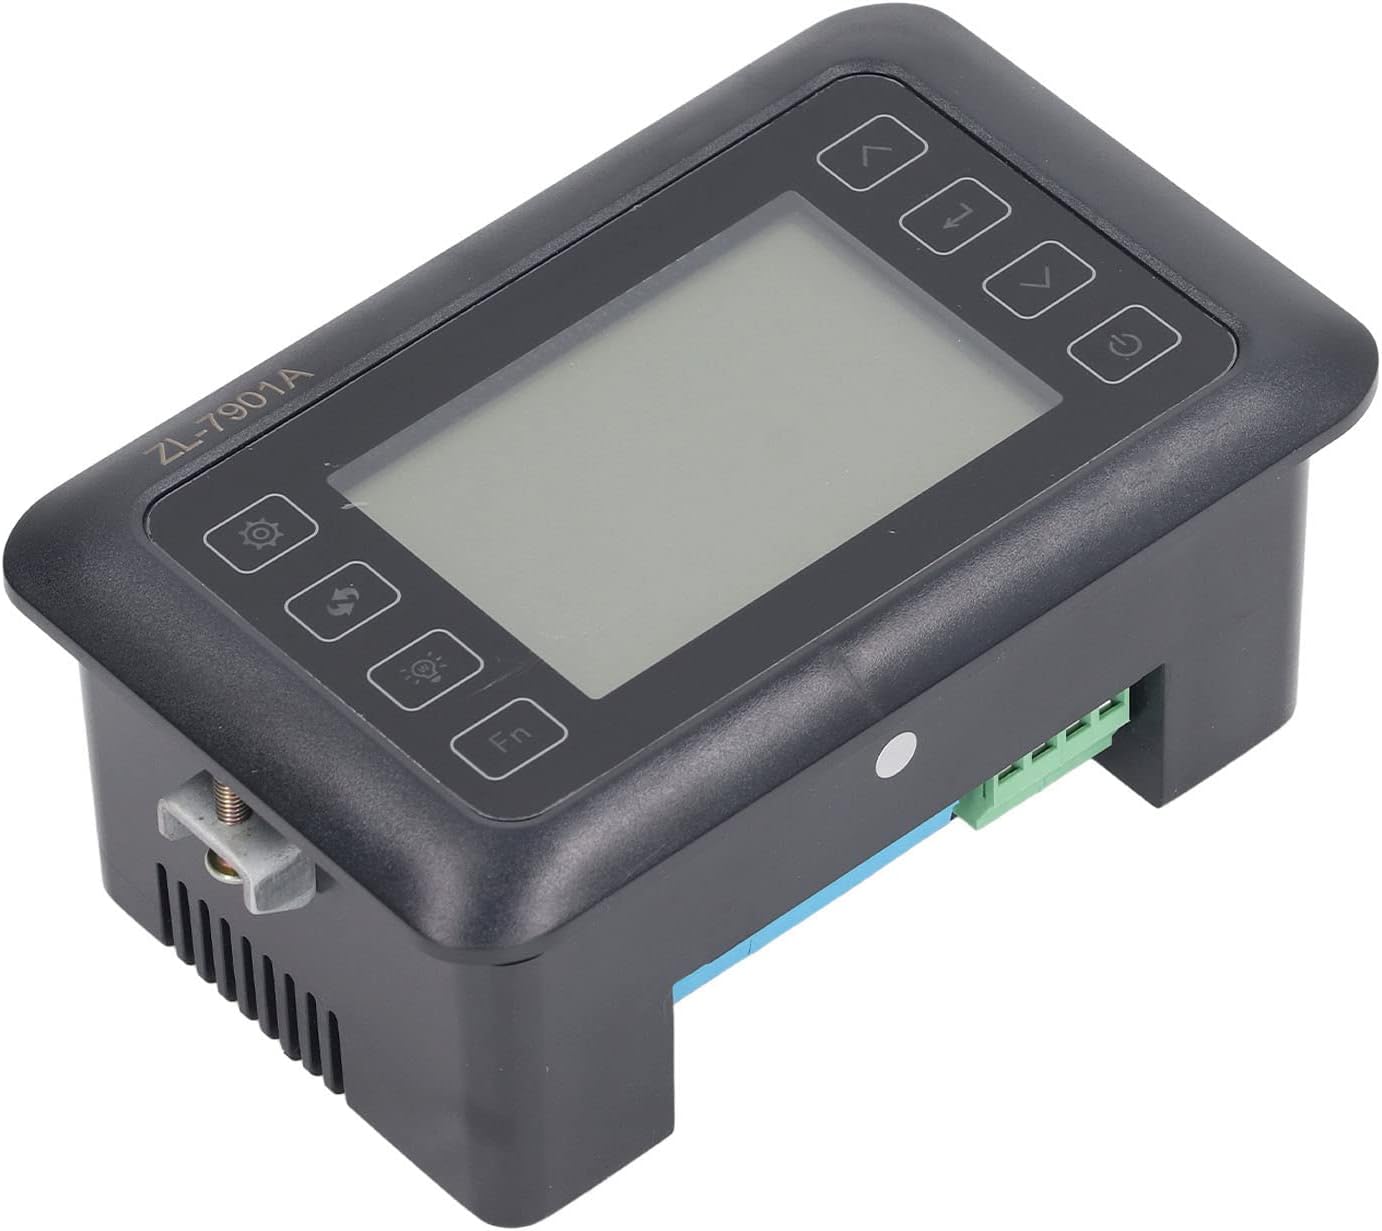
図4.3: 角度付き view highlighting the various connection points on the controller's side.
After all connections are made, double-check them for correctness before applying power.
5. 操作手順
5.1 電源オン/オフ
を押す 電源ボタン to turn the controller on or off. The display will illuminate upon power-on. The power button is located on the right side of the controller's front panel.
5.2ディスプレイオーバーview
The main display shows the current temperature and humidity readings. Additional indicators may show the status of heating, humidifying, and turning functions.
5.3 パラメータの設定
- を押す 設定ボタン (gear icon) to enter the parameter setting mode. This button is on the left side of the controller's front panel.
- 使用 Up (上矢印)と 下 (down arrow) buttons to navigate through different parameters (e.g., target temperature, target humidity, egg turning interval). These buttons are on the right side of the controller's front panel.
- を押す 入力ボタン (return arrow icon) to select a parameter for editing. This button is on the right side of the controller's front panel.
- 使用 Up そして 下 ボタンで値を調整します。
- を押す 入力ボタン もう一度クリックして、新しい値を確認します。
- Repeat for all desired parameters.
- 設定モードを終了するには、 設定ボタン again or waiting for a timeout.
注記: Consult the full product manual (if provided separately) for a complete list of parameters and their functions.
5.4機能ボタン
- ライトボタン (light bulb icon): Controls the internal light of the incubator (if connected). This button is on the left side of the controller's front panel.
- Fnボタン: Activates special functions or enters advanced settings. Refer to the detailed manual for specific Fn button operations. This button is on the left side of the controller's front panel.
6. メンテナンス
6.1 クリーニング
- Ensure the controller is powered off and disconnected from the power source before cleaning.
- Wipe the exterior of the controller with a soft, dry cloth.
- 研磨剤入りの洗剤や溶剤を使用したり、ユニットを水に浸したりしないでください。
- Keep the sensor probes clean and free from debris to ensure accurate readings.
6.2 センサーのケア
Handle the temperature and humidity sensors with care. Avoid bending or damaging the cables. If readings appear inaccurate, gently clean the sensor tips. Do not attempt to disassemble the sensors.
7。 トラブルシューティング
| 問題 | 考えられる原因 | 解決 |
|---|---|---|
| コントローラの電源が入らない。 | 電源が供給されていない、接続が緩んでいる、電源ケーブルに障害がある。 | Check power outlet; ensure all connections are secure; test power cable. |
| 温度/湿度の測定値が不正確です。 | Sensor dirty or damaged; sensor not properly placed; calibration needed. | Clean sensor; reposition sensor away from direct airflow/heat; refer to advanced settings for calibration (if available). |
| Heater/Humidifier not activating. | Output device not connected; setpoint not reached; faulty output device. | Verify wiring connections; check setpoint values; test heater/humidifier independently. |
| ディスプレイにエラーコードが表示されます。 | Sensor fault; internal error. | Note the error code and consult the full product manual or contact support. |
8. 仕様
| 特徴 | 詳細 |
|---|---|
| モデル | ZL-7901A |
| ブランド | Fydun |
| 入力ボリュームtage | 100V-240V AC |
| コントロールタイプ | Fully Automatic Digital Temperature and Humidity Control |
| 正確さ | High precision for both temperature and humidity |
| 応用 | Incubators for various poultry and bird eggs |
| 取り付け | パネルマウント |
9. 保証とサポート
Fydun is committed to providing quality products and excellent customer service. If you encounter any issues or have questions regarding your ZL-7901A Incubator Controller, please contact our customer service team.
For support, please refer to the contact information provided with your purchase or visit the official Fydun store on Amazon: Fydun Amazon Store.
Our professional customer service team is ready to assist you promptly.