
Raddy WM6
Raddy WM6 気象ステーション ユーザーマニュアル
モデル: WM6
導入
Thank you for choosing the Raddy WM6 Weather Station. This device provides comprehensive environmental monitoring, including indoor and outdoor temperature, humidity, barometric pressure, and a 12-hour weather forecast. It also features an atomic clock, moon phase display, and comfort level indicators. This manual will guide you through the setup, operation, and maintenance of your new weather station to ensure optimal performance.

Image: The Raddy WM6 Weather Station main unit displaying calendar, weather forecast, temperature, humidity, barometer, comfort level, mold risk, moon phase, atomic clock, and high/low alerts.
箱の中身
パッケージの内容を確認し、すべてのアイテムが揃っていることを確認してください。
- Raddy WM6 Main Display Unit
- Remote Sensor (R3) - Note: This model includes 2 extra sensors, totaling 3 remote sensors.
- 電源アダプター
- 取り付け金具
- 内蔵充電式バッテリー(2000mAh)
セットアップ手順
1. 初期設定
- 本体の電源供給: Connect the provided power adapter to the main display unit and plug it into a wall outlet. The unit also has a built-in 2000mAh rechargeable battery for portable or wall-mounted use without a constant power connection.
- Activating Remote Sensors: Open the battery compartment of each R3 remote sensor and insert the required batteries (typically AA or AAA, not specified in product data, assume standard). Ensure correct polarity. The sensors will automatically attempt to pair with the main unit.
- 自動時刻同期: The WM6 features an atomic clock with WWVB technology. Upon initial power-up, the unit will attempt to synchronize the time automatically. This process may take several minutes or hours depending on signal strength.
2. Remote Sensor Placement
Proper placement of the remote sensors is crucial for accurate readings and reliable transmission. The sensors have a transmission range of up to 330ft (100m).
- オリエンテーション: Always position the remote sensor upright. Avoid laying it down horizontally.
- 保護: Place the sensor in a shaded area, protected from direct sunlight and rain. Ensure good air circulation around the sensor.
- 干渉: Keep the sensor away from large metal objects, electronic devices, and other potential sources of interference.
- 身長: Mount the sensor at least 1.2 meters (approximately 4 feet) above the ground for optimal readings. Avoid placing it directly on the ground.

Image: Visual guide for correct remote sensor usage, illustrating upright positioning, shade protection, distance from interfering sources, and minimum height from the ground.
操作手順
1. 表示終了view
The main display unit shows various information simultaneously:
- 日時: 現在の時刻、曜日、日付を表示します。
- 室内温度と湿度: 本体内部のセンサーからの読み取り値。
- 屋外の温度と湿度: Readings from the connected remote sensors.
- 天気予報: A 12-hour forecast indicated by icons (sunny, cloudy, rainy, snowy, etc.).
- 大気圧: 現在の大気圧。
- 月相: 現在の月の満ち欠けをグラフィックで表します。
- 快適レベル: Indicates indoor comfort based on temperature and humidity.
- High/Low Alerts: Customizable alerts for temperature and humidity.
2. 時刻と日付の設定
While the atomic clock automatically sets the time, manual adjustments may be necessary for time zone or daylight saving time. Refer to the specific buttons on your device (usually 'SET' or 'MODE') to enter time setting mode and use '+' or '-' buttons to adjust values.
3.アラーム設定
The WM6 features dual alarm clocks, customizable for weekdays and weekends.
- 「アラーム」ボタンを押すと view またはアラームを設定します。
- Use the 'SET' button to toggle between Alarm 1 and Alarm 2.
- アラーム時間を調整するには、「+」または「-」を使用します。
- The snooze function can be activated by pressing a designated button (often labeled 'SNOOZE' or 'LIGHT') when the alarm sounds.

Image: The Raddy WM6 Weather Station showcasing its atomic clock with WWVB technology and dual alarm clock functionality for weekdays and weekends.
4. 明るさ設定
The display brightness is adjustable and can be scheduled for specific times.
- Press the 'LIGHT' or 'BRIGHTNESS' button to cycle through brightness levels (e.g., OFF, 1%, 60%, 100%).
- To set a schedule, access the brightness settings menu (refer to your device's specific button combinations). For example, you can set 60% brightness from 8:00 AM to 6:00 PM and turn the display OFF from 6:00 PM to 11:00 PM.
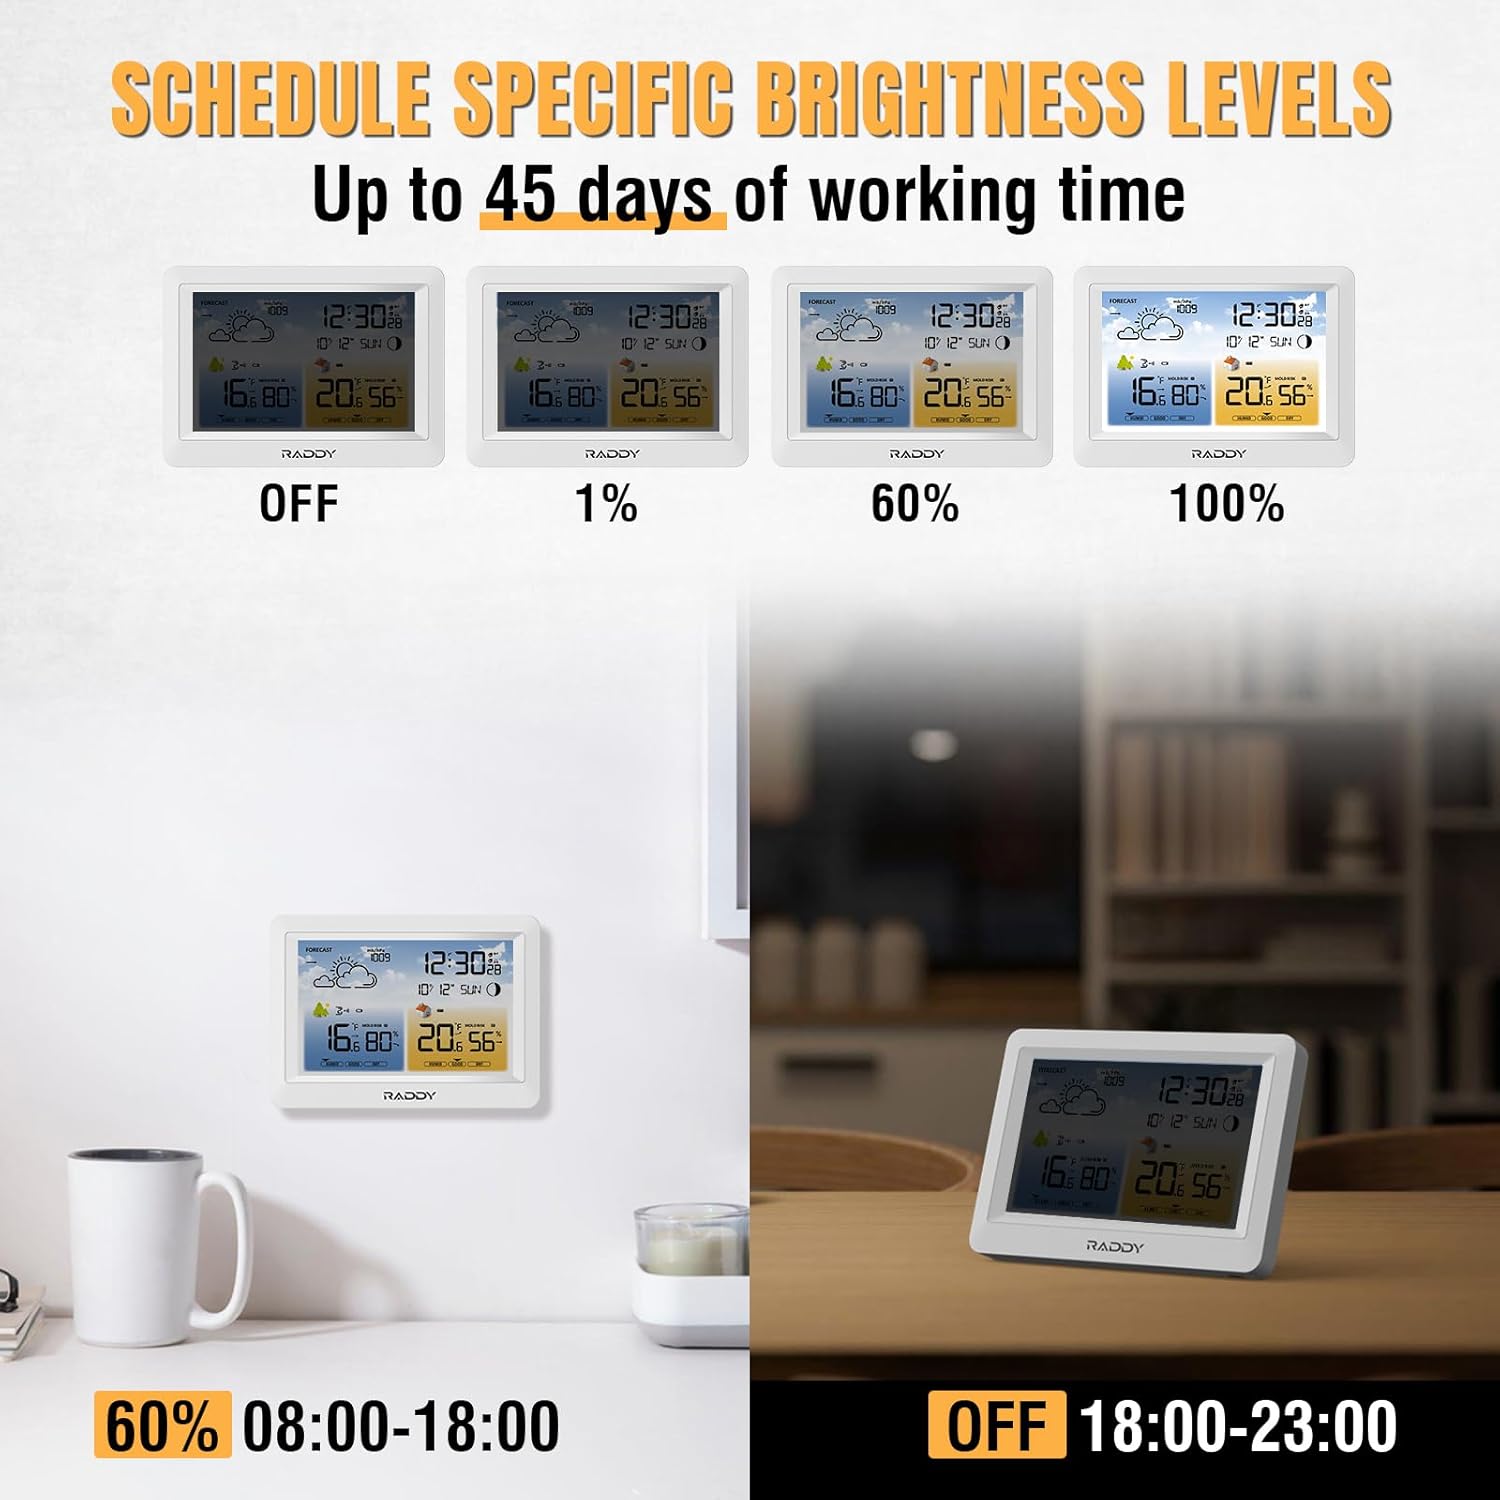
Image: The Raddy WM6 Weather Station demonstrating various brightness levels (Off, 1%, 60%, 100%) and examples of scheduled brightness settings for different times of the day.
5. 天気予報の解釈
The weather station provides a 12-hour forecast based on barometric pressure changes. The icons displayed represent:
- 晴れ
- 所により曇り
- 曇り
- 雨
- 大雨
- 雪の
These forecasts are predictions and may not always perfectly match local conditions.
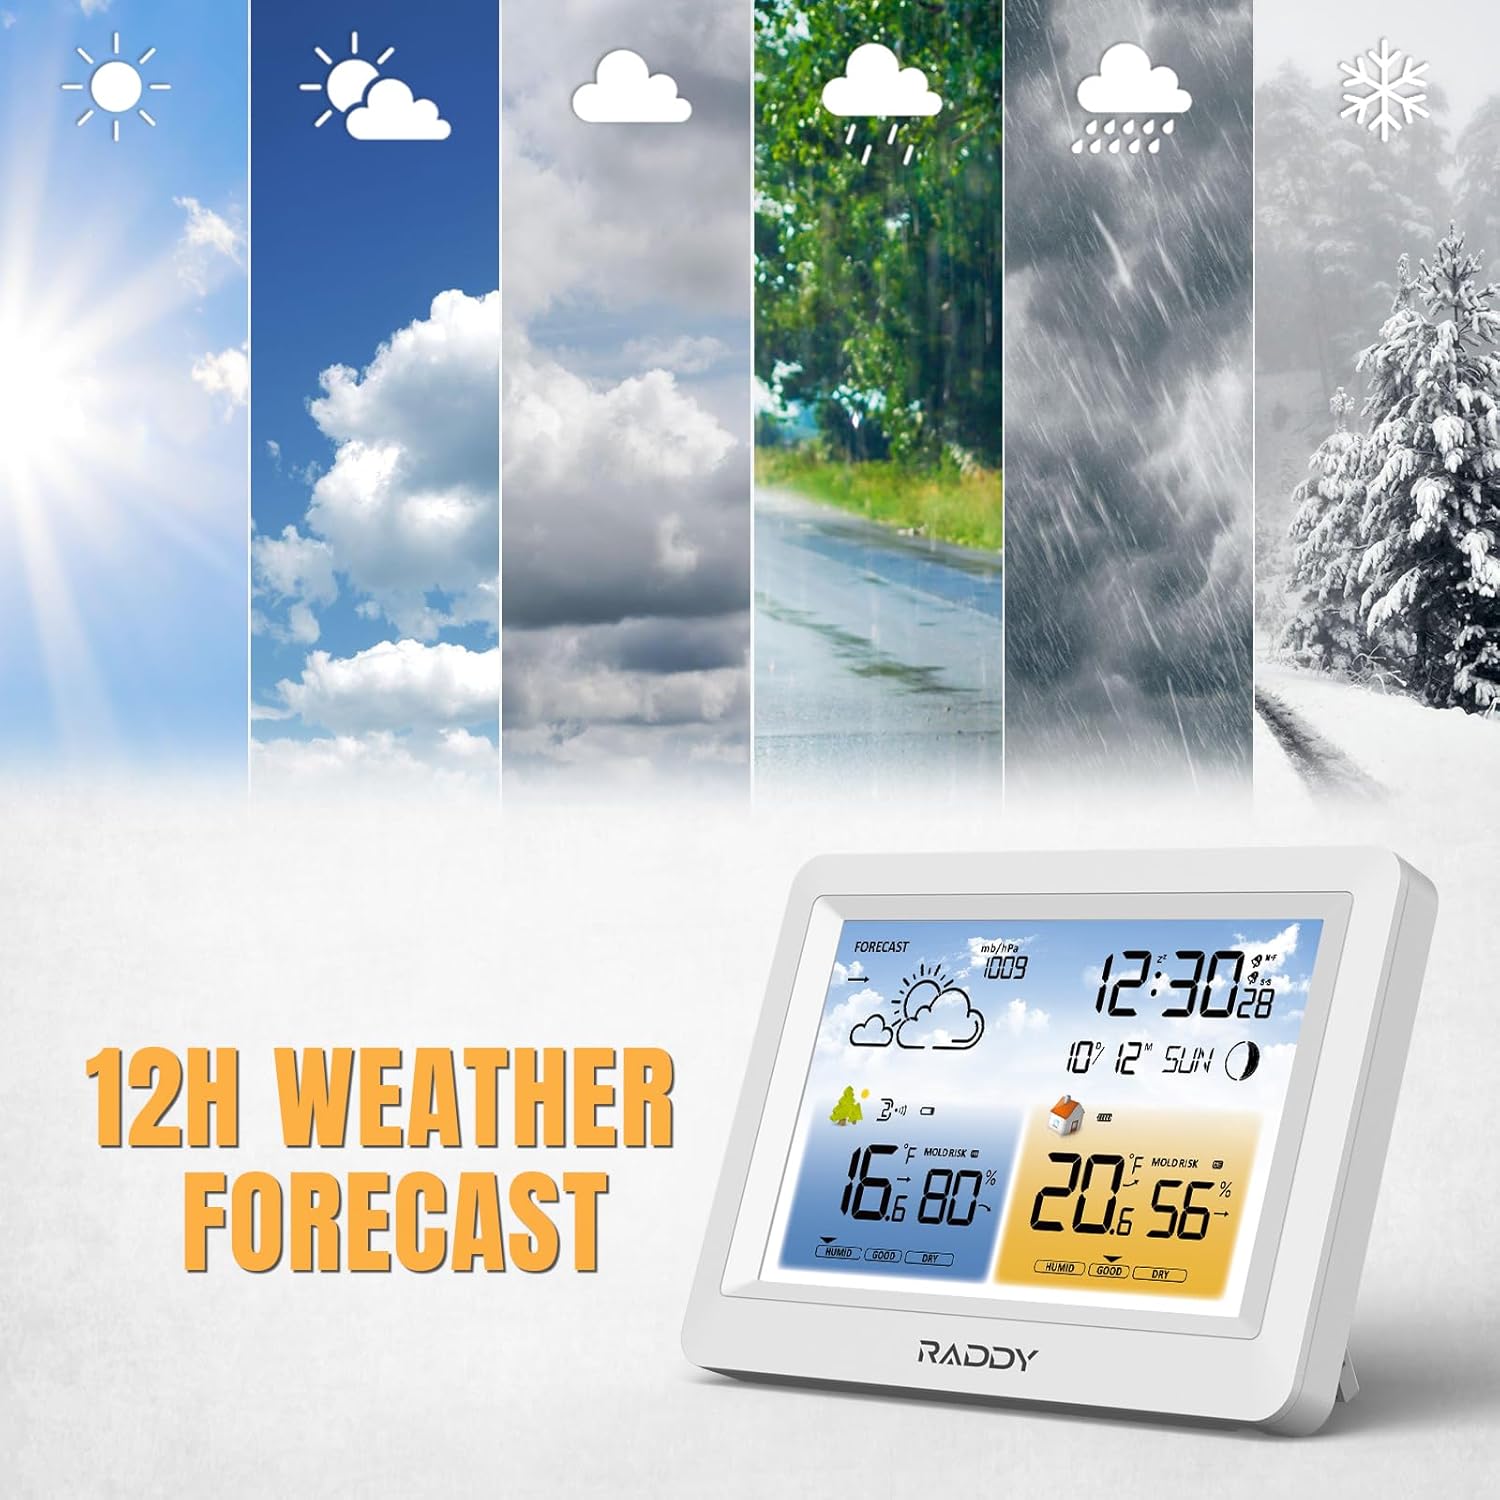
Image: The Raddy WM6 Weather Station showing its 12-hour weather forecast feature with various weather icons.
6. センサーのペアリング
The main unit supports up to 3 remote sensors (R3 model). If a sensor loses connection or you are adding a new one:
- Ensure the remote sensor has fresh batteries and is within range.
- On the main unit, press and hold the 'CHANNEL' or 'SEARCH' button (refer to your device's specific buttons) to initiate a search for remote sensors.
- The main unit will display readings from the connected sensors, cycling through channels if multiple sensors are paired.

Image: The Raddy WM6 Weather Station main unit displaying data from multiple remote sensors, highlighting its capability to monitor up to 3 channels with a transmission range of up to 330ft.
メンテナンス
1. バッテリーのお手入れ
The main unit features a built-in 2000mAh rechargeable battery, providing up to 45 days of operation on a single charge. For extended screen usage and consistent functionality, it is recommended to keep the power adapter connected to prevent rapid battery drainage.

Image: A graphic illustrating the benefits of the Raddy WM6's built-in rechargeable battery, including 45-day battery life and data retention after power loss, compared to other devices using disposable batteries.
2. 清掃
To clean the main unit and remote sensors, use a soft, dry cloth. Do not use abrasive cleaners, solvents, or immerse the devices in water.
トラブルシューティング
| 問題 | 考えられる原因 | 解決 |
|---|---|---|
| 本体にディスプレイが表示されない | Power adapter not connected or battery depleted. | Ensure power adapter is securely plugged in or charge the built-in battery. |
| Remote sensor not displaying data | Sensor out of range, low battery, or interference. | Move sensor closer to the main unit, replace batteries, or relocate away from interference. Initiate sensor search on main unit. |
| 温度/湿度の測定値が不正確 | Sensor exposed to direct sunlight/rain or poor air circulation. | Relocate sensor to a shaded, well-ventilated area. Ensure proper placement as per instructions. |
| Atomic clock not synchronizing | WWVB 信号が弱いか干渉があります。 | Place the main unit near a window, away from electronic devices. Allow several hours for synchronization. Manual time setting is an alternative. |
仕様
| 特徴 | 詳細 |
|---|---|
| モデル | WM6 |
| 表示タイプ | 液晶 |
| 電源 | Battery Powered (Built-in 2000mAh rechargeable battery) / Power Adapter |
| 接続技術 | Wireless (for remote sensors), Bluetooth (not explicitly for sensor connection, but listed in specs) |
| センサー技術 | 無線 |
| Remote Sensor Support | Up to 3 channels (R3 model) |
| 伝送距離 | 最大330フィート(100メートル) |
| 特集 | Adjustable Brightness, Alarm, Thermometer, Hygrometer, Barometer, Atomic Clock (WWVB), Moon Phase, Comfort Level, 12-hour Weather Forecast |
| 含まれるコンポーネント | Remote Sensor (R3), Power Adapter, Mounting Hardware, Battery |
保証情報
Raddy products are designed for reliability and performance. For specific warranty details, including coverage period and terms, please refer to the warranty card included with your product or visit the official Raddy webサイトでご確認ください。保証請求の際に必要となりますので、購入証明書を保管してください。
カスタマーサポート
If you encounter any issues or have questions regarding your Raddy WM6 Weather Station, please contact Raddy customer support. You can typically find contact information (email, phone, or support portal) on the Raddy official webサイトまたは製品パッケージ内に記載されています。
追加のリソースと製品情報については、 Raddy Store on Amazon.
Ask a question about this manual
Ask about setup, troubleshooting, compatibility, parts, safety, or missing instructions. Manuals+ will review the question and use this page’s manual context to help answer it.