
1. はじめに
This manual provides detailed instructions for the installation, operation, and maintenance of your OLONETO 100A Solar Charge Controller. This device is designed to manage power flow from your solar panel to your battery bank and DC loads, ensuring efficient charging and protection for your battery system. It supports 12V, 24V, 36V, and 48V battery systems with automatic voltage識別。
Note: This controller utilizes a combination of MPPT and PWM charging technologies. It is not a 100% true MPPT controller.
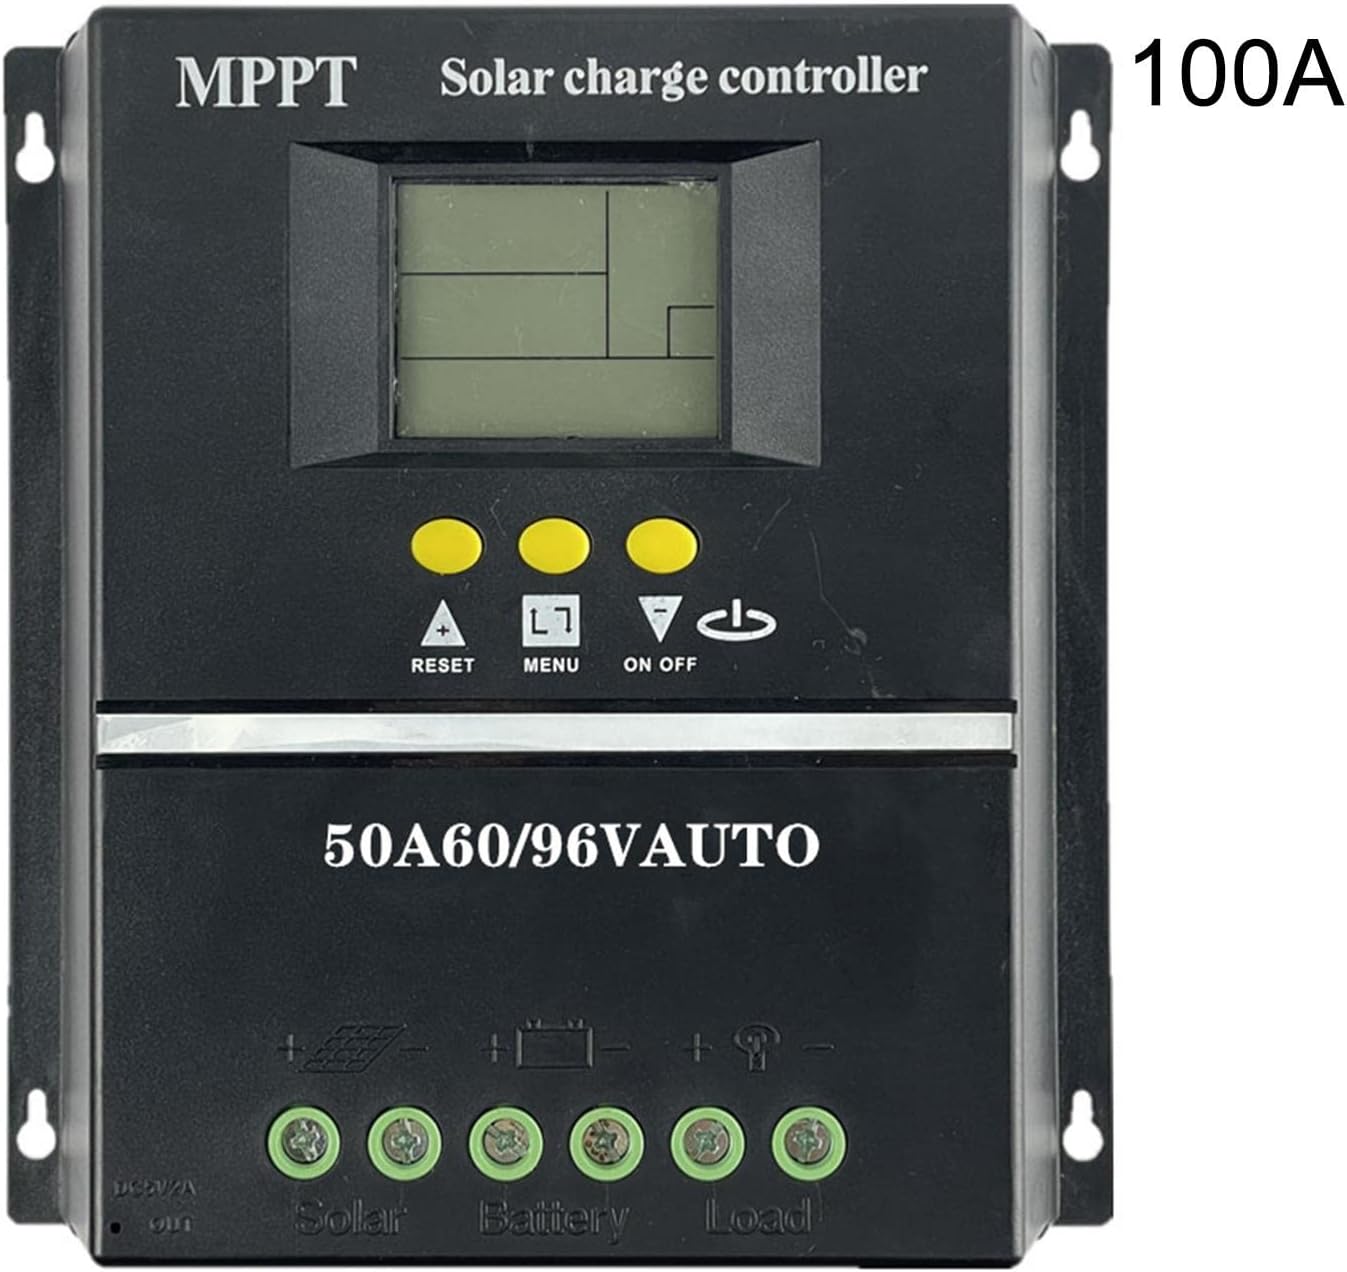
図1: 前面 view of the OLONETO 100A Solar Charge Controller, showing the LCD display, control buttons, and connection terminals. The "100A" rating is visible on the top right.
2. 安全に関する注意事項
- Ensure all connections are tight and correct to prevent damage to the controller or other components.
- 常にバッテリーをコントローラーに接続してください 初め, and then connect the solar panel. Disconnect in the reverse order: solar panel first, then battery. Failure to follow this sequence may damage the controller.
- バッテリー容量を確認してくださいtage is sufficient for the controller to recognize the system voltage (e.g., >10V for 12V battery, >20V for 24V battery, >30V for 36V battery, >40V for 48V battery).
- コントローラーは、直射日光、高温、湿気を避け、換気の良い場所に設置してください。
- コントローラーをご自身で修理または改造しないでください。修理は資格のある担当者にご相談ください。
3 製品の特徴
The OLONETO Solar Charge Controller offers several key features for efficient solar power management:
- 自動巻tage 識別: Automatically detects 12V, 24V, 36V, or 48V battery systems.
- LCDディスプレイ: Provides real-time information on battery status, charging parameters, and load status.
- デュアルUSB出力: Convenient 5V output for charging mobile phones and other USB devices.
- 調整可能なパラメータ: Allows users to customize charging and discharge settings.
- Smart Charge Management: Optimizes battery charging to prolong battery life.
- 環境保護: Designed with green environmental protection principles.
- Automatic Focusing MPPT Tracking: High charging efficiency with non-stop detection during charging and bidirectional focusing tracking.

Figure 2: Diagram illustrating key features of the solar charge controller, including LCD display for battery power supply voltage, smart charge capabilities, 5V USB output, adjustable parameters, and green environmental protection.

Figure 3: Image highlighting the automatic focusing MPPT tracking feature, which ensures high charging efficiency and continuous detection during the charging process.
4. セットアップとインストール
4.1 配線手順
- バッテリーを接続します。 Connect the battery to the controller's battery terminals. Ensure correct polarity (+ to + and - to -). The controller will automatically detect the battery voltage.
- ソーラーパネルを接続します。 Connect the solar panel to the controller's solar panel terminals. Ensure correct polarity.
- DC負荷を接続する(オプション): Connect your DC loads to the controller's load terminals. Ensure correct polarity.
Important: Always follow this connection order: Battery → Solar Panel → Load. To disconnect, follow the reverse order: Load → Solar Panel → Battery.
4.2 Recommended Solar Panel Voltage
- のために 12V battery systems: Use a solar panel with approximately 18V 出力。
- のために 24V battery systems: Use a solar panel with approximately 30-37V 出力。
- のために 36V battery systems: Use a solar panel with approximately 45-55V 出力。
- のために 48V battery systems: Use a solar panel with approximately 60-72V 出力。
4.3 配線図

Figure 4: Basic wiring diagram showing connections for the solar panel, battery, and DC loads to the controller. Ensure positive (+) and negative (-) terminals are correctly matched.

Figure 5: Detailed wiring diagram illustrating connections for the solar panel, battery, DC load, and the integrated USB output for charging external devices.
5. 操作手順
5.1 初期電源投入と表示
Once the battery is connected, the controller's LCD display will power on, showing current system parameters. The controller automatically identifies the battery voltage (12V、24V、36V、または48V)。
5.2 ボタンの機能
- ▲ (Up/Reset): Used to increase values during setting, or as a reset function.
- メニュー: Used to navigate through display screens and enter/exit setting modes.
- ▼ (Down/On/Off): Used to decrease values during setting, or to toggle the DC load on/off.
5.3充電Voltage設定
To adjust charging parameters:
- After connecting the battery, ensure the clock is set and saved (see 5.4 Clock Setting).
- 「▲" button for 3-5 seconds. The screen will display "L**V" (floating charging voltage)。
- 「▼" button to adjust the floating charging voltage.
- Briefly press "▲" again. The screen will display "H**V" (boost charging voltage)。
- 「▼" button to adjust the boost charging voltage.
- Briefly press "▲" again. The screen will display "F**V" (low-voltageカットオフvoltage for DC load).
- 「▼" button to adjust the low-voltageカットオフvoltage.
- After making all desired adjustments, press and hold the "▲" button for 3-5 seconds to save the settings and exit.
5.4 時計の設定
To set the internal clock:
- バッテリーが接続されていることを確認します。
- 「▲" または "▼" buttons to navigate to the clock setting interface.
- 「▲" そして "▼" buttons to adjust the time.
- Briefly press the "MENU" button (represented as "□" in some descriptions) to save the clock setting.
5.5 Load Protection Voltageリファレンス
The following are typical battery charging voltages for different system voltages:
- 使用する場合 12V battery, the battery charging voltage is typically 13.7V.
- 使用する場合 24V battery, the battery charging voltage is typically 27.4V.
- 使用する場合 36V battery, the battery charging voltage is typically 41.1V.
- 使用する場合 48V battery, the battery charging voltage is typically 54.8V.
6. メンテナンス
- 定期点検: すべての配線接続部の締め付け具合と腐食を定期的に点検してください。
- 清潔さ: コントローラーは清潔に保ち、ほこりやゴミが付かないようにしてください。清掃には乾いた布をご使用ください。
- 換気: 過熱を防ぐために、設置場所の換気が十分であることを確認してください。
- バッテリーの状態: バッテリーの状態と容量を監視するtage regularly to ensure optimal system performance.
7。 トラブルシューティング
| 問題 | 考えられる原因 | 解決 |
|---|---|---|
| コントローラーのディスプレイがオフになっています。 | バッテリーが接続されていないか、バッテリーの容量が不足していますtag低すぎます。 | Connect battery or ensure battery voltage is above minimum threshold (e.g., >10V for 12V system). |
| ソーラーパネルからの充電はありません。 | Solar panel not connected, incorrect polarity, or insufficient sunlight. | ソーラーパネルの接続と極性を確認してください。十分な日光が当たるようにしてください。 |
| 巻tage identification error. | バッテリーvoltage was too low when connected initially. | バッテリー容量を確保するtage is above the minimum threshold before connecting to the controller. Disconnect and reconnect the battery. |
| DC load not working. | Load is off, incorrect wiring, or battery voltage is below low-voltagカットオフ。 | Check load connection and polarity. Press the "▼" button to toggle load. Check battery voltage and adjust low-voltage cut-off if necessary. |
8. 仕様
| パラメータ | 価値 |
|---|---|
| モデル | 100A |
| ブランド | OLONETO |
| システム巻tage | 12V / 24V / 36V/48Vオート |
| 充電技術 | MPPT/PWM Hybrid |
| USB出力 | Dual USB, 5V |
| アイテム重量 | 200グラム |
| 寸法(約) | 190mm (7.48インチ) x 180mm (7.08インチ) |

Figure 6: Physical dimensions of the solar charge controller, showing approximate measurements of 190mm (7.48 inches) in width and 180mm (7.08 inches) in height.
9. 保証とサポート
保証情報およびテクニカルサポートについては、ご購入時に付属の説明書をご参照いただくか、販売店にお問い合わせください。保証請求の際に必要となるため、購入証明書は保管してください。