
KGUSS D70 Pro OCTO
KGUSS Topping D70 Pro OCTO DAC User Manual
モデル: D70 Pro OCTO
導入
The KGUSS Topping D70 Pro OCTO DAC is a high-fidelity digital-to-analog converter designed to deliver exceptional audio performance. Featuring 8 Cirrus Logic CS43198 DAC chips, Bluetooth 5.1 with LDAC support, and a vibrant Aurora UI color display, this unit offers versatile connectivity and advanced audio decoding capabilities up to PCM768kHz/32bit and DSD512. It also includes RCA and XLR outputs and can function as an integrated preamplifier。
箱の中身
パッケージを開封したら、すべてのアイテムが揃っていることを確認してください。
- D70 Pro OCTOユニット
- リモートコントロール
- USBケーブル
- AC電源ケーブル
- Bluetoothアンテナ
- クイックスタートガイド

Image: The D70 Pro OCTO unit with its included accessories: remote control, USB cable, AC cable, Bluetooth antenna, and quick start guide.
セットアップ手順
1. 電源接続
Connect the provided AC power cable to the unit and a suitable power outlet. Ensure the power switch on the rear panel is in the ON position.
2.オーディオ接続
The D70 Pro OCTO offers both RCA single-ended and XLR balanced outputs. You can use either or both simultaneously to connect to your amplifier or active speakers. Ensure all cables are securely connected.
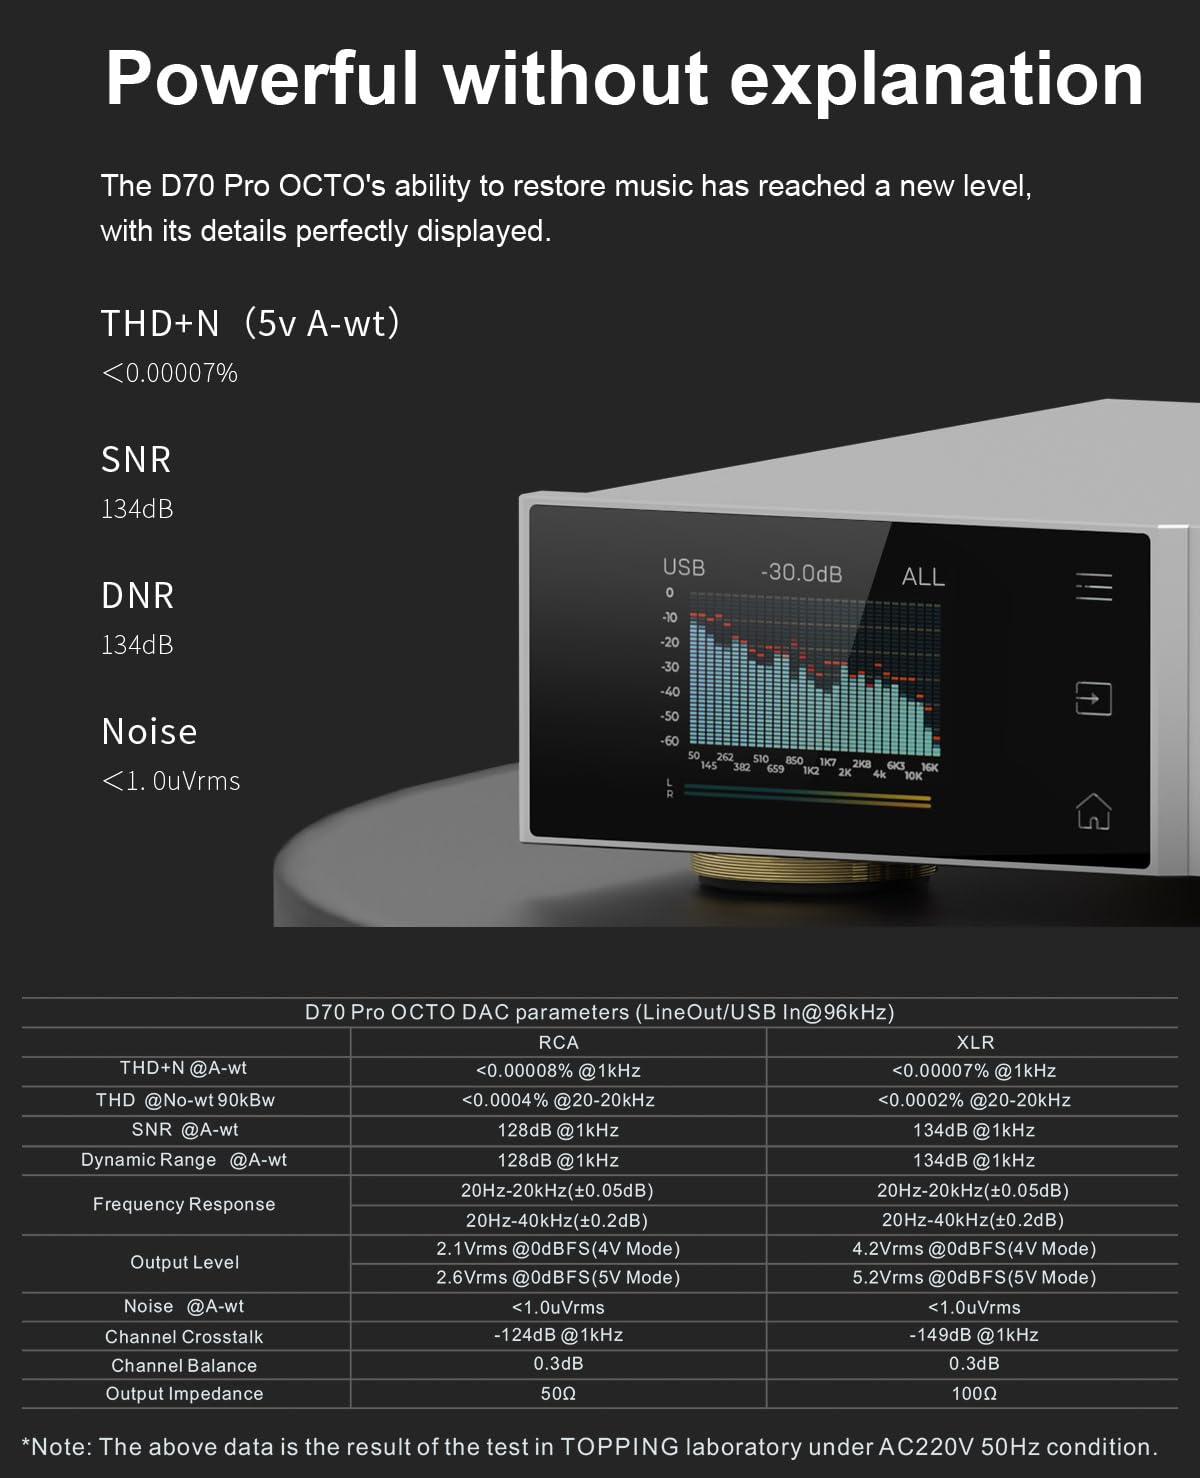
Image: Rear panel connections of the D70 Pro OCTO, illustrating RCA, XLR, optical, coaxial, and USB input/output options.
3. USB Connectivity (Plug and Play)
The D70 Pro OCTO is compatible with Windows 10, Windows 11, MAC, Linux, iOS, and Android devices. For Windows users requiring ASIO applications, a custom driver (XMOS XU316 and Thesycon) is provided for stable performance. Other operating systems are driver-free.

Image: A computer screen displaying the D70 Pro OCTO as a recognized audio output device, demonstrating its plug-and-play functionality across various operating systems.
4.Bluetooth接続
The unit supports Bluetooth 5.1 with LDAC, aptX-Adaptive, aptX HD, AAC, and SBC audio encoding for high-quality wireless transmission. Pair your device by enabling Bluetooth on the D70 Pro OCTO and selecting it from your source device's Bluetooth settings.

Image: A smartphone wirelessly connected to the D70 Pro OCTO via Bluetooth 5.1, demonstrating its LDAC-supported wireless audio streaming capability.
5. 12V Trigger
The D70 Pro OCTO includes a 12V Trigger input and output interface. This allows the unit to be switched on or off by other compatible devices, and also actively trigger other devices to power on or off synchronously.

Image: Detail of the 12V Trigger input and output ports on the rear of the D70 Pro OCTO, enabling synchronized power control with other audio components.
操作手順
1. Aurora UI and Display
The D70 Pro OCTO features a full-color screen and three touch buttons for an intuitive user interface. You can toggle between playback information, FFT (Fast Fourier Transform) display, or VU (Volume Unit) meters. Customized functions are accessible by pressing the volume knob. The display supports switching between Chinese and English.

Image: The Aurora UI of the D70 Pro OCTO, showcasing its full-color display with options for playback information, FFT, and VU meter visualizations.
2. Output Mode Switching
The unit allows you to freely switch between RCA single-ended output, XLR balanced output, or use both simultaneously. Additionally, you can select between XLR 4V/RCA 2V and XLR 5V/RCA 2.5V output levels to match different devices and performance requirements.

Image: The D70 Pro OCTO's display menu, illustrating the option to select between 4V and 5V output levels for versatile system integration.
3. Integrated Preamplifier関数
Beyond its DAC capabilities, the D70 Pro OCTO can operate in a "preamp" mode. In this mode, you can directly adjust the volume and output to power amplifiers or active speakers. It features independent volume memory for different modes, ensuring the unit reverts to your last-used volume setting when switching modes.
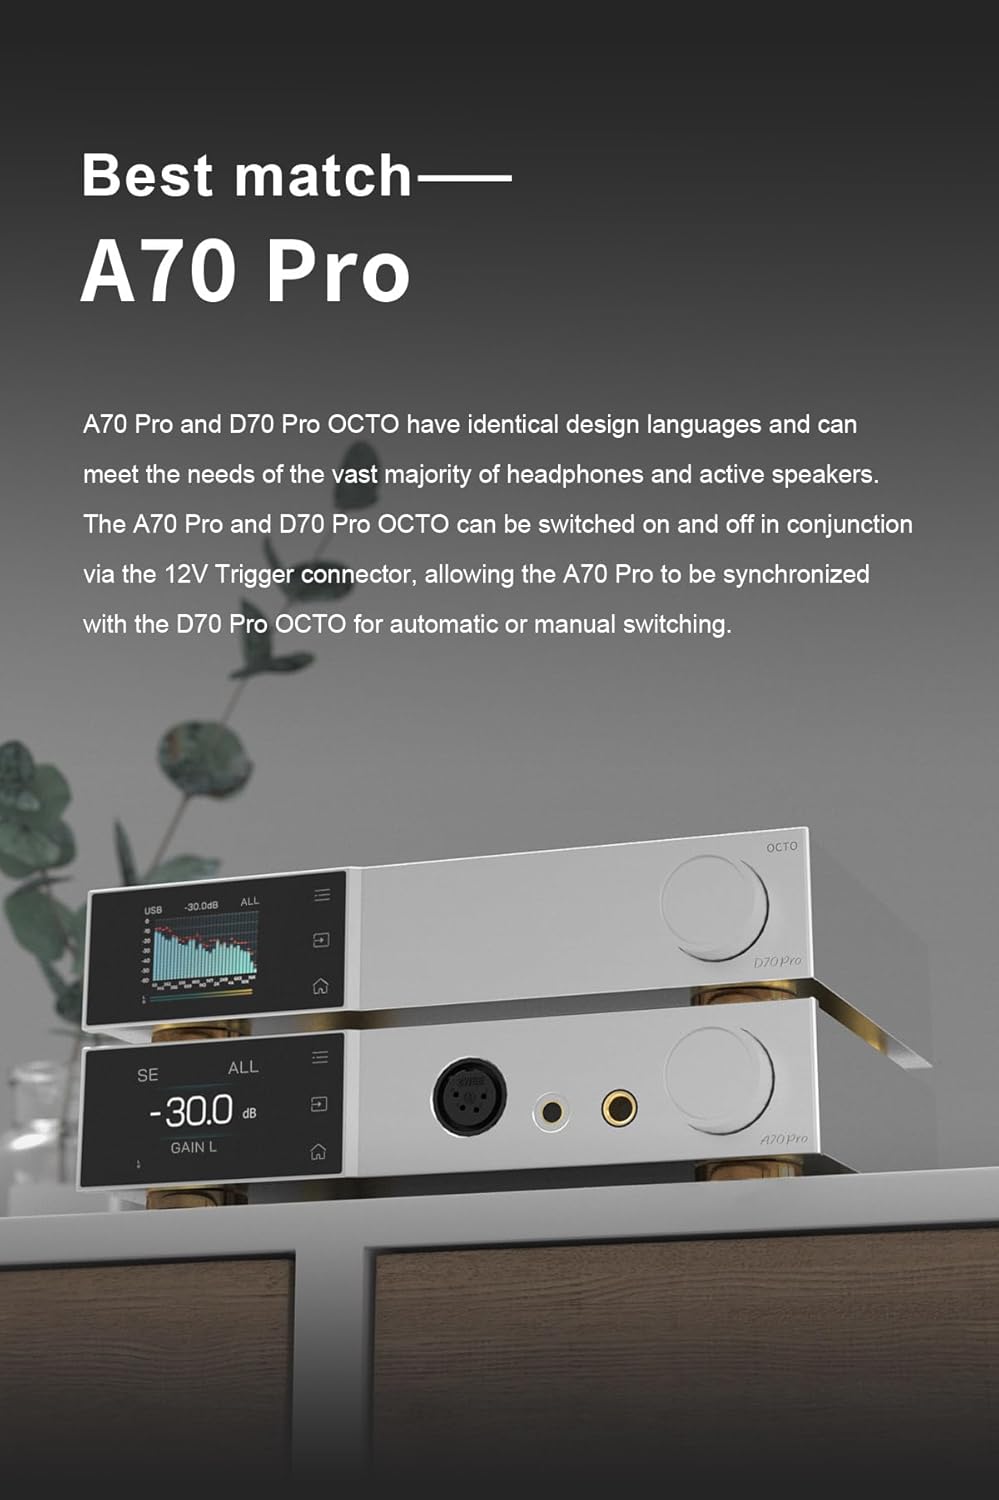
Image: The D70 Pro OCTO functioning as a preamplifier, connected to and controlling the volume of a pair of active speakers.
仕様
- DACチップ: 8x Cirrus Logic CS43198
- オーディオデコード: Up to PCM768kHz/32bit, DSD512
- ブルートゥース: Version 5.1, supports LDAC, aptX-Adaptive, aptX HD, AAC, SBC
- 出力: RCA (single-ended), XLR (balanced)
- THD+N (5V A-wt): <0.00007%
- SN比: 134dB(A-wt)
- DNR: 134デシベル
- ノイズ: <1.0uVrms
- UI: Aurora UI with full-color display and touch buttons
- 前amp 関数: 統合されたプレamplifier with independent volume memory
- トリガー: 12V Trigger input/output
- 寸法: 14.57 x 9.49 x 3.43インチ
- 商品の重量: 4.27ポンド

Image: A table detailing the D70 Pro OCTO DAC's performance parameters, including THD+N, SNR, DNR, frequency response, output levels, channel crosstalk, channel balance, and output impedance for both RCA and XLR outputs.
トラブルシューティング
This section provides solutions to common issues you might encounter with your D70 Pro OCTO DAC. For more detailed troubleshooting, refer to the official support video.
トラブルシューティングビデオガイド
Video: Official troubleshooting guide for the Topping D70 Pro OCTO HIFI DAC, covering various common issues and their solutions.
よくある問題と解決策
| 現象 | 解決 |
|---|---|
| Can't be turned on |
|
| 音が出ない |
|
| ノイズの多い再生 |
|
| One channel with noise / no output |
|
| Channel imbalance |
|
| Cannot pair the Bluetooth |
|
| Bluetooth in: the sound is cut off |
|
| The connected USB device does not recognize this unit |
|
| リモコンが反応しない |
|
| Can't adjust this unit's volume |
|
| Sample rate displayed on the device does not match the music file |
|
| DAC異常 |
|
| DIR異常 |
|
| PN ボリュームtage abnormal / low / high |
|
| 5Vボリュームtage abnormal / low / high |
|
| FFTモジュール異常 |
|
| File size large |
|
| Firmware damage |
|
| Topping other firmware |
|
| 未知 file |
|
| 更新に失敗しました |
|
| No firmware |
|
保証とサポート
KGUSS, as a brand authorized distributor, provides the following:
- 30日間返金保証 いかなる理由であっても。
- より多い 12ヶ月保証 on all quality defects.
- サポート 30-day price matching.
For any questions or support needs, please contact us at: HIFICOLLEGE@gmail.com
Ask a question about this manual
Ask about setup, troubleshooting, compatibility, parts, safety, or missing instructions. Manuals+ will review the question and use this page’s manual context to help answer it.