1. はじめに
The Walfront MPPT Solar Charge Controller is designed to efficiently manage power flow from your solar panels to your battery bank, optimizing charging performance for off-grid solar systems. This manual provides essential information for the safe and effective installation, operation, and maintenance of your 50A MPPT solar charge controller.

Image 1.1: Walfront MPPT Solar Charge Controller 50A. This image shows the front view of the orange and black controller, featuring an LCD screen displaying PV, Battery, and Load information, along with 'ESC' and 'SET' buttons.
2. 主な特徴
- High Efficiency MPPT Tracking: Features MPPT tracking efficiency greater than 99% and a maximum conversion efficiency of up to 98%, maximizing energy harvest from solar panels.
- Wide 180V PV Input and Auto Voltage 認識: Supports a maximum solar input voltage of 180V (at 25℃) and automatically recognizes 12V, 24V, 36V, and 48V battery systems. Compatible with battery voltag9Vから64Vまで。
- Clear LCD Display and Smart Protection: Built-in LCD provides real-time system data (voltage, current, operating status). Includes temperature compensation and multiple protection features for safe operation.
- Low No-Load Loss and Reliable Performance: No-load loss of ≤0.4W conserves energy. Designed for reliable operation in temperatures from -10℃ to 65℃ and altitudes up to 3000 meters.
- インストールと使用が簡単: Auto-recognition feature simplifies setup. Compact design allows for straightforward mounting.

Image 2.1: Automatic Voltage Identification. This image highlights the controller's ability to automatically identify 12V, 24V, 36V, and 48V systems, shown with various solar panel application exampレ。
3. 安全情報
Please read all instructions carefully before installation and operation. Failure to follow these safety guidelines may result in personal injury, damage to the controller, or other equipment.
- Ensure all wiring is correctly polarized and securely connected. Loose connections can cause overheating and damage.
- 必ず最初にバッテリー、次にソーラーパネル、最後に負荷を接続します。取り外しは逆の順序で行ってください。
- バッテリーを接続せずにソーラーパネルアレイをコントローラーに接続しないでください。
- システムボリュームを確認するtage of the solar panel and battery are compatible with the controller's specifications.
- コントローラーは、可燃性物質や直射日光を避け、換気の良い場所に設置してください。
- Avoid touching live terminals. Use insulated tools during installation.
- This device is not waterproof. Protect it from moisture and water exposure.
4. パッケージ内容
以下にリストされているすべてのアイテムがパッケージに含まれていることを確認してください。
- 1 x Walfront MPPT Solar Charge Controller (50A)
- ネジ4本
- 拡張ネジ4本
- ユーザーマニュアル (本書) x 1
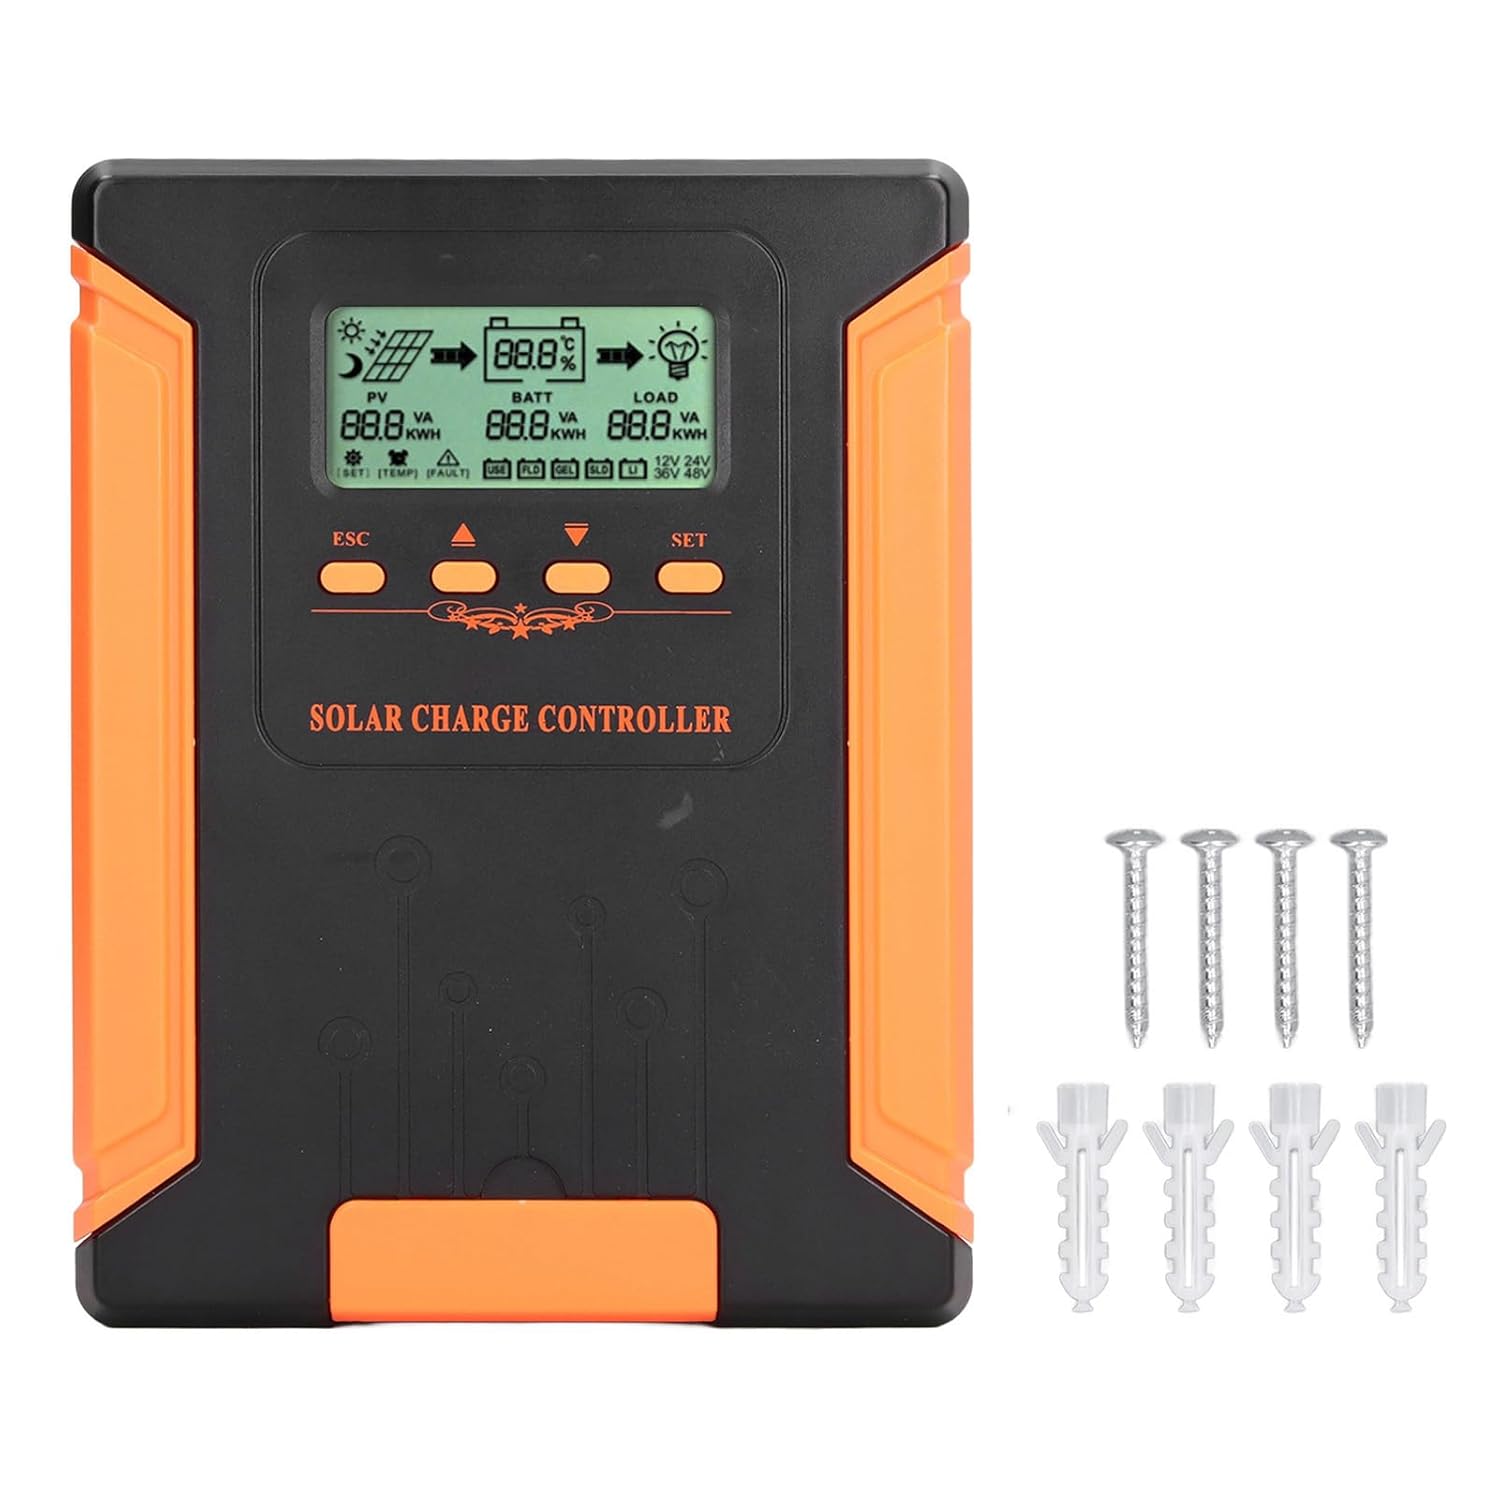
Image 4.1: Package Contents. This image displays the solar charge controller alongside the mounting screws and expansion screws provided in the package.
5. セットアップとインストール
ソーラー充電コントローラーを適切に設置するには、次の手順に従ってください。
5.1コントローラーの取り付け
- 直射日光、高温、湿気を避け、乾燥した風通しの良い場所を選んでください。
- Ensure there is sufficient space around the controller for heat dissipation, especially around the cooling fins.
- Mount the controller vertically on a solid surface using the provided screws.
5.2配線接続
Refer to the wiring diagrams below for correct connection sequence. Always connect in the following order:
- バッテリーを接続します。 Connect the battery to the controller's battery terminals. Ensure correct polarity (+ to + and - to -). The controller will automatically detect the battery voltage.
- ソーラーパネルを接続します。 ソーラーパネルアレイをコントローラーのPV端子に接続します。極性が正しいことを確認してください。
- DC負荷を接続する(オプション): DC負荷をコントローラの負荷端子に接続します。極性が正しいことを確認してください。
To disconnect the system, follow the reverse order: disconnect load, then solar panel, then battery.

Image 5.1: Basic System Connection Diagram. This diagram illustrates the connection order: 1. Battery Assembly, 2. Solar Panel Assembly, 3. DC Load. It also shows an AC Load and Inverter connected to the Battery Assembly.

Image 5.2: Detailed System Wiring Diagram. This diagram provides a more comprehensive view of a solar power system, including solar panels, battery, inverter (AC Output/Input), and various AC loads like laptops, lights, air conditioners, televisions, and fans.
6. 操作手順
The controller features an LCD display and control buttons for monitoring and configuration.
6.1 LCDディスプレイ
LCD 画面には、次のような太陽光発電システムに関するリアルタイムの情報が表示されます。
- PV(太陽光発電)ステータス: 入力ボリュームtage, current, and power from solar panels.
- BATT (Battery) Status: バッテリーvoltage, charging current, and state of charge.
- LOAD Status: Output current and power to the DC load.
- システム巻tage: Automatically detected battery system voltage(12V / 24V / 36V / 48V)。
- エラーインジケータ: Displays fault codes or warnings if issues occur.
6.2つの制御ボタン
The controller has three buttons: ESC, Up/Down arrows, and SET.
- ESCボタン: Used to exit current menu or cancel an operation.
- 上/下ボタン: Used to navigate through menu options or adjust parameter values.
- SETボタン: Used to enter a menu, confirm a selection, or save changes to parameters.

Image 6.1: Control Buttons. This close-up image shows the 'ESC', 'Up arrow', 'Down arrow', and 'SET' buttons on the controller's front panel.
7. メンテナンス
定期的なメンテナンスにより、ソーラー充電コントローラーの最適なパフォーマンスと寿命が確保されます。
- クリーニング: Periodically clean the controller's exterior with a dry cloth. Ensure the cooling fins are free from dust and debris to maintain proper heat dissipation.
- 接続: すべての配線接続がしっかりと固定され、腐食がないことを定期的に確認してください。
- 検査: Inspect the controller for any signs of physical damage, overheating, or unusual odors.
- 環境: 設置環境が乾燥していて換気が良好であることを確認してください。

Image 7.1: Cooling Fins. This close-up shows the cooling fins on the top of the controller, which are crucial for heat dissipation and require regular cleaning.
8。 トラブルシューティング
コントローラーで問題が発生した場合は、次の一般的な問題と解決策を参照してください。
| 問題 | 考えられる原因 | 解決 |
|---|---|---|
| コントローラーの表示がオフになっています | バッテリーが接続されていないか、バッテリーの容量が不足していますtag低すぎます。 | Ensure battery is connected correctly and has sufficient charge (above 9V). |
| PVからの充電電流なし | Solar panels not connected, insufficient sunlight, or PV polarity reversed. | Check PV connections and polarity. Ensure adequate sunlight. Verify PV voltageは範囲内です。 |
| ロードが機能しない | Load disconnected, load current too high, or load polarity reversed. | Check load connections and polarity. Ensure load current does not exceed controller's rating. |
| バッテリーが完全に充電されていません | Insufficient solar input, undersized solar array, or battery issues. | Increase solar panel capacity or check for shading. Inspect battery health. |
9. 技術仕様
Below are the technical specifications for the Walfront MPPT Solar Charge Controller 50A.
| パラメータ | 仕様 |
|---|---|
| システム巻tage | 12V / 24V / 36V / 48V Auto |
| 定格充電電流 | 50A |
| No Load Loss | ≤0.4W |
| Solar Maximum Input Voltage | 180V (at 25℃), 150V (at -25℃) |
| バッテリー巻tage範囲 | 9-64V |
| 最大電力点ボリュームtage範囲 | バッテリー巻tage + 2V〜150V |
| 変換効率 | ≤98% |
| MPPT 追跡効率 | >99% |
| 温度補償係数 | -2mv/℃/2V (default value) |
| 動作温度 | -10℃~65℃ |
| 保護等級 | IP21 |
| 高度 | ≤3000 Meter / 9842.5ft |

Image 9.1: Model Comparison Table. This table provides a comparison of rated charging current and solar panel maximum input power for CM-50 (50A) and CM-60 (60A) models across different system voltages。
10. 保証とサポート
保証情報およびテクニカルサポートについては、ご購入時に付属のマニュアルをご参照いただくか、販売店にお問い合わせください。ご購入の証明として、ご購入時のレシートを保管してください。