1. はじめに
This manual provides detailed instructions for the proper setup, operation, and maintenance of your HOTRC CT-4A 4-channel 2.4GHz RC Transmitter and Receiver system. Designed for use with RC cars, boats, and tanks, this system offers stable control and advanced features. Please read this manual thoroughly before use to ensure safe and optimal performance.
2. 箱の中身
- 1 x CT-400 Remote Controller
- 1 x CT-600 4+2channel Receiver
- ユーザーマニュアル x 1
3.製品オーバーview
The HOTRC CT-4A transmitter features an ergonomic pistol-grip design for comfortable one-handed operation. The control panel includes various buttons and trims for precise adjustments.

図3.1: HOTRC CT-4A Transmitter with labeled components including antenna, operation panel, handwheel, trigger, and battery compartment.
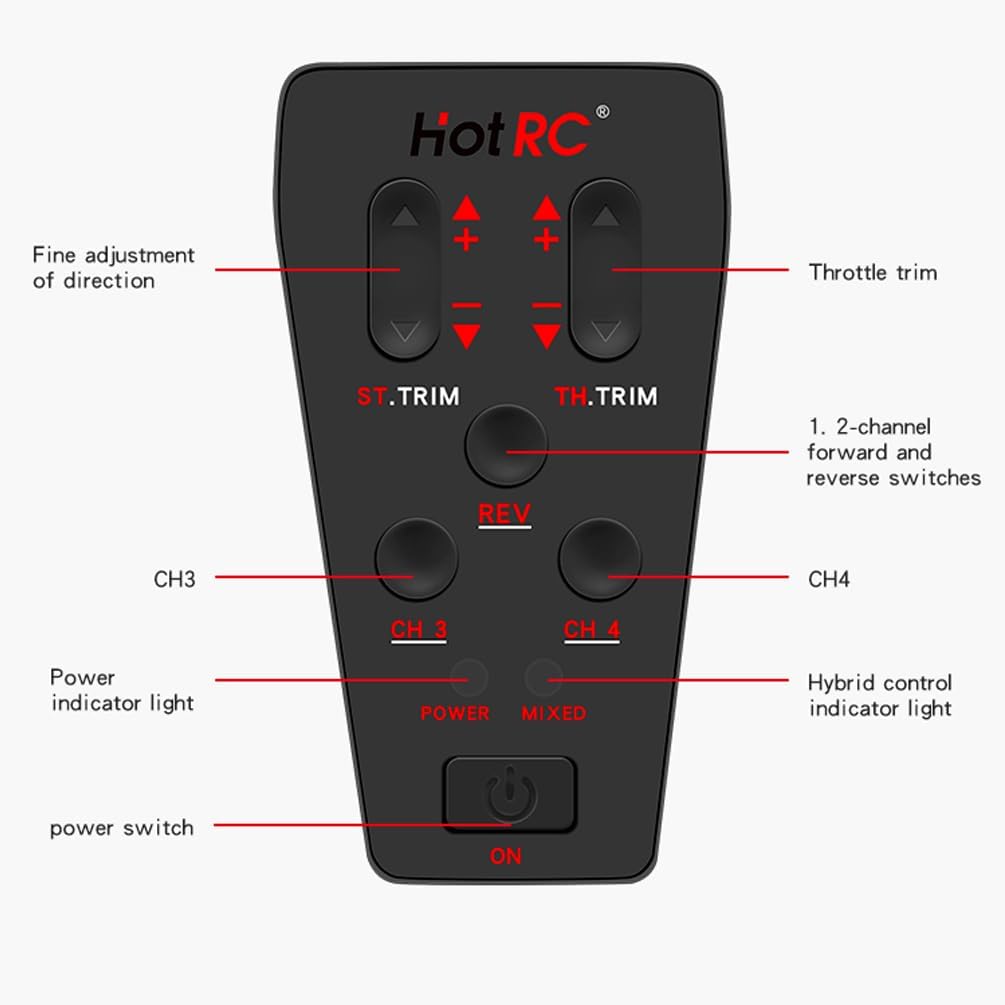
図3.2: 詳細 view of the CT-4A control panel, showing ST.TRIM, TH.TRIM, REV, CH3, CH4 buttons, Power indicator, Mixed control indicator, and Power switch.
4. セットアップ
4.1 バッテリーの取り付け
The transmitter supports two power supply methods: 2S lithium batteries or 4 AA batteries. The innovative detachable battery box allows direct insertion of a 2S lithium battery balance port.
- 送信機の下部にある電池ケースのカバーを開きます。
- Insert 4 AA batteries, observing correct polarity, or connect a 2S lithium battery to the designated port.
- 電池カバーをしっかりと閉じてください。
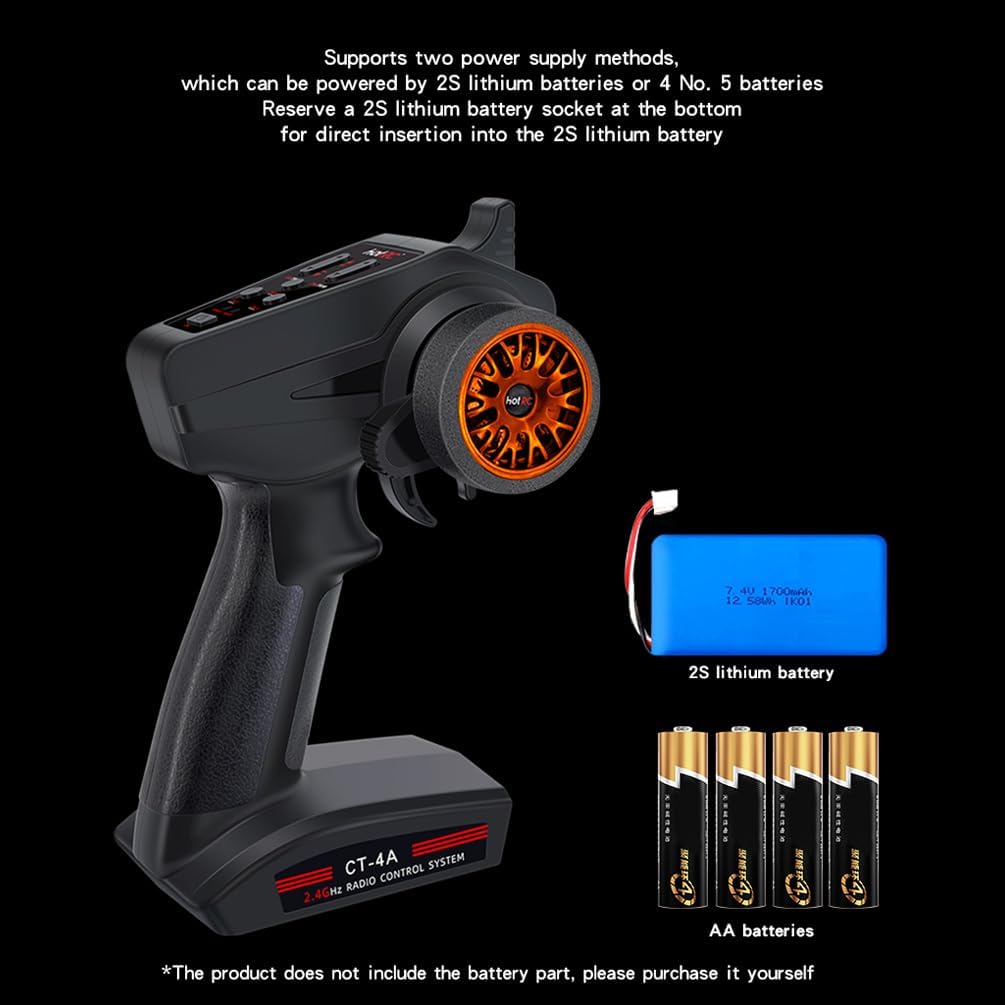
図4.1: Illustration of battery installation options for the CT-4A transmitter, showing both 2S lithium battery and AA battery configurations.
4.2 受信機の接続
The receiver supports a voltage supply of 4-9V and both numerical and analog servo modes. Connect your servos and other components to the appropriate channels on the receiver.
- Connect the receiver to your RC vehicle's components (servos, ESC, etc.).
- すべての接続が安全で正しい方向になっていることを確認します。
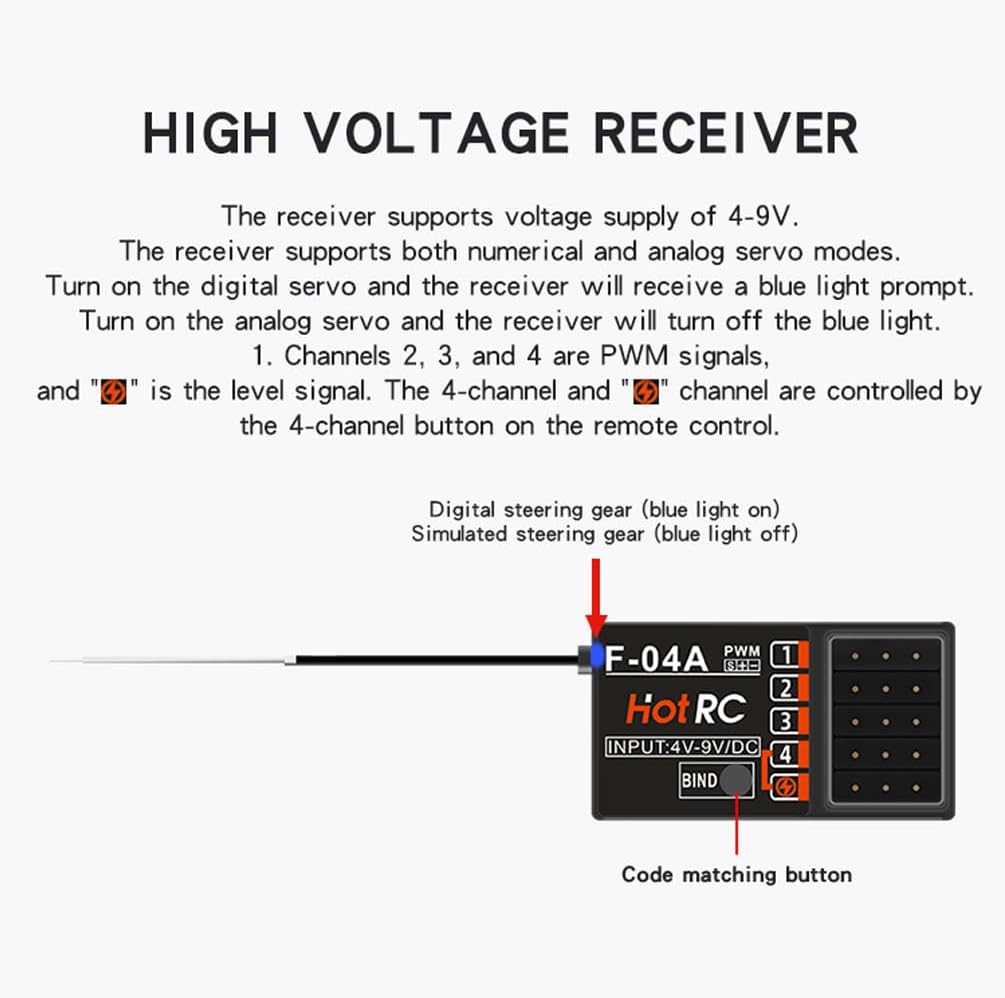
図4.2: The CT-600 receiver showing the bind button and channel ports. Channels 2, 3, and 4 are PWM signals. The 4-channel and 'CH1' channel are controlled by the 4-channel button on the remote control.
4.3 バインディングプロセス
To establish communication between the transmitter and receiver, follow these steps:
- 送信機の電源がオフになっていることを確認してください。
- Insert the bind plug (codec) into the receiver's BIND/CH5 port.
- Power on the receiver. The LED on the receiver should start flashing.
- Press and hold the 'BIND' button on the transmitter while powering it on.
- Release the 'BIND' button once the transmitter powers on. The LED on the receiver should become solid, indicating successful binding.
- 送信機と受信機の両方の電源を切ります。受信機からバインドプラグを取り外します。
- まず送信機の電源を入れ、次に受信機の電源を入れます。これでシステムがバインドされ、操作準備が完了します。
5. 操作手順
5.1 基本的な制御
The CT-4A features an ergonomic pistol-grip and steering wheel for intuitive control. The throttle speed limit can be adjusted, and it includes brake and fail-safe functions.
5.2 Positive and Negative Channel Settings
This setting allows you to reverse the direction of specific channels if needed for your model.
ビデオ5.1: Instructions for setting positive and negative channels on the HOTRC CT-4A transmitter. This video demonstrates how to adjust channel direction by holding the REV key and manipulating the CH1 handwheel or CH2 trigger. A sound indicates successful setting.
5.3 Stroke Amount Adjustment
Adjusting the stroke amount allows you to fine-tune the range of movement for your servos.
ビデオ5.2: Guide on setting the stroke amount for the HOTRC CT-4A. This video shows how to enter adjustment mode by powering on the transmitter while holding the REV key, then using the trim buttons to adjust CH1 and CH2 stroke. The stroke is divided into 5 levels, with the default being the largest.
5.4 Mixing Control Setting
The CT-4A allows for mixed control mode on channels 1-2. This feature can be useful for specific vehicle configurations.
ビデオ5.3: Demonstration of how to activate mixing control on the HOTRC CT-4A. To enable, press and hold the CH3 and CH4 switches simultaneously while powering on the remote control. The mixing indicator light on the panel will illuminate, confirming successful activation. The same method is used to disable it.
5.5 Out of Control Protection (Fail-Safe) Setting
The fail-safe function protects your model by setting predefined servo positions in case of signal loss, preventing loss of control.
ビデオ5.4: Instructions for setting the out-of-control protection (fail-safe) function. First, ensure the code is successfully matched. Then, control the transmitter's throttle channel to the desired braking or stalling state. Insert the encoder into the receiver's bind pairing hole. The LED light will flash, then remain solid when the fail-safe is set. Test by turning off the transmitter power and observing if the throttle servo moves to the set position.
6. 仕様
| 仕様 | 価値 |
|---|---|
| モデルタイプ | 車、ボート、戦車 |
| チャンネル | 4CH |
| RF範囲 | 2.4Ghz ISM (2.4005 - 2.483.5Ghz) |
| RF電力 | <100mW |
| 変調 | GFSK |
| スペクトラム拡散 | FHSS |
| 反応速度 | PWM≤20ms |
| RF距離(地上) | 400m-500m |
| 受信感度 | <-97dbm |
| トランスミッターVol。tage | DC 4.5-9V |
| レシーバーVol。tage | DC 4V-14V |
| 総重量 | 196グラム |
| パッケージ寸法 | 8.98 x 6.42 x 3.98インチ |
| アイテム重量 | 8オンス |
7. メンテナンス
To ensure the longevity and reliable performance of your HOTRC CT-4A system, follow these maintenance guidelines:
- クリーニング: 送信機と受信機の清掃には、柔らかく乾いた布をご使用ください。刺激の強い化学薬品や溶剤の使用は避けてください。
- ストレージ: システムは、直射日光や極端な温度を避け、涼しく乾燥した場所に保管してください。長期間保管する場合は、液漏れを防ぐため、送信機から電池を取り外してください。
- 検査: Periodically check all cables and connectors for signs of wear or damage. Ensure the antenna is not bent or broken.
- バッテリーのケア: Always use recommended batteries and follow proper charging procedures for rechargeable types.
8。 トラブルシューティング
If you encounter issues with your HOTRC CT-4A system, refer to the following common troubleshooting steps:
- 電源なし: Check battery installation and ensure batteries are fully charged or new. Verify the power switch is in the 'ON' position.
- 信号なし/バインディングの問題: Re-perform the binding process as described in Section 4.3. Ensure the receiver is powered correctly and within range of the transmitter. Check for any interference from other 2.4GHz devices.
- 不規則なサーボの動き: Check all servo connections to the receiver. Ensure the receiver is receiving adequate power. Verify that the channel settings (positive/negative, stroke amount) are correctly configured.
- 限定範囲: Ensure the transmitter and receiver antennas are not obstructed or damaged. Avoid operating in areas with high radio interference.
- コントロールが応答しない: Confirm the system is properly bound. Check if the fail-safe function has been triggered due to signal loss.
9. 保証とサポート
For warranty information or technical support, please refer to the contact details provided with your product packaging or visit the official HOTRC webサイトでご確認ください。保証請求の際は購入証明として領収書を保管してください。