
導入
Thank you for choosing the ASAKUKI ZH-001S 4L Ultrasonic Humidifier. This manual provides essential information for the safe and efficient operation, maintenance, and troubleshooting of your new humidifier. Please read it thoroughly before use and retain it for future reference.

Image: The ASAKUKI ZH-001S 4L Ultrasonic Humidifier, a white cylindrical unit with a digital display and mist output.
設定
1. 開梱
- パッケージからすべてのコンポーネントを慎重に取り出します。
- 輸送中に破損がないかご確認ください。破損している場合は使用せず、カスタマーサポートにご連絡ください。
- Ensure all accessories are present: humidifier unit, remote control, cleaning brush, and user manual.
2.配置
- 加湿器は、壁や電化製品から少なくとも 6 インチ (15 cm) 離れた、堅固で平らな防水面に設置してください。
- カーペットの上や熱源の近くに直接置かないでください。
- Ensure the mist outlet is not directed at furniture, walls, or electronic devices.
3. Water Filling (Top-Fill Design)
- 加湿器の上部カバーを取り外します。
- 清潔で冷たい水道水を直接水タンクに注いでください。「MAX」ラインを超えないようにしてください。
- For optimal performance and to prevent mineral buildup, distilled or demineralized water is recommended.
- 上部カバーをしっかりと取り付けます。

画像: クローズアップ view demonstrating the top-fill water feature of the humidifier, showing water being poured directly into the tank.
4. 初回電源投入
- 電源コードを適切な電源コンセントに差し込みます。
- The unit will beep once, and the display will light up briefly.
- コントロールパネルまたはリモコンの電源ボタンを押して、加湿器の電源を入れます。
操作手順
1. 電源のオン/オフ
- を押す 力 ボタン () ユニットの電源をオンまたはオフにします。
2. ミストレベル調整
- を押す ミスト ボタン () to cycle through 3 mist output levels: Low (100ml/h), Medium (140ml/h), and High (200ml/h).
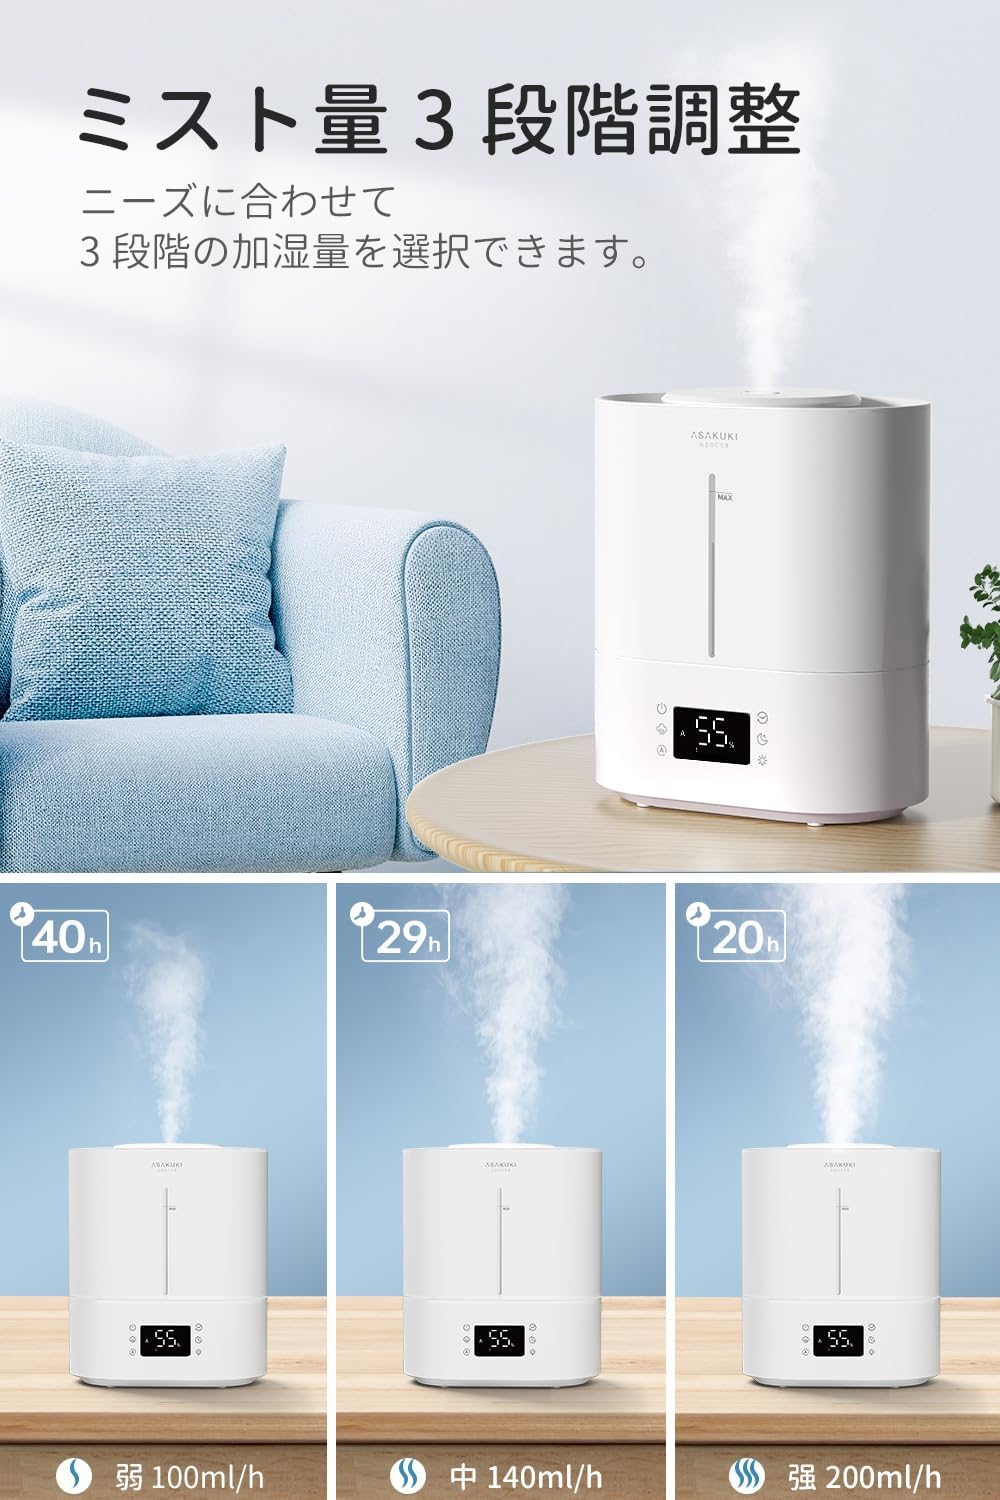
Image: The humidifier demonstrating its three adjustable mist output levels, from low to high, with corresponding run times.
3. Automatic Humidity Control
- The humidifier features a humidity sensor to automatically maintain a comfortable humidity level between 40% and 60%.
- を押す 自動モード ボタン () to activate this function. The unit will adjust mist output based on the ambient humidity.
- You can also set a specific target humidity level. Press the 湿度設定 ボタン () to adjust the desired humidity in 5% increments from 40% to 80%. The unit will automatically start/stop to maintain this level.
4. スリープモード
- 活性化 スリープモード () for quiet operation (below 35dB) and automatic humidity adjustment.
- In Sleep Mode, the display lights will dim or turn off to avoid disturbance.

Image: The humidifier operating in a dimly lit bedroom, illustrating its quiet sleep mode and soft night light.
5.タイマー機能
- を押す タイマー ボタン () to set the operating time from 1 to 12 hours. The humidifier will automatically turn off once the set time expires.
6. ナイトライト
- を押す ナイトライト ボタン () to turn the warm-colored night light on or off.
7. アロマディフューザー機能
- Locate the aroma box at the base of the unit.
- Pull out the aroma box and add a few drops of your preferred essential oil onto the aroma pad.
- Slide the aroma box back into the unit. The humidifier will diffuse the aroma along with the mist.
- 注意: 水タンクにエッセンシャルオイルを直接加えないでください。

Image: A hand adding essential oil drops to the aroma pad in the pull-out tray of the humidifier.
8. リモートコントロール
- The included remote control allows convenient operation from up to 7 meters away.
- Ensure the remote is pointed directly at the humidifier for optimal response.

Image: A hand holding the remote control, pointing it towards the humidifier, demonstrating remote operation.
メンテナンス
Regular cleaning is crucial for maintaining the humidifier's efficiency and preventing bacterial growth and mineral buildup.
1. 日常のメンテナンス
- Empty the water tank and wipe it dry daily, especially if not in continuous use.
- 新鮮できれいな水を補充してください。
2. Weekly Cleaning (Water Tank and Base)
- 加湿器のプラグを抜き、上部カバーを取り外します。
- タンクとベースに残っている水を捨てます。
- Pour 1 cup (240ml) of white vinegar into the water tank and base. Let it soak for 30 minutes.
- Use a soft brush or cloth to clean the inside of the tank and the ultrasonic atomizer in the base.
- 酢の臭いがなくなるまできれいな水でよくすすいでください。
- すべての表面を乾拭きします。
3. Cleaning Filter
- The humidifier includes a cleaning filter designed to reduce impurities and prevent white dust.
- 水タンクからフィルターを取り外します。
- フィルターを冷水で洗い流します。
- For deeper cleaning, soak the filter in a 1:1 solution of white vinegar and water for 30 minutes, then rinse thoroughly.
- Replace the filter. The filter can be used without affecting other functions.

Image: A diagram illustrating the cleaning filter's location and function within the humidifier, showing how it removes impurities.
4. 長期保管
- Clean and dry all parts of the humidifier thoroughly.
- ユニットは涼しく乾燥した場所に保管してください。
トラブルシューティング
| 問題 | 考えられる原因 | 解決 |
|---|---|---|
| ミストが出ない、またはミストの出力が低い | 低水位 アトマイザーでのミネラルの蓄積 ミスト出口が詰まっている | 水タンクを補充する 酢溶液でアトマイザーを洗浄する ミスト出口の障害物を取り除いてください |
| ミストからの不快な臭い | Stagナントウォーター Dirty water tank/filter | Empty and clean the water tank regularly Clean the filter as per maintenance instructions |
| ユニットの電源が入らない | 電源なし Dry-burn protection activated | 電源接続を確認してください Refill water tank; unit will resume operation automatically |
| コントロールパネルが応答しない | 一時的な電子的な不具合 | ユニットのプラグを 5 分間抜き、再度差し込んでください。問題が解決しない場合は、カスタマー サポートにお問い合わせください。 |
仕様
- モデル: ZH-001S
- 容量: 4リットル
- 力: 27W
- カバーエリア: Up to 18 Tatami Mats (approx. 30 square meters)
- 連続運転: 最大40時間
- 最大ミスト出力: 200ml/h (3 adjustable levels)
- 騒音レベル: <35dB(スリープモード時)
- 材料: HIPS, PP
- 寸法: 32.3 x 27.1 x 17.3 cm
- 重さ: 1.67キロ
- 特徴: Timer, Remote Control, Leak Prevention, Adjustable Humidity Control, Quiet Operation, Night Light, Aroma Diffuser, Dry-burn Protection
保証とサポート
ASAKUKI provides a one-year quality guarantee and lifetime technical support for this product. If you encounter any issues or have questions regarding your humidifier, please do not hesitate to contact our customer support team. We are committed to ensuring your satisfaction and comfortable living experience.