1.製品オーバーview
This wall switch plate mount is designed to securely hold your Home Decorators Collection ceiling fan remote, model TX028C-S. It provides a convenient and organized solution to keep your remote accessible, preventing it from being misplaced. The design integrates seamlessly with existing wall switch plates for a clean aesthetic.
注記: The ceiling fan remote, wall switch plate, and mounting screws are not included with this product. This product is the mount only.
- Custom Fit for TX028C-S: Tailor-made for the Home Decorators Collection remote model TX028C-S, ensuring a secure fit.
- リモートアクセス: Keeps your remote within easy reach, eliminating the need to search for it.
- Clean Appearance: Designed for a neat and polished look, integrating with your existing switch plate.
- ユーザーフレンドリーなインストール: Features a simple slide-in installation process.
- スペースの最適化: Frees up table or counter space by storing the remote on the wall.
2. セットアップとインストール
Follow these steps to install your ceiling fan remote wall switch plate mount.
- Step 1: Prepare the Wall Switch Plate
Carefully remove the existing wall switch plate from your wall. Use a screwdriver to loosen and remove the screws holding the plate in place. Set the screws aside as they will be reused.

Image 2.1: Removing the wall switch plate screw.
- Step 2: Insert the Mount into the Switch Plate
Identify an unused opening on your wall switch plate. Align the remote mount with this opening and slide it into place. Ensure the mount is oriented correctly, with the opening for the remote facing outwards.

Image 2.2: Inserting the mount into the switch plate.

Image 2.3: Demonstrating the slide-in installation.
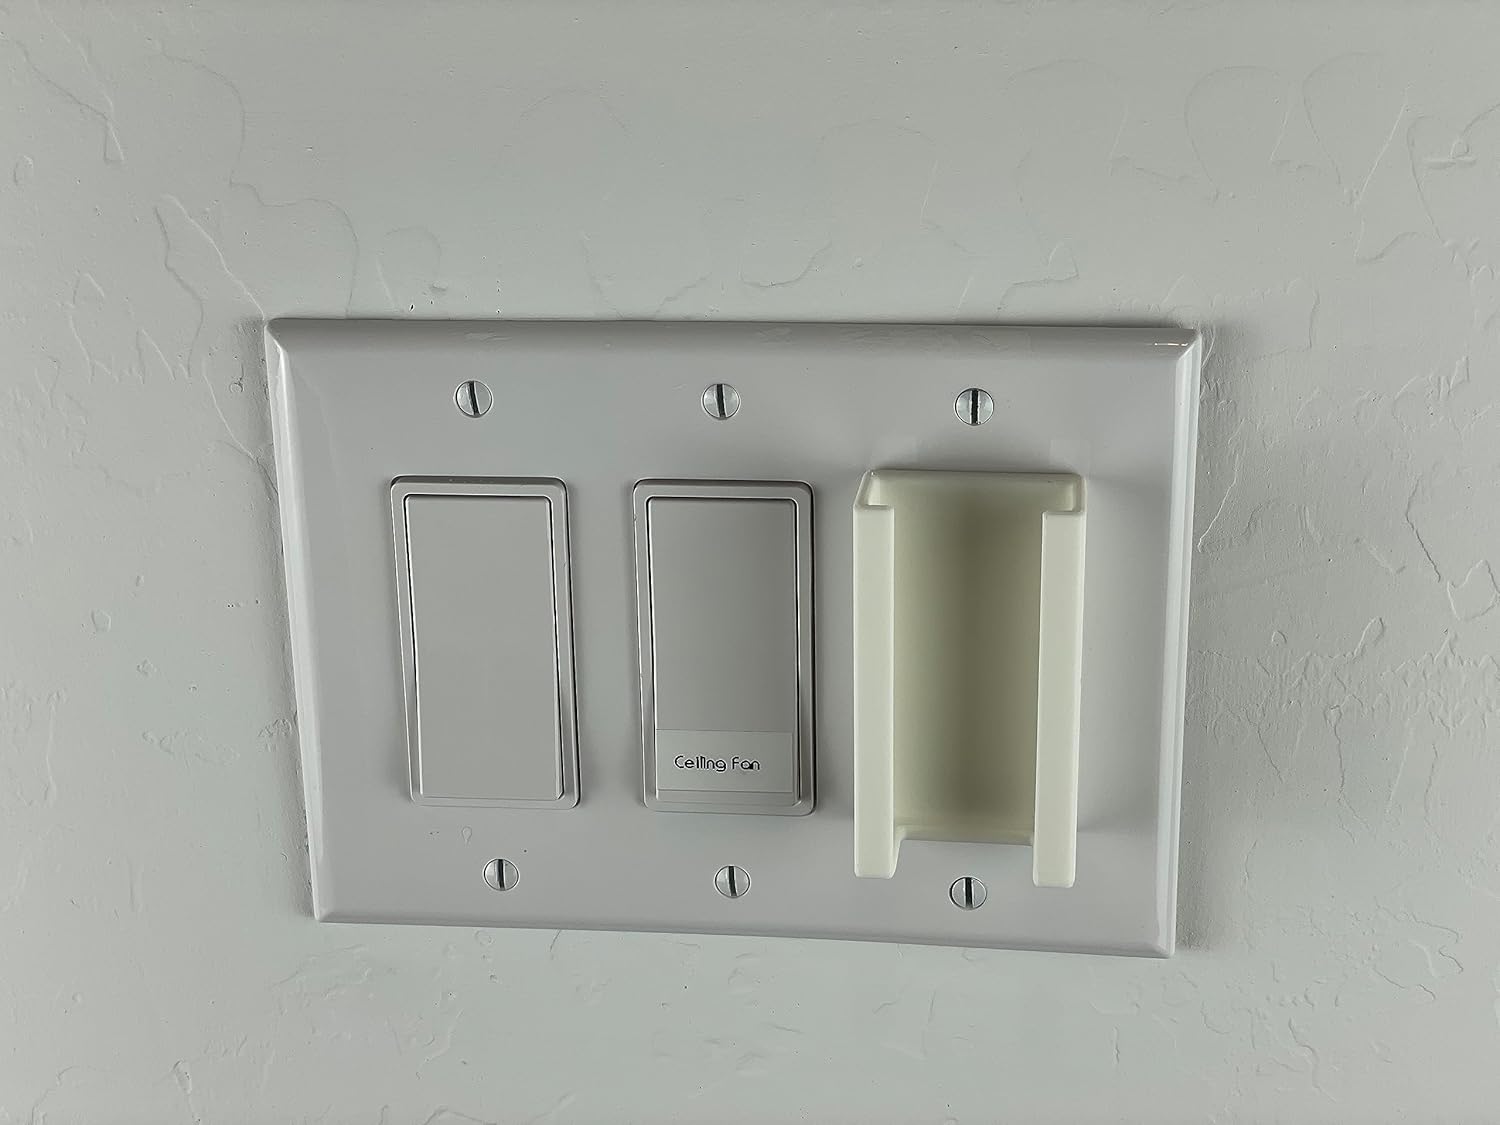
Image 2.4: Mount fully inserted into the switch plate.
- Step 3: Reattach the Wall Switch Plate
Once the mount is securely in place within the switch plate, reattach the entire assembly to the wall using the screws you removed earlier. Ensure the plate is flush against the wall and the screws are tightened appropriately.

Image 2.5: Reattaching the switch plate with the mount.
- Step 4: Insert the Remote
With the mount installed, gently slide your Home Decorators Collection TX028C-S remote into the mount. It should fit snugly, holding the remote securely in place.

Image 2.6: Inserting the TX028C-S remote into the mount.
3. 操作手順
Using the remote mount is straightforward:
- To retrieve the remote, gently pull it upwards from the mount.
- To store the remote, slide it back into the mount until it is securely seated.
The mount is designed for easy insertion and removal while providing a stable storage solution.
4. メンテナンス
To maintain the appearance and functionality of your remote mount:
- Wipe the mount with a soft, dry cloth to remove dust.
- 頑固な汚れには、軽くamp cloth can be used, followed by drying with a soft cloth.
- 研磨剤入りの洗剤や溶剤は仕上げを傷める恐れがあるので使用しないでください。
5。 トラブルシューティング
- リモコンが適合しない: This mount is specifically designed for the Home Decorators Collection remote model TX028C-S. Please verify your remote model number. Refer to the specifications section for exact dimensions.
- Mount is loose in the switch plate: Ensure the switch plate screws are tightened securely. If the issue persists, check if the mount is fully seated within the switch plate opening.
- Mount is difficult to insert into switch plate: Ensure you are aligning the mount correctly with the opening. Do not force the mount; it should slide in with minimal effort.
6. 仕様
| ブランド | ジェネリック |
| Compatible Remote Model | Home Decorators Collection TX028C-S |
| 材料 | プラスチック |
| 色 | 白 |
| スタイル | スイッチプレートマウント |
| Mount Dimensions (Width x Height x Depth) | 40 mm x 71 mm x 22 mm(約1.57インチ x 2.80インチ x 0.87インチ) |
| Remote Fit Dimensions (Width x Depth) | 35 mm x 17 mm(約1.38インチ x 0.67インチ) |
| 電池が必要 | いいえ |

Image 6.1: Technical drawing with mount dimensions.
7. 保証とサポート
Information regarding specific warranty terms or direct support contacts is not available in the product details provided. For any issues or inquiries, please refer to the retailer or point of purchase for assistance.