
1. はじめに
Thank you for choosing the SILENTWARE Air 1000 Black ATX Midi Tower PC Case. This manual provides essential information for the proper installation, operation, and maintenance of your new PC case. Please read this manual thoroughly before beginning the assembly process to ensure a smooth and successful build.
2. 安全情報
- PC ケース内のコンポーネントを取り付けたり取り外したりする前に、必ず壁のコンセントから電源を外してください。
- 静電気放電(ESD)による損傷を防ぐため、コンポーネントを慎重に取り扱ってください。静電気防止リストストラップの使用を検討してください。
- ケース内部の鋭利な部分にご注意ください。
- ケースまたはそのコンポーネントを改造しないでください。改造すると保証が無効になり、安全上のリスクが生じる可能性があります。
- Keep the case away from water, moisture, and extreme temperatures.
3. パッケージ内容
パッケージにすべてのアイテムが含まれていることを確認してください。
- SILENTWARE Air 1000 Black ATX Midi Tower PC Case
- Pre-installed 4x 120mm ARGB Fans
- Accessory box (screws, cable ties, standoffs, etc.)
- ユーザーマニュアル(このドキュメント)
4.製品オーバーview
The SILENTWARE Air 1000 is an ATX Midi Tower PC case designed for optimal airflow and component compatibility. It features a mesh front panel for maximum ventilation and a tempered glass side panel to showcase your build.


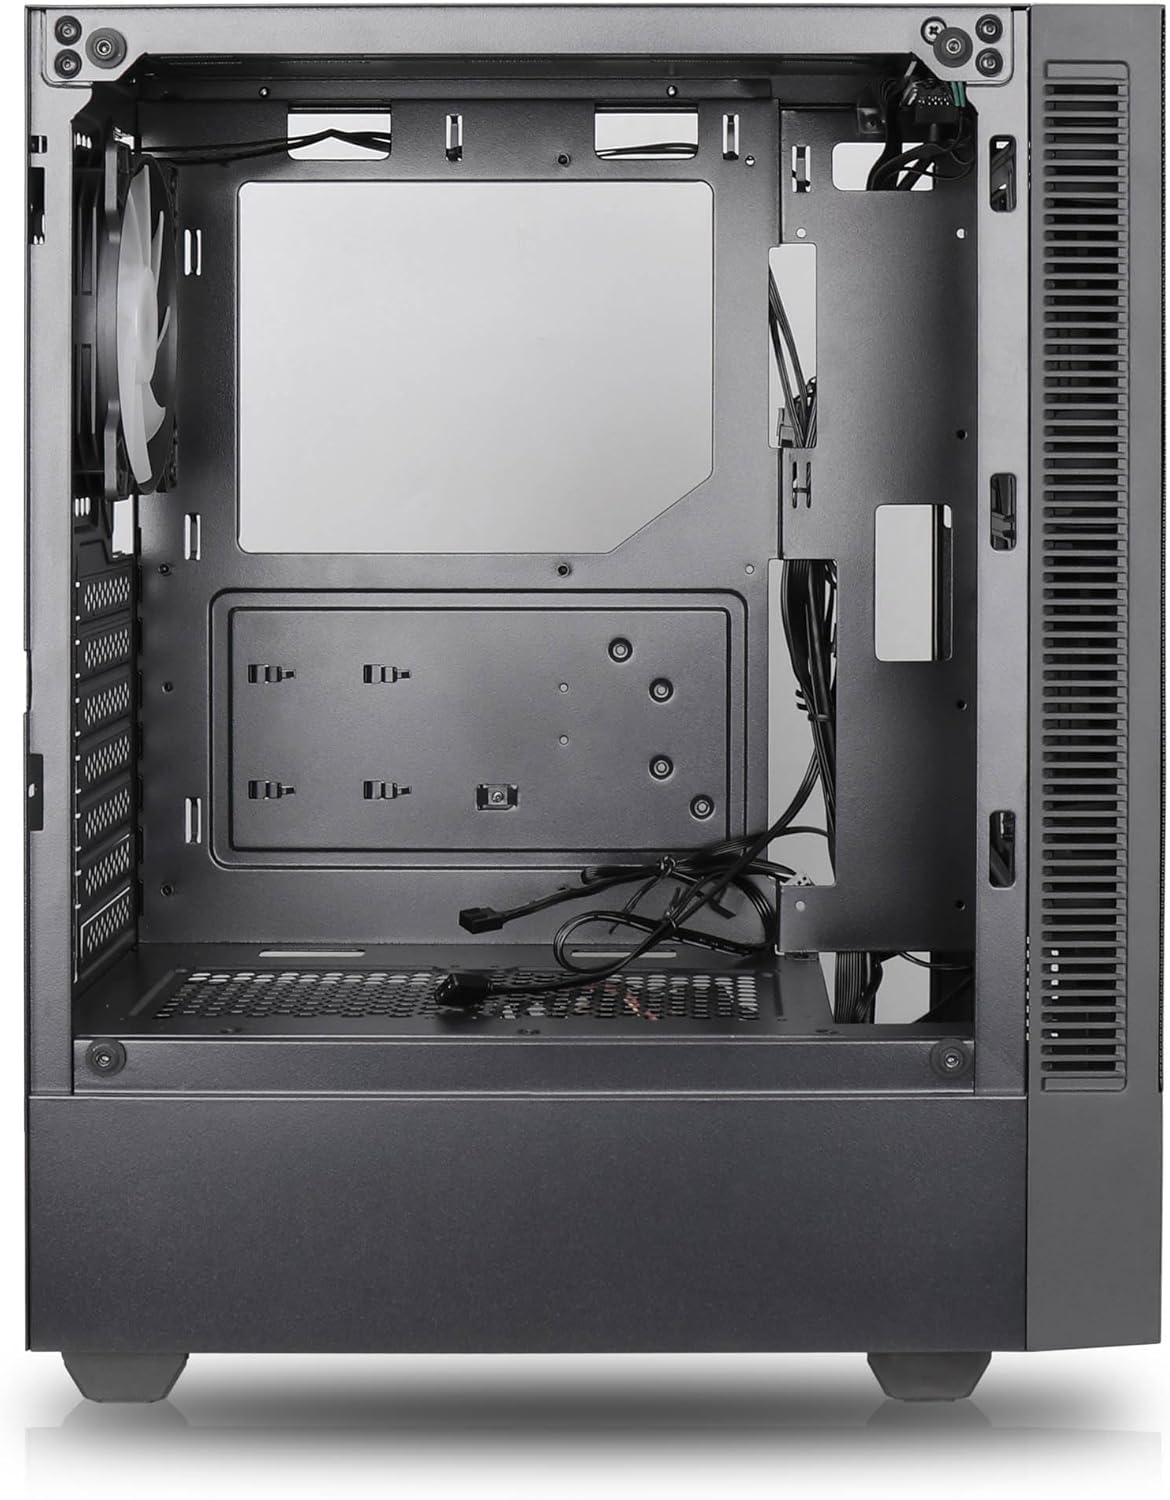

主な特徴:
- 最大風量: Large mesh front panel and four pre-installed 140mm A-RGB fans with hydraulic bearings ensure excellent ventilation.
- Easy PC Building: Thoughtful design with daisy-chain connections simplifies installation, eliminating the need for additional adapters or controllers.
- 高品質なデザイン: Genuine tempered glass side panel showcases installed components and provides a minimalist, premium aesthetic.
- Flexible Lighting and Control: 3-pin A-RGB fans and 4-pin fan control allow for impressive lighting effects and easy adjustment of fan speed and curves directly from the motherboard.
- Powerful Component Compatibility: Supports GPUs up to 400mm long, radiators up to 360mm (front and top) and 140mm (rear), and space for up to 4 fans.
- Compact Case with Ampスペース: Midi tower format accommodates E-ATX, ATX, mATX, and ITX motherboards, up to two 2.5" SSDs, two 3.5" HDDs, and ATX power supplies.
5.インストールガイド
Follow these steps for component installation. Refer to your individual component manuals for specific instructions.
5.1. ケースの準備
- ケースを平らで安定した面に置きます。
- Carefully remove the tempered glass side panel by unscrewing the thumb screws and gently pulling it away. Set it aside on a soft, non-abrasive surface.
- Remove the solid right side panel by unscrewing the thumb screws and sliding it backward.
5.2. マザーボードの取り付け
- I/O シールドをケースの背面開口部に取り付けます。
- Ensure the correct standoffs are installed for your motherboard form factor (E-ATX, ATX, mATX, ITX). Adjust or add standoffs as needed.
- ネジ穴を合わせながら、マザーボードをスタンドオフの上に慎重に置きます。
- 付属のネジでマザーボードを固定してください。締めすぎないようにしてください。
5.3. 電源ユニット(PSU)の取り付け
- PSU をケース下部背面の専用コンパートメントに配置します。
- Ensure the PSU fan faces downwards (if the case has a bottom vent) or upwards, depending on your cooling preference.
- 付属のネジを使用して、背面から PSU をケースに固定します。
5.4. ストレージドライブのインストール
2.5インチSSD:
- Locate the 2.5" drive mounts (typically behind the motherboard tray).
- Secure the SSDs using the provided screws.
3.5インチHDD:
- Locate the 3.5" drive cages (usually near the PSU shroud).
- Slide the HDDs into the drive trays and secure them with screws or tool-less mechanisms if available.
5.5. グラフィックカード(GPU)のインストール
- ケースの背面から必要な PCIe スロット カバーを取り外します。
- Align your GPU with the PCIe slot on the motherboard and press firmly until it clicks into place.
- Secure the GPU to the case with screws.
5.6.ケーブル管理
マザーボードトレイ背面のケーブル配線用カットアウトと結束ポイントを活用してケーブルを整理しましょう。これにより、エアフローと美観が向上します。
6. 操作
6.1. 電源を入れる
After all components are installed and cables are connected, reattach the side panels. Connect the power cable to the PSU and a wall outlet, then press the power button on the top I/O panel of the case.
6.2. ARGBファンコントロール
The pre-installed ARGB fans feature 3-pin ARGB connectors for lighting control and 4-pin connectors for fan speed control. These can be connected directly to compatible headers on your motherboard. Use your motherboard's software or BIOS settings to customize lighting effects and fan curves.
7. メンテナンス
7.1. 清掃
- 最適な空気の流れを維持するために、ダストフィルター(ある場合)を定期的に清掃してください。
- Use a can of compressed air to remove dust from inside the case and components.
- 外側の表面を柔らかくて乾いた布で拭いてください。amp 布。刺激の強い化学物質は避けてください。
- 強化ガラスパネルの場合は、ガラスクリーナーとマイクロファイバークロスを使用してください。
8。 トラブルシューティング
- PCの電源が入らない: Check all power connections, including the 24-pin motherboard power, 8-pin CPU power, and GPU power cables. Ensure the PSU switch is in the 'ON' position.
- Fans not spinning/RGB not working: Verify that fan and ARGB headers are correctly connected to the motherboard. Check motherboard software for fan speed and lighting control settings.
- 過熱: Ensure proper airflow by checking fan orientation and cleaning dust filters. Verify CPU cooler and GPU cooler are properly seated.
- 表示なし: Confirm the monitor cable is connected to the graphics card (not the motherboard integrated graphics, unless you are using integrated graphics). Reseat the graphics card and RAM modules.
9. 仕様
| 特徴 | 仕様 |
|---|---|
| ブランド | SILENTWARE |
| モデル名 | Silentware Flow 100 ARGB |
| 商品型番 | フロー100 |
| ASIN | B0CB8CZ5GF |
| 色 | 黒 |
| ケースタイプ | ミッドタワー |
| 材料 | 強化ガラス |
| マザーボードの互換性 | ATX、マイクロATX、ミニITX |
| 対応デバイス | ATX, mATX, ITX motherboards, GPUs up to 325mm, radiators up to 360mm, 2.5" and 3.5" storage drives |
| 推奨用途 | ゲーム |
| 冷却方法 | 空気 |
| プレインストールされたファン | 120mm ARGBファン×4 |
| ファンサイズ | 140 Millimeters (Note: Product description mentions 140mm fans, while pre-installed are 120mm. Please verify with product packaging.) |
| 電源取付タイプ | ボトムマウント |
| GPUの最大長 | 400mm |
| Radiator Support (Front/Top) | 最大360mm |
| ラジエーターサポート(リア) | 最大140mm |
| 2.5インチドライブベイ | 最大2 |
| 3.5インチドライブベイ | 最大2 |
10. 保証とサポート
For warranty information and technical support, please refer to the official SILENTWARE website or contact your retailer. Specific details regarding spare parts availability and software updates are not available in the provided product information.