1.製品オーバーview
The SEAFRONT 3-in-1 Endoscope Camera is a versatile inspection tool designed for examining hard-to-reach areas. It features a 5.5mm diameter lens, a 5-meter rigid cable, and adjustable LED lighting for clear visibility in dark or confined spaces. This endoscope is compatible with Android smartphones (with OTG support) and Windows PCs, offering flexible connectivity options via Micro USB, standard USB, and USB Type-C adapters.
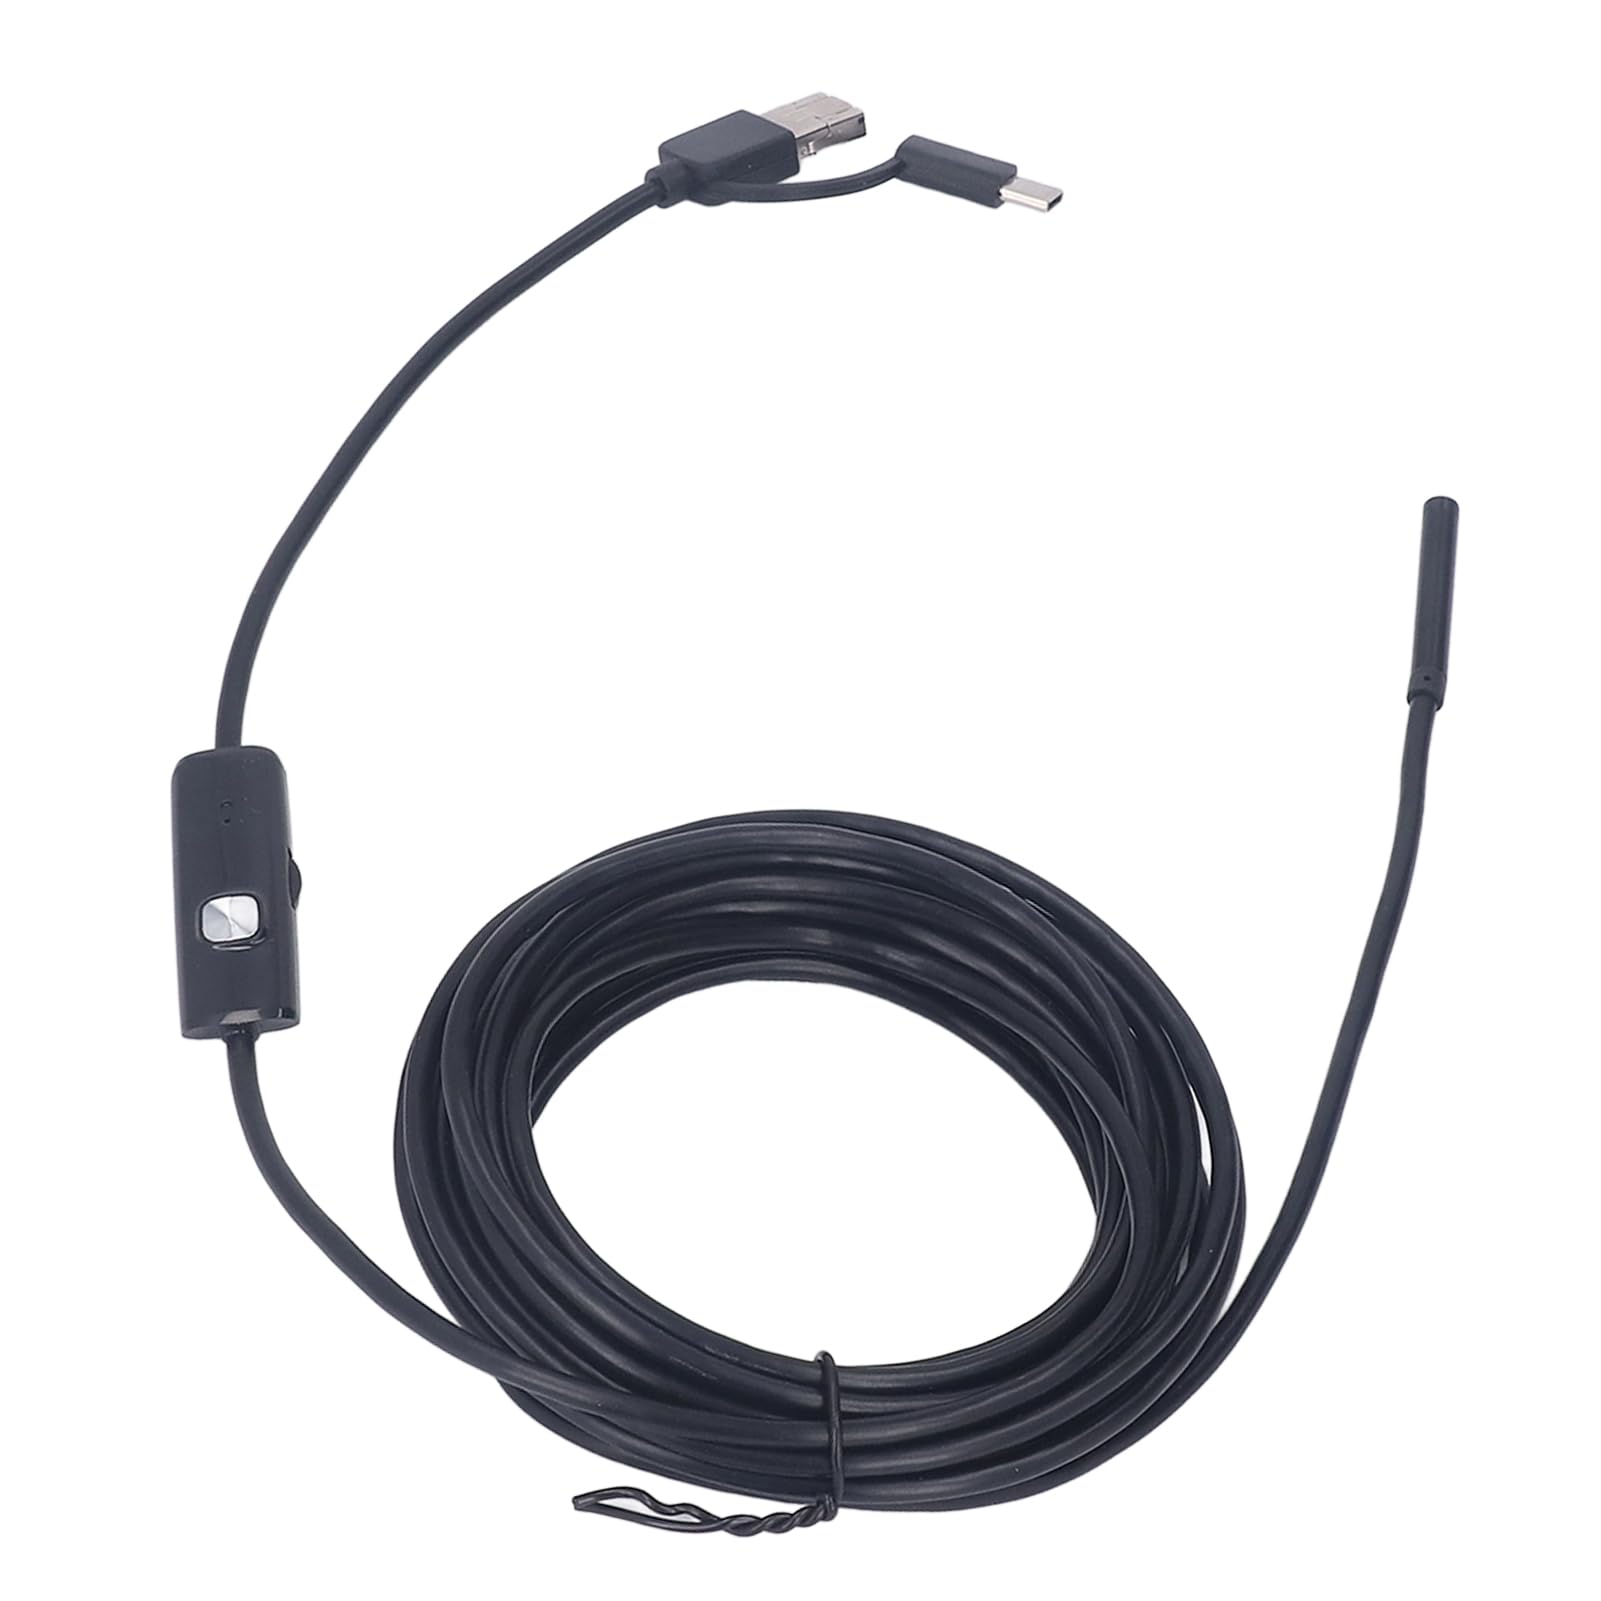
Image: The endoscope camera connected to a smartphone, illustrating its use for detailed inspections.
Its waterproof design allows for inspections in wet environments, such as pipes or drains. The compact and lightweight design ensures portability for various applications, from automotive diagnostics to home maintenance.
2. パッケージ内容
- SEAFRONT 3-in-1 Endoscope Camera (5.5mm lens, 5-meter rigid cable)
- USBアダプタ
- USBType-Cアダプター
- ユーザーマニュアル(このドキュメント)
- Accessory Kit (includes mirror, hook, and magnet attachments)

Image: Endoscope camera head with various attachments for enhanced functionality.
3. セットアップ手順
3.1 Connecting to an Android Smartphone
- Verify OTG Support: Ensure your Android smartphone supports OTG (On-The-Go) functionality. You can check this in your phone's settings or by using a third-party USB OTG Checker application.
- アプリケーションのダウンロード: 検索する and download a compatible endoscope camera application from the Google Play Store. Recommended applications often include names like "USB Camera," "OTG View," or similar.
- Connect Endoscope: Attach the appropriate adapter (Micro USB or USB Type-C) to the endoscope cable. Plug the endoscope into your smartphone's charging port.
- アプリケーションを起動: Open the downloaded endoscope application. The camera feed should appear automatically. If not, check the app settings for camera selection.
3.2 Connecting to a Windows PC
- Connect Endoscope: Use the standard USB adapter to connect the endoscope to an available USB port on your Windows PC.
- Install Driver (if necessary): In most cases, Windows will automatically install the necessary drivers. If the device is not recognized, you may need to manually install a driver. Refer to the product's support page or contact customer service for driver downloads.
- Open Camera Application: Use the built-in "Camera" application in Windows or a third-party webcam software. Select the endoscope camera from the list of available cameras.

Image: The versatile 3-in-1 connector for Micro USB, standard USB, and USB Type-C devices.
4. 操作手順
4.1 LEDライトの調整
The endoscope features integrated LED lights to illuminate inspection areas. A control wheel or button on the cable allows you to adjust the brightness of these LEDs. Rotate the wheel or press the button to achieve optimal lighting for your inspection.

Image: The endoscope camera head demonstrating adjustable LED light intensity.
4.2 画像とビデオのキャプチャ
Once the endoscope is connected and the application is running, you can capture still images or record videos directly through the application interface. Look for camera and video icons within the app to initiate these functions. Captured media will be saved to your device's gallery or a designated folder within the application.
4.3 添付ファイルの使用
The accessory kit includes a mirror, hook, and magnet. These can be attached to the endoscope camera head to assist with various inspection tasks:
- 鏡: サイドメニューを提供 view for inspecting corners or areas not directly in front of the camera.
- フック: Useful for retrieving small objects from confined spaces.
- 磁石: Helps in picking up small metallic items.
To attach, carefully slide the desired accessory onto the camera head until it is securely in place.
5. メンテナンス
- レンズの掃除: After use, gently wipe the camera lens with a soft, dry cloth to remove any debris or moisture. For stubborn dirt, a slightly damp 布で拭いてから乾燥させることもできます。
- ストレージ: Store the endoscope in a clean, dry place, away from extreme temperatures and direct sunlight. Coil the cable loosely to prevent damage.
- 耐水性: The camera head is waterproof. However, ensure all connections (USB ports) are dry before connecting to devices. Do not submerge the USB connectors.

Image: The endoscope camera head submerged in water, highlighting its waterproof feature.
6。 トラブルシューティング
- 画面に画像が表示されない:
- Ensure the endoscope is securely connected to your device.
- For Android, verify OTG support and that the application is correctly installed and running. Try a different compatible application.
- For PC, check if drivers are installed. Try a different USB port.
- Restart your device and the application.
- 画質が悪い:
- ケーブル上のコントロールホイールを使用して LED ライトの明るさを調整します。
- カメラのレンズが汚れていたり、シミがある場合は、清掃してください。
- Ensure the camera is within its optimal macro focus range (approximately 5mm).
- Device Not Recognizing Endoscope:
- Confirm your Android device has OTG enabled.
- Try connecting to a different compatible device (another Android phone or PC) to rule out device-specific issues.
- Ensure you are using the correct adapter for your device's port.
7. 仕様
| 商品型番 | SEAFRONTubhni8e7ag |
| メーカー | SEAFRONT |
| 接続技術 | USB |
| 対応デバイス | Android Smartphones (OTG compatible), Windows PCs |
| レンズ径 | 5.5 mm / 0.22インチ |
| ケーブル長さ | 5メートル / 16.4フィート |
| ビデオ録画解像度 | 640×480P |
| Screen Capture Resolution | 640×480P |
| 耐水性レベル | Waterproof (camera head) |
| 光源 | 調節可能なLEDライト |
| マクロ焦点範囲 | 5ミリメートル |
| センサータイプ | シーモス |
| 露出制御タイプ | 自動、手動 |
| 撮影モード | 自動、手動 |
| 色 | 黒 |
| パッケージ寸法 | 13 x 12.3 x 3.9 cm; 160 グラム |
| 原産国 | 中国 |

Image: Visual representation of the endoscope's lens diameter and cable length.
8. 安全情報
- 本製品を分解または改造しないでください。保証が無効になり、損傷の原因となる可能性があります。
- デバイスを子供の手の届かない場所に保管してください。
- Avoid exposing the USB connectors to water or excessive moisture.
- Use only the provided adapters and accessories.
- 内視鏡を医療目的や人体/動物の内部検査に使用しないでください。