
1. はじめに
This manual provides comprehensive instructions for the Vrabocry WR01RF Wireless 4-Zone RGBCCT Wall Mounted Smart Panel Remote. This device is designed to control compatible RGB, RGBW, and RGBCCT LED lighting systems wirelessly, offering flexible control over color, brightness, and saturation across up to four independent zones.

画像1.1:正面 view of the Vrabocry WR01RF Smart Panel Remote, showing the touch-sensitive control surface with color sliders and zone buttons.
2. 特徴
- Wireless 2.4GHz RF Transmission: Provides a control distance of up to 30 meters (98 feet), allowing for flexible installation without direct wiring to the lighting circuit.
- 4ゾーンコントロール: Independently manage up to four groups of compatible LED lamps, strips, or controllers. Each zone can control numerous lighting units.
- RGBCCT Compatibility: Supports RGB (4-wire), RGBW (5-wire), and RGBCCT (6-wire) LED strip controllers, including models like C03RF, C04RF, C05RF, C03W, C04W, C05W, WB5, LM052, LM053, LM051, and various Mi-boxer/Mi-light series products (e.g., WL5, LS2, FUT039 series).
- Adjustable Lighting Parameters: Offers control over RGB color, color temperature (warm white to cool white), brightness, and saturation.
- Wall Mounted Design: Features a sleek, glass panel design for convenient wall installation.
- Magnetic Support: Allows for easy attachment and removal from its mounting base.
- 60-Second Delay OFF Function: Provides a convenient delay before turning off the lights.

Image 2.1: Packaging displaying key features and specifications of the WR01RF remote.
3. 仕様
| パラメータ | 価値 |
|---|---|
| モデル番号 | WR01RF |
| ワーキングVoltage | 3V (2*AAA Battery, 含まれません) |
| 送信周波数 | 2.4GHz |
| 変調方式 | GFSK |
| 送信電力 | 6dBm |
| スタンバイ電力 | 20uA |
| 制御距離 | 30メートル(98フィート) |
| 動作温度 | -20°C ~ 60°C |
| 寸法 | 86 x 86 x 19 mm (3.39 x 3.39 x 0.75 インチ) |
| 材料 | ガラス |
4. セットアップ
4.1. バッテリーの取り付け
- Gently remove the back cover of the remote panel.
- Insert two (2) AAA batteries into the battery compartment, ensuring correct polarity (+/-).
- 裏蓋をしっかりと取り付けてください。
Note: AAA batteries are not included in the package and must be purchased separately.
4.2.壁への取り付け
The WR01RF remote is designed for wall mounting. It typically comes with a mounting bracket that can be screwed to the wall. The remote panel then magnetically attaches to this bracket.
- Choose a suitable location on the wall, away from metal objects or high magnetic fields that could interfere with the 2.4GHz signal.
- Secure the mounting bracket (if provided) to the wall using appropriate screws.
- Align the remote panel with the mounted bracket and allow the magnets to secure it in place.
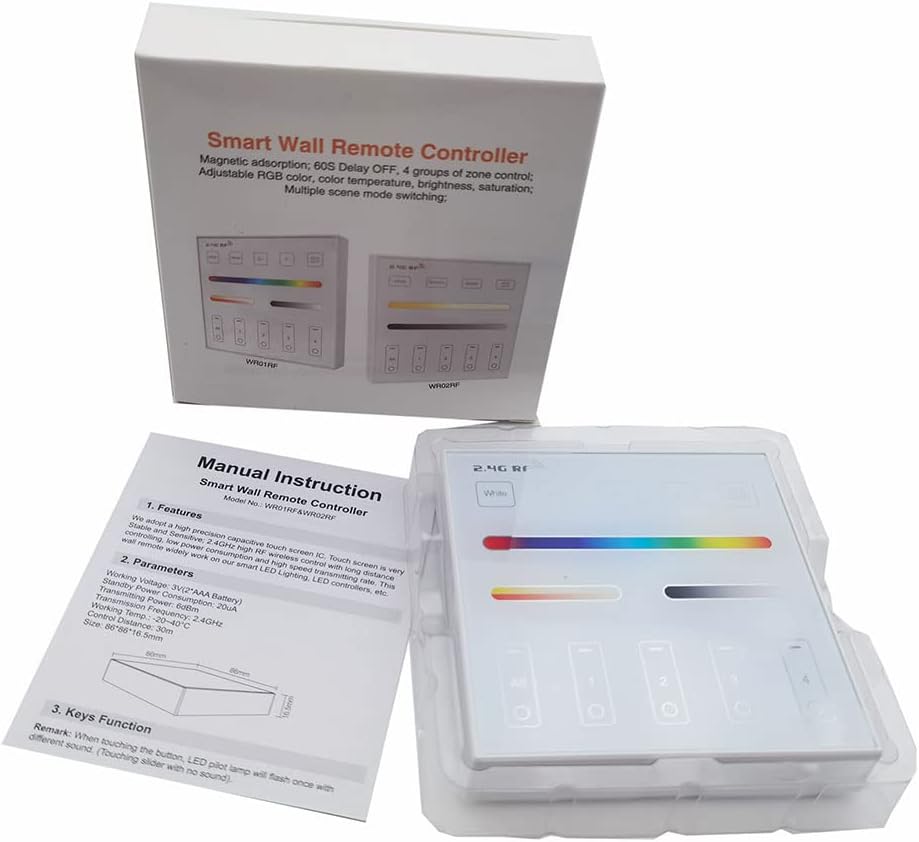
Image 4.1: The WR01RF remote packaging, showing the included manual and the device itself.
5. 操作
The WR01RF remote features a touch-sensitive glass panel for intuitive control of your lighting system. The main control elements include:
- 電源ボタン: Typically located on the panel, used to turn the lights On/Off.
- カラースライダー: A horizontal touch bar for selecting specific RGB colors.
- Color Temperature/Brightness Slider: Another horizontal touch bar for adjusting white light color temperature (warm to cool) and overall brightness.
- Zone Selection Buttons (1, 2, 3, 4, All): Allows you to select individual zones or all zones simultaneously for control.
- モードボタン: Cycles through various pre-programmed lighting modes or effects.
- S+ / S- Buttons: ダイナミック照明モードの速度を調整します。
- 60秒遅延オフボタン: Activates a 60-second delay before the lights turn off.
To operate, first select the desired zone(s) using the zone buttons. Then, use the sliders and other function buttons to adjust the lighting as needed. The touch panel is sensitive; a light touch is usually sufficient for input.
6. Linking and Unlinking with Controllers
The WR01RF remote must be linked to compatible LED controllers to function. Follow these steps carefully for linking and unlinking.
6.1. Linking Instructions
- Ensure the LED light or controller you wish to link is powered off.
- 少なくとも10秒待ちます。
- Switch on the power to the LED light/controller.
- Within 3 seconds of the light turning on, short press any zone button ("I") on the WR01RF remote one (1) time.
- The connected light should blink three (3) times slowly, indicating successful linking.
Note: If the light does not blink slowly, the linking process failed. Power off the light/controller, wait 10 seconds, and repeat the steps.
6.2. Unlinking Instructions
- Ensure the LED light or controller you wish to unlink is powered off.
- 少なくとも10秒待ちます。
- Switch on the power to the LED light/controller.
- Within 3 seconds of the light turning on, long press the specific zone button ("I") on the WR01RF remote that was used for linking.
- The connected light should blink ten (10) times quickly, indicating successful unlinking.
Note: If the light does not blink quickly, the unlinking process failed. Power off the light/controller, wait 10 seconds, and repeat the steps, ensuring you long-press the correct zone button.
7. メンテナンス
- クリーニング: Use a soft, dry cloth to clean the glass panel. Avoid abrasive cleaners or solvents that could damage the surface.
- バッテリー交換: Replace AAA batteries when the remote's response becomes sluggish or inconsistent. Always use fresh batteries of the same type.
- ストレージ: リモコンを長期間保管する場合は、液漏れを防ぐために電池を取り外してください。
8。 トラブルシューティング
- リモコンが応答しない:
- 電池が正しく取り付けられ、十分に充電されていることを確認してください。必要に応じて交換してください。
- Ensure the remote is within the 30-meter control distance of the receiver.
- Verify that the remote is linked to the correct controller/light (refer to Section 6).
- リンク/リンク解除されないライト:
- Strictly follow the timing (within 3 seconds) and button press instructions (short press for link, long press for unlink) as detailed in Section 6.
- Ensure the light/controller is powered off for at least 10 seconds before attempting to link/unlink.
- For unlinking, ensure you long-press the exact zone button that was used for the initial linking.
- 干渉の問題:
- Avoid installing the remote or lighting fixtures near large metal objects or in areas with high magnetic fields, as this can negatively affect the control distance and signal reliability.
9. 重要な注意事項と安全性
- Always check wiring connections of the LED controller and ensure the circuit is correct before applying power.
- Handle the glass panel with care during installation to prevent breakage.
- Do not use the lighting fixtures or remote in areas with strong electromagnetic interference.
- このデバイスは屋内専用に設計されています。