
1. はじめに
This manual provides instructions for the safe and effective operation of your ThreeH 1/4 Inch Digital Torque Adapter. This device converts a standard ratchet wrench into a digital torque wrench, offering precise torque measurement with audible and visual alerts.
2. 安全情報
- 工具を使用するときは、必ず安全メガネなどの適切な個人用保護具を着用してください。
- Ensure the adapter is securely attached to the ratchet wrench and the fastener before applying torque.
- Do not exceed the maximum torque capacity of the adapter (30 Nm / 22.1 ft-lb).
- Keep the device clean and dry. Avoid exposure to extreme temperatures or corrosive environments.
- Do not attempt to disassemble or modify the adapter. Refer servicing to qualified personnel.
3.製品オーバーview
The ThreeH Digital Torque Adapter features a clear digital display, intuitive controls, and a compact design for use in various applications.

図3.1: Digital Torque Adapter Components and Controls. This image highlights the LED flashing indicator, buzzer, and control buttons (P/T, Power, M, +, -) for unit selection and value adjustment.
主要コンポーネント:
- デジタルディスプレイ: Shows real-time torque values and settings.
- P/T Button: Toggles between Peak Hold (P) and Track (T) modes.
- 電源ボタン: デバイスの電源をオン/オフにします。
- Mボタン: Used for mode selection and data memory functions.
- 「+」と「-」ボタン: Adjust preset torque values.
- LED Flashing Indicator: Provides visual alert during torque application.
- ブザー: Provides audible alert during torque application.
- 1/4 Inch Drive: Input and output square drives for connecting to a ratchet wrench and sockets.
4. セットアップ
4.1 バッテリーの取り付け
The torque adapter requires two (2) AAA 1.5V batteries (not included).
- アダプタの背面にある電池ボックスのカバーを見つけます。
- Remove the screw(s) securing the battery cover and carefully lift it off.
- 電池ボックス内の指示に従って、極性 (+/-) が正しいことを確認して、単 4 電池 2 本を挿入します。
- 電池カバーを元に戻し、ネジで固定します。
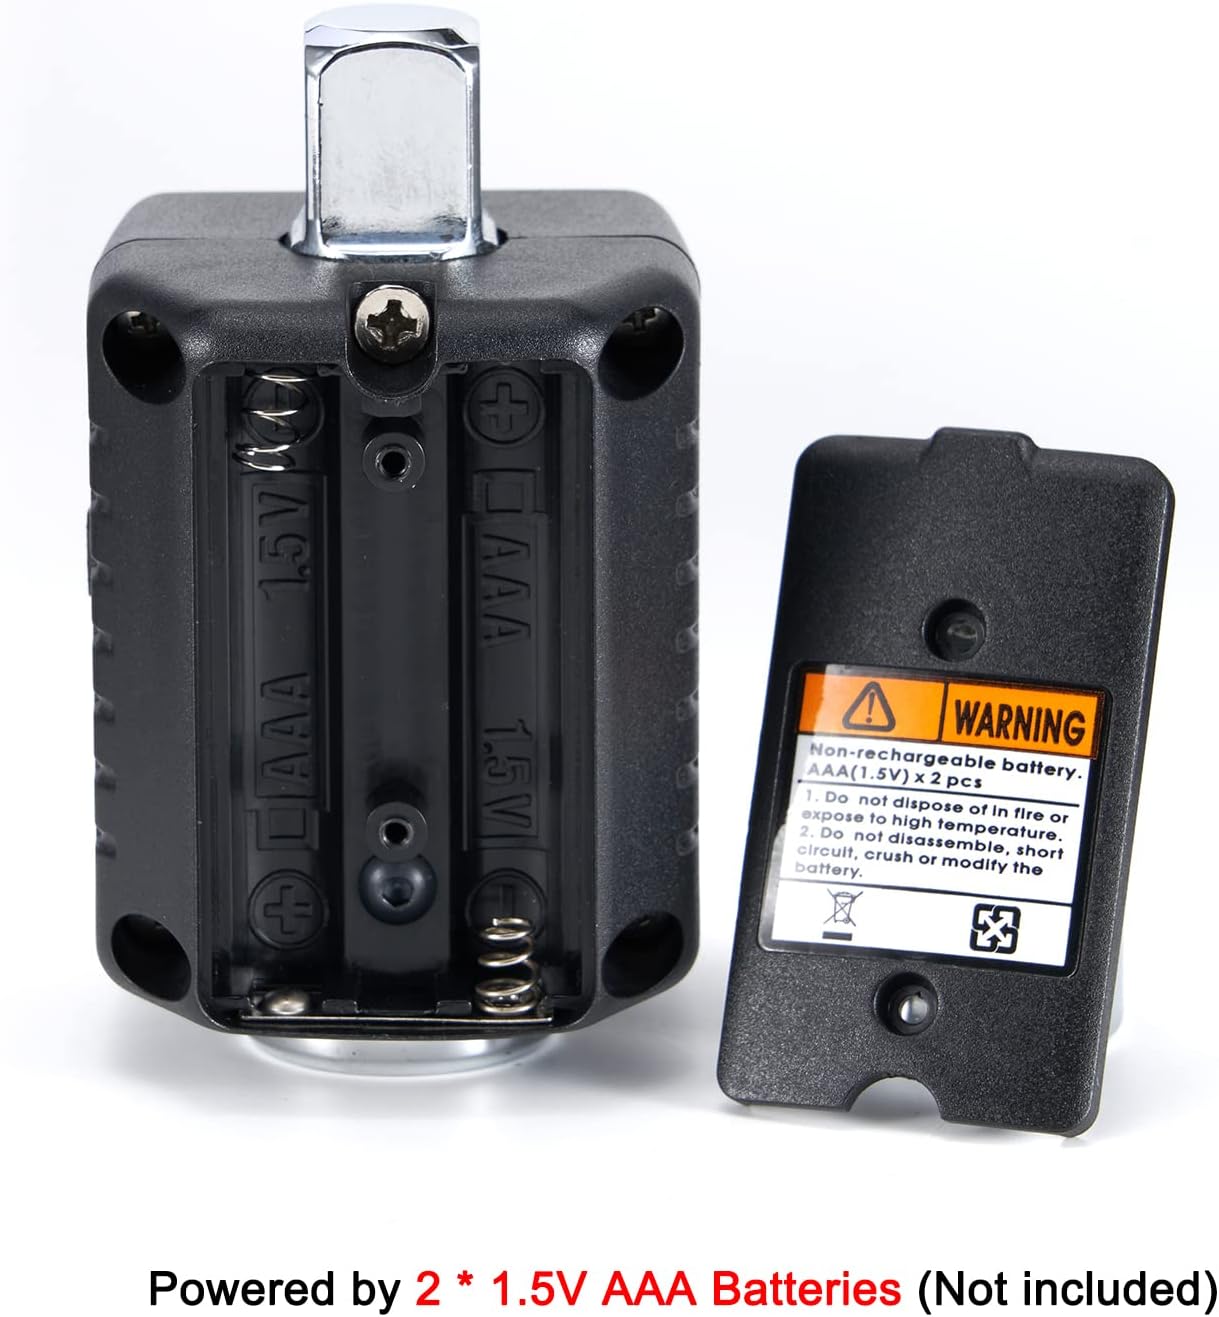
図4.1: Battery Compartment. The image shows the open battery compartment, ready for two AAA batteries to be inserted with correct polarity.
5. 操作手順
5.1 電源オン/オフ
- オンにするには: 力 ボタン。
- オフにするには: 力 button for approximately 3 seconds. The device will also auto shut off after 70 seconds of inactivity.
5.2ユニットの選択
The adapter supports torque units in Newton-meters (Nm), foot-pounds (lb-ft), and kilogram-meters (kg-m).
- To change units: Simultaneously press the P / T そして M buttons. The unit displayed on the screen will cycle through Nm, lb-ft, and kg-m. Release the buttons when the desired unit is shown.
5.3 目標トルク値の設定
- を押す M button to enter the preset torque setting mode.
- 使用 '+' そして 「-」 buttons to adjust the target torque value. Pressing and holding these buttons will increase or decrease the value more rapidly.
- Once the desired value is set, press the M もう一度ボタンを押して確定し、設定モードを終了します。
5.4 Torque Application and Alerts
Attach the digital torque adapter to your 1/4 inch drive ratchet wrench, then attach the appropriate socket to the adapter's output drive. Apply torque to the fastener.

図5.1: Adapter in Use. The image shows the digital torque adapter connected to a ratchet wrench, being used to tighten a fastener on an engine.
- As you apply torque, the digital display will show the real-time torque value.
- When the applied torque reaches 80% of the preset target value, the buzzer will begin to sound, and the LED will flash. The frequency of the beeps and flashes will increase as the torque approaches the target.
- When the preset target torque value is reached, the buzzer will emit a continuous tone, and the LED will flash rapidly. At this point, stop applying force immediately to avoid over-tightening.
5.5 Peak Hold (P) and Track (T) Modes
- トラックモード(T): Displays the real-time torque value as it is being applied. This is the default mode.
- ピークホールドモード(P): Displays the maximum torque value achieved during the tightening process. To switch to Peak Hold mode, press the P / T button once. The display will show 'P' to indicate Peak Hold mode. To clear the peak value, press the P / T もう一度ボタンを押します。
6. メンテナンス
6.1 クリーニング
- Wipe the adapter with a soft, dry cloth after each use.
- 研磨剤入りのクリーナーや溶剤はディスプレイやハウジングを損傷する恐れがあるので使用しないでください。
6.2 ストレージ
- Store the adapter in its protective case when not in use to prevent damage.
- 長期間使用しない場合は、液漏れを防ぐため電池を取り外してください。
- 直射日光や極端な温度を避け、涼しく乾燥した場所に保管してください。

図6.1: Protective Carrying Case. The image displays the compact protective case designed for storing the digital torque adapter, with dimensions indicated.
7。 トラブルシューティング
- デバイスの電源が入らない: 電池の取り付けを確認し、電池が新品であることを確認してください。必要に応じて交換してください。
- 不正確な読み取り: Ensure the adapter is properly seated on the ratchet wrench and the socket is firmly attached. Avoid sudden jerking motions when applying torque. If persistent, the device may require professional calibration.
- ディスプレイが暗い、またはちらつく: Batteries may be low. Replace batteries.
- ブザーまたは LED が動作しない: バッテリー残量を確認してください。問題が解決しない場合は、カスタマーサポートにお問い合わせください。
8. 仕様
| 特徴 | 仕様 |
|---|---|
| モデル番号 | H-TG55A |
| トルク範囲 | 0.3 - 30 Nm (0.22 - 22.1 ft-lb) |
| ドライブサイズ | 1/4インチ |
| 正確さ | ±2% |
| ユニット | Nm, lb-ft, kg-m |
| データメモリ | 40セット |
| 自動シャットオフ | 70 seconds (no usage) |
| 電源 | 2V AAA電池1.5本 |
| 材料 | 合金鋼 |
| アイテムの長さ | 4.7インチ |
| アイテム重量 | 120グラム |

図8.1: Drive Size and Torque Range. This image visually confirms the 1/4 inch drive size and the specified torque range of 0.3-30Nm (0.22-22.1ft-lb).
9. 保証情報
This product comes with a standard manufacturer's warranty. Please retain your proof of purchase for any warranty claims. For specific warranty terms and conditions, refer to the documentation included with your purchase or contact ThreeH customer support.
10. サポート
For technical assistance, troubleshooting, or warranty inquiries, please contact ThreeH customer support through the retailer's platform or the official ThreeH website. Please have your product model number (H-TG55A) and purchase details ready when contacting support.