
1. はじめに
The Saramonic Blink 100 B5 is an ultra-portable and easy-to-use 2.4GHz wireless microphone system designed to deliver broadcast-quality sound. This system is ideal for content creators using iPhone 15, Android smartphones and tablets, newer iPads, computers, and other devices equipped with a USB-C port. Its compact design and advanced features make it suitable for various applications, including video recording, streaming, and audio recording.

2. 箱の中身
- 1 x Blink 100 TX Transmitter
- 1 x Blink 100 RXUC USB-C Receiver
- 1 x Furry Windscreen for TX
- 1 x USB-C充電ケーブル
- 1×キャリングポーチ

3.コンポーネントオーバーview
3.1. Blink 100 TXトランスミッター
- Built-in Omnidirectional Microphone: Captures clear audio.
- ファーリーウィンドスクリーン: Reduces wind noise for outdoor use.
- 電源ボタン: 押し続けると電源がオン/オフになります。
- 消音ボタン: を押してマイクをミュート/ミュート解除します。
- NR (Noise Reduction) Button: Press to activate/deactivate active noise cancellation.
- Gain Control (+/-) Buttons: Adjust microphone input level (12-step control).
- 3.5mm TRS入力: For connecting external lavalier microphones or line-level audio sources.
- USB-C充電ポート: For charging the transmitter's internal battery.

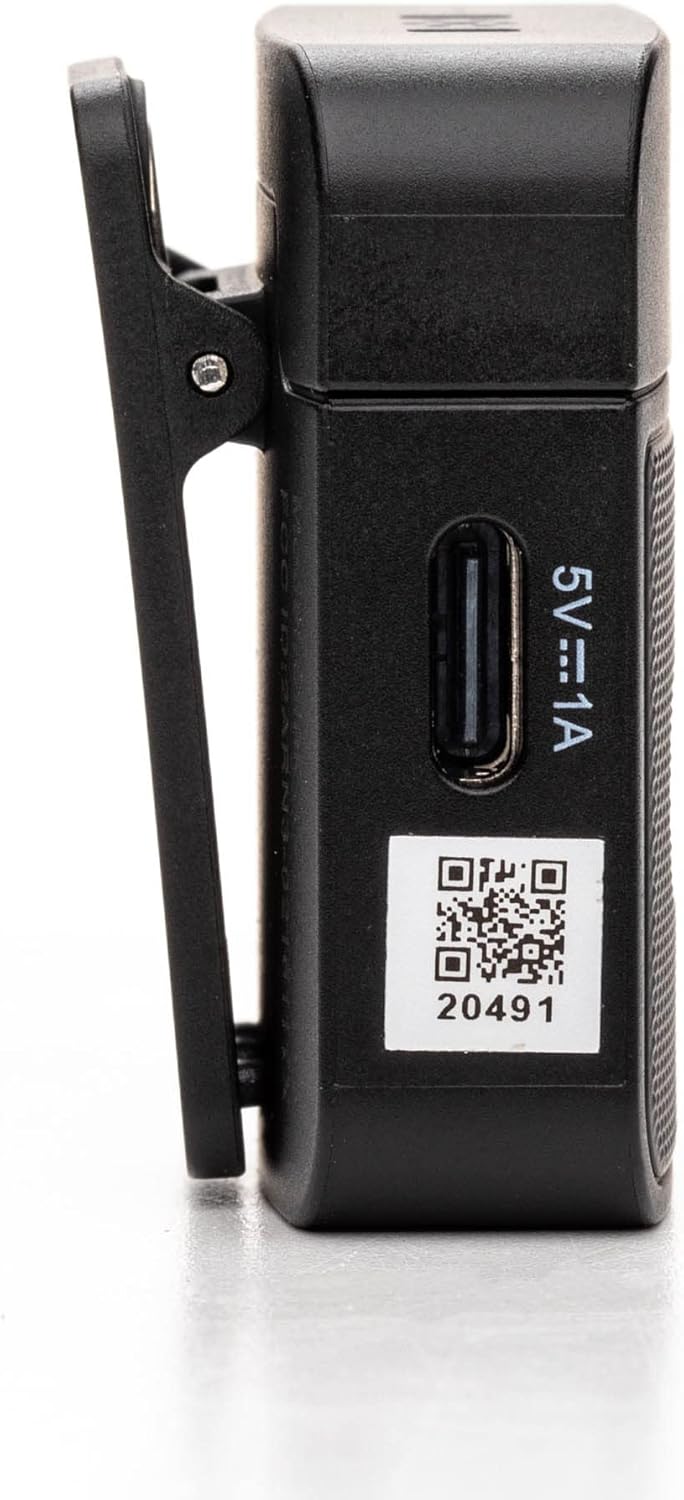
3.2. Blink 100 RXUC USB-C Receiver
- USB-C コネクタ: Plugs directly into your mobile device or computer.
- USB-C Pass-Through Charging Port: Allows simultaneous charging of your mobile device while the receiver is connected.
- ペアリングインジケーター: LED light indicates pairing status.

4. セットアップ
4.1. 送信機の充電
- Connect the supplied USB-C charging cable to the transmitter's USB-C port.
- ケーブルのもう一方の端を USB 電源 (コンピューター、壁のアダプターなど) に接続します。
- The indicator light will show charging status. A full charge provides up to 10 hours of operation.
4.2. 受信機の接続
- Blink 100 RXUC レシーバーをスマートフォン、タブレット、またはコンピューターの USB-C ポートに直接接続します。
- The receiver is battery-free and draws power from your device.

4.3. 自動ペアリング
The Blink 100 system features automatic pairing. Simply power on the transmitter and plug in the receiver. The units will automatically search for and connect to each other, indicated by a solid blue light on both units. The system also automatically switches channels to avoid static and dropouts.
5. 操作手順
5.1. 基本操作
- 電源オン/オフ: Press and hold the power button on the TX transmitter for 2 seconds.
- Wearing the Transmitter: Clip the TX transmitter to your shirt or clothing. For optimal sound, position the microphone approximately 6-8 inches from your mouth.

5.2. ゲインコントロール
使用 + そして - buttons on the TX transmitter to adjust the microphone's input gain. There are 12 steps of gain control to achieve optimal audio levels for different recording environments and speaker volumes.
5.3. アクティブノイズキャンセレーション(NR)
を押す NR button on the TX transmitter to activate or deactivate the active noise cancellation feature. When activated, the system will reduce ambient background noise, providing clearer audio, especially in noisy environments.
5.4. ミュート
を押す ミュート button on the TX transmitter to temporarily mute the microphone. Press it again to unmute.
5.5. Connecting External Audio Sources
The 3.5mm TRS input on the TX transmitter allows you to connect external lavalier microphones, headset microphones, or even line-level audio devices (e.g., music players, mixers) for wireless transmission. Ensure the input mode is correctly set on the transmitter if using a line-level source (refer to advanced settings if available, though the Blink 100 series typically auto-detects mic input).
5.6. Powering Your Mobile Device
The RXUC receiver features a USB-C pass-through charging port. This allows you to charge your mobile device simultaneously while the receiver is connected and in use, ensuring extended recording sessions without draining your device's battery.
5.7. 公式製品ビデオ
6. 仕様
| 特徴 | 仕様 |
|---|---|
| ブランド | サラモニック |
| モデル名 | Wireless Audio Transmission Kit |
| 商品型番 | Saramonic BLINK100 |
| 接続技術 | 2.4GHz |
| コネクタタイプ | USBタイプC |
| 対応デバイス | Personal Computer, Smartphones, Tablets |
| マイクフォームファクター | Handheld (Clip-On) |
| 極性パターン | 全方向 |
| オーディオ感度 | 39デシベル |
| 信号対ノイズ比 | 76デシベル |
| 周波数応答 | 24GHz帯 |
| チャンネル数 | 2 |
| 特集 | バッテリーインジケーターライト、クリップ、ミュート機能、ノイズ低減 |
| 電源 | コード式電気(充電用) |
| バッテリー | 1 個のリチウムポリマー電池が必要 (付属) |
| アイテム重量 | 4.8オンス |
| 製品寸法(長さ x 幅 x 高さ) | 3.74 x 2.32 x 4.69インチ |
| 色 | 黒 |
| ワイヤレス範囲 | 最大164フィート(50メートル)の見通し距離 |
| TXバッテリー駆動時間 | 最大10時間 |
7。 トラブルシューティング
7.1. No Sound or Low Audio Level
- Ensure both the transmitter (TX) and receiver (RXUC) are powered on and successfully paired (solid blue indicator light).
- Check the microphone gain level on the TX transmitter using the +/- buttons. Increase the gain if the audio is too low.
- Verify that the RXUC is securely plugged into your recording device's USB-C port.
- Confirm that your recording application or device settings are configured to use the external microphone input.
- If using an external lavalier, ensure it is properly connected to the TX's 3.5mm TRS input.
7.2. Poor Sound Quality / Interference
- Activate the Noise Reduction (NR) feature on the TX transmitter if recording in a noisy environment.
- Ensure there are no obstructions between the transmitter and receiver, and try to maintain line-of-sight within the 164-foot (50m) range.
- Avoid operating near other 2.4GHz wireless devices (Wi-Fi routers, other wireless mics) that might cause interference.
- Check the furry windscreen is properly installed on the TX's built-in mic when recording outdoors to minimize wind noise.
7.3. ペアリングの問題
- Power cycle both the TX transmitter and RXUC receiver.
- Ensure both units are within close proximity during initial pairing.
- The system is designed for automatic pairing. If issues persist, refer to the full Saramonic support documentation online.
7.4. Device Not Charging via RXUC Pass-Through
- Ensure the charging cable is securely connected to both the RXUC's pass-through port and a working power source.
- Verify that your mobile device supports charging via its USB-C port while an accessory is connected.
8. メンテナンス
- Keep the devices clean using a soft, dry cloth.
- デバイスを極端な温度、湿度、または直射日光にさらさないでください。
- Store the system in the provided carrying pouch when not in use to protect it from dust and damage.
- 保証が無効になるため、デバイスを自分で分解または修理しないでください。
9. 保証とサポート
Saramonic products come with a manufacturer's warranty. For detailed warranty information, product registration, and technical support, please visit the official Saramonic web公式サイトをご覧いただくか、カスタマーサービスまでお問い合わせください。保証請求の際は、購入証明としてレシートを保管してください。
さらに詳しいサポートが必要な場合は、 AmazonのSaramonicストア.