
導入
Thank you for choosing the iTOMA CKS213 Digital Alarm Clock. This manual provides detailed instructions for setting up, operating, and maintaining your new alarm clock. Please read this manual thoroughly before use to ensure proper function and to maximize your user experience.
安全情報
- ユニットを極端な温度、直射日光、ほこり、または湿気にさらさないでください。
- Ensure the power adapter is connected to an easily accessible outlet.
- 付属の電源アダプターのみを使用してください。非対応のアダプターを使用すると、デバイスが損傷し、保証が無効になる可能性があります。
- デバイスを水やその他の液体から遠ざけてください。
- 分解や改造は絶対に行わないでください。損傷や怪我の原因となる可能性があります。
- The backup battery is for memory retention only; the clock requires main power for full operation.
パッケージ内容
パッケージに以下の項目が含まれているか確認してください。
- iTOMA CKS213 Digital Alarm Clock
- 電源アダプター(60インチケーブル)
- CR2032 Backup Battery (pre-installed or included)
- ユーザーマニュアル(このドキュメント)
製品終了view
Familiarize yourself with the various features and controls of your iTOMA CKS213 Digital Alarm Clock.

設定
1. 電源接続
Connect the provided power adapter to the DC input port on the back of the alarm clock, then plug the adapter into a standard wall outlet. The clock display will illuminate.
2. Installing Backup Battery
The clock includes a pre-installed CR2032 battery for backup. This battery preserves time and alarm settings during a power outage. The clock will not operate on battery power alone; it requires main power for the display and alarm functions.
3. 初期時間設定
Upon initial power connection, the clock may automatically set the time. If manual adjustment is needed, press and hold the 'CLOCK' button located on the top of the unit. Use the 'SETTING+' and 'SETTING-' buttons to adjust the hour and minute. Press 'CLOCK' again to confirm.
4. 12/24時間形式
To switch between 12-hour and 24-hour time formats, press the '12/24H' button (often integrated with 'CLOCK' or 'SETTING' buttons, refer to the top panel diagram on your device). In 12-hour format, 'AM' or 'PM' indicators will be displayed.
操作手順
1. Setting Dual Alarms (AL1 & AL2)
The iTOMA CKS213 features two independent alarms. Follow these steps to set an alarm:
- Press and hold the 'AL1' or 'AL2' button to enter alarm setting mode. The hour display will flash.
- Use the 'SETTING+' and 'SETTING-' buttons to adjust the desired alarm hour.
- Press 'AL1' or 'AL2' again to confirm the hour and move to minute adjustment. The minute display will flash.
- Use the 'SETTING+' and 'SETTING-' buttons to adjust the desired alarm minute.
- Press 'AL1' or 'AL2' again to confirm the minute and select the alarm mode.
- Use 'SETTING+' or 'SETTING-' to cycle through the 4 alarm modes:
- ALL-7-DAY: 毎日アラームが鳴ります。
- 平日: アラームは月曜日から金曜日まで鳴ります。
- WEEKEND: 土曜日と日曜日にアラームが鳴ります。
- SINGLE DAY: Alarm sounds only on the selected day.
- Press 'AL1' or 'AL2' one last time to save the alarm settings and activate the alarm. An alarm icon will appear on the display.

2. スヌーズ機能
When an alarm sounds, press the large 'SNOOZE' button on the top of the clock to temporarily silence the alarm for 9 minutes. You can repeat this up to 6 times. To turn off the alarm completely, press the 'AL1 OFF' or 'AL2 OFF' button.

3. Display Brightness and Automatic Dimmer
The clock features a 0.9-inch orange LED display with adjustable brightness. You can manually set the brightness or enable the automatic dimmer function.
- 手動明るさ: Press the 'DIMMER' button repeatedly to cycle through 3 brightness levels (High, Medium, Low).
- 自動調光器: The built-in sensor automatically adjusts the display brightness based on ambient light conditions in the room. This feature ensures the display is not too bright in a dark room or too dim in a well-lit environment.

4. 夜間照明操作
The clock includes a 2-level orange night light. To activate or adjust the night light, locate the 'NIGHT LED' button (or similar) on the top panel and press it to cycle through the brightness levels or turn it off.
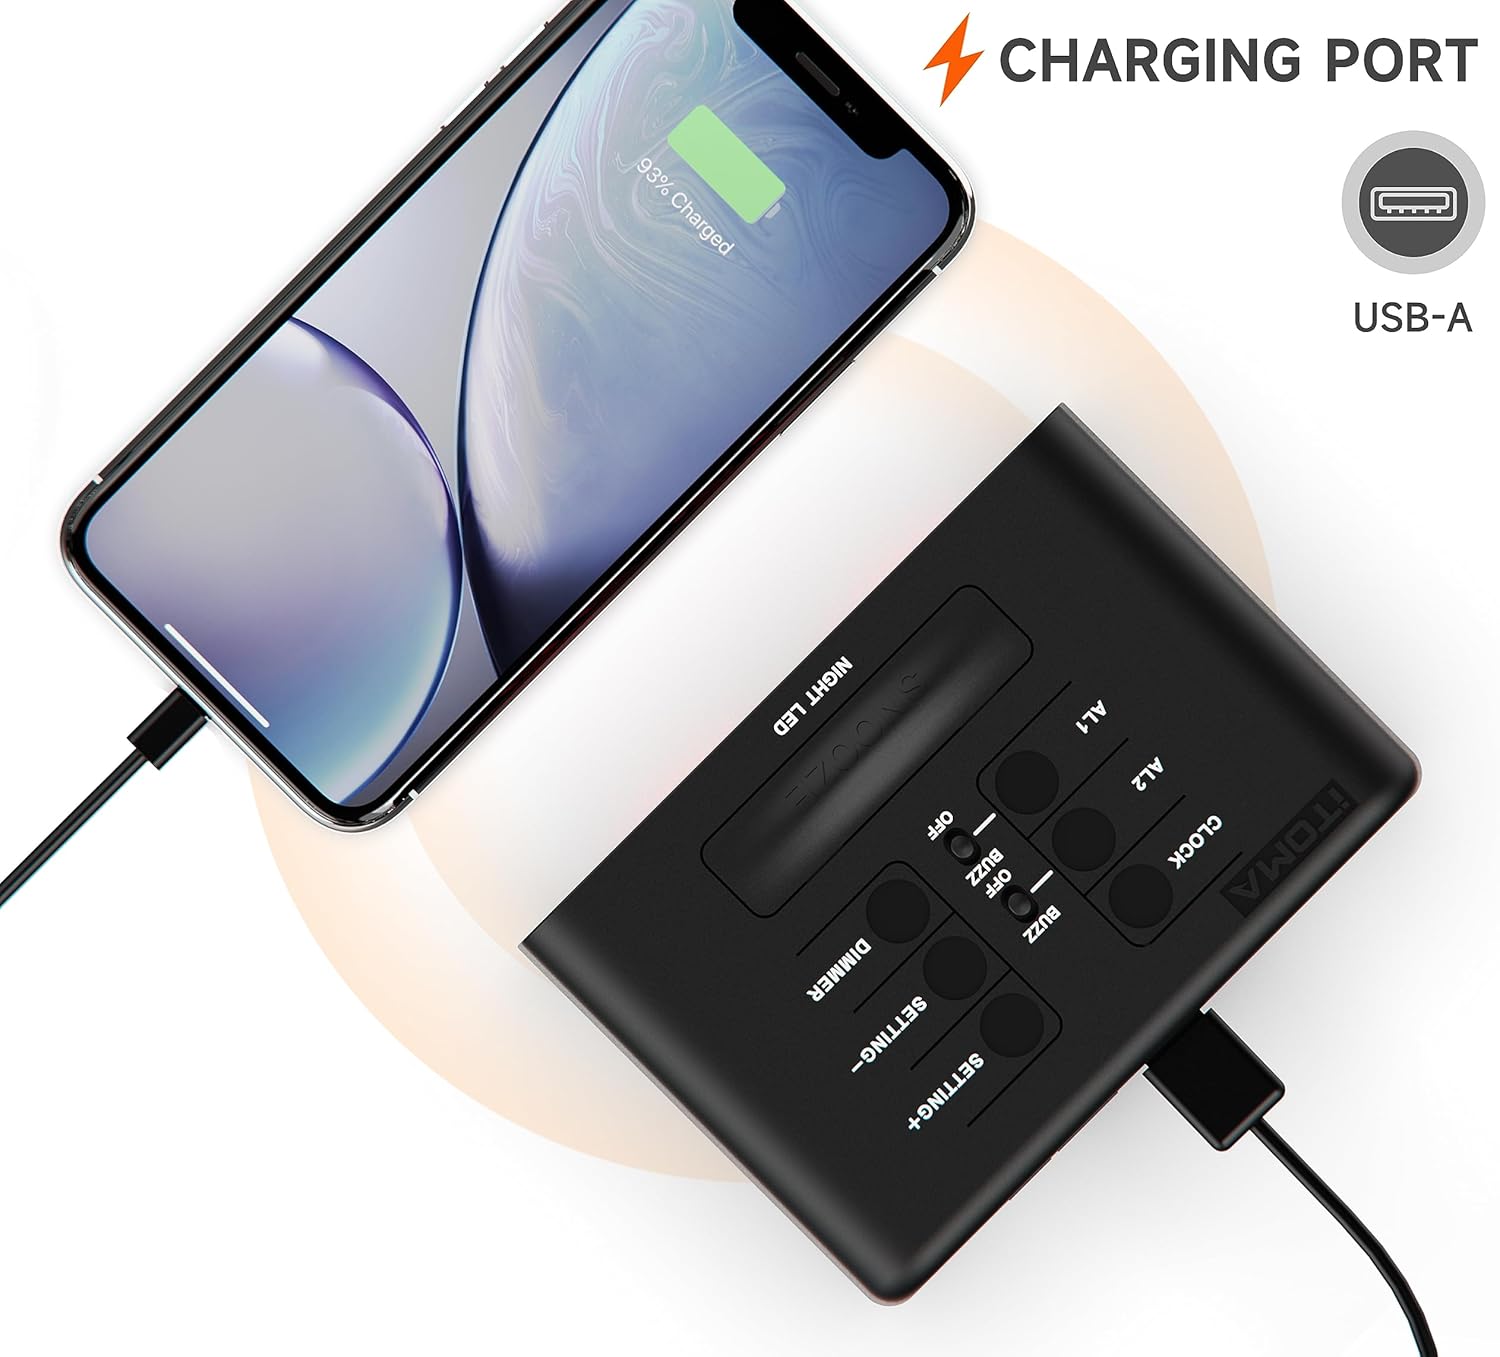
5.USB充電ポート
A USB-A charging port is located on the back of the unit. You can use this port to charge your smartphone or other mobile devices. Connect your device's USB charging cable to this port. The output is typically 1A.
メンテナンス
- クリーニング: 時計は柔らかく乾いた布で拭いてください。研磨剤入りの洗剤や溶剤は使用しないでください。
- バッテリー交換: If the backup battery needs replacement, open the battery compartment on the bottom of the unit and replace the CR2032 battery with a new one, observing polarity.
トラブルシューティング
| 問題 | 解決 |
|---|---|
| 時計の表示が空白です。 | Ensure the power adapter is securely connected to both the clock and a working wall outlet. Check if the outlet has power. |
| アラームは鳴りません。 | Verify that the alarm is activated (alarm icon visible). Check the alarm time and ensure it is set correctly for the desired day(s) of the week. |
| USB充電ポートが機能しません。 | Ensure the clock is powered by the main adapter. Check the USB cable and the device being charged. The port is for charging only, not data transfer. |
| Time or settings reset after power outage. | The CR2032 backup battery may be depleted and needs replacement. |
仕様
| 特徴 | 詳細 |
|---|---|
| モデル番号 | CKS213 |
| 表示タイプ | 0.9" Orange LED Digital Display |
| 時刻形式 | 12/24時間選択可能 |
| アラーム | Dual Alarms with 4 Modes (7-Day, Weekday, Weekend, Single Day) |
| スヌーズ時間 | 9 Minutes (up to 6 times) |
| 明るさコントロール | 3 Manual Levels & Automatic Dimmer |
| ナイトライト | 2-Level Orange Night Light |
| USB充電ポート | USB-A (Output: 1A) |
| 電源 | AC電源アダプター |
| バックアップバッテリー | 1 x CR2032(付属) |
| 製品寸法(長さ x 幅 x 高さ) | 8.2 x 3.81 x 6.2 cm(3.23 x 1.5 x 2.44インチ) |
| アイテム重量 | 280グラム |
| 材料 | アクリロニトリルブタジエンスチレン(ABS) |

保証とサポート
iTOMA products are designed for reliability and performance. For any questions, concerns, or technical support regarding your CKS213 Digital Alarm Clock, please refer to the contact information provided with your purchase or visit the official iTOMA webサイトでご確認ください。保証請求のために購入証明書を保管してください。