1. はじめに
This manual provides instructions for the assembly, operation, and maintenance of your kleankin Bathroom Under-Sink Cabinet. Please read this manual thoroughly before assembly and use to ensure proper installation and safe operation. Keep this manual for future reference.

Image 1.1: The kleankin Bathroom Under-Sink Cabinet in a typical bathroom setting.
2. 安全に関する注意事項
- 組み立てが必要: This product requires assembly. Please follow all assembly instructions carefully.
- Prevent Injury: Exercise caution during assembly to avoid personal injury or damage to the product.
- 重量容量: キャビネット全体の最大重量は 40 kg、棚あたりは 5 kg を超えないようにしてください。
- 安定した配置: 転倒を防止するために、キャビネットが平らで安定した面に設置されていることを確認してください。
- 水への露出: While the material is resistant, avoid prolonged exposure to excessive water to maintain product integrity. Wipe spills immediately.
- 子どもの安全: 組み立て中は、小さな部品や梱包材を子供の手の届かないところに保管してください。
3. パッケージ内容
組み立てを始める前に、下記のすべての部品が揃っていて、損傷がないことを確認してください。部品が不足または損傷している場合は、カスタマーサポートまでご連絡ください。

Image 3.1: The product is delivered in one package.
パッケージには次のものが含まれている必要があります。
- 1 x kleankin Bathroom Under-Sink Cabinet (unassembled components)
- 1 x Adjustable Interior Shelf
- Assembly Hardware (screws, dowels, hinges, handles, magnetic catches)
- 組み立て手順(このマニュアル)
4. 組み立て手順
Follow these steps carefully for proper assembly. A Phillips head screwdriver and possibly a hammer may be required (not included).
4.1. 場所の準備
Clear a spacious, clean, and flat area for assembly. Lay out all components and hardware. Identify each part using the provided diagrams (if any are included separately).
4.2. キャビネットフレームの組み立て
Connect the side panels to the bottom and top panels using the provided hardware. Ensure all connections are secure. The cabinet features elevated feet for stability and moisture protection.
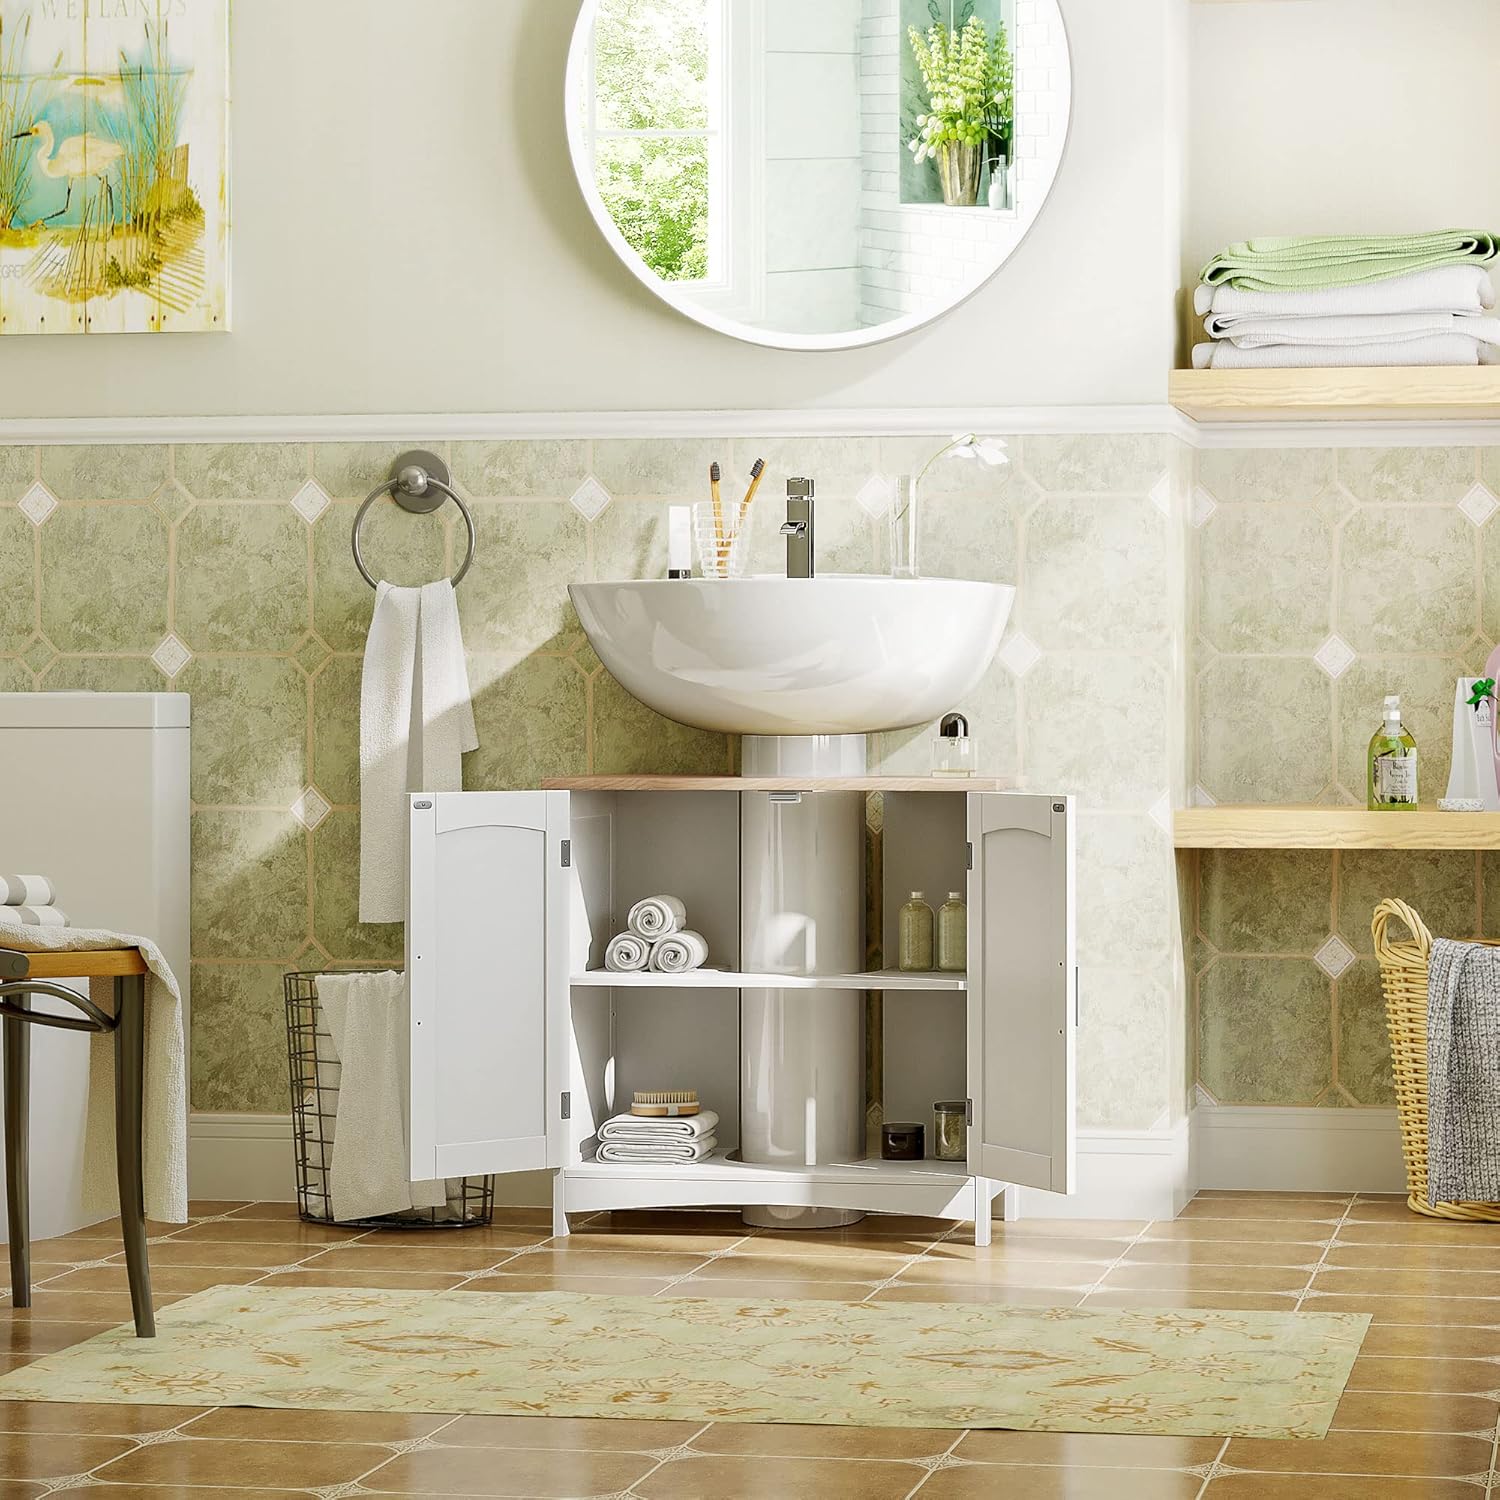
Image 4.1: Detail of aluminum alloy handles and elevated feet.
4.3. Install the Back Panel and U-Shaped Cutout
Attach the back panel. The top panel includes a 20 x 20 cm U-shaped cutout designed to accommodate sink plumbing. Ensure this cutout aligns with your sink's pipes during placement.
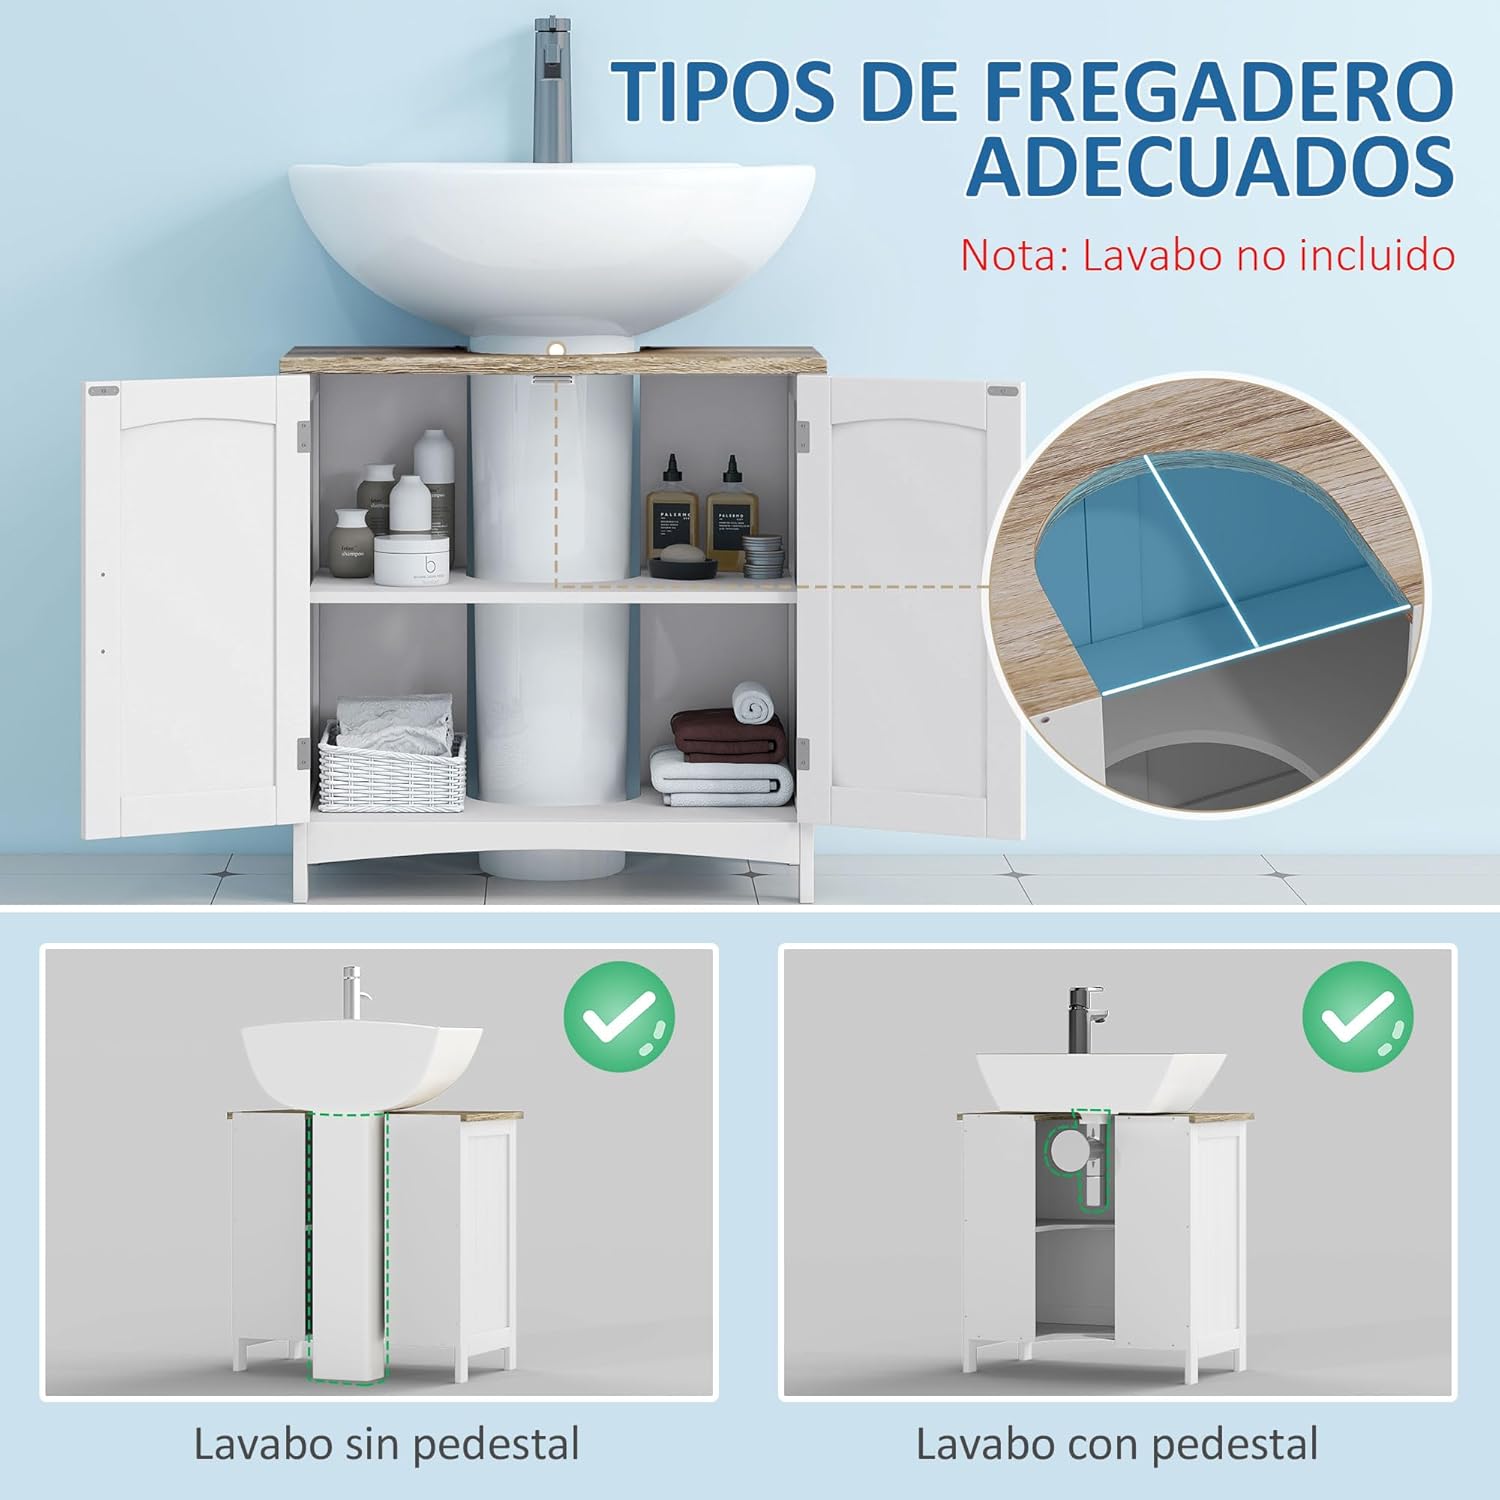
Image 4.2: Sink compatibility diagram, highlighting the U-shaped cutout for plumbing.
4.4. Install the Adjustable Shelf
Insert the shelf support pins into the desired holes on the side panels. Place the adjustable shelf on these pins. The shelf can be positioned at different heights to suit your storage needs.

Image 4.3: Adjustable shelf mechanism with multiple height options.
4.5. Attach the Doors
Mount the hinges to the cabinet doors and then attach the doors to the cabinet frame. Ensure the doors open and close smoothly. Install the aluminum alloy handles and magnetic catches.

Image 4.4: Detail of a door hinge.

Image 4.5: Detail of the magnetic catch.
4.6. 最終順位
Carefully position the assembled cabinet under your sink, ensuring the U-shaped cutout correctly accommodates the plumbing. Verify the cabinet is level and stable.
5. 操作手順(使用方法)
Your kleankin under-sink cabinet is designed for convenient bathroom storage.
- ストレージ: Use the interior compartments to store towels, toiletries, cleaning supplies, and other bathroom essentials.
- 調節可能な棚: To adjust the shelf height, remove items from the shelf, lift the shelf, reposition the support pins to the desired height, and then place the shelf back on the pins.
- ドア操作: The doors are equipped with aluminum alloy handles for easy opening and magnetic catches to keep them securely closed.

Image 5.1: Interior storage capacity with items.
6. メンテナンス
- クリーニング: キャビネットの表面を柔らかくて乾いた布で拭いてください。amp 布。 仕上げを損傷する可能性がある研磨剤入りのクリーナーや刺激の強い化学薬品は避けてください。
- こぼれ: Immediately wipe up any water spills or moisture to prevent damage to the engineered wood material.
- ハードウェアチェック: すべてのネジと接続部がしっかりと締まっているか定期的に確認してください。必要に応じて締め直してください。
- 換気: 時間の経過とともに木製品に影響を及ぼす可能性のある湿度を最小限に抑えるため、浴室では適切な換気を確保してください。
7。 トラブルシューティング
- ぐらぐらする内閣: Ensure the cabinet is placed on a level surface. Check all assembly screws and tighten any loose ones.
- ドアが正しく閉まらない: Check hinge alignment. Adjust hinges if needed. Ensure magnetic catches are properly installed and aligned.
- 棚が安定しない: Verify that the shelf support pins are fully inserted into the holes and that the shelf is resting evenly on all pins.
8. 仕様

図8.1: 製品寸法view.
| ブランド | クリーンキン |
| モデル番号 | 834-356ND |
| 色 | 白 |
| 材料 | エンジニアードウッド(MDF) |
| 全体寸法(L x D x H) | 60 x 33 x 60 cm |
| U-Shaped Cutout Dimensions | 20 x 20 cm |
| Suitable Sink Dimensions (L x D) | 最大50×20cm |
| Max Weight Capacity (Total) | 40キロ |
| 最大重量容量(棚) | 5キロ |
| ドアの数 | 2 |
| 調節可能な棚の数 | 1 (creating 2 compartments) |
| ストレージ容量 | 79リットル |
| 床からのクリアランス | 1.5インチ(約3.8cm) |
| 組み立てが必要 | はい |
| 特集 | Sturdy, Water-resistant, Modern, Adjustable, Stable |
9. 保証とサポート
保証情報やカスタマーサポートについては、販売店のポリシーを参照するか、メーカーに直接お問い合わせください。保証請求の際に必要となるため、購入証明書を保管してください。