1. はじめに
This manual provides detailed instructions for the installation, operation, and maintenance of your XENOCAM A6504LME-5 4-Channel 5M-N/1080N Hybrid Digital Video Recorder (DVR). This DVR is a versatile 5-in-1 system compatible with AHD, TVI, CVI, analog, and IP cameras, offering advanced H.265 video compression for efficient surveillance. Please read this manual thoroughly before using the device to ensure proper setup and functionality.
2 製品の特徴
- 5-in-1 Hybrid Compatibility: Supports CVBS 5MP/4MP/1080P AHD, 1MP/2MP TVI, 1MP/2MP CVI, IP, and 960H cameras.
- 高解像度ビデオ: Supports 5M-N/1080N resolution (1280x1920) for clear video capture.
- 高度なH.265圧縮: Provides smoother video recordings and optimizes hard drive storage space.
- 複数のビデオ出力: Equipped with HDMI and VGA ports, supporting up to 1080p output.
- P2Pリモートアクセス: View live or playback video remotely via the XMeye app on Android and iOS devices by scanning a QR code.
- 動きの検出とアラート: Configurable motion detection zones with instant email and app notifications.
- 柔軟な録画モード: Manual, alarm, motion detection, and scheduled recording options.
- Multiple Backup Options: Network, USB portable HDD, and USB DVD-RW.
3. パッケージ内容
以下にリストされているすべてのアイテムがパッケージに含まれていることを確認してください。
- 1 x XENOCAM 4-Channel 5MP-N Digital Video Recorder (HDD not included)
- 電源アダプター x 1
- 1 x USBマウス
- ユーザーマニュアル x 1
- Mounting Screws for HDD (typically included)
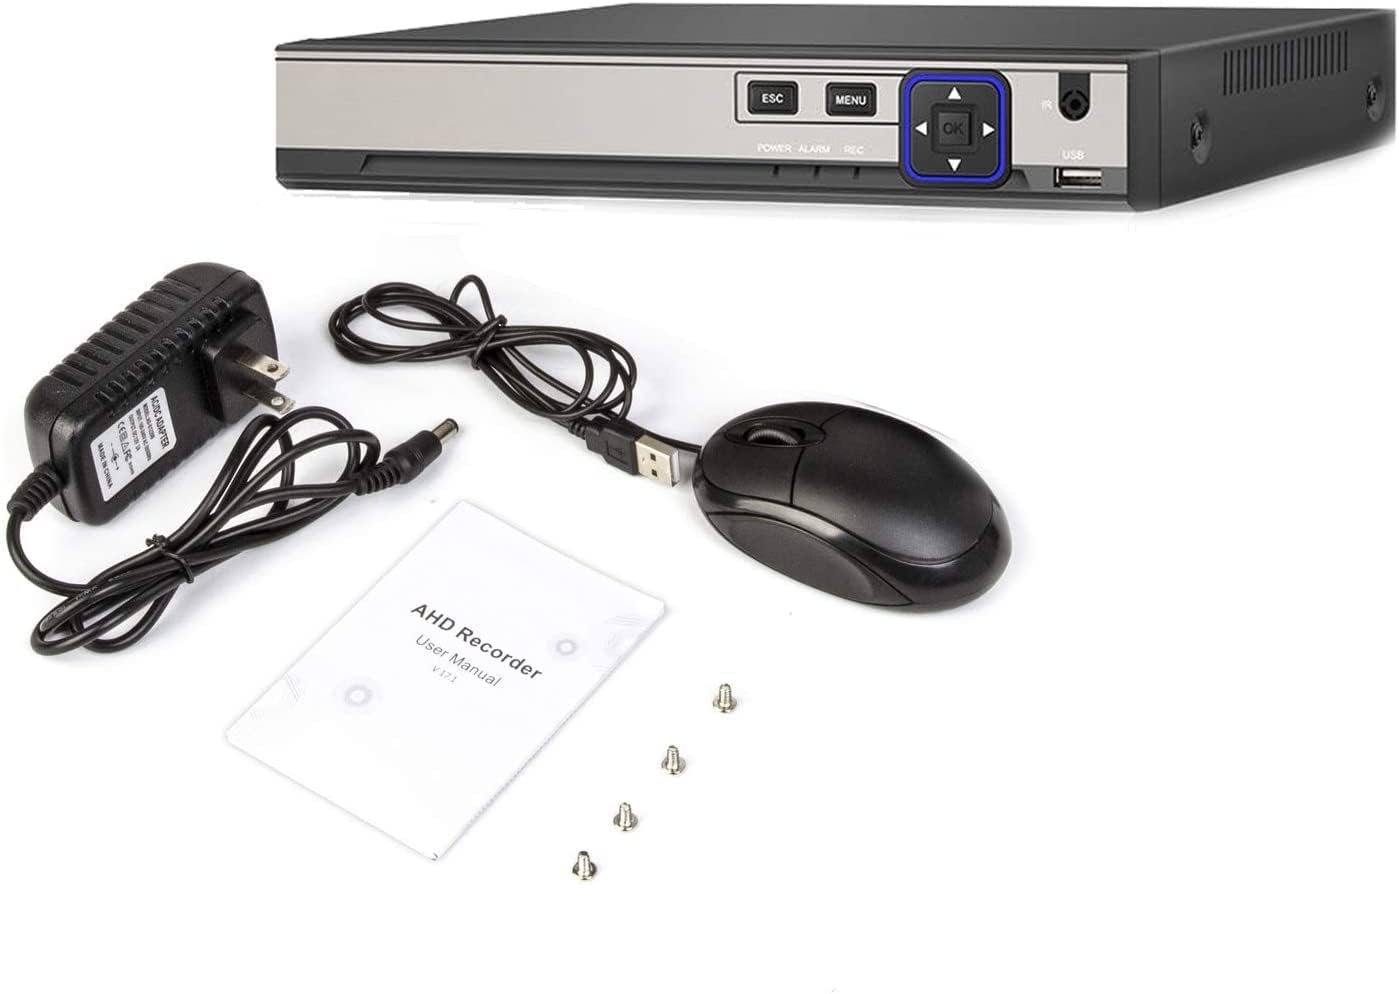
Image: The XENOCAM A6504LME-5 DVR unit shown with its power adapter, USB mouse, user manual, and mounting screws.
4. セットアップ
4.1 ハードウェアのインストール
- Install Hard Drive (HDD): DVR cを開くasing. Connect a SATA hard drive (up to 6TB, not included) to the internal SATA power and data cables. Secure the HDD using the provided screws.
- カメラを接続する: Connect your AHD, TVI, CVI, or analog cameras to the BNC video input ports on the rear panel. For IP cameras, ensure they are on the same network as the DVR.
- ディスプレイを接続する: モニターを DVR の HDMI または VGA 出力ポートに接続します。
- マウスを接続する: USB マウスを DVR の USB ポートの 1 つに接続します。
- ネットワークを接続: For remote access and network features, connect an Ethernet cable from the DVR's RJ-45 port to your router or network switch.
- 接続電源: Plug the power adapter into the DVR's power input and then into an electrical outlet.

画像: 前面と背面 views of the XENOCAM A6504LME-5 DVR, showing control buttons, USB ports, BNC video inputs, HDMI/VGA outputs, and network port.
4.2 初期電源投入と設定
- Power on the DVR. The system will boot up and display on the connected monitor.
- Upon first boot, you will be prompted to set a password for the default 'Admin' user. This is crucial for system security.
- Follow the on-screen wizard to configure basic settings such as date, time, network settings, and video output resolution.
- Format the installed hard drive through the system settings menu to ensure it is ready for recording.
5. 操作手順
5.1メニューナビゲーション
Use the connected USB mouse to navigate the DVR's graphical user interface (GUI). Right-click to access the main menu, and use the left-click to select options and confirm settings. The front panel buttons (ESC, MENU, OK, directional arrows) can also be used for navigation.
5.2 録音モード
DVR はさまざまな録画モードをサポートしています。
- 手動録音: 録画を手動で開始および停止します。
- スケジュールされた記録: 連続録画の特定の時間を設定します。
- 動き検出記録: カメラの動きが検知されたときのみ録画します view.
- アラーム記録: 外部アラーム入力がトリガーされたときに記録します。
Configure these settings in the 'Record' section of the main menu.
5.3 再生
記録された foo にアクセスするtage through the 'Playback' option in the main menu. You can search by date, time, and event type (e.g., motion detection). Use the on-screen controls to play, pause, fast forward, and rewind.
5.4 バックアップ手順
重要なfooをバックアップするtage:
- USB バックアップ: Connect a USB flash drive or external hard drive to a USB port. Select the desired footage in the 'Backup' menu and transfer it to the USB device.
- ネットワークバックアップ: フーtage can be downloaded to a PC via the network using the CMS/VMS software.
- USB DVD-RW: Connect a compatible USB DVD-RW drive for burning footage to discs.
6. リモートアクセス(P2P)
6.1 モバイルアプリのインストール
To access your DVR remotely, download the 'XMeye' app on your smartphone or tablet (Android/iOS).
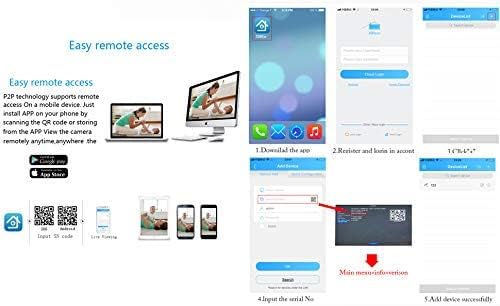
Image: Visual guide for downloading the XMeye app and the steps involved in registering an account and adding a device using a QR code.
6.2 デバイスのペアリング
- DVR がインターネットに接続されていることを確認してください。
- Open the XMeye app and register a new account or log in.
- Select 'Add Device' and choose the option to scan a QR code.
- Locate the unique QR code on your DVR (usually found in the network settings or device info menu) and scan it with the app.
- Follow the prompts to add the device. Once successfully added, you can view live feeds and playback recordings from your mobile device.
7. 動きの検出とアラート
7.1 モーション検出の設定
To set up motion detection:
- Navigate to the 'Alarm' or 'Motion Detection' settings in the main menu.
- 設定するカメラ チャネルを選択します。
- Define the motion detection area by drawing a grid on the camera's view. You can customize sensitivity levels.
- Enable motion detection recording for the selected channel.

Image: Illustration showing how motion detection triggers recording, with a timestamp indicating the start of recording upon detecting movement.
7.2 Setting Up Alerts
Once motion detection is configured, you can set up alerts:
- 電子メールアラート: Enter your email address and SMTP server details in the network settings to receive email notifications with snapshots when motion is detected.
- アプリのプッシュ通知: Ensure push notifications are enabled for the XMeye app on your mobile device to receive instant alerts.
8. メンテナンス
- 定期清掃: DVRを埃から守ってください。外装の清掃には、柔らかく乾いた布を使用してください。液体洗剤は使用しないでください。
- ファームウェアの更新: 定期的にメーカーの web最適なパフォーマンスとセキュリティを確保するため、ファームウェアのアップデートについては、こちらのサイトをご覧ください。アップデート手順をよく読んでください。
- ハードドライブの健全性: Monitor the health of your hard drive through the DVR's system information. Replace the HDD if signs of failure appear.
- パスワードのセキュリティ: Regularly change your DVR's password and use strong, unique combinations to prevent unauthorized access.
9。 トラブルシューティング
| 問題 | 考えられる原因 | 解決 |
|---|---|---|
| モニターに何も表示されない | ケーブル接続が緩んでいる、ビデオ出力設定が正しくない、モニターに問題がある。 | HDMI/VGAケーブルの接続を確認してください。モニターの電源がオンになっており、正しい入力に設定されていることを確認してください。別のモニターまたはケーブルをお試しください。 |
| 録音なし | No HDD installed, HDD not formatted, recording schedule not set, motion detection not configured. | Install and format an HDD. Check recording schedules and motion detection settings. |
| リモートアクセスできません | DVR がネットワークに接続されていない、ネットワーク設定が正しくない、アプリが正しく構成されていない。 | Ensure Ethernet cable is connected. Verify network settings (DHCP/Static IP). Re-add device in XMeye app. Check router firewall settings. |
| パスワードをお忘れですか | パスワードを忘れました。 | Contact XENOCAM support for password reset procedures. Do not attempt unauthorized resets. |
| IP Camera not detected | IP camera not ONVIF compatible, incorrect network settings, camera not powered. | Ensure IP camera is ONVIF compliant. Verify camera and DVR are on the same network segment. Check camera power. |
10. 仕様
| 特徴 | 詳細 |
|---|---|
| モデル番号 | A6504LME-5 |
| ビデオ入力 | 4チャンネルBNC入力 |
| ビデオ出力 | HDMI, VGA (up to 1080p) |
| オーディオ入力/出力 | 1-channel RCA input / 1-channel RCA output |
| ビデオ圧縮 | 265 形式 |
| 前view 解決 | 4x5M-N@12fps (6-in-1); 4x4M-N@15fps (6-in-1); 8x1080p (6-in-1) |
| 録画解像度 | 4x5M-N@8fps (6-in-1); 4x4M-N@8fps (6-in-1); 8x1080p@15fps (6-in-1) |
| 再生解像度 | 2x5M-N@8fps (6-in-1); 4x4M-N@8fps (6-in-1); 4x1080p@15fps (6-in-1) |
| HDDインターフェース | 1 SATA port (supports up to 6TB HDD) |
| ネットワーク·インタフェース | 1 x RJ-45 10M/100Mbps Ethernet port |
| USBインターフェース | USB 2 ポート x 2.0 |
| DVR Input Modes | DVR Mode: 4x5M-N; 4x1080p Hybrid Mode: 2ch 1080p AHD + 2ch 1080p IP NVR Mode: 8x1080p; 4x5M |
| 対応デバイス | Smartphone, Tablet (for remote viewing) |
| PCソフトウェア | CMS, VMS |
| IP Camera Compatibility | ONVIF only |

Image: Diagram illustrating the efficiency of H.265 compression compared to normal compression, showing clearer image quality with less bandwidth usage.
11. 保証情報
Warranty terms and conditions for the XENOCAM A6504LME-5 DVR are subject to the policies of the retailer and manufacturer at the time of purchase. Please refer to your purchase documentation or contact your seller for specific warranty details. Keep your proof of purchase for any warranty claims.
12. サポート
For technical assistance, troubleshooting beyond this manual, or inquiries regarding your XENOCAM A6504LME-5 DVR, please contact the seller or manufacturer directly. Refer to the contact information provided with your product packaging or on the official XENOCAM webサイト。