
Blackmagic Design CINECAMPOCHDEF6K2
Blackmagic Design Pocket Cinema Camera 6K G2 取扱説明書
Model: CINECAMPOCHDEF6K2
1. はじめに
This manual provides essential information for the setup, operation, and maintenance of your Blackmagic Design Pocket Cinema Camera 6K G2. Please read this manual thoroughly before using the camera to ensure proper handling and optimal performance. This camera is designed for professional digital film production, offering advanced features for high-quality video capture.
2. 安全情報
- 電源: Use only the specified power supply and battery. Incorrect power sources can damage the camera or cause fire.
- 水と湿気: Do not expose the camera to water or high humidity. This camera is not waterproof.
- 温度: カメラは推奨温度範囲(通常0℃~40℃ / 32°F~104°F)内でご使用ください。極端な高温や低温は避けてください。
- 取り扱い: カメラは丁寧に取り扱ってください。落としたり、強い衝撃を与えたりしないでください。
- レンズアタッチメント: Always ensure the camera is powered off when attaching or detaching lenses to prevent damage to the sensor or lens mount.
- クリーニング: Use a soft, dry cloth for cleaning. For the sensor, use specialized cleaning kits and follow manufacturer guidelines.
3. パッケージ内容
パッケージにすべてのアイテムが含まれていることを確認します。
- Blackmagic Design Pocket Cinema Camera 6K G2 Body
- DaVinci Resolve Studio Activation Key
- Lens Turret Dust Cap
- カメラストラップ
- 30W Power Supply with Locking Connector and International Adapters
- NP-F570 バッテリー
- NP-F Series Battery USB Charger
4.カメラオーバーview
The Blackmagic Design Pocket Cinema Camera 6K G2 features a compact design with a Super 35 sensor and an active EF/EF-S lens mount. It includes a large, bright adjustable tilt 5-inch LCD display for monitoring and menu navigation.

図4.1: 斜めの前面 view of the Blackmagic Design Pocket Cinema Camera 6K G2, showing the lens mount and grip.

図4.2: 前面 view of the camera, highlighting the EF/EF-S lens mount and Super 35 sensor.
4.1. Connections and Ports
The camera offers various connectivity options for audio, video output, and data transfer.

図4.3:詳細 view of the camera's side panel, showing various input/output ports.
- マイク入力: Connect consumer microphones or a timecode master clock.
- 3.5mmヘッドフォン出力: Supports consumer headphones for audio monitoring.
- Full Size HDMI Connector: Outputs 1080p up to 60fps as clean feed or with camera data.
- USB Expansion Port (USB-C): For recording to external SSD storage or connecting focus demands.
- 12V DC電源: Main power supply input or for external batteries.
- XLR Audio Connection: Two professional balanced Mini XLR audio inputs with phantom power support.

図4.4:側面 view of the camera, illustrating the arrangement of the various ports.
4.2. Rear Panel and Controls
The rear panel features the tilting LCD touchscreen and essential control buttons.

図4.5:背面 view of the camera displaying the menu interface on the 5-inch LCD screen.

図4.6: 角度付き後部 view showing the camera's LCD screen tilted for flexible view角度を変える。
5. セットアップ
5.1. バッテリーの取り付けと充電
- カメラの下部にある電池ケースのカバーを開きます。
- Insert the NP-F570 battery, ensuring correct orientation. Close the cover securely.
- To charge, connect the included NP-F series battery USB charger to a power source and attach the battery. Alternatively, connect the camera to the 30W power supply with the battery installed.
5.2. レンズアタッチメント
- カメラの電源がオフになっていることを確認してください。
- Remove the lens turret dust cap from the camera body and the rear cap from your EF/EF-S compatible lens.
- Align the red or white index mark on the lens with the corresponding mark on the camera's lens mount.
- レンズをマウントにゆっくりと挿入し、カチッと音がするまで時計回りに回します。
5.3. Media Card Insertion
The camera supports SD/UHS-II and CFast 2.0 cards, as well as external SSDs via USB-C.
- Locate the SD card slot and CFast 2.0 card slot on the camera body.
- Insert the appropriate card into its slot until it clicks. Ensure the card is correctly oriented.
- For external SSD recording, connect a compatible SSD to the USB-C port.
5.4.電源のオン/オフ
Press and hold the power button located on the top of the camera until the screen illuminates or turns off.
6. カメラの操作
6.1. 基本的な録音
To begin recording, press the red record button on the top of the camera. Press it again to stop recording.

Figure 6.1: Camera menu displaying recording settings such as project frame rate and preferred media.
- Frame Rates and Resolution: Navigate the menu on the LCD to select desired frame rates (e.g., 24 fps, 60 fps) and resolutions (up to 6K).
- File フォーマット: The camera supports industry-standard formats like Apple ProRes (up to 4K) and 12-bit Blackmagic RAW. Select your preferred format in the recording settings.
6.2. Focusing and Exposure
- 集中: Use the lens's manual focus ring or electronic focus controls if available. The LCD offers focus assist tools.
- ISO: Adjust the dual gain ISO up to 25,600 to manage sensitivity in various lighting conditions.
- Aperture and Shutter Speed: Control these settings via the camera's physical dials or the touchscreen interface to achieve desired exposure and depth of field.
6.3.オーディオ録音
The camera includes a built-in stereo microphone. For professional audio, utilize the mini XLR or 3.5mm inputs for external microphones.
6.4. 監視
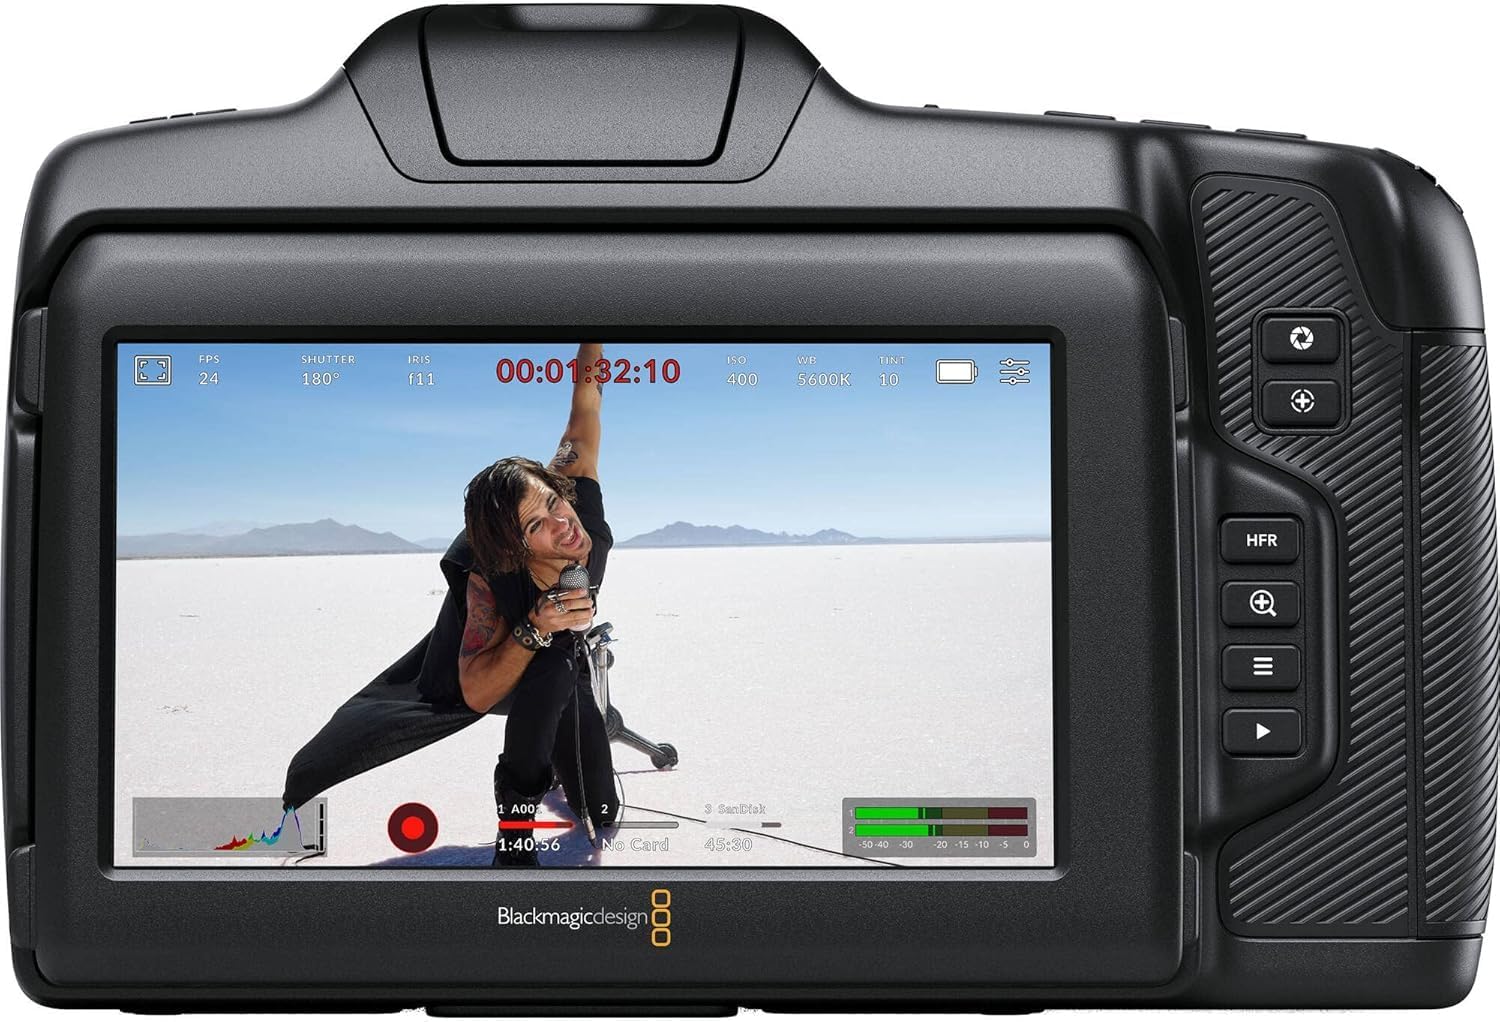
図6.2:背面 view of the camera displaying live footage with overlays on the LCD screen.
5インチのLCDディスプレイは鮮明な view あなたの食べ物のtage and camera settings. It can be tilted for better viewing angles. An external monitor can be connected via the HDMI port.

Figure 6.3: The camera's tilting LCD screen in an operational setup, demonstrating its flexibility.
6.5. DaVinci Resolve Studio
Your camera includes an activation key for DaVinci Resolve Studio. This software is a comprehensive solution for editing, color correction, visual effects, and audio post-production. Install and activate it on your computer to process your Blackmagic RAW and ProRes footage.
7. メンテナンス
7.1. 清掃
- カメラ本体: Wipe with a soft, dry, lint-free cloth. Do not use harsh chemicals or solvents.
- レンズ: Use a lens brush or air blower to remove dust, then gently clean with a lens cleaning solution and microfiber cloth.
- センサー: Sensor cleaning should be performed with extreme care using a specialized sensor cleaning kit. If unsure, consult a professional.
7.2. ファームウェアのアップデート
定期的にBlackmagic Designをチェックしてください website for firmware updates. Updates can improve performance, add features, and fix bugs. Follow the instructions provided by Blackmagic Design carefully during the update process.
7.3. ストレージ
When not in use, store the camera in a cool, dry place, away from direct sunlight and extreme temperatures. Use a protective case to prevent dust and physical damage.
8。 トラブルシューティング
| 問題 | 考えられる原因 | 解決 |
|---|---|---|
| カメラの電源が入らない | Battery depleted or incorrectly installed; power cable loose. | Charge battery, ensure correct installation. Check power cable connection. |
| 録画が突然停止する | Media card full or too slow; battery low. | Use a faster card (UHS-II, CFast 2.0), free up space, or replace/charge battery. |
| 画質が悪い | Incorrect exposure settings; dirty lens/sensor. | Adjust ISO, aperture, shutter speed. Clean lens or sensor. |
| 音声録音なし | Microphone not connected or configured correctly; audio levels too low. | Check microphone connections and camera audio settings. Adjust input levels. |
9. 仕様
Key technical specifications for the Blackmagic Design Pocket Cinema Camera 6K G2:
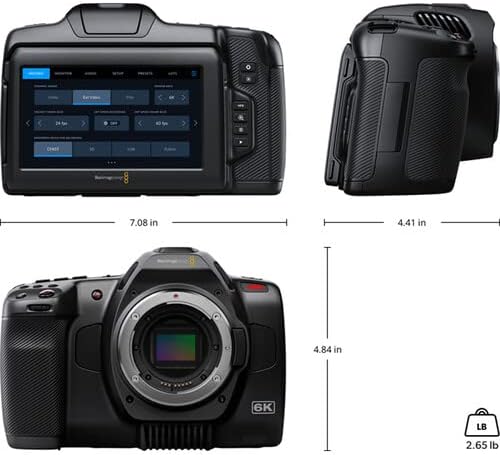
Figure 9.1: Dimensions of the Blackmagic Design Pocket Cinema Camera 6K G2.
| 特徴 | 詳細 |
|---|---|
| モデル番号 | シネックAMPOCHDEF6K2 |
| センサーサイズ | スーパー35 |
| ネイティブ解像度 | 6144×3456 |
| ダイナミックレンジ | 13 ストップ |
| Dual Gain ISO | 最大25,600 |
| レンズマウント | Active EF/EF-S |
| 画面サイズ | 5 Inches (Adjustable Tilt LCD) |
| ストレージメディア | SD/UHS-II, CFast 2.0, External SSD via USB-C |
| ビデオキャプチャ解像度 | 6K |
| ビデオキャプチャフォーマット | Apple ProRes, Blackmagic RAW |
| オーディオフォーマット | WAV, BWF |
| 接続性 | HDMI, USB-C, 3.5mm Audio, Mini XLR Audio, 12V DC |
| アイテム重量 | 3.8ポンド |
| 製品寸法 | 9.1 x 9.1 x 9.1インチ |
| バッテリー | リチウムイオン1個(NP-F570付属) |
10. 保証とサポート
詳細な保証情報とテクニカルサポートについては、Blackmagic Designの公式ウェブサイトをご覧ください。 web購入サイトをご覧いただくか、カスタマーサービスまでお問い合わせください。保証請求のために購入証明書を保管してください。
オンラインリソース: 訪問 www.blackmagicdesign.com/support ドライバー、マニュアル、FAQ についてはこちらをご覧ください。
Ask a question about this manual
Ask about setup, troubleshooting, compatibility, parts, safety, or missing instructions. Manuals+ will review the question and use this page’s manual context to help answer it.