導入
Thank you for choosing the Optex 990047 Indoor/Outdoor Wireless Digital Thermometer. This device provides accurate temperature readings for both your indoor environment and an outdoor location via a wireless sensor. Please read this manual carefully before use to ensure proper operation and to maximize the lifespan of your thermometer.
パッケージ内容
- 1 x Optex 990047 Main Display Unit
- ワイヤレス屋外センサー x 1
- ユーザーマニュアル x 1
- (Batteries not included, typically requires AAA or AA batteries for both units)
製品終了view
Familiarize yourself with the components of your Optex thermometer.
Main Display Unit (Front)

画像: フロント view of the Optex 990047 main display unit. The digital screen shows indoor and outdoor temperatures, along with high/low records and trend indicators. Below the screen are three buttons: 'CH', '°C/°F', and 'CLEAR'.
- デジタルディスプレイ: Shows indoor temperature (top) and outdoor temperature (bottom), along with HI/LO records and temperature trend arrows.
- CHボタン: Selects the wireless channel (if multiple sensors are used) or initiates sensor search.
- °C/°F ボタン: 摂氏と華氏の温度単位を切り替えます。
- クリアボタン: Clears the recorded HI/LO temperatures.
Main Display Unit (Back)

画像: 戻る view of the Optex 990047 main display unit. It features a battery compartment cover and an integrated kickstand for tabletop placement, as well as a hanging hole.
- バッテリーコンパートメント: Houses the batteries for the main unit.
- キックスタンド: ユニットを平らな面に直立させることができます。
- 壁取り付け穴: For hanging the unit on a wall.
ワイヤレス屋外センサ
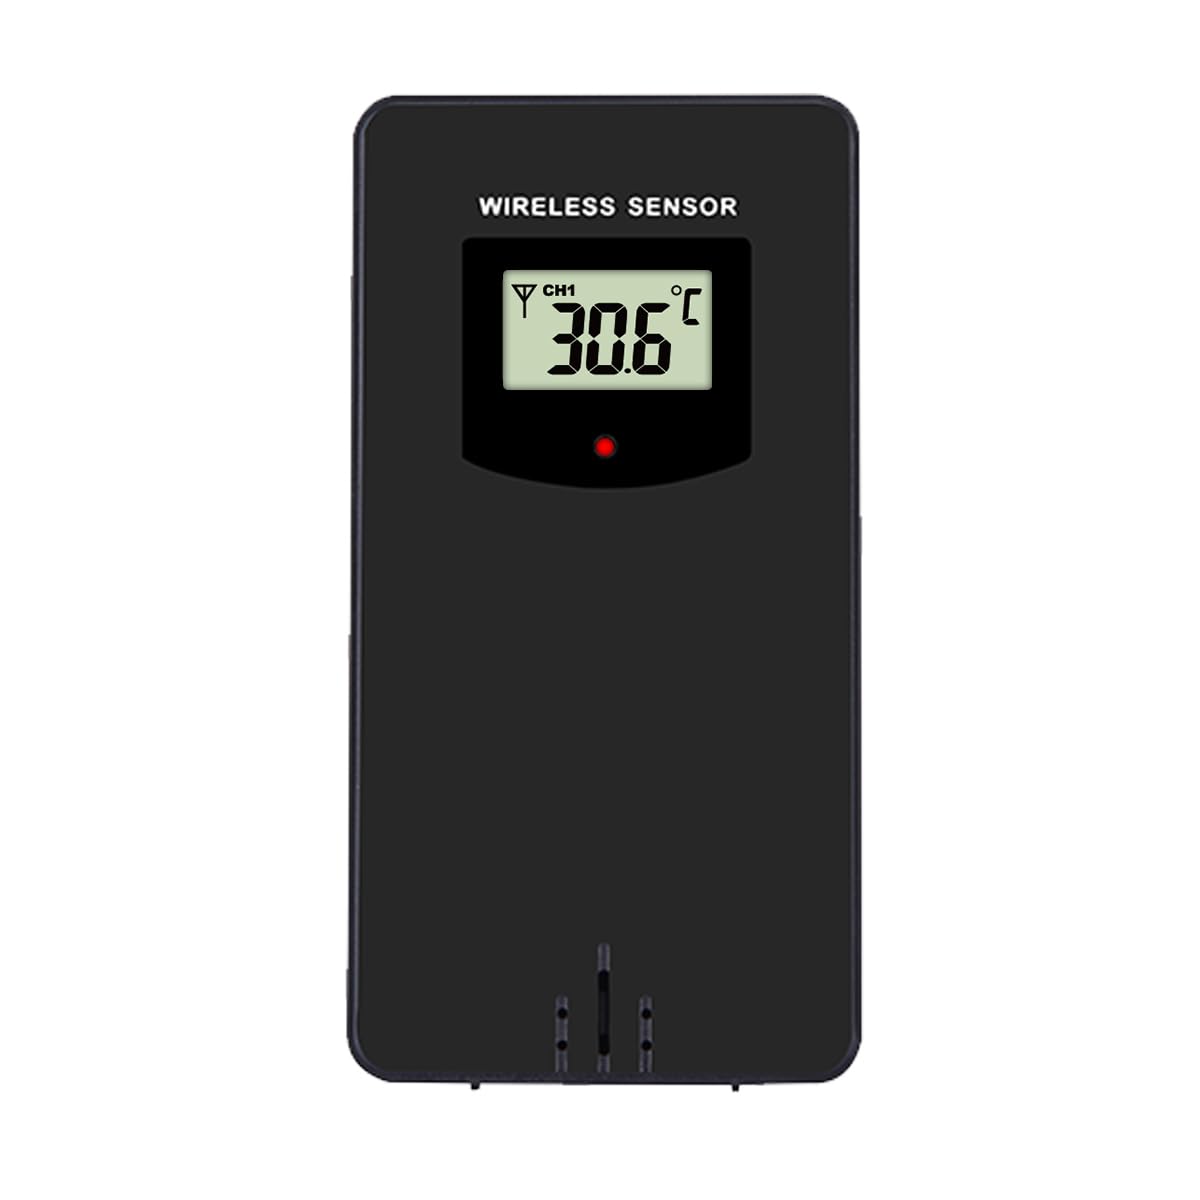
画像: フロント view of the Optex wireless outdoor temperature sensor. It has a small digital display showing the current temperature and channel, along with a red indicator light and a battery compartment on the back.
- 温度センサー: Measures the outdoor temperature.
- 送信インジケーター: A small LED light that flashes when data is transmitted.
- バッテリーコンパートメント: Houses the batteries for the outdoor sensor.
- チャンネルスイッチ: (Typically inside the battery compartment) Allows selection of a specific channel (1, 2, or 3) if using multiple sensors.
設定
- 屋外センサーに電池を取り付けます。
- ワイヤレスセンサーの背面にあるバッテリーコンパートメントを開きます。
- 極性マーク(+/-)に従って、単4電池2本(別売)を挿入します。
- 電池ケースを閉じます。
- Note: If there is a channel switch inside the compartment, ensure it is set to Channel 1 for initial setup.
- Install Batteries in the Main Display Unit:
- メインディスプレイユニットの背面にある電池ボックスを開きます。
- 極性マーク(+/-)に従って、単4電池2本(別売)を挿入します。
- 電池ケースを閉じます。
- The display will light up and begin searching for the outdoor sensor.
- センサーのペアリング:
- Place the outdoor sensor and the main display unit close to each other during the initial setup.
- The main unit should automatically detect and connect to the outdoor sensor within a few minutes. The outdoor temperature will appear on the display.
- If the outdoor temperature does not appear, press and hold the "CH" button on the main unit for 3 seconds to initiate a manual search for the sensor.
- 屋外センサーの配置:
- Choose a shaded location for the outdoor sensor, away from direct sunlight and rain, to ensure accurate readings.
- Avoid placing it near heat sources (e.g., vents, appliances) or metal objects that could interfere with the wireless signal.
- The maximum wireless range is approximately 30 meters (100 feet) in open air. Walls and obstacles will reduce this range.
手術
温度の読み方
The main display unit shows the indoor temperature at the top and the outdoor temperature (from the wireless sensor) at the bottom. Both displays show the current temperature, along with the recorded high (HI) and low (LO) temperatures for the day, and a trend indicator.
温度単位の切り替え(°C/°F)
を押す °C /°F button once to switch between Celsius and Fahrenheit temperature units.
Clearing HI/LO Records
The thermometer automatically records the highest and lowest temperatures since the last reset. To clear these records and start new ones, press the クリア button once. The HI/LO values will reset to the current temperature.
Channel Selection (for multiple sensors)
If you are using multiple outdoor sensors (sold separately), you can switch between their readings by pressing the CH button. Each press will cycle through the available channels (e.g., CH1, CH2, CH3). Ensure each sensor is set to a unique channel via its internal switch.
メンテナンス
- クリーニング: ユニットを柔らかくて乾いた布で拭いてください。amp 布で拭いてください。研磨剤や溶剤は使用しないでください。
- バッテリー交換: ディスプレイに電池残量低下のインジケーターが表示されたら、本体と屋外センサーの両方の電池を交換してください。必ずすべての電池を同じ種類の新しい電池に同時に交換してください。
- ストレージ: 温度計を長期間保管する場合は、液漏れを防ぐため、すべての電池を取り外してください。涼しく乾燥した場所に保管してください。
トラブルシューティング
| 問題 | 解決 |
|---|---|
| No outdoor temperature reading / "---" displayed. |
|
| 温度の測定値が不正確です。 |
|
| ディスプレイが暗いか空白です。 |
|
仕様
- モデル: Optex 990047
- 表示タイプ: デジタルLCD
- 室内温度範囲: -10°C ~ 50°C (14°F ~ 122°F) (Estimated, based on typical indoor thermometers)
- 屋外温度範囲: -40°C ~ 60°C (-40°F ~ 140°F) (Estimated, based on typical outdoor sensors)
- 温度精度: +/- 1°C (+/- 2°F) (推定)
- 無線範囲: 屋外では最大30メートル(100フィート) (推定)
- 電源(本体): 単4形1.5V電池2本(別売)
- 電源(屋外センサー): 単4形1.5V電池2本(別売)
- 材料: プラスチック
- 色: 黒
安全情報
- Do not expose the main unit or sensor to extreme temperatures, direct sunlight, or excessive moisture.
- Do not immerse the units in water. The outdoor sensor is weather-resistant but not waterproof.
- Do not attempt to disassemble or repair the units. This will void the warranty.
- 古い電池は、地域の規制に従って責任を持って処分してください。
- 電池はお子様の手の届かないところに保管してください。
保証とサポート
Optex products are designed for reliability and performance. For warranty information or technical support, please refer to the contact details provided with your purchase or visit the official Optex webサイトをご覧ください。サポートにお問い合わせの際は、モデル番号(990047)をご用意ください。