
1. はじめに
This manual provides detailed instructions for the setup, operation, maintenance, and troubleshooting of your AMIR Indoor/Outdoor Thermometer with 3 Wireless Sensors. This device is designed to monitor temperature and humidity in up to four different locations simultaneously, offering clear readings on a large LCD display.
2. 安全情報
- Do not disassemble the product. Unauthorized modifications may void the warranty and cause damage.
- If the display becomes blurry, replace the batteries promptly.
- Avoid placing the product in hot, humid, dusty, or corrosive gas environments to prevent damage to electronic components.
- 電池を挿入するときは、電池の極性が正しいことを確認してください。
3. パッケージ内容
パッケージにすべてのアイテムが揃っていることを確認します。
- 1 x AMIR Indoor/Outdoor Thermometer Main Unit
- 3 x Wireless Thermometer-Hygrometer Transmitters
- ユーザーマニュアル x 1
- 1 x Apple Data Cable (for main unit power)
4. セットアップ
4.1 本体の電源供給
The main unit can be powered in two ways:
- バッテリー電源: Insert 3 AA batteries (not included) into the battery compartment on the back of the main unit.
- Cable Power: Plug the included Apple data cable into the main unit's charging port and connect it to a USB power source.

Figure 1: Main unit power supply options (battery and cable).
4.2 Setting Up Wireless Sensors
The three wireless transmitters are identical. To differentiate them and ensure proper connection:
- On the back cover of each transmitter, locate the channel dial and set it to 1, 2, or 3 for each respective sensor.
- Insert 2 AAA batteries (not included) into each transmitter. The indicator light on the transmitter will flash red, signaling it is attempting to connect.
- The main unit will automatically connect to the transmitters. If a sensor does not connect immediately, it will attempt to reconnect in approximately 60-second cycles. To expedite the connection, remove and reinsert the batteries in the transmitter and wait for the red light to flash.

Figure 2: Main unit and three wireless sensors for multi-location monitoring.
ビデオ1: 終了view of the AMIR Indoor Outdoor Thermometer, demonstrating its features and setup process.
5. 操作手順
5.1 Large LCD Display and Backlight
The main unit features a 4.6-inch large LCD display for clear and simple readings. To activate the backlight, press the 'LIGHT' button on the right side of the unit. The backlight has one level when battery-powered and two levels when cable-powered.

Figure 3: Activating the LCD backlight for improved visibility.
5.2 温度単位の選択(°C/°F)
To switch between Celsius (°C) and Fahrenheit (°F), press the '°C/°F' button located on the right side of the main unit.
5.3 MAX/MIN Record
The thermo-hygrometer records the maximum and minimum temperature and humidity values over the past 24 hours. Press the 'MIN/MAX' button on the left side of the unit to cycle through current, maximum, and minimum readings.
5.4 空気快適度インジケーター
The display includes an air comfort indicator to quickly assess indoor conditions:
- ドライ: 湿度 < 40%
- COM(快適性): 40% < 湿度 < 70%
- ウェット: 湿度 > 70%

Figure 4: Air Comfort Indicator for quick environmental assessment.
5.5 低電池残量通知
The unit will display a low battery icon when the main unit's battery voltage drops below 3.6V or the transmitters' battery voltage drops below 2.7V. Replace batteries promptly to ensure continuous operation.

Figure 5: Low battery reminder on the main unit and transmitters.
6. 取り付けオプション
Both the main unit and the wireless transmitters offer flexible mounting options:
6.1 本体の取り付け
- 直立: Use the integrated stand to place the unit on a tabletop or desk.
- ウォールマウント: 背面の吊り下げ穴を利用して壁に取り付けます。
- 磁気バック: The unit has a magnetic back for attachment to metallic surfaces like refrigerators.
6.2 送信機の取り付け
- 直立: Place the transmitter on a flat surface.
- ウォールマウント: Use the hanging hole for wall mounting.
- Lanyard/Suction Cup: The transmitter comes with a lanyard and suction cup for versatile placement, such as hanging or attaching to glass.
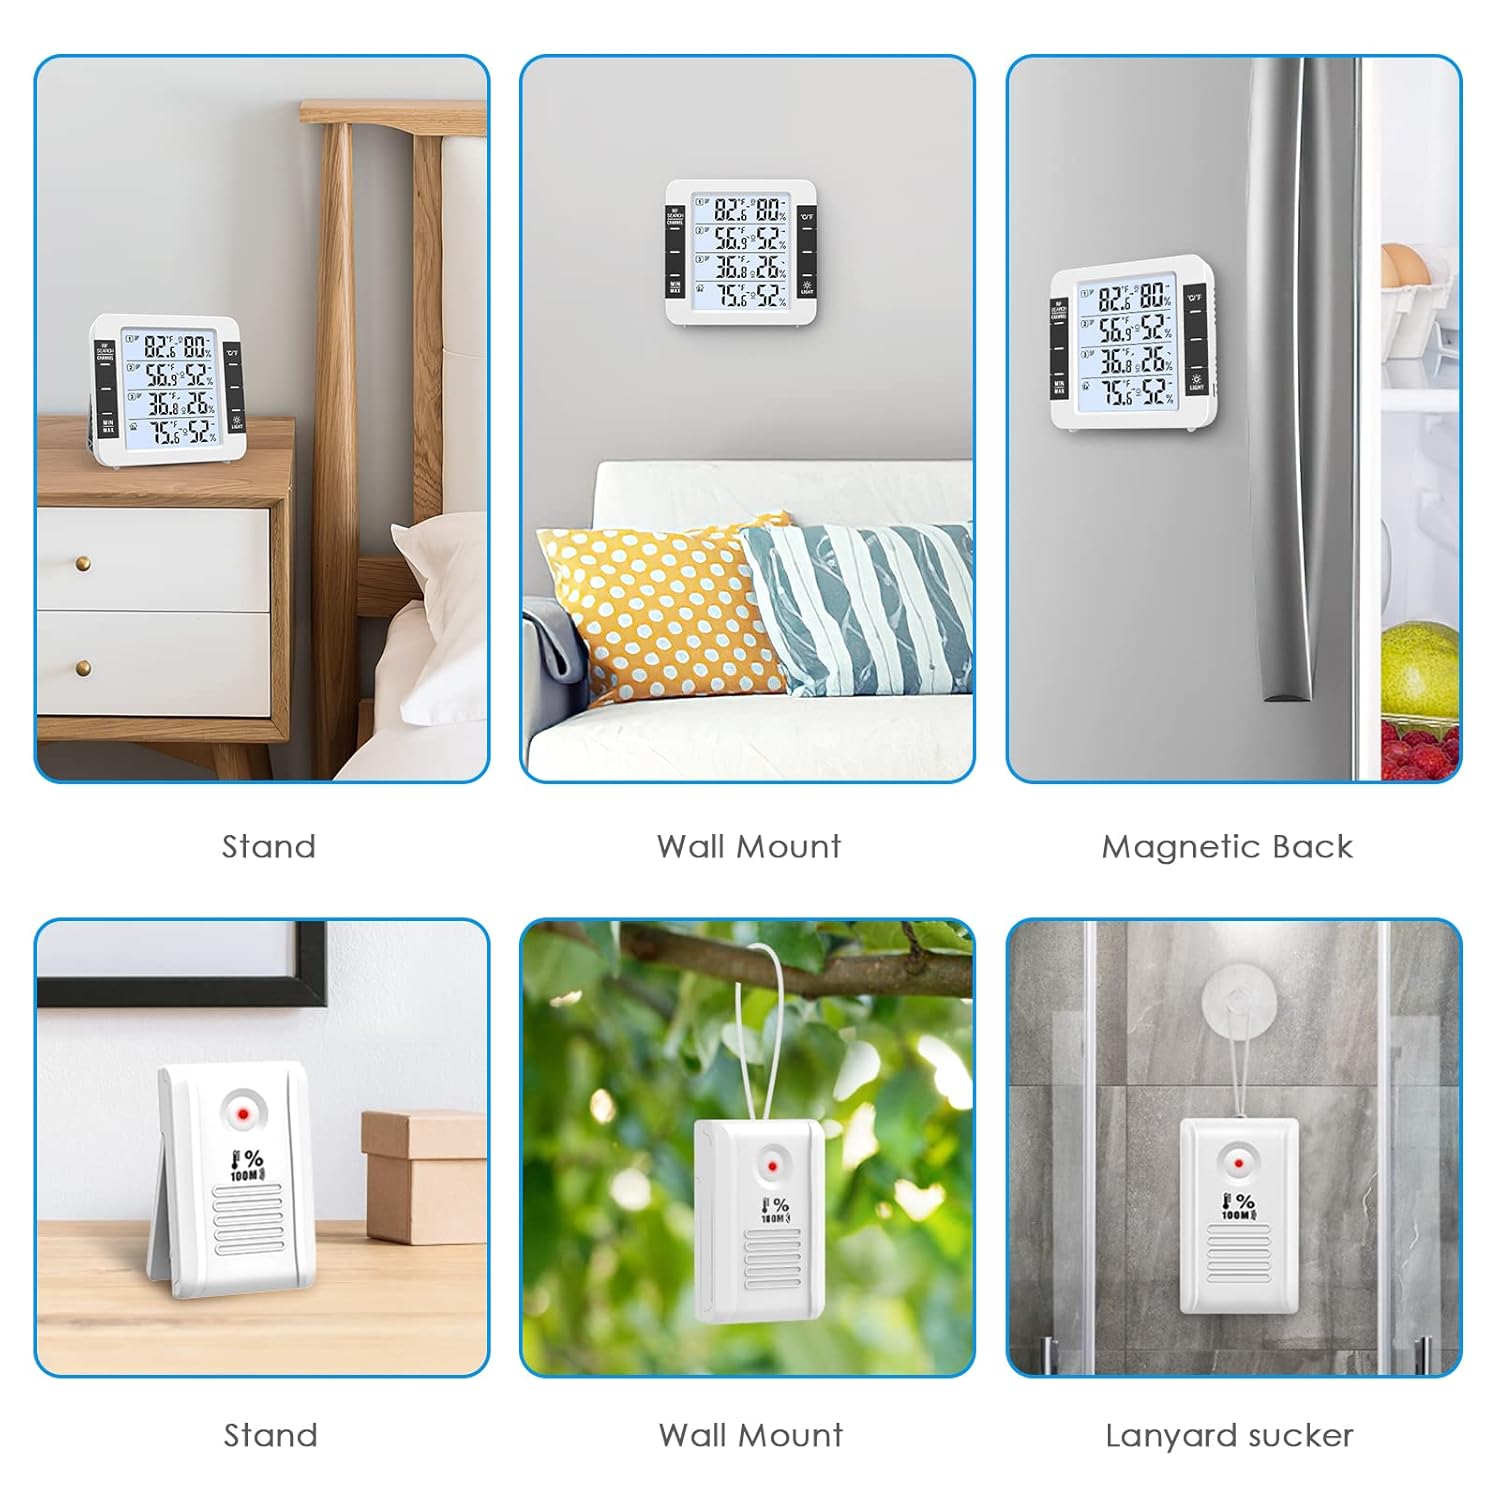
Figure 6: Multiple mounting options for the main unit and wireless sensors.
7. メンテナンス
7.1 電池の交換
Replace batteries in the main unit (3 AA) and transmitters (2 AAA each) when the low battery indicator appears on the display. Always use new batteries and ensure correct polarity.
7.2 クリーニング
柔らかく乾いた布で拭いてください。研磨剤入りの洗剤を使用したり、水に浸したりしないでください。
7.3 環境への配慮
To prolong the life and accuracy of your device, avoid exposing it to:
- 直射日光や極度の熱源。
- High humidity or direct water exposure.
- Excessive dust or corrosive gases.
8。 トラブルシューティング
8.1 センサーが接続されない
- Ensure batteries are correctly inserted and have sufficient charge in both the main unit and the sensor.
- Verify that the sensor's channel dial is set to a unique number (1, 2, or 3).
- Move the sensor closer to the main unit to check if it's a range issue. The maximum range is 100m/328ft in open air, but obstacles like walls can reduce this.
- Remove and reinsert the batteries in the problematic sensor to force a reconnection attempt.
8.2 Blurring Display
A blurring display typically indicates low battery power. Replace the batteries in the main unit.
8.3 不正確な読み取り
- Ensure sensors are not placed in direct sunlight or near heat/cold sources, which can skew readings.
- Allow the main unit and sensors to stabilize in their respective environments for at least 30 minutes after setup for accurate readings.
- Compare readings with another known accurate thermometer/hygrometer if possible.
9. 仕様
| 特徴 | 仕様 |
|---|---|
| 室内温度範囲 | -20°C to 70°C (0°F to 60°C in some specifications) |
| 屋外の温度範囲 | -50°C ~ 70°C |
| 湿度範囲 | 10%から99% |
| 温度精度 | ±1°C (±2°F) |
| 湿度精度 | ±5% |
| 無線伝送周波数 | 433MHz |
| ワイヤレス伝送距離 | 屋外では最大100メートル(328フィート) |
| 本体電源 | 3 x AA batteries (not included) or Apple data cable (included) |
| 送信機電力 | センサー1個につき単4電池2本(別売) |
| 本体寸法 | 11.8 x 11.2 x 2.5 cm (approx. 4.65"W x 4.41"H) |
| 送信機の寸法 | 8.3 x 5 x 2 cm |
10. 保証とサポート
AMIR products are designed for reliability and performance. For warranty information or technical support, please refer to the contact details provided with your purchase or visit the official AMIR webサイトでご確認ください。保証請求の際は購入証明として領収書を保管してください。