
1. はじめに
Thank you for choosing the vidaXL Wall-mounted Parasol with LED Lights. This manual provides essential information for the safe assembly, operation, and maintenance of your parasol. Please read these instructions carefully before installation and retain them for future reference.

画像1.1: The vidaXL Wall-mounted Parasol with LED Lights in its fully extended position, showcasing its design and coverage.
2. 安全に関する注意事項
- Ensure the parasol is securely mounted to a sturdy wall structure capable of supporting its weight and wind loads. Consult a professional if unsure about wall suitability.
- Do not use the parasol in strong winds, heavy rain, or snow. Close and secure the parasol during adverse weather conditions to prevent damage or injury.
- Keep children and pets away from the parasol during opening and closing operations.
- すべての部品に摩耗、損傷、接続の緩みがないか定期的に点検してください。損傷した部品は直ちに交換してください。
- パラソルのフレームや天蓋に物を吊り下げないでください。
- Ensure the solar panel is clean and unobstructed for optimal charging of the LED lights.
3. パッケージ内容
組み立てを始める前に、すべてのコンポーネントが揃っていることを確認してください。
- Parasol Canopy with LED Lights and Solar Panel
- Wall-mounting Arm/Pole Assembly (Aluminum frame)
- Crank Lift Mechanism
- Mounting Hardware (screws, anchors - specific types may vary, ensure suitability for your wall type)
- 取扱説明書
4. セットアップと組み立て
Follow these steps for proper installation of your wall-mounted parasol.
4.1.壁への取り付け
- 場所を選択してください: Choose a sturdy wall surface, such as concrete, brick, or reinforced wood. Ensure sufficient clearance for the parasol to open and rotate without obstruction. Refer to the dimensions diagram for space requirements.
- 掘削ポイントをマークする: Hold the wall-mounting arm assembly against the desired location. Use a pencil to mark the drilling points for the mounting brackets. Ensure the arm is level.
- ドリル穴: Using an appropriate drill bit for your wall type, drill holes at the marked points. Insert wall anchors if necessary.
- セキュアアーム: Attach the wall-mounting arm assembly to the wall using the provided screws and a suitable screwdriver or wrench. Ensure all connections are tight and secure.
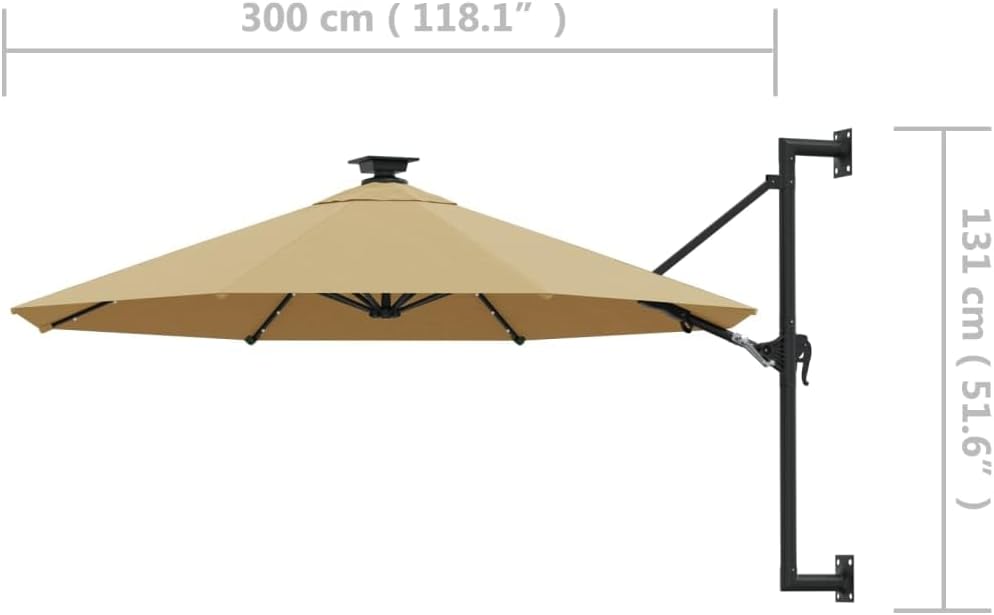
画像4.1: This diagram illustrates the overall dimensions of the wall-mounted parasol, including its width (118.1 inches / 300 cm) and height (51.6 inches / 131 cm) when mounted.
4.2. Parasol Assembly
- Attach Parasol to Arm: Carefully lift the parasol canopy assembly and connect it to the wall-mounting arm. Follow the specific connection points and secure with any provided pins or bolts.
- Verify Solar Panel: Ensure the solar panel on top of the parasol canopy is facing upwards and is free from any packaging material.

画像4.2: 詳細な view of the solar panel integrated into the top of the parasol canopy, responsible for charging the LED lights.
5. 操作手順
This section details how to open, close, adjust, and use the LED lights of your parasol.
5.1. Opening the Parasol
- Release Securing Strap: If the parasol is secured in a closed position, release any straps or ties holding the canopy together.
- Use Crank Handle: Locate the crank handle on the wall-mounting arm. Rotate the crank handle clockwise to slowly open the parasol canopy. Continue cranking until the canopy is fully extended and taut.
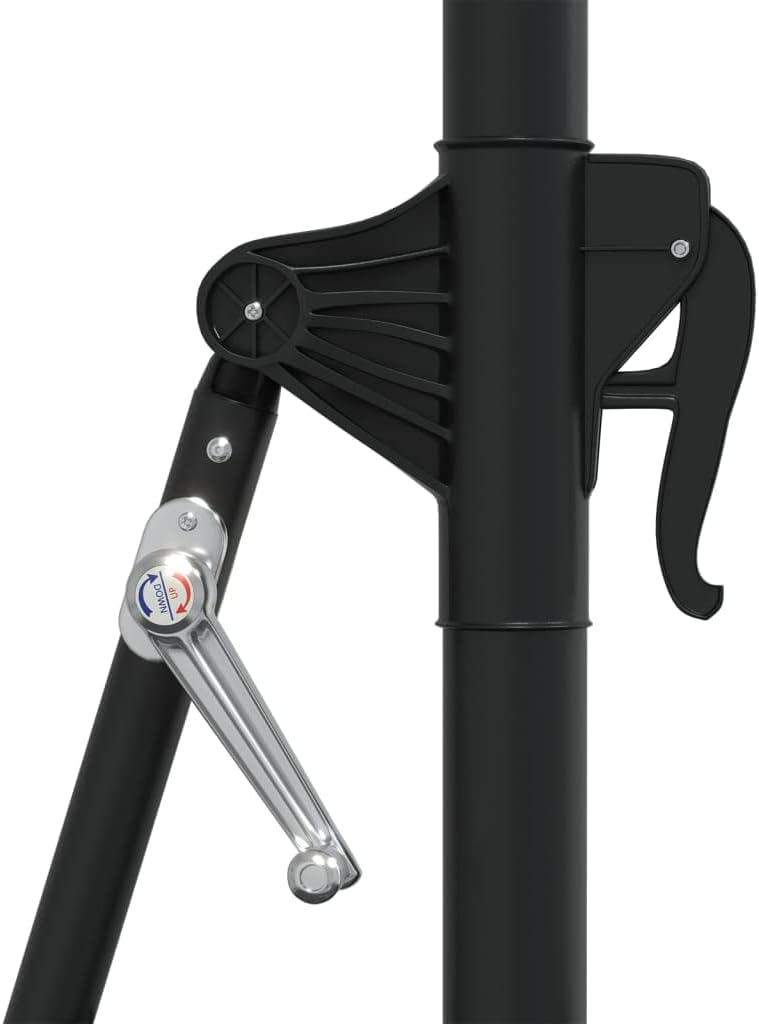
画像5.1: クローズアップ view of the crank lift mechanism, used for opening and closing the parasol, and the lever for adjusting the canopy angle.
5.2. Closing the Parasol
- Rotate Crank Handle: Rotate the crank handle counter-clockwise to slowly retract the parasol canopy.
- 安全なキャノピー: Once fully closed, use the securing strap to hold the canopy neatly together.

画像5.2: The wall-mounted parasol shown in its folded and secured closed position, ready for storage or protection from weather.
5.3. 角度を調整する
The parasol features an adjustable angle mechanism. Locate the adjustment lever on the wall-mounting arm (refer to Image 5.1). Release the lever, adjust the canopy to the desired angle, and then secure the lever firmly to lock the position.
5.4. LEDライトの使用
The integrated LED lights are powered by a solar panel located on top of the parasol canopy. Ensure the solar panel receives direct sunlight during the day for optimal charging. The lights typically activate automatically at dusk or via a manual switch, if present (check your specific model for a switch location, usually near the solar panel or on the main pole).
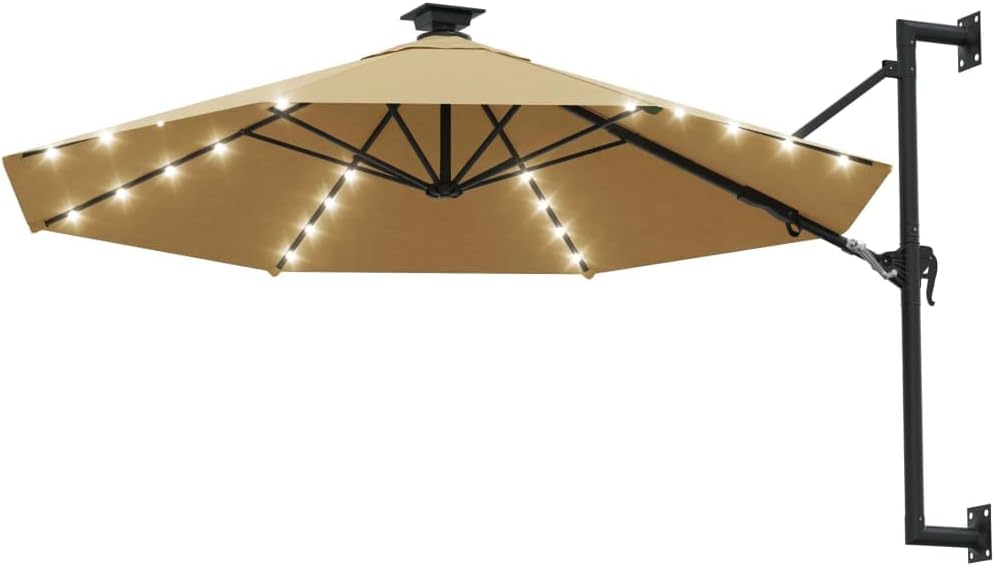
画像5.3: The wall-mounted parasol with its integrated LED lights illuminated, providing ambient lighting.
6. メンテナンス
- キャノピーの清掃: Clean the polyester canopy regularly with a mild soap solution and a soft brush or cloth. Rinse thoroughly with clean water and allow to air dry completely before closing or storing. Do not use harsh chemicals or abrasive cleaners.
- フレームの掃除: アルミフレームを広告で拭くamp 布で拭いてください。頑固な汚れには中性洗剤をご使用ください。
- ソーラーパネルのお手入れ: Keep the solar panel clean from dust, leaves, and debris to ensure efficient charging. Wipe gently with a soft, damp 布。
- 潤滑: スムーズな動作を確保するために、クランク機構と可動ジョイントにシリコンベースの潤滑剤を定期的に塗布してください。
- 冬の保管: For prolonged periods of non-use, especially during winter, it is recommended to remove the parasol canopy from the arm and store it in a dry, protected area.
7。 トラブルシューティング
| 問題 | 考えられる原因 | 解決 |
|---|---|---|
| Parasol does not open/close smoothly. | 機構が乾燥しているか、または閉塞しています。 | Lubricate the crank mechanism and moving joints. Check for any debris obstructing movement. |
| LEDライトが動作しません。 | Insufficient solar charge; dirty solar panel; switch off. | Ensure solar panel is clean and exposed to direct sunlight for several hours. Check if the light switch (if present) is in the 'ON' position. Allow battery to charge fully. |
| Parasol feels unstable after mounting. | Mounting hardware loose; unsuitable wall structure. | Check and tighten all mounting screws. Re-evaluate wall suitability; consider professional installation if concerns persist. |
8. 仕様
- モデル番号: 312525
- ブランド: ビダXL
- キャノピー素材: ポリエステル
- フレーム素材: アルミニウム
- シャフト材質: 金属
- 開閉機構: クランクリフト
- 特徴: Integrated LED Lights, Solar Panel, Adjustable Angle, UV Protective, Anti-fade
- アイテムの形状: ラウンド
- 寸法(W x H): 118.1インチ x 51.6インチ (300 cm x 131 cm)
- 商品の重量: 10.65キログラム
9. 保証とサポート
For warranty information or technical support, please refer to the documentation included with your purchase or contact vidaXL customer service directly. Keep your proof of purchase for any warranty claims.