Saooer BLUE 20A
Saooer 20A Solar Charge Controller User Manual
Model: BLUE 20A
導入
This manual provides essential information for the safe and efficient operation of your Saooer 20A Solar Charge Controller. This intelligent regulator is designed to manage the working of solar panels and batteries in a solar system, featuring dual USB ports for mobile device charging. It is compatible with 12V and 24V systems and includes multiple protection functions to ensure system efficiency and prolong battery lifespan.

図1: 前面 view of the Saooer 20A Solar Charge Controller.
安全に関する注意事項
- Ensure all connections are correct before powering on the controller. Incorrect wiring can damage the device or connected components.
- The controller is designed for indoor use or in a protected environment. Avoid exposure to direct sunlight, high temperatures, or moisture.
- コントローラーをご自身で分解したり修理したりしないでください。修理は資格のある専門家にご依頼ください。
- お子様の手の届かない場所に保管してください。
- This controller is only suitable for lead-acid batteries: OPEN, AGM, GEL. Do not use with other battery types like Lithium-ion or LiFePO4, as this may cause damage or safety hazards.
- Always connect the battery first, then the solar panel, and finally the load. When disconnecting, reverse the order: disconnect the load, then the solar panel, and finally the battery.
製品の特徴
- 自動システムVoltage 識別: Automatically detects 12V/24V system voltage.
- PWM充電: Efficient Pulse Width Modulation charging mode.
- デュアルUSBポート: Provides 5V/2A output for charging mobile devices.
- LCDディスプレイ: Clear display of status and data, allowing for convenient mode switching and parameter configuration.
- 複数の保護機能: Includes short-circuit protection, open-circuit protection, reverse protection, and over-load protection.
- 調整可能なパラメータ: User-adjustable charge and discharge parameters.
- 温度補正: Automatic temperature compensation for optimal charging.
セットアップとインストール
Follow these steps carefully to install your solar charge controller. Incorrect installation can lead to damage or malfunction.
- 配線の準備: Ensure all wires are properly stripped and have appropriate connectors if necessary. Use wires of sufficient gauge for your system's current.
- バッテリーを接続します。 Connect the battery to the charge regulator first. Observe correct polarity (+ to + and - to -). The controller will automatically recognize the battery voltage(12Vまたは24V)。
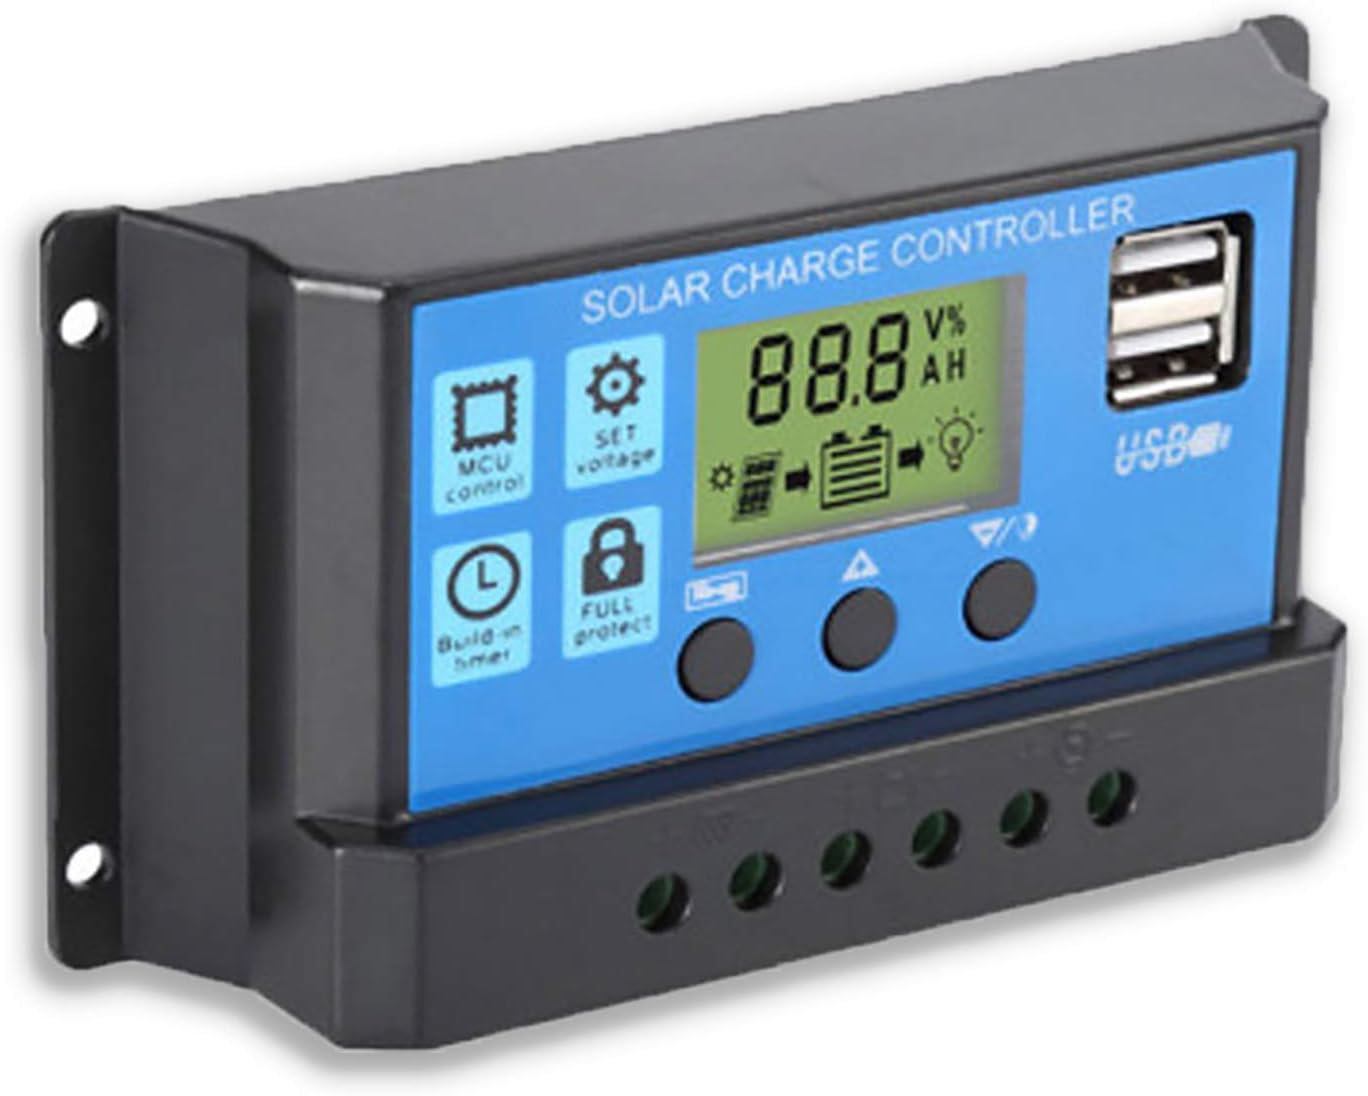
図2:側面 view showing the connection terminals for battery, solar panel, and load.
- ソーラーパネルを接続します。 Connect the solar panel to the solar charge controller. Ensure correct polarity.
- 負荷を接続する: Connect the consumer or load to the charge controller regulator. Ensure correct polarity.
重要な注意: Always connect the battery first, then the solar panel, and finally the load. When disconnecting the controller, please remove the solar panel, then the load, and finally the battery. This sequence helps the controller recognize the battery voltage correctly and prevents damage.
操作手順
LCDディスプレイとボタン

図3: 角度付き view showing the LCD display and control buttons.
コントローラーには LCD ディスプレイと操作用の 3 つのボタンがあります。
- メニューボタン: Used to cycle through display modes and enter parameter setting mode.
- 上ボタン: 値を増やしたり、メニュー内で上へ移動したりするために使用されます。
- 下ボタン: 値を減らしたり、メニュー内で下に移動したりするために使用されます。
表示モード
Press the Menu button to cycle through the following display modes:
- バッテリー巻tage(V)
- ソーラーパネルVol。tage(V)
- 負荷電流 (A)
- Battery Temperature (°C)
- 充電電流 (A)
- 放電電流 (A)
- Load Working Mode (24H, 0-23H, 0H)
パラメータ設定
To enter parameter setting mode, press and hold the Menu button for 5 seconds. Use the Up and Down buttons to adjust values, and the Menu button to confirm and move to the next parameter. Press and hold Menu again to exit setting mode.
| パラメータ | 説明 | Default (12V) | Range (12V) |
|---|---|---|---|
| B01/B02/B03 | Battery Type Selection (B01=Lead-acid, B02=Lithium Ion, B03=LiFePO4) | B01 | 該当なし |
| Charge Off Voltage | 巻tage at which charging stops | 14.4V | 13.0V~15.0V |
| 放電再接続ボリュームtage | 巻tage at which load reconnects after low voltage切断 | 12.6V | 11.0V~13.5V |
| 排出停止量tage | 巻tage at which load disconnects to protect battery | 10.7V | 9.0V~11.5V |
| Load Working Time | Timer for load output (24H, 0-23H, 0H) | 24H | 該当なし |
Note: For 24V systems, multiply the 12V values by two.
メンテナンス
- 定期点検: すべての配線接続部の締め付け具合と腐食を定期的に点検してください。
- 清潔さ: コントローラーは清潔に保ち、ほこりを取り除いてください。清掃には乾いた布を使用してください。
- 換気: 過熱を防ぐために、コントローラーの周囲に十分な換気を確保してください。
- バッテリーの状態: バッテリー容量を監視するtage and health regularly. Replace batteries as needed.
トラブルシューティング
| 問題 | 考えられる原因 | 解決 |
|---|---|---|
| Controller not powering on / LCD blank | バッテリーが接続されていないか、極性が逆です。バッテリーの容量tag低すぎます。 | Check battery connections and polarity. Ensure battery has sufficient charge. |
| Solar panel not charging battery | Solar panel not connected or reverse polarity; Insufficient sunlight; Damaged solar panel. | Check solar panel connections and polarity. Ensure panel is in direct sunlight. Test solar panel output. |
| ロードが機能しない | Load not connected or reverse polarity; Battery voltage too low (low voltage disconnect); Overload protection activated. | Check load connections and polarity. Charge battery. Reduce load or check for short circuit. |
| USBポートが充電されない | バッテリーvoltage too low; Device not compatible; Faulty USB cable. | Ensure battery is charged. Try a different device or cable. |
| Controller gets hot | 過負荷、換気不良。 | Reduce load. Ensure controller has adequate airflow and is not in an enclosed space. |
仕様
| 特徴 | 詳細 |
|---|---|
| モデル | 青 20A |
| システム巻tage | 12V / 24V自動 |
| 最大充放電電流 | 20A |
| USB出力 | Dual USB, 5V/2A (Max) |
| バッテリータイプの互換性 | Lead-acid (OPEN, AGM, GEL) |
| 製品寸法 | 5.12 x 2.76 x 1.5インチ(約133mm x 70mm x 38mm) |
| アイテム重量 | 5オンス |
| 画面 | 液晶 |
| 動作温度 | -35°C ~ +60°C |

Figure 4: Product dimensions of the solar charge controller.
保証とサポート
For warranty information or technical support, please contact the manufacturer, Saooer, through their official channels. Refer to your purchase documentation for specific warranty terms and contact details.
メーカー: Saooer
ASIN: B095764VB7
国際コード: 605832982977
訪問することができます Saooer Store on Amazon 詳細については、またはサポートにお問い合わせください。