
導入
This manual provides detailed instructions for the setup, operation, and maintenance of your Taylor 5282011 Digital Weather Forecaster. This device is designed to provide accurate indoor and outdoor temperature and humidity readings, along with a 12-hour weather trend forecast and a clock/calendar function.
パッケージ内容
パッケージに以下の項目が含まれているか確認してください。
- Taylor 5282011 Main Unit
- ワイヤレスリモートセンサー
- Type-C USB Power Cord
- 取扱説明書(本書)
製品終了view
The Taylor 5282011 Digital Weather Forecaster features a contemporary round design with a bright LED display. It monitors various environmental conditions to help you stay informed.
Main Unit Display Elements
The main unit's display provides the following information:
- Day of the week and Time (12 or 24-hour format)
- Calendar (Month, Day)
- Weather Forecast icon (indicating general trend over 12 hours)
- 屋外の温度と湿度
- 室内の温度と湿度
- 気圧
- 無線信号強度インジケーター
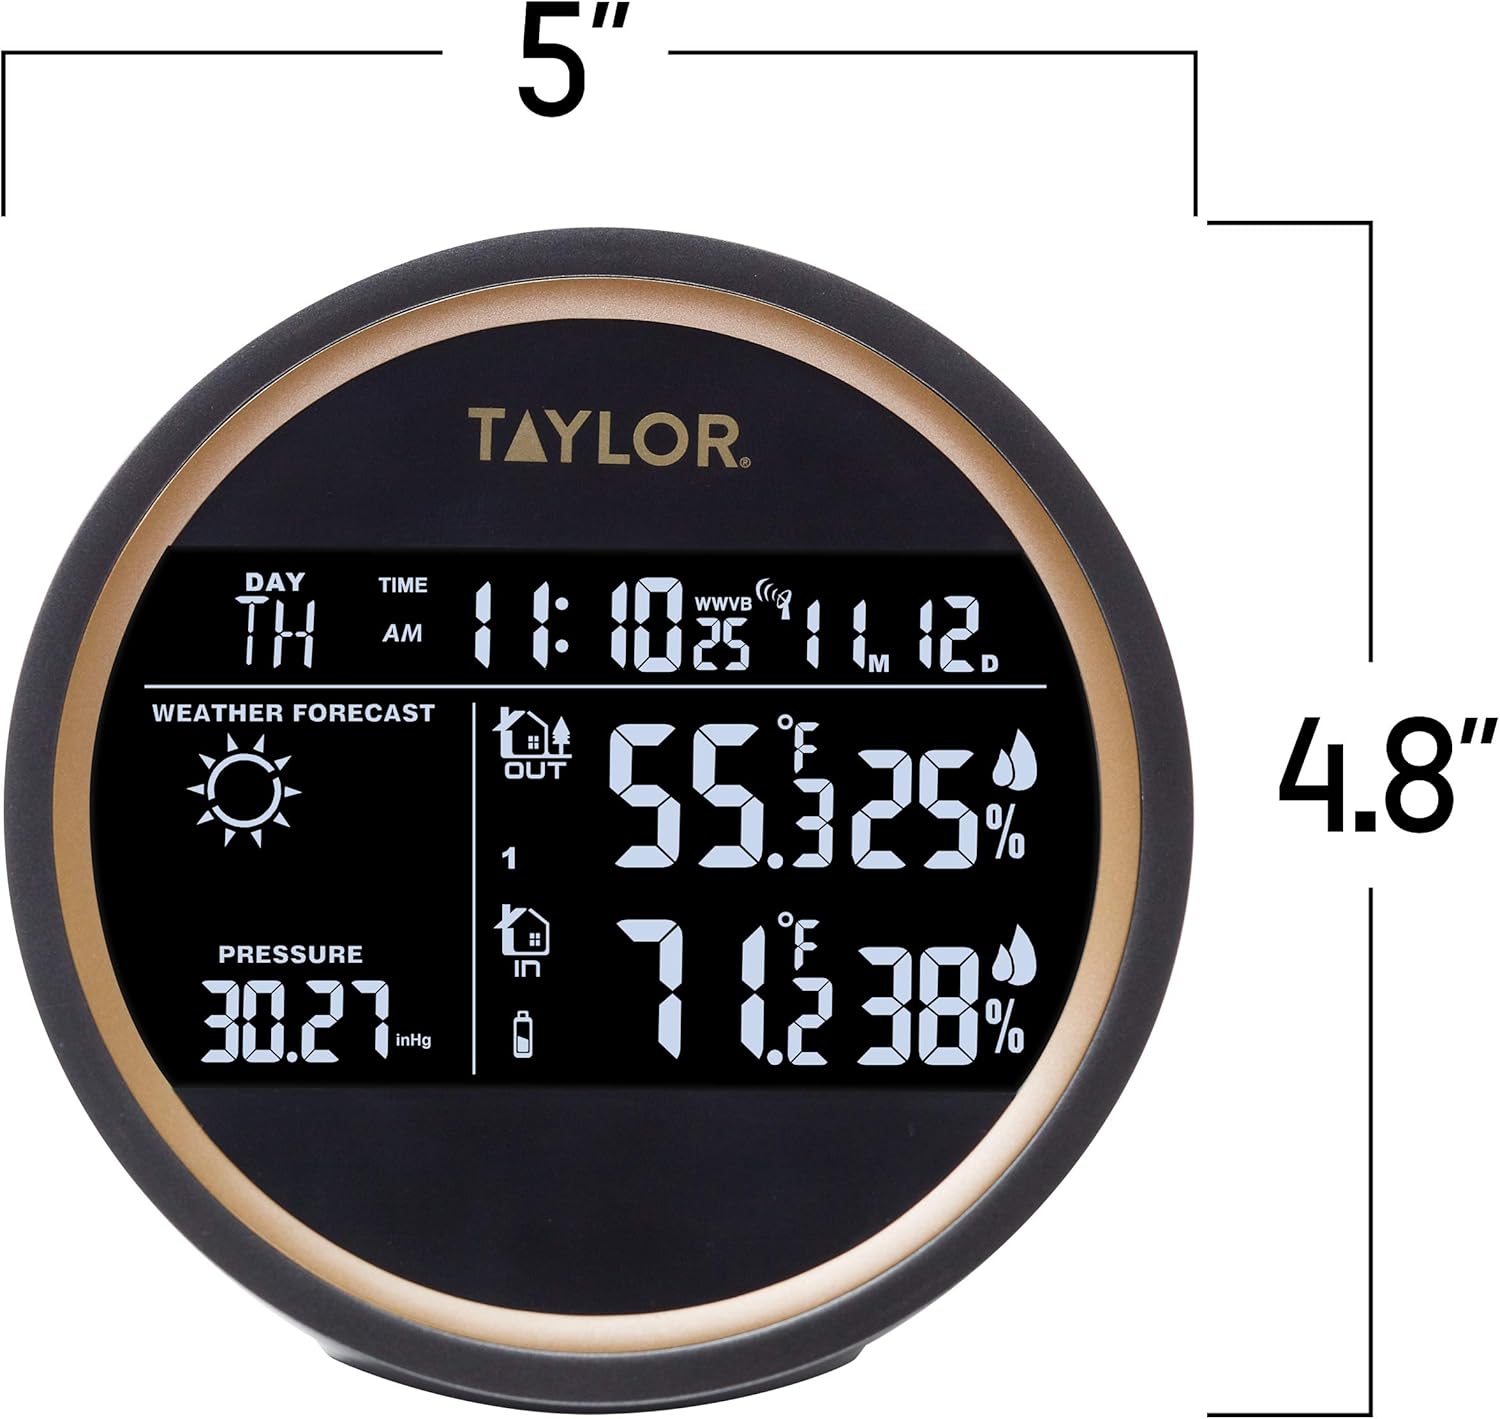
Figure 1: Main Unit Display with Dimensions. The unit measures approximately 5 inches in width and 4.8 inches in height.
Main Unit Rear Controls
The back of the main unit contains control buttons and power ports.

図2:背面 View of Main Unit. Shows buttons for LIGHT, CHANNEL, SET/AL SET, °F/°C/RCC, MAX/MIN, battery compartment, USB 5V/1A port, and RESET button.
ワイヤレスリモートセンサー
The remote sensor transmits outdoor temperature and humidity data to the main unit.

Figure 3: Main Unit and Wireless Remote Sensor. The remote sensor is a compact, rectangular device designed for outdoor placement.
設定
Powering the Main Unit
The main unit can be powered by either the included Type-C USB cord or 2 AAA batteries (not included).
- USB電源: Connect the Type-C USB cord to the USB port on the back of the main unit and plug the other end into a compatible USB power adapter (not included).
- バッテリー電源: Open the battery compartment on the back of the main unit. Insert 2 new AAA batteries, ensuring correct polarity (+/-). Close the compartment.
Note: Using USB power is recommended for continuous display illumination. Batteries serve as a backup or for temporary use.
Installing Batteries in the Remote Sensor
The wireless remote sensor requires batteries for operation.
- Open the battery compartment on the remote sensor.
- 正しい極性 (+/-) を確認して、新しい AAA 電池 2 本を挿入します。
- 電池ケースをしっかりと閉めてください。
Pairing the Remote Sensor
The main unit will automatically attempt to connect with the remote sensor upon initial power-up. If the connection is not established or is lost:
- Ensure both the main unit and remote sensor have fresh batteries or are powered.
- Place the remote sensor within 200 feet (60 meters) of the main unit, minimizing obstructions.
- Press the 'CHANNEL' button on the back of the main unit to cycle through channels if you have multiple sensors, or to initiate a new search.
- Press the 'RESET' button on the back of the main unit with a small pin if issues persist.
The main unit can accommodate up to 3 wireless remote sensors. Use the 'CHANNEL' button to switch between sensor data displays.
配置ガイドライン
- 本体: Place indoors, away from direct sunlight, heat sources, and strong electromagnetic fields.
- リモートセンサー: Place outdoors in a shaded, dry location, protected from direct rain and sunlight. Ensure it is mounted vertically for proper drainage. Avoid placing near metal objects that could interfere with signal transmission.
操作手順
Initial Settings (Time, Date, Units)
- Press and hold the 'SET/AL SET' button on the back of the main unit to enter setup mode.
- Use the '▲ CHANNEL' or '▼ °F/°C/RCC' buttons to adjust values.
- Press 'SET/AL SET' again to confirm and move to the next setting.
- Settings typically include: 12/24-hour format, Hour, Minute, Year, Month, Day.
- To switch between Fahrenheit (°F) and Celsius (°C) for temperature display, press the '°F/°C/RCC' button during normal operation.
表示について
- 日時: Displays current time and calendar information.
- 天気予報: Icons (e.g., sun, clouds, rain) indicate the predicted weather trend for the next 12 hours based on barometric pressure changes. This is a forecast, not a real-time condition.
- 屋内/屋外の読み取り: Shows current temperature and humidity for both indoor and selected outdoor sensor.
- 大気圧: Displays the current atmospheric pressure, often in inHg (inches of mercury).
MAX/MIN Records
The unit records the maximum and minimum temperature and humidity values.
- 「MAX/MIN」ボタンを押すと view 記録された最大値。
- Press 'MAX/MIN' again to view 記録された最小値。
- Press 'MAX/MIN' a third time to return to current readings.
- To clear MAX/MIN records, press and hold the 'MAX/MIN' button while viewレコードを作成します。
バックライト
Press the 'LIGHT' button to activate the display backlight for a few seconds. If powered by USB, the backlight may remain on continuously or be adjustable.
メンテナンス
- クリーニング: 本体とリモコンセンサーを柔らかくて乾いた布で拭いてください。amp 布で拭いてください。研磨剤や溶剤は使用しないでください。
- バッテリー交換: Replace batteries in both units when the low battery indicator appears on the display. Always use fresh batteries of the specified type (AAA).
- センサーのケア: Ensure the remote sensor remains protected from extreme weather conditions and direct moisture.
- 一般的なケア: Avoid dropping the device or exposing it to excessive force.
トラブルシューティング
| 問題 | 考えられる解決策 |
|---|---|
| 本体にディスプレイが表示されない | Check USB power connection or replace AAA batteries. Ensure correct polarity. |
| 屋外の測定値が表示されない、または不正確です | Replace batteries in the remote sensor. Ensure sensor is within range (up to 200ft) and free from obstructions. Press 'CHANNEL' button on main unit to re-establish connection. Reset both units if necessary. |
| 天気予報は間違っているようだ | The weather forecast indicates a trend over 12 hours based on barometric pressure changes, not current conditions. Allow time for the unit to gather data. |
| 時刻/日付が正しくありません | Manually set the time and date using the 'SET/AL SET' button as described in the Operating Instructions. |
仕様
- 室内温度範囲: 14°F ~ 122°F (-10°C ~ 50°C)
- 屋外温度範囲: -40°F ~ 140°F (-40°C ~ 60°C)
- 温度精度: ±1℃
- 屋内/屋外湿度範囲: (Information not explicitly provided, but implied by description)
- 無線伝送範囲: 屋外では最大200フィート(60メートル)
- 電源(本体): Type-C USB cord (included) or 2 x AAA batteries (not included)
- 電源(リモートセンサー): 単2電池XNUMX本(別売)
- 表示タイプ: 導かれた
- 材料: プラスチック
- モデル番号: 5282011
保証情報
This product is covered by a manufacturer's warranty. For specific details regarding warranty coverage and duration, please refer to the warranty card included with your purchase or contact Taylor customer support directly. Proof of purchase may be required for warranty claims.
カスタマーサポート
For technical assistance, troubleshooting, or general inquiries, please contact Taylor customer service. Our USA-based Design, Marketing, Engineering, and Customer Service teams are available to assist you.
Please visit the official Taylor website for contact information or refer to the packaging for support details.