
1. はじめに
This manual provides comprehensive instructions for the installation, operation, and maintenance of your PANOEAGLE DS-7608NI-I2/8P 8-Channel 4K Network Video Recorder (NVR). Please read this manual thoroughly before using the product to ensure proper setup and functionality. Retain this manual for future reference.
The PANOEAGLE DS-7608NI-I2/8P is an embedded Plug and Play 4K NVR designed for robust 24/7 surveillance recording. It supports up to 8 cameras simultaneously, offering high-resolution recording up to 12MP and utilizing H.264+/H.264/H.265 video compression for efficient storage. Its Power over Ethernet (PoE) capability simplifies camera installation by providing both power and data through a single cable.
2.製品オーバーview
Familiarize yourself with the components and interfaces of your NVR.
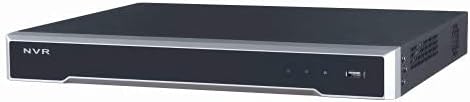
図2.1:フロントパネル View
This image displays the front panel of the NVR, featuring the 'NVR' branding, status indicators, and a USB port for peripheral connections.

図2.2:背面パネル View
This image shows the rear panel of the NVR, highlighting the power input, cooling fan, 8 PoE ports, network port, USB ports, audio input/output, VGA, and HDMI video outputs, and alarm/control terminals.

図2.3: 斜め後部 View
An angled perspective of the NVR's rear panel, providing a clearer view of the various connectivity options and ventilation.
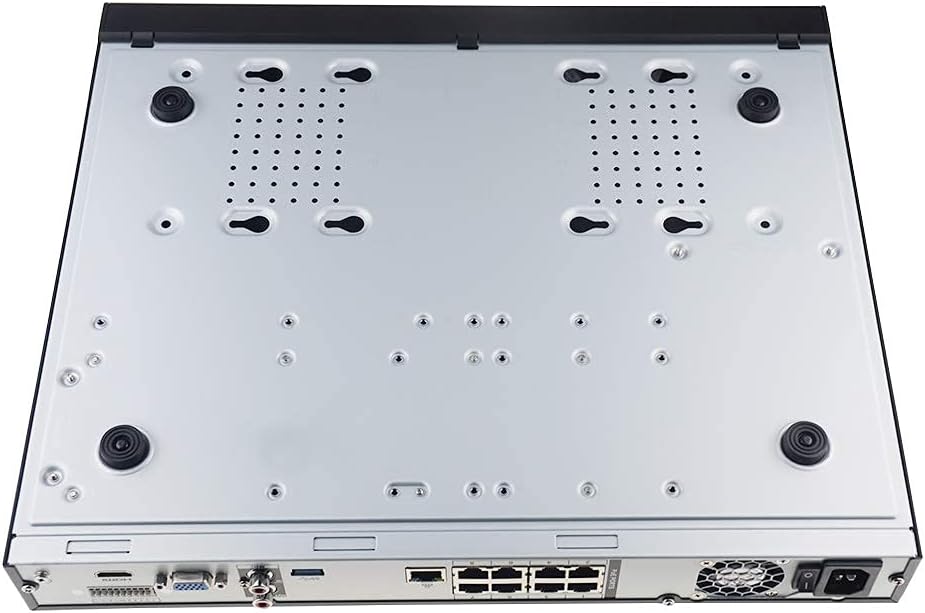
Figure 2.4: Bottom Panel View
This image displays the bottom of the NVR, showing mounting points and ventilation holes, along with rubber feet for stable placement.
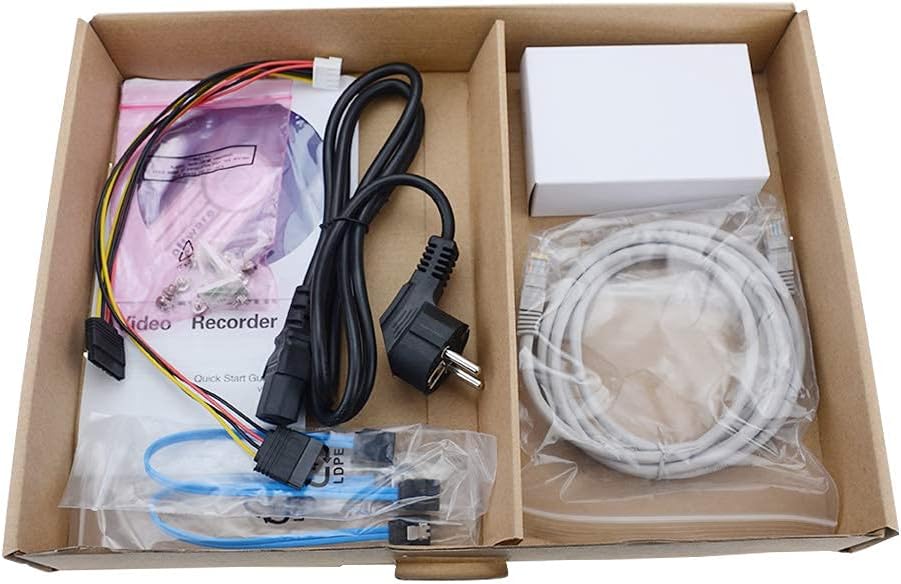
図2.5: パッケージ内容
A view of the accessories included with the NVR, typically comprising a power cable, network cable, USB mouse, SATA cables for hard drive installation, and a quick start guide.
3. 主な特徴
- 8チャンネル録音: Supports simultaneous recording from up to 8 IP cameras.
- 4K 解像度のサポート: Capable of recording and displaying video resolutions up to 12MP.
- PoE Easy Setup: Integrated Power over Ethernet (PoE) ports for direct connection and power supply to IP cameras via a single Ethernet cable.
- 高度なビデオ圧縮: Utilizes H.264+/H.264/H.265 codecs for efficient storage and bandwidth usage.
- 24時間7日録画: Designed for continuous, reliable surveillance monitoring.
- HDMI出力: High-definition video output for connecting to monitors or TVs.
- SATA サポート: Features 2 SATA interfaces for internal hard drive installation (HDDs not included).
4.セットアップガイド
4.1. ハードドライブのインストール(オプション)
NVR にハード ドライブがプリインストールされていない場合は、次の手順に従ってください。
- NVR の電源をオフにし、すべてのケーブルを外します。
- NVR シャーシの上部カバーをネジを外して取り外します。
- Connect the SATA data cable and power cable from the NVR to the hard drive.
- 付属のネジを使用してハードドライブを NVR シャーシに固定します。
- 上部カバーを取り付けて、ネジで固定します。
4.2. 初期接続
- モニターを接続する: モニターを NVR の HDMI または VGA 出力ポートに接続します。
- マウスを接続する: USB マウスを NVR の USB ポートの 1 つに接続します。
- ネットワークに接続する: イーサネット ケーブルを使用して、NVR の LAN ポートをルーターまたはネットワーク スイッチに接続します。
- IP カメラを接続する: Connect your PoE IP cameras to the NVR's PoE ports using Ethernet cables. The NVR will provide power and data to the cameras.
- 電源オン: 電源アダプターをNVRに接続し、電源コンセントに差し込みます。NVRは自動的に電源が入ります。
4.3. 初期設定
NVRの初回起動時に、初期セットアップウィザードが表示されます。ウィザードには通常、以下の内容が含まれます。
- 管理者パスワードの設定。
- Configuring network settings (DHCP is usually default).
- Initializing the hard drive (if newly installed).
- 接続されている IP カメラを検索して追加します。
- 日付と時刻の設定。
画面の指示に従ってセットアップを完了します。
5. 操作手順
5.1.ライブ View
ログイン後、NVRは通常ライブ映像を表示します。 view 接続されているすべてのカメラの映像を表示します。 view、マルチカメラグリッド view、表示レイアウトをカスタマイズします。
5.2。 録音
- 連続記録: Records 24/7. Configure schedules in the NVR's menu.
- 動き検出記録: Records only when motion is detected. Sensitivity and detection zones can be adjusted.
- スケジュールされた記録: 録音する特定の時間を設定します。
Access recording settings via the NVR's main menu, usually under "Record" or "Storage" settings.
5.3.再生
再するためにview 記録されたfootage:
- メインメニューから「再生」を選択します。
- 再表示するカメラと日付/時間範囲を選択してくださいview.
- Use the timeline to navigate through recorded events. Options for fast-forward, rewind, and pause are available.
5.4. リモートアクセス
NVRはリモートをサポート viewモバイルアプリまたは web browser. Refer to the NVR's network settings for details on enabling P2P (peer-to-peer) or port forwarding for remote access. Download the official PANOEAGLE mobile application from your device's app store.
6. メンテナンス
- 定期清掃: Keep the NVR free from dust. Use a soft, dry cloth for exterior cleaning. Ensure ventilation openings are clear.
- ファームウェアの更新: Periodically check the PANOEAGLE official website for firmware updates. Updates can improve performance, add features, and enhance security. Follow update instructions carefully.
- ハードドライブの健全性: Monitor the health of your hard drive(s) through the NVR's system information. Replace failing drives promptly to avoid data loss.
- パスワードのセキュリティ: Regularly change your administrator password and use strong, unique passwords.
7。 トラブルシューティング
| 問題 | 考えられる原因 | 解決 |
|---|---|---|
| モニターにビデオ出力がありません。 | ケーブル接続が緩んでいる、モニターの入力ソースが正しくない、NVR の電源がオンになっていない。 | HDMI/VGAケーブルの接続を確認してください。モニターの入力が正しいことを確認してください。NVRの電源を確認してください。 |
| ライブでカメラが表示されない view. | Camera not powered, network issue, camera not added to NVR, incorrect IP address. | Check camera power and Ethernet cables. Ensure cameras are connected to PoE ports. Use NVR's camera management to search and add cameras. Verify camera IP addresses. |
| 録画なしまたは欠落tage. | Hard drive not installed/initialized, recording schedule not configured, hard drive full, hard drive failure. | Install and initialize HDD. Configure recording schedules. Check HDD status and capacity. Replace faulty HDD. |
| NVRにリモートでアクセスできません。 | Network configuration issues, P2P disabled, incorrect app settings, firewall blocking. | Ensure NVR has internet access. Enable P2P service. Verify app settings and NVR's network configuration. Check router firewall settings. |
8. 仕様
| 特徴 | 詳細 |
|---|---|
| モデル | DS-7608NI-I2/8P |
| ブランド | PANOEAGLE (Compatible with Hi-k USA systems) |
| チャンネル数 | 8 |
| 最大解像度 | 最大12MP |
| ビデオ圧縮 | 264+/H.264/H.265 |
| ビデオ出力 | HDMI、VGA |
| オーディオ入力 | RCA |
| SATAインターフェース | 2 (for HDD) |
| 接続技術 | HDMI、イーサネット(PoE) |
| 初回利用可能日 | 28年2021月XNUMX日 |
9. 保証とサポート
For warranty information, please refer to the warranty card included with your product or visit the official PANOEAGLE website. Technical support may be available through the manufacturer's webサイトにアクセスするか、カスタマー サービス部門に問い合わせてください。
Always ensure you are using official channels for support and firmware downloads to maintain product integrity and security.