
Sartorius MCA125S-2S00-I
Sartorius Cubis II Semi-Micro Balance MCA125S-2S00-I User Manual
Model: MCA125S-2S00-I
1. はじめに
This manual provides essential instructions for the safe and efficient operation, setup, and maintenance of your Sartorius Cubis II Semi-Micro Balance, model MCA125S-2S00-I. This high-performance laboratory balance is designed for precise weighing applications requiring a 0.01 mg division and a maximum load of 120g. It features a modular design, an MCA Interface, and an integrated Draft Shield I to ensure accurate and repeatable results in R&D and analytical laboratories.
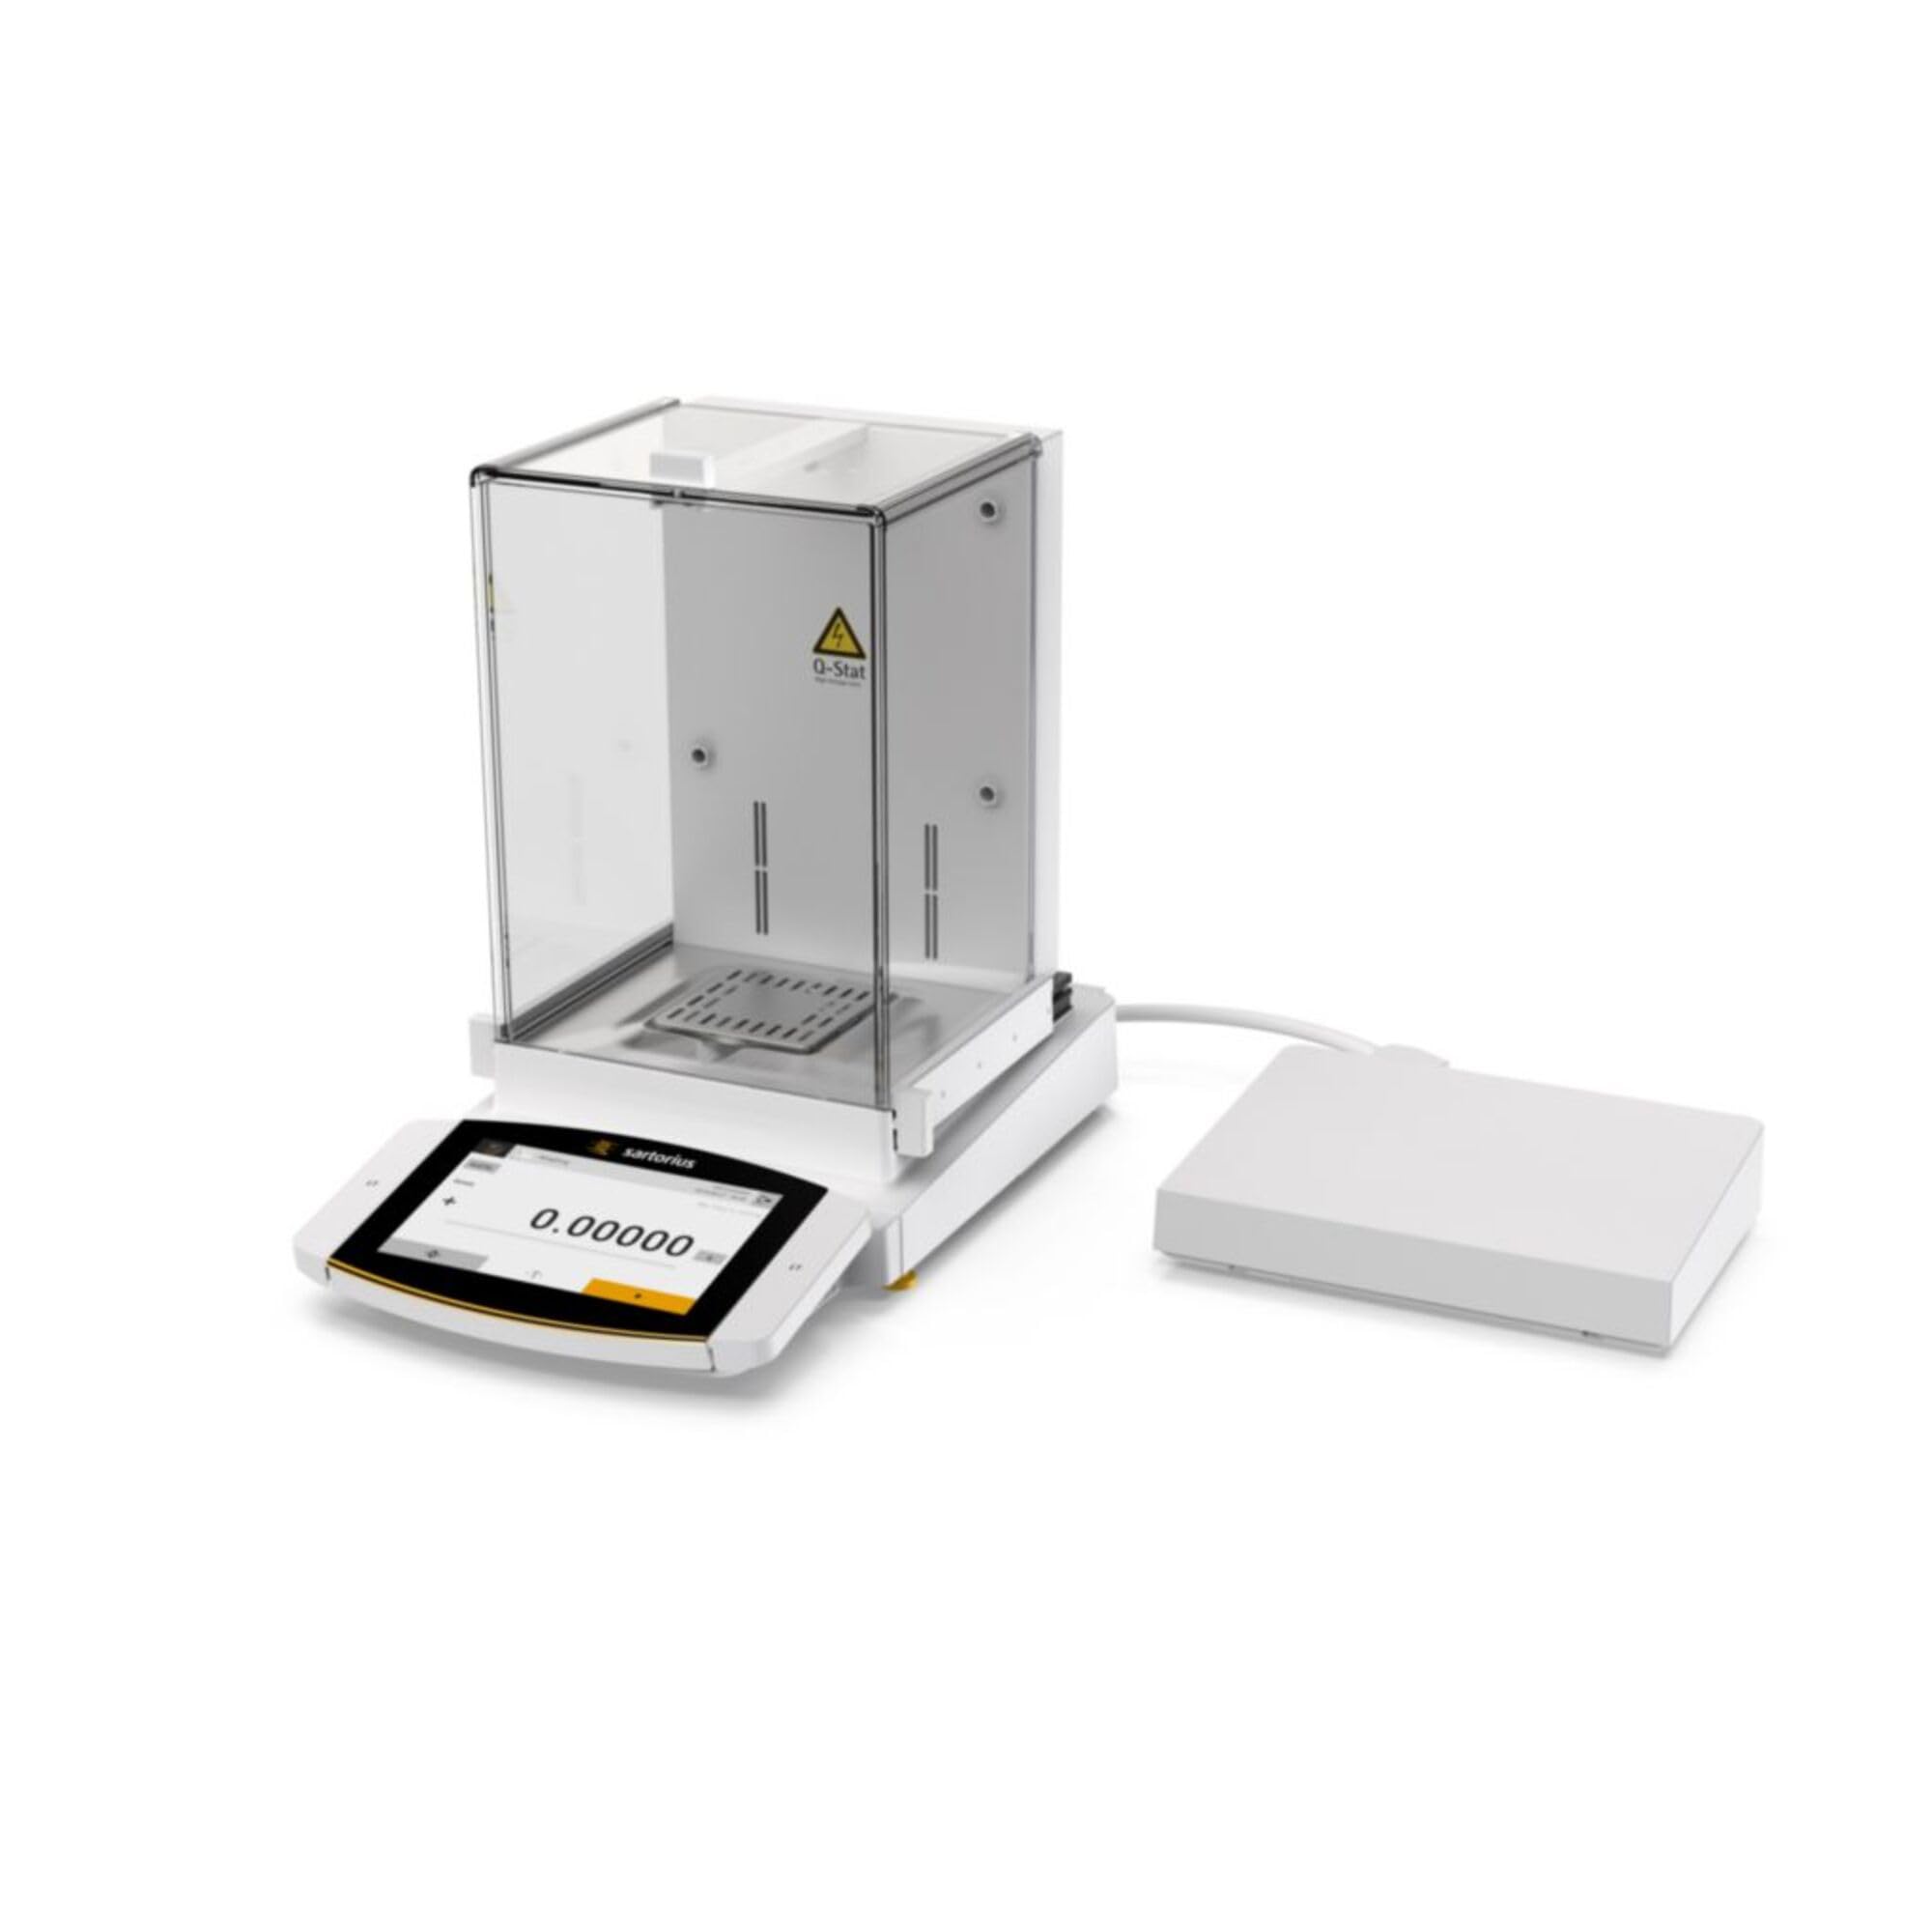
Figure 1: Sartorius Cubis II Semi-Micro Balance MCA125S-2S00-I with Draft Shield I. This image shows the complete balance unit, including the weighing pan and the protective draft shield.
2. 安全情報
Always observe the following safety precautions to prevent injury and damage to the balance:
- 天秤を操作する前にこのマニュアル全体をお読みください。
- Operate the balance only in a stable, level environment free from vibrations, drafts, and extreme temperature fluctuations.
- Ensure the power supply matches the balance's requirements (100-240V).
- Do not expose the balance to corrosive chemicals or excessive moisture.
- Only use Sartorius-approved accessories and spare parts.
- 清掃やメンテナンスを行う前に、電源ケーブルを外してください。
- ご自身で天秤を開けたり修理したりしないでください。修理は資格のある専門家にご依頼ください。
3. 開梱と初期検査
Carefully unpack all components and check for any visible damage. Retain the original packaging for future transport or storage.
- Open the shipping carton and remove the balance unit and accessories.
- 梱包リストに記載されているすべてのコンポーネントが揃っていることを確認します。
- Inspect the balance for any signs of damage incurred during shipping. If damage is found, contact your supplier immediately.
4. セットアップ
4.1 配置
Place the balance on a sturdy, level, and vibration-free surface. Avoid locations near air conditioning vents, open windows, or direct sunlight, which can cause temperature fluctuations and affect weighing accuracy.
4.2 Draft Shield Assembly
The Cubis II MCA125S-2S00-I comes with Draft Shield I. Assemble the draft shield components according to the diagrams provided in the separate assembly guide (if applicable) or by carefully following the intuitive design. Ensure all glass panels are securely seated to prevent air currents from affecting measurements.
Figure 2: Illustrative image of the balance with Draft Shield I. This image highlights the transparent draft shield enclosure, crucial for protecting the weighing pan from air currents.
4.3 バランスの均衡
The balance must be perfectly level for accurate measurements. Use the leveling feet located at the base of the balance and the integrated spirit level (bubble level) to adjust until the bubble is centered.
- Locate the spirit level, usually at the front or side of the balance.
- Adjust the two rear leveling feet until the bubble is centered in the spirit level.
- Adjust the front leveling foot (if present) to fine-tune the level.
4.4電源接続
Connect the power adapter to the balance and then plug it into a suitable electrical outlet (100-240V AC). Allow the balance to warm up for at least 30 minutes after connecting power before performing any measurements to ensure optimal stability.
5. 操作手順
5.1 電源のオン/オフ
を押す オン/オフ button (often indicated by a circle with a vertical line) to power on the balance. To turn off, press and hold the same button until the display shuts down.
5.2 基本的な計量手順
- 計量皿が清潔で空であることを確認します。
- Close the draft shield doors.
- を押す 風袋 or ゼロ 表示をゼロに設定するボタン。
- 計量する物を計量皿の中央に慎重に置きます。
- Close the draft shield doors.
- Wait for the stability indicator (usually a circle or asterisk) to appear on the display, indicating a stable reading.
- Read the weight displayed in milligrams (mg).
- Remove the item from the weighing pan.
5.3 Using the Tare Function
The tare function allows you to weigh the net weight of a substance by subtracting the weight of its container.
- 空の容器を計量皿の上に置きます。
- Close the draft shield doors.
- を押す 風袋 ボタンを押します。ディスプレイにゼロが表示されます。
- 計量する物質を容器に入れます。
- Close the draft shield doors and wait for a stable reading. The displayed value is the net weight of the substance.
5.4 MCA Interface
The MCA Interface provides advanced control and data management capabilities. Refer to the separate MCA Interface user guide for detailed instructions on navigating menus, configuring settings, and connecting to external devices or software. This interface allows for customization of weighing applications, data logging, and compliance features.
6. キャリブレーション
Regular calibration is crucial for maintaining the accuracy of your balance. The Cubis II balance may feature internal calibration (isoCAL) or require external calibration using certified weights.
6.1 Internal Calibration (isoCAL)
If your balance is equipped with isoCAL, it will perform automatic internal calibration at set intervals or when temperature changes occur. You can also initiate it manually via the menu. Consult the MCA Interface user guide for specific steps.
6.2 外部キャリブレーション
For external calibration, you will need certified calibration weights appropriate for the balance's capacity and readability. The procedure typically involves:
- Accessing the calibration menu on the MCA Interface.
- Following the on-screen prompts to place and remove the specified calibration weights.
- Confirming the calibration process.
Always use certified weights and ensure they are clean and handled with gloves to avoid contamination.
7. メンテナンス
適切なメンテナンスを行うことで、天秤の寿命と精度が確保されます。
7.1 クリーニング
- 清掃する前に必ず天びんを電源から外してください。
- 柔らかく糸くずの出ない布を使用してください。ampened with a mild cleaning agent (e.g., isopropyl alcohol or a mild soap solution) to clean the exterior surfaces.
- Remove the weighing pan and draft shield components for separate cleaning. Wash them with mild detergent and rinse thoroughly. Ensure they are completely dry before reassembling.
- Do not use abrasive cleaners, strong solvents, or immerse the balance in water.
- Avoid spraying cleaning agents directly onto the balance; apply them to the cloth first.
7.2 環境条件
Maintain a stable environment. Avoid rapid temperature changes, high humidity, and strong air currents. Store the balance in a clean, dry place when not in use.
8。 トラブルシューティング
This section addresses common issues you might encounter. For problems not listed here, contact Sartorius customer support.
| 問題 | 考えられる原因 | 解決 |
|---|---|---|
| 不安定な測定値 | Drafts, vibrations, unstable surface, temperature fluctuations, dirty weighing pan. | Ensure draft shield is closed. Relocate balance to a stable, vibration-free area. Check leveling. Allow balance to acclimatize. Clean weighing pan. |
| バランスが取れない | No power supply, faulty power cable/adapter. | Check power cable connection. Verify power outlet. Try a different power adapter if available. |
| 不正確な測定値 | Not calibrated, incorrect leveling, temperature drift, overloading. | Perform calibration. Re-level the balance. Allow warm-up time. Do not exceed 120g max load. |
| エラーメッセージを表示する | Internal fault, overload, communication error. | Refer to the MCA Interface user guide for specific error codes. Turn off and restart the balance. If persistent, contact support. |
9. 仕様
Key technical specifications for the Sartorius Cubis II Semi-Micro Balance MCA125S-2S00-I:
- モデル: MCA125S-2S00-I
- ブランド: サルトリウス
- Maximum Load (Maxload): 120グラム
- Readout Accuracy (Division): 0.01mg
- インタフェース: MCA Interface
- ドラフトシールド: Draft Shield I
- 電源: 100-240V
- 含まれるコンポーネント: バランス
- フォームファクター: ミニ
10. 保証とサポート
For detailed warranty information, please refer to the warranty card included with your product or visit the official Sartorius website. In case of technical issues, service requirements, or questions not covered in this manual, please contact your local Sartorius representative or authorized service center. Provide your model number (MCA125S-2S00-I) and serial number when requesting support.
Sartorius Contact Information: 参照 www.sartorius.com/en/global-contacts 地域の連絡先の詳細については、こちらをご覧ください。
Ask a question about this manual
Ask about setup, troubleshooting, compatibility, parts, safety, or missing instructions. Manuals+ will review the question and use this page’s manual context to help answer it.