1. はじめに
Thank you for choosing the CREATE SILKAIR CONNECT 3-in-1 Mobile Air Conditioner. This versatile appliance is designed to provide cooling, dehumidification, and fan functions for your living space. With its Wi-Fi connectivity, you can conveniently control the unit via a mobile application. Please read this manual thoroughly before operation to ensure safe and efficient use.
モデル: 64274_145198
ブランド: 作成する
2. 安全情報
火災、感電、怪我のリスクを減らすために、電気製品を使用するときは常に基本的な安全上の注意事項に従ってください。
- 電源がボリュームと一致していることを確認してくださいtag評価ラベルに明記されています。
- コードやプラグが損傷した状態で本機を操作しないでください。
- ユニットを熱源や直射日光から遠ざけてください。
- 空気の入口や出口を塞がないでください。
- 清掃やメンテナンスを行う前に、必ずユニットのプラグを抜いてください。
- この機器はR290冷媒を使用しています。冷媒回路に穴を開けないでください。
- 子供たちを監視し、機器で遊ばないようにしてください。
3. パッケージ内容
Carefully unpack your air conditioner and check that all items are present and in good condition.
- CREATE SILKAIR CONNECT Mobile Air Conditioner Unit
- 排気ホース
- Window Sealing Kit (Adjustable window slider, hose adapter)
- リモートコントロール
- ユーザーマニュアル

Figure 1: The CREATE SILKAIR CONNECT Mobile Air Conditioner unit shown alongside a smartphone displaying its control application interface.
4.製品オーバーview
4.1 コントロールパネル

Figure 2: Close-up of the top-mounted control panel, featuring an LED display and touch-sensitive buttons for various functions such as power, mode selection, fan speed, and timer.
4.2 コンポーネントと寸法
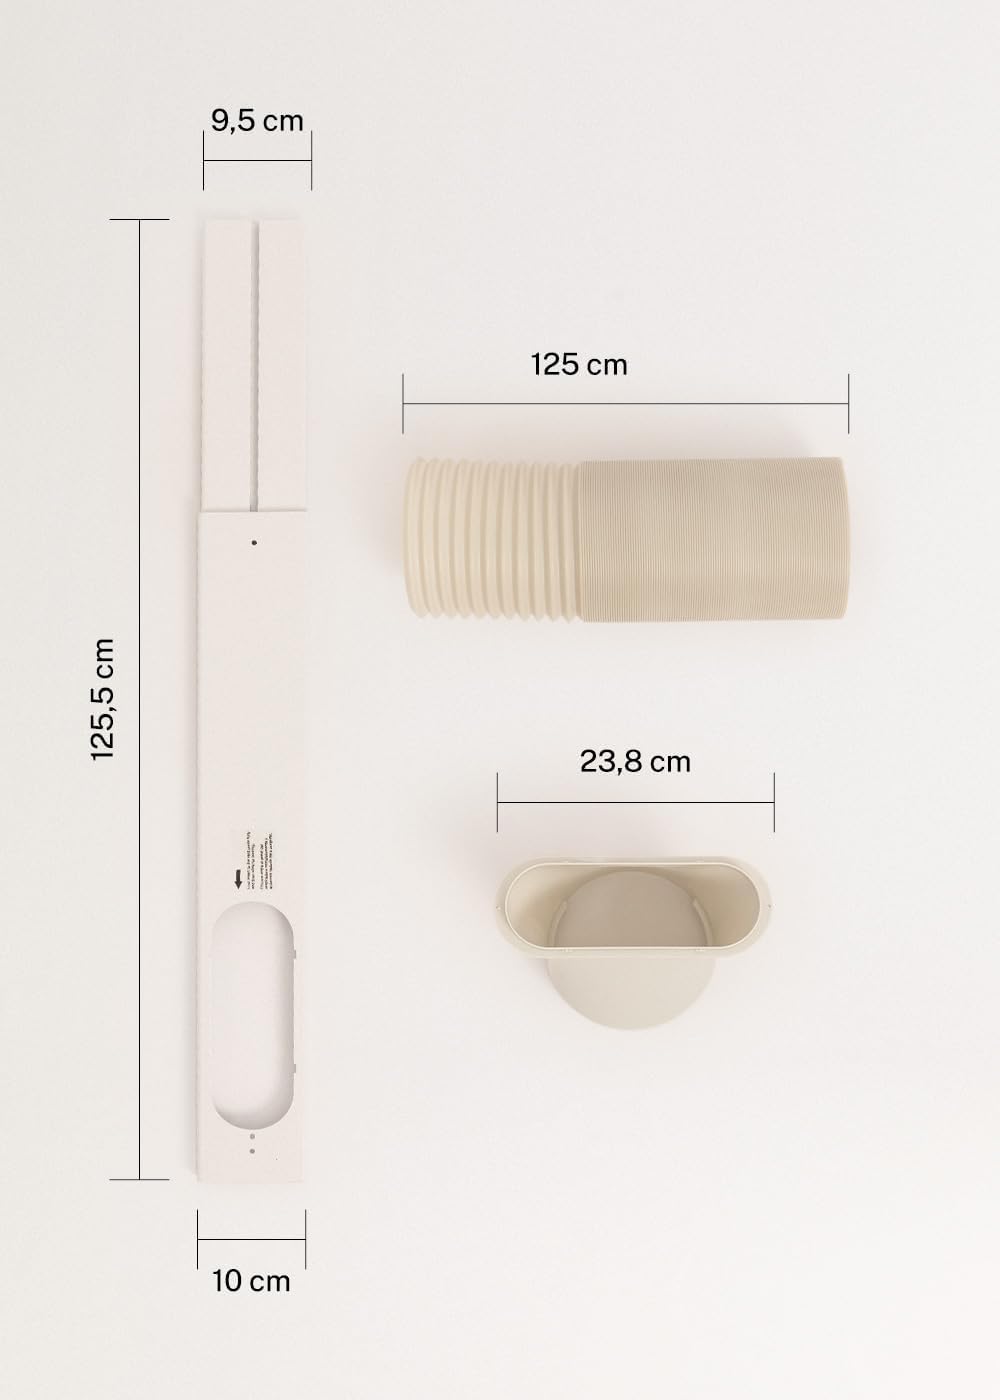
Figure 3: Detailed diagram illustrating the dimensions of the window sealing plate (125.5 cm length, 10 cm width, 9.5 cm adjustable width) and the exhaust hose (125 cm length) with its adapter (23.8 cm diameter).
5. セットアップとインストール
Proper installation is crucial for the efficient operation of your mobile air conditioner.
5.1 ユニットの配置
- ユニットを平らで安定した面に置きます。
- 適切な空気の流れを確保するため、ユニットの周囲に少なくとも 30 cm のスペースを確保してください。
- ユニットを窓または排気ホースの開口部の近くに配置します。
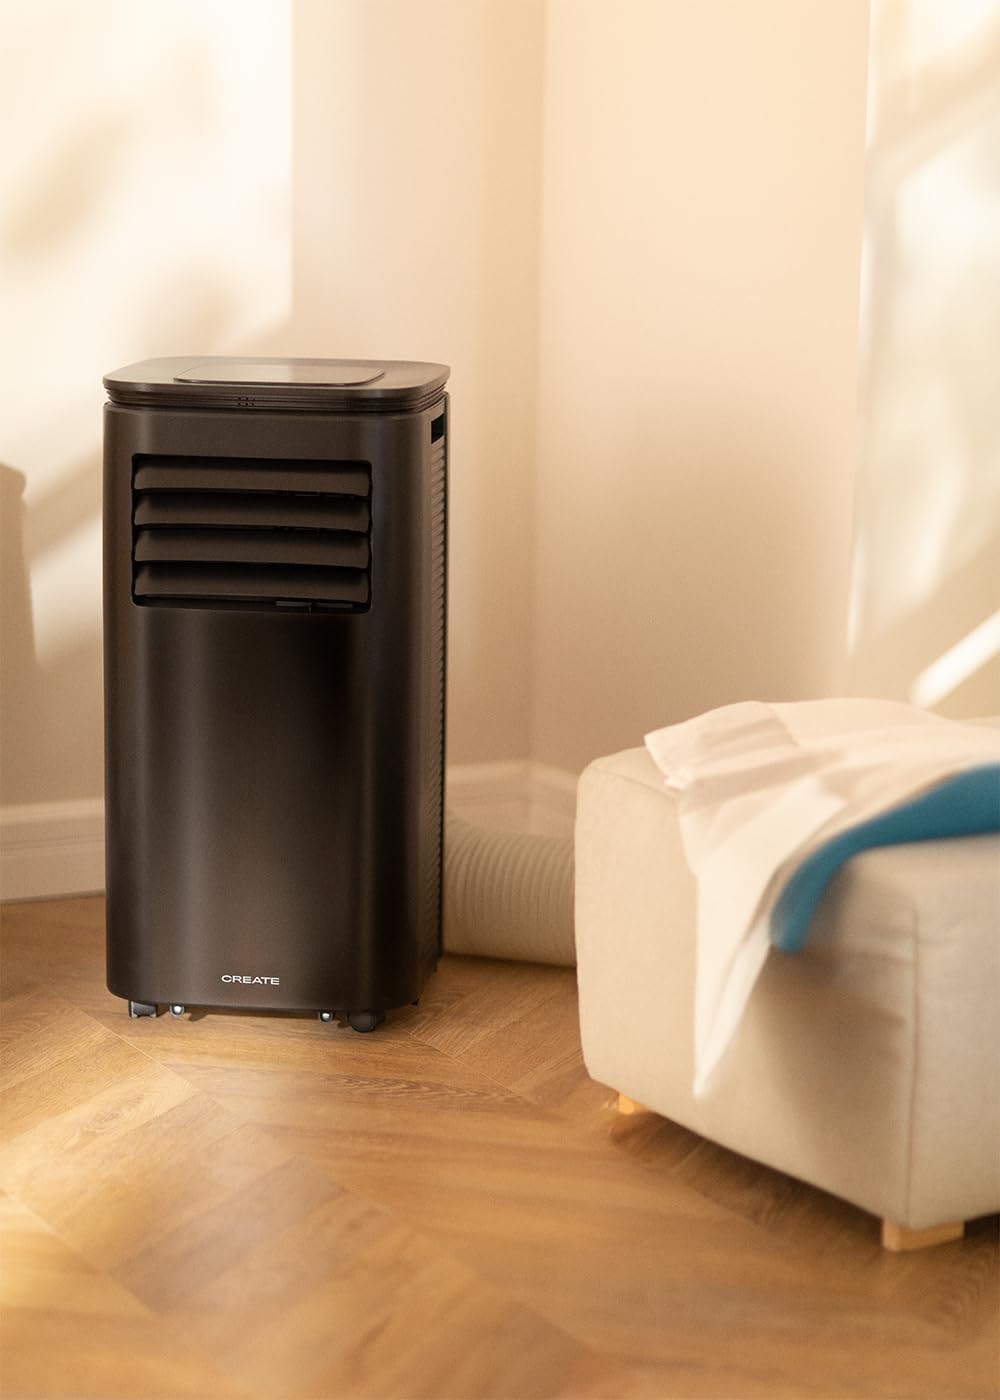
Figure 4: The air conditioner unit positioned in a room, demonstrating the typical setup with the exhaust hose directed towards a window for heat expulsion.
5.2 Installing the Exhaust Hose and Window Kit
- Attach the hose adapter to one end of the exhaust hose.
- Connect the other end of the exhaust hose to the air outlet on the back of the unit.
- Install the adjustable window sealing kit in your window opening. Extend it to fit the window frame.
- Insert the hose adapter into the opening of the window sealing kit.

Figure 5: Illustrates the secure connection of the flexible exhaust hose to the designated port at the rear of the air conditioning unit.
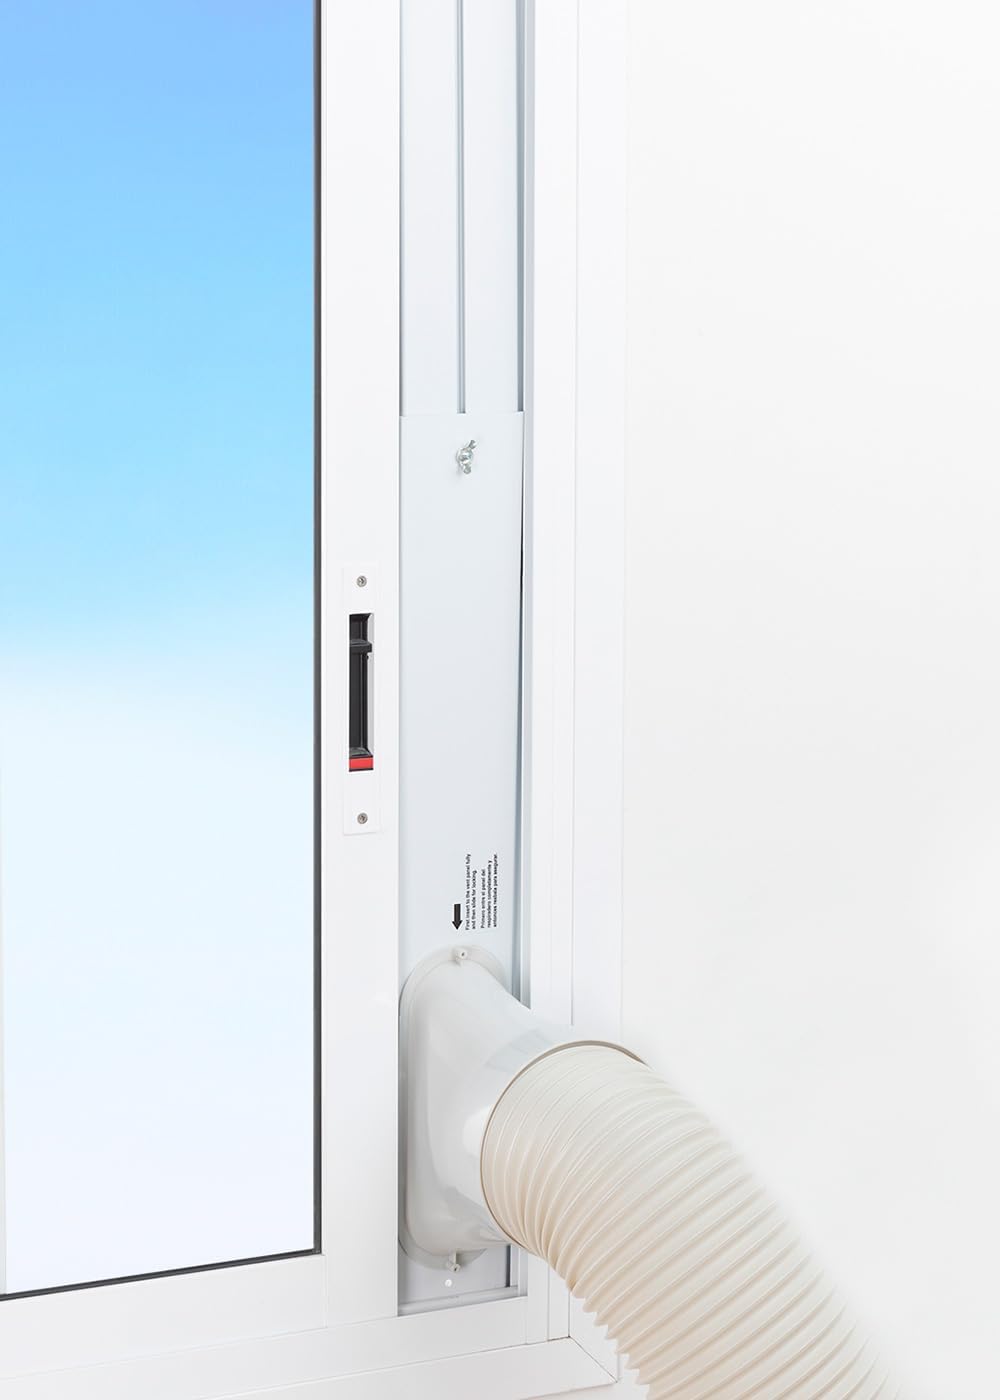
Figure 6: The window sealing kit is shown properly installed in a window frame, with the exhaust hose securely fitted into the kit's opening to vent hot air outside.
6. 操作手順
6.1コントロールパネルの使用
The control panel on top of the unit allows direct operation.
- 電源ボタン: を押して、ユニットの電源をオンまたはオフにします。
- モードボタン: 冷房、ファン、除湿モードを切り替えます。
- ファン速度ボタン: Adjust fan speed (Low, High).
- 温度ボタン(+/-): Adjust desired temperature in Cooling mode.
- タイマーボタン: 自動オンまたは自動オフタイマーを設定します (最大 24 時間)。
- スリープモードボタン: 夜間の使用に適した静かな動作モードを有効にします。
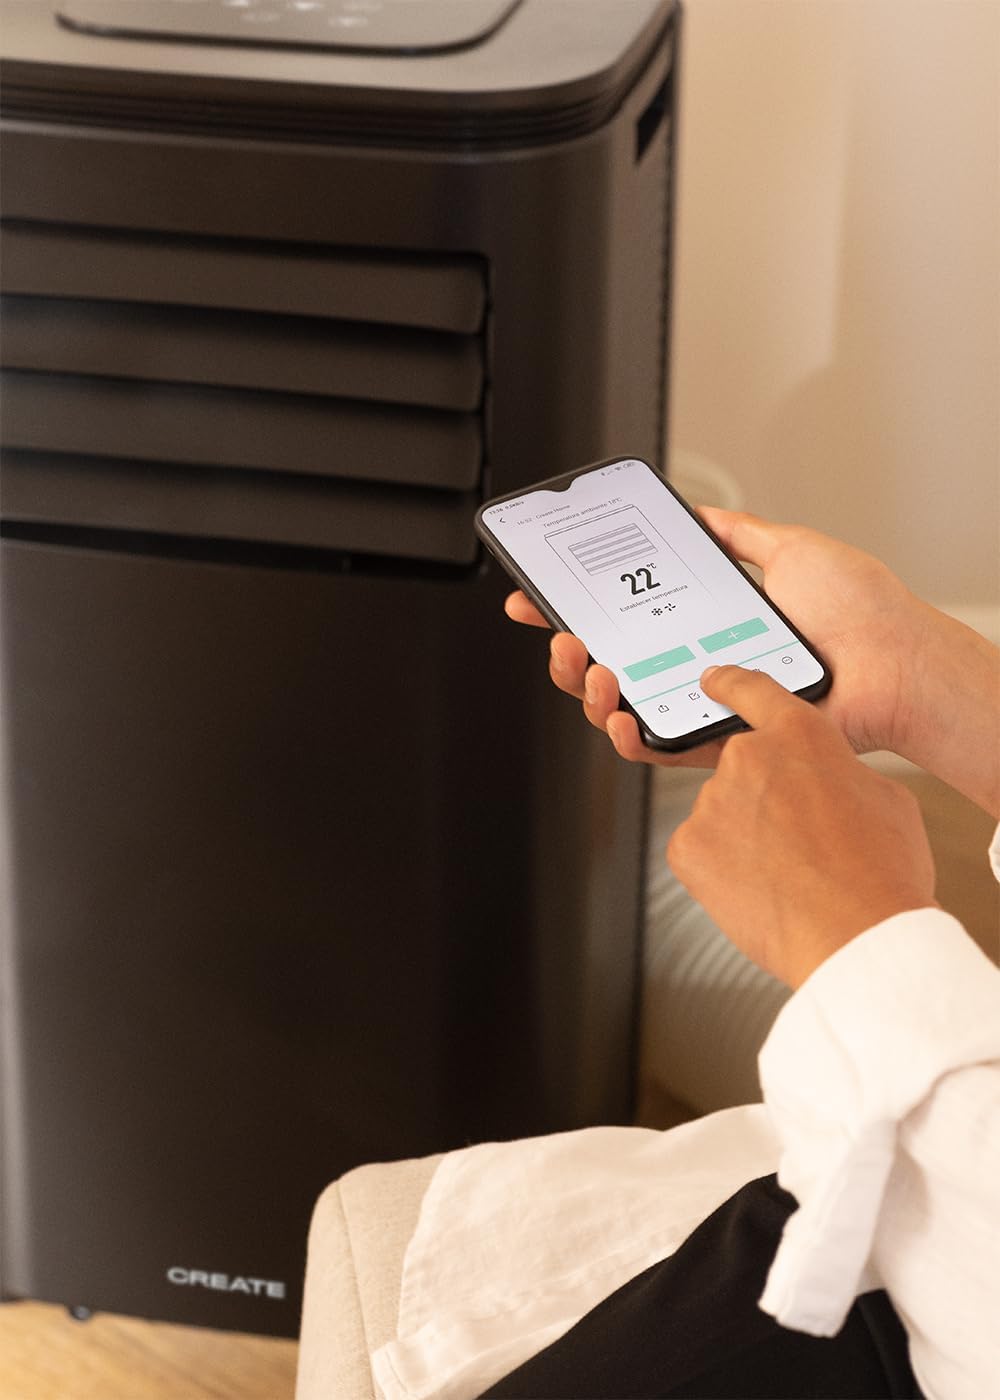
Figure 7: A user's hand interacting with the touch-sensitive control panel located on the top surface of the air conditioner, demonstrating direct manual operation.
6.2 リモコンの使用
The remote control provides convenient operation from a distance.

Figure 8: A hand holding the dedicated remote control for the air conditioner, illustrating its use for convenient operation from a distance.
6.3 Wi-Fiとアプリ制御
Download the CREATE Home app from your smartphone's app store. Follow the in-app instructions to connect your air conditioner to your home Wi-Fi network. Once connected, you can control all functions of the unit from your smartphone, including mode selection, temperature adjustment, fan speed, and timer settings.
Figure 9: A user interacting with the mobile application on a smartphone to remotely control the air conditioner, showcasing the Wi-Fi connectivity feature.
7. メンテナンス
定期的なメンテナンスにより、最適なパフォーマンスが確保され、ユニットの寿命が延びます。
7.1エアフィルターの清掃
エアフィルターは、使用状況と空気の質に応じて 2 週間ごと、またはより頻繁に清掃する必要があります。
- 本体の電源を切り、電源プラグをコンセントから抜きます。
- Locate the air filter panel on the back of the unit.
- フィルターをそっと取り外します。
- Clean the filter with warm, soapy water or a vacuum cleaner. Rinse thoroughly and allow it to air dry completely before reinserting.

Figure 10: Demonstrates the process of removing the air filter from the rear of the air conditioner unit for cleaning or replacement.
7.2 排水
In Dehumidifier mode or high humidity conditions, the internal water tank may fill up. The unit will stop operating when the tank is full. Drain the water from the drainage port at the bottom rear of the unit.
8。 トラブルシューティング
| 問題 | 考えられる原因 | 解決 |
|---|---|---|
| ユニットがオンにならない | No power; Power cord not plugged in; Water tank full. | Check power outlet; Plug in power cord; Drain water tank. |
| ユニットが効果的に冷却されない | エアフィルターが汚れている。排気ホースが正しく取り付けられていない。部屋が広すぎる。ドアや窓が開いている。 | Clean air filter; Ensure hose is sealed; Use in recommended room size (14-25 m²); Close doors/windows. |
| 大きな音 | ユニットが平らな面に設置されていない。ファンに障害がある。 | Place on flat surface; Check for obstructions. |
| Wi-Fi接続の問題 | Wi-Fi パスワードが正しくありません。ルーターが遠すぎます。アプリに問題があります。 | Verify password; Move unit closer to router; Restart app/unit. |
9. 仕様
| 特徴 | 仕様 |
|---|---|
| モデル番号 | 64274_145198 |
| 冷却能力 | 9000 BTU / 2270 Watt |
| 除湿能力 | 24リットル/日 |
| 気流 | 最大350 m³/時 |
| 推奨される部屋のサイズ | 14~25㎡ |
| 騒音レベル | 65デシベル |
| 冷媒 | R290 (ECO-friendly) |
| 巻tage | 240ボルト |
| ワットtage | 2600ワット |
| 寸法(長さ×幅×高さ) | 35.5 x 36.5 x 71.3 cm |
| 材料 | アブソリュート |
| エネルギー効率クラス | A |

Figure 11: The energy efficiency label for the CREATE SILKAIR CONNECT, indicating an A-class energy rating, 2.6 kW cooling capacity, and a noise level of 65 dB. More details can be found at eprel.ec.europa.eu/qr/1580267.
10. 保証とサポート
For warranty information and technical support, please refer to the warranty card included with your product or visit the official CREATE webサイトでご確認ください。購入証明として購入レシートを保管してください。
メーカー: 作成する
接触: Refer to CREATE's official support channels.