
amFilm Galaxy S20 Ultra
amFilm Ultra Glass Screen Protector for Samsung Galaxy S20 Ultra
インストールとユーザーマニュアル
1. はじめに
This manual provides detailed instructions for the installation and proper use of your amFilm Ultra Glass Screen Protector for the Samsung Galaxy S20 Ultra. This tempered glass protector is designed to be fully compatible with the ultrasonic fingerprint scanner, offering robust protection without compromising device functionality.
2. 含まれるもの
Your amFilm Ultra Glass Screen Protector package includes all necessary components for a successful installation:
- 2x amFilm Full Screen Adhesive Glass Screen Protectors
- 1x Application Tray (with 2 absorption pads pre-installed)
- ほこり除去ステッカー
- マイクロファイバークロス
- Installation Manual (this guide)
- ウェット/ドライワイプ
- 2x Adhesive Tubes
- 1x Metal Cylinder
- 水準器 x 1
- プラスチックピン1個
- Speaker Stickers
- 1x UV Light
- Levelling Pads
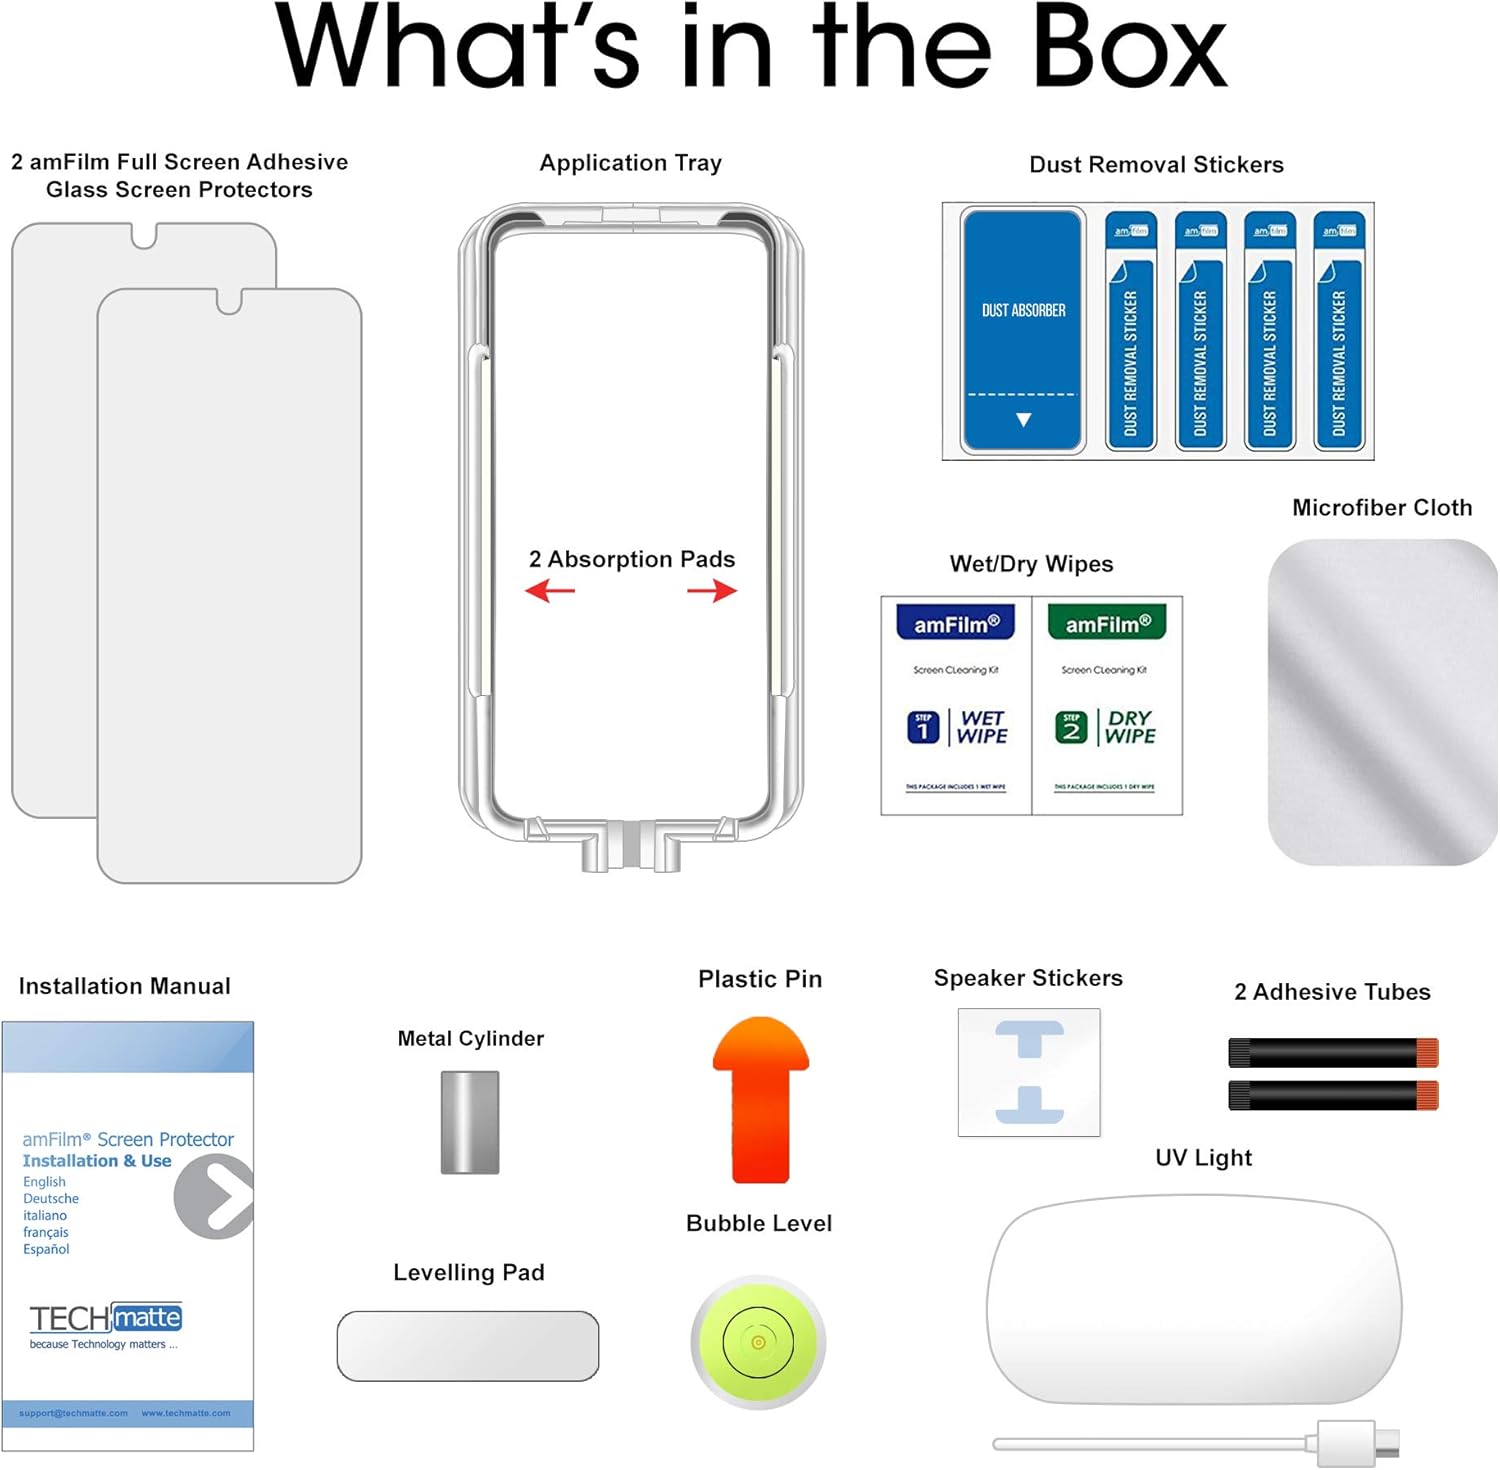
Image: All components included in the amFilm Ultra Glass Screen Protector package.
3. 互換性
This screen protector is specifically designed for the サムスンギャラクシーS20ウルトラ. It is not compatible with other phone models such as the Galaxy S20 or S20 Plus.

Image: Visual guide illustrating compatibility with the Samsung Galaxy S20 Ultra only.
4. インストール手順
Follow these steps carefully for optimal installation. It is recommended to watch the official installation video before beginning.
Video: Official amFilm Ultra Glass Screen Protector Installation Guide.
- デバイスを準備する:
- Turn off your Samsung Galaxy S20 Ultra.
- Clean the screen thoroughly using the provided wet and dry wipes. Ensure no dust or smudges remain.
- Apply the levelling pads to the back of your phone to ensure it remains flat during installation.
- Set Up Application Tray:
- Place the application tray on your phone. Ensure the open cut on the tray is positioned at the top of the phone. Verify that the four internal pins of the tray are in direct contact with the phone screen.
- Peel one speaker sticker from its film and place it over the device's speaker through the open cut at the top of the tray. Press firmly to adhere the tab to the speaker, preventing adhesive from entering.
- Insert the plastic pin into the slot at the bottom of the tray, opposite the speaker protecting tab.
- Ensure your installation surface is completely flat. Use the bubble level provided to confirm the surface is level.
- 接着剤を塗布する:
- Remove the red cap from an adhesive tube. Hold it directly over the middle of the device with the open end facing downwards.
- Unscrew the other end of the tube to release the adhesive onto the center of the phone screen. You may gently tilt the phone to ensure the adhesive forms a single, centered drop.
- Position Screen Protector:
- Remove the mask film from the screen protector.
- Carefully place the top edge of the screen protector onto the phone, and the bottom edge onto the plastic pin. Ensure all sides of the screen protector are within the four pins of the application tray.
- Slowly pull the plastic pin from the bottom of the tray. This will allow the screen protector to gradually lower and make contact with the adhesive. Once contact is made, quickly finish pulling the pin out.
- Allow the adhesive to spread naturally across the screen. This may take 2-3 minutes or longer. Do not touch the screen protector or the metal cylinder during this process.
- Cure Adhesive with UV Light:
- Plug in the UV light and extend its legs. Suspend it over the phone.
- Cure the top, middle, and bottom sections of the screen for 15 seconds each.
- Place the metal cylinder on the fingerprint scanner area (approximately one inch from the bottom of your device). Cure this specific area for an additional 30 seconds using the UV light.
- Remove the metal cylinder.
- Repeat the full curing process: 60 seconds on the top, 60 seconds on the middle, and 60 seconds on the bottom sections.

Image: UV light being used to cure the adhesive.

Image: Explanation of strategically placed UV dots for even adhesive spread.
- 最終ステップ:
- Remove your phone from the application tray and carefully remove the speaker protecting tab.
- Re-scan Fingerprint: If you had a fingerprint registered before installation, it may no longer work. We recommend re-scanning each fingerprint twice to ensure optimal accuracy with the new screen protector.

Image: Prompt to re-scan your fingerprint after screen protector installation.
5. 主な特徴
The amFilm Ultra Glass Screen Protector offers several key advantages:
- Premium Tempered Glass: Constructed from high-quality tempered glass for superior durability and scratch resistance.
- Full Screen Adhesive: Utilizes full screen adhesive for a secure fit and enhanced touch sensitivity.
- No Dot Matrix or Sensitivity Loss: Designed to provide clear visibility and maintain original screen sensitivity, unlike some other protectors.
- Ultrasonic Fingerprint Scanner Compatible: Fully functional with the device's ultrasonic fingerprint scanner after re-registration.
- ケースに優しいデザイン: The protector is designed to be slightly smaller than the actual screen size to ensure compatibility with most phone cases.

Image: The amFilm Ultra screen protector applied to a Samsung Galaxy S20 Ultra, showcasing その機能。

Image: Illustration of the screen protector's case-friendly dimensions.
6. メンテナンス
スクリーンプロテクターの透明度と効果を維持するには:
- Clean the screen protector regularly with a soft, lint-free cloth, such as the microfiber cloth provided.
- 頑固な汚れには、軽くamp布に水または電子機器専用のスクリーンクリーナーを含ませて拭いてください。刺激の強い化学薬品は避けてください。
- Do not use abrasive materials or excessive force when cleaning, as this may damage the protector's surface.
7。 トラブルシューティング
インストール後に問題が発生した場合は、次の点を考慮してください。
- 指紋スキャナーの問題: If the ultrasonic fingerprint scanner is not working correctly, ensure you have re-registered your fingerprints after applying the screen protector. It is recommended to register each fingerprint twice for improved accuracy.
- Bubbles or Uneven Adhesive: Small bubbles may disappear over 24-48 hours. If large bubbles or uneven adhesive persist, it may indicate an issue during the initial adhesive spread or curing process. Review the installation video and instructions carefully for your next attempt.
- Screen Sensitivity: If touch sensitivity is reduced, ensure the screen protector is fully adhered without any lifting edges. Re-curing with the UV light on affected areas might help.
8. 仕様
| 属性 | 詳細 |
|---|---|
| ブランド | アムフィルム |
| 対応デバイス | サムスンギャラクシーS20ウルトラ |
| 材料 | 強化ガラス |
| アイテム硬度 | 9H |
| 製品寸法 | 長さ8インチ x 幅4インチ |
| 特集 | 9H Surface Hardness, Ultrasonic Fingerprint Compatible |
| 仕上げタイプ | 光沢のある |
| 耐水性レベル | 防水 |
| ユニット数 | 2 カウント |
| 画面サイズ | 6.9インチ |
| 明瞭性 | 9 (High Clarity) |
| メーカー | TechMatte |
| モデル番号 | ギャラクシーS20ウルトラ |
9.保証とサポート
amFilm is committed to providing high-quality products and excellent customer service.
- カスタマーサポート: We offer round-the-clock customer support for all our products. If you encounter any issues during or after the application, please contact us via email, and our professional service team will be happy to assist you within 24 hours.
- 品質保証: Every amFilm product undergoes rigorous quality testing to ensure a top-quality experience for the end-user.
For further assistance, please refer to the contact information provided with your product packaging or visit the official amFilm webサイト。
Ask a question about this manual
Ask about setup, troubleshooting, compatibility, parts, safety, or missing instructions. Manuals+ will review the question and use this page’s manual context to help answer it.