
1. はじめに
This manual provides detailed instructions for the setup, operation, maintenance, and troubleshooting of your Sharkoon Light² 200 Gaming Mouse. Please read this manual thoroughly before using the device to ensure optimal performance and longevity.
2. パッケージ内容
パッケージにすべてのアイテムが揃っていることを確認します。
- Sharkoon Light² 200 Gaming Mouse
- Interchangeable Solid Top Cover (7g)
- Set of Replacement PTFE Glide Feet
- 取扱説明書
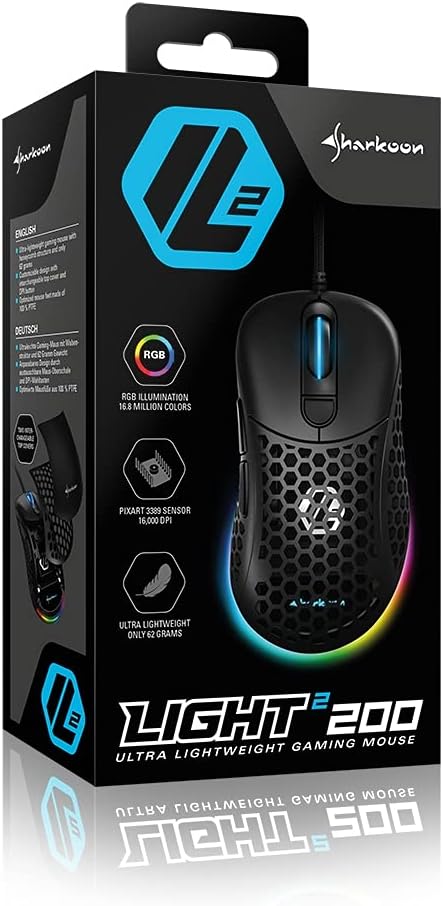
Image: The retail packaging for the Sharkoon Light² 200 Gaming Mouse, showing the mouse and its key features.
3. セットアップ
3.1 マウスの接続
- Unpack the Sharkoon Light² 200 Gaming Mouse from its packaging.
- マウス ケーブルの USB コネクタをコンピューターの使用可能な USB ポートに差し込みます。
- オペレーティング システムが必要なドライバーを自動的に検出してインストールします。

Image: The Sharkoon Light² 200 Gaming Mouse with its USB cable, ready for connection to a computer.
3.2 ソフトウェアのインストール
For full customization and access to all features, download and install the Sharkoon gaming software from the official Sharkoon website. The software allows for DPI adjustments, button programming, and RGB lighting control.
- Visit the official Sharkoon webサイト。
- Navigate to the support or downloads section for the Light² 200 Gaming Mouse.
- Download the latest version of the gaming software.
- 画面の指示に従ってインストールを完了します。
4. マウスの操作
4.1 基本機能
The Light² 200 features standard mouse buttons and a scroll wheel:
- 左クリック: 主なアクション ボタン。
- 右クリック: セカンダリアクションボタン。通常はコンテキストメニュー用です。
- スクロールホイール: For vertical scrolling. Can also be pressed for a middle-click function.
- サイドボタン: Two buttons located on the left side, typically for 'forward' and 'back' navigation.
- DPIボタン: スクロール ホイールの後ろにあり、DPI 設定を切り替えるために使用します。

画像: サイド view of the Sharkoon Light² 200 Gaming Mouse, highlighting the two programmable side buttons and the honeycomb structure.
4.2 DPI調整
The optical PixArt sensor supports up to 16,000 DPI. You can adjust the DPI sensitivity using the dedicated DPI button behind the scroll wheel or through the Sharkoon gaming software. The RGB lighting on the scroll wheel and rear of the mouse indicates the current DPI profile.
4.3つのプログラム可能なボタン
The Light² 200 features six programmable buttons. Use the Sharkoon gaming software to assign custom functions, macros, or key bindings to these buttons for an optimized gaming experience.
4.4 RGB照明のカスタマイズ
The mouse features adjustable RGB illumination on the scroll wheel and the back end. The gaming software allows you to customize colors, effects, and brightness to match your preferences or gaming setup.
4.5 Modular Design: Changing the Top Cover
The Light² 200 has a modular design, allowing you to change the top surface. The default honeycomb top cover can be replaced with a closed 7-gram alternative for a different feel or aesthetic.
- Gently lift the rear edge of the honeycomb top cover to detach it. It is held by magnets.
- Align the replacement solid top cover with the mouse body and gently press it down until the magnets secure it in place.

Image: The Sharkoon Light² 200 Gaming Mouse with its honeycomb top cover removed, revealing the internal structure and magnetic attachment points.
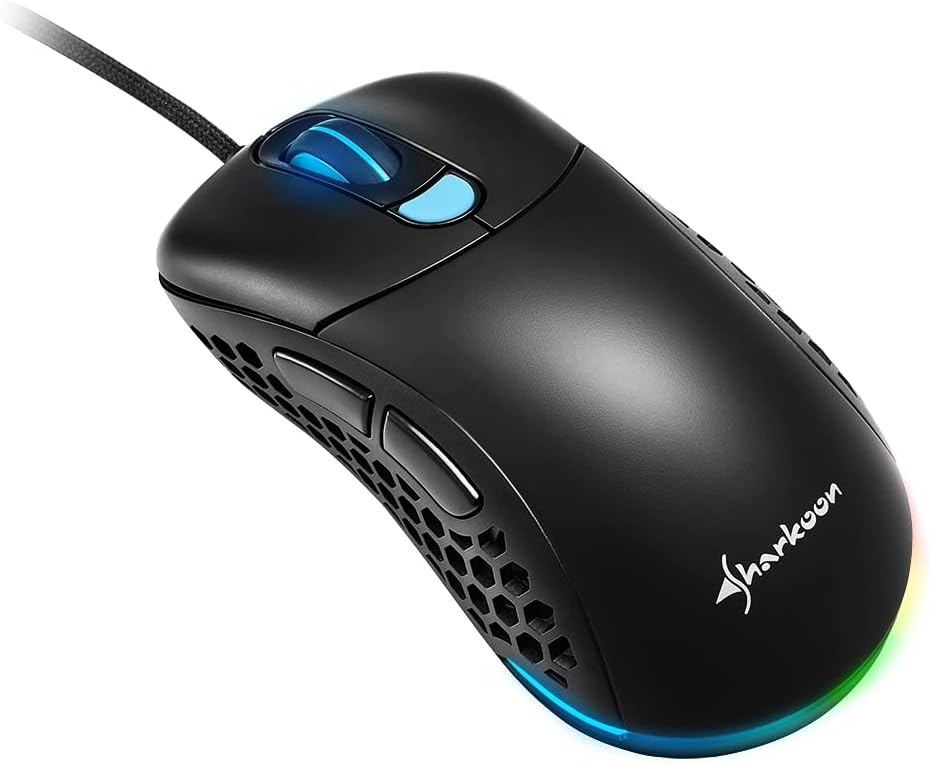
Image: The Sharkoon Light² 200 Gaming Mouse with the alternative solid top cover installed, providing a different aesthetic and feel.
5. メンテナンス
5.1 マウスのクリーニング
最適なパフォーマンスを維持するには、マウスを定期的にクリーニングしてください。
- マウスをコンピューターから取り外します。
- 柔らかく乾いた布を使用してマウスの表面を拭きます。
- 頑固な汚れには、軽くamp布を水または中性洗剤で拭いてください。刺激の強い化学薬品は避けてください。
- Use compressed air to clear dust from the honeycomb structure and around buttons.
- Clean the optical sensor area with a cotton swab lightly dampイソプロピルアルコールで消毒しました。
5.2 Replacing PTFE Glide Feet
The PTFE glide feet ensure smooth movement. If they become worn, replace them using the included spare set:
- 薄くて研磨剤を含まない工具を使って、古い PTFE 足を慎重に剥がします。
- 脚を取り付けた表面をきれいにし、残留物が残らないようにします。
- Peel the new PTFE feet from their backing and carefully apply them to the corresponding areas on the mouse's underside.
- しっかりと押し付けて、適切な接着を確保します。

Image: The underside of the Sharkoon Light² 200 Gaming Mouse, showing the optical sensor, the DPI switch, and the four white PTFE glide feet.
6。 トラブルシューティング
- マウスが反応しない:
- Ensure the USB cable is securely connected to a working USB port.
- Try connecting the mouse to a different USB port or another computer to rule out port or system issues.
- コンピュータを再起動してください。 - DPI設定が変更されない:
- Ensure the Sharkoon gaming software is installed and running.
- Check if the DPI button is functioning correctly. - RGB 照明が機能しない、または正しくない:
- Verify that the Sharkoon gaming software is installed and that lighting settings are configured correctly.
- Ensure the mouse is properly connected. - Mouse movement is erratic or imprecise:
- マウスの裏側にある光学センサーを清掃します。
- Ensure you are using the mouse on a suitable surface (e.g., a mouse pad).
- Check for any physical obstructions around the sensor. - ボタンが反応しない:
- Check button assignments in the Sharkoon gaming software.
- Ensure no physical debris is obstructing the button mechanism.
7. 仕様
| 特徴 | 詳細 |
|---|---|
| モデル名 | Light²200 |
| 商品型番 | 4044951029013 |
| 製品寸法 | 4.72 x 2.6 x 1.65 インチ (120 x 66 x 42 mm) |
| アイテム重量 | 2.19オンス(62グラム) |
| 動き検出技術 | 光学式(PixArtセンサー) |
| 最大DPI | 16,000DPI |
| プログラム可能なボタン | 6 |
| 接続技術 | USB |
| 特集 | RGB LED Lights, Modular Design |
| メーカー | Sharkoon テクノロジー |
8. 保証とサポート
8.1 保証情報
Sharkoon products are covered by a manufacturer's warranty against defects in materials and workmanship. The specific warranty period and terms may vary by region. Please retain your proof of purchase for warranty claims.
8.2 テクニカルサポート
For technical assistance, driver downloads, or further information, please visit the official Sharkoon webサイト:
- Webサイト: www.sharkoon.com
You may also find FAQs and troubleshooting guides on their support pages.