Logitech K860, MX Vertical
Logitech Ergo K860 Wireless Ergonomic Keyboard and MX Vertical Wireless Mouse User Manual
Model: K860, MX Vertical
1. はじめに
This manual provides comprehensive instructions for setting up, operating, and maintaining your Logitech Ergo K860 Wireless Ergonomic Keyboard and MX Vertical Wireless Mouse. This combo is designed for all-day comfort, promoting a more relaxed posture and reducing strain during extended use.
最適なパフォーマンスと寿命を確保するために、製品を使用する前にこのマニュアルをよくお読みください。
2.製品オーバーview

Figure 2.1: Logitech Ergo K860 Wireless Ergonomic Keyboard and MX Vertical Wireless Mouse Combo. This image displays the full product set, including the keyboard, mouse, and USB receivers.

Figure 2.2: Advanced Ergonomic Solution. This image highlights the ergonomic design of the keyboard and mouse, emphasizing comfort for prolonged use.
2.1 主な特徴
- 人間工学に基づいた分割キーボード: The ERGO K860 features a curved, split, and sloping keyframe designed to reduce wrist bending and forearm strain.
- Pillowed Wrist Rest: Integrated wrist rest provides 54% more wrist support compared to standard keyboards, enhancing comfort.
- 調節可能なパームリフト: Tilt legs allow for adjustable angles (0, -4, -7 degrees) to maintain a natural wrist position whether seated or standing.
- MX Vertical Mouse: Designed with a unique 57-degree vertical angle to place the hand in a natural handshake position, reducing wrist pressure.
- マルチデバイス接続: Connects via Bluetooth or USB receiver to up to three devices, allowing seamless switching.
- 静かなキー: PerfectStroke keys are crafted for precision and quiet typing.
3. セットアップ
3.1 開梱と初期検査
- 製品のパッケージを慎重に開封してください。
- Remove the keyboard, mouse, and USB receiver(s).
- すべての部品に損傷の兆候がないか点検してください。損傷が見つかった場合は、カスタマーサポートにご連絡ください。

Figure 3.1: Unboxing the Logitech ERGO K860. This image shows the keyboard being removed from its packaging, highlighting the initial setup process.
3.2 Powering On and Battery Installation
The keyboard uses AAA batteries. The mouse has a built-in rechargeable battery.
- For the keyboard, locate the battery compartment on the underside.
- Insert the provided AAA batteries, ensuring correct polarity.
- Turn on the keyboard using the power switch, usually located on the top right edge.
- For the mouse, ensure it is charged. It comes with a USB cable for charging.
- Turn on the mouse using its power switch, typically on the underside.
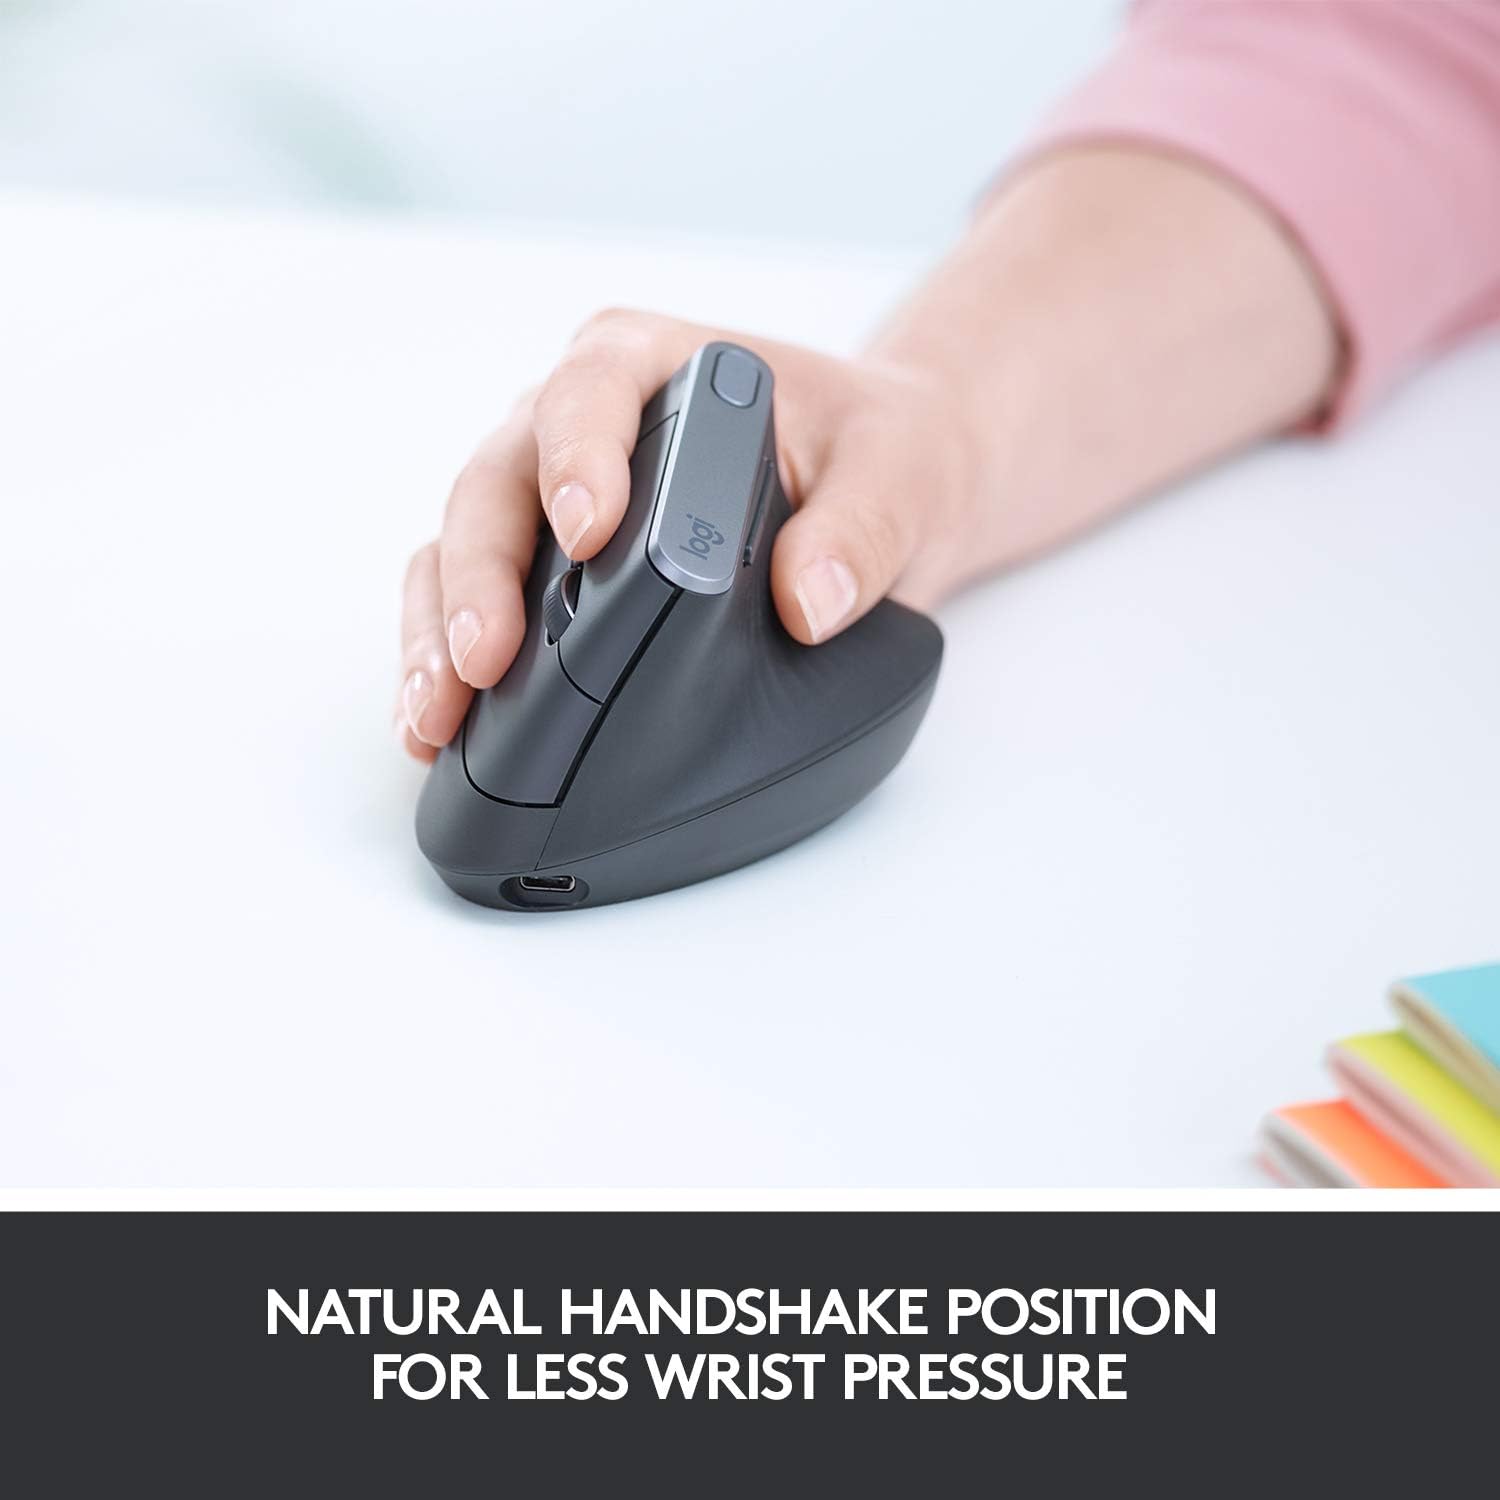
Figure 3.2: Keyboard Battery Compartment. This image illustrates the location for inserting AAA batteries into the keyboard.

Figure 3.3: MX Vertical Mouse Charging. This image shows the USB-C charging port on the MX Vertical mouse.
3.3 デバイスへの接続
The combo supports both Bluetooth and Logitech Unifying USB receiver connections.
3.3.1 Using the Logitech Unifying USB Receiver
- Plug the Unifying USB receiver into an available USB port on your computer.
- The keyboard and mouse should automatically connect. If not, press and hold one of the Easy-Switch buttons (1, 2, or 3) on the keyboard/mouse until the LED blinks rapidly, then follow on-screen prompts or use Logitech Options software.
Figure 3.4: Logitech Unifying USB Receiver. The small USB dongle is visible, used for wireless connection.
3.3.2Bluetoothの使用
- コンピューターで Bluetooth が有効になっていることを確認します。
- On the keyboard/mouse, press and hold one of the Easy-Switch buttons (1, 2, or 3) until the LED blinks rapidly. This indicates it's in pairing mode.
- On your computer, go to Bluetooth settings and select "Logitech ERGO K860" or "Logitech MX Vertical" from the list of available devices.
- 画面上の指示に従って、ペアリングプロセスを完了します。

Figure 3.5: Multi-Device Pairing. This image demonstrates how the keyboard can be paired with up to three different devices, such as laptops and monitors.
4. デバイスの操作
4.1 キーボードの使用
The split design of the ERGO K860 promotes a natural typing posture. Place your hands on the pillowed wrist rest, allowing your wrists to remain straight and relaxed.

Figure 4.1: Proper Ergonomic Typing. This image shows a user's hands positioned correctly on the keyboard, demonstrating the ergonomic benefits.

Figure 4.2: Ergonomic Certification. This image displays certifications for the product's ergonomic design, indicating user testing and approval.
4.1.1 Adjustable Palm Lift
The keyboard features adjustable tilt legs on the underside. You can set them to 0, -4, or -7 degrees to find the most comfortable angle for your wrists, whether you are sitting or standing.

Figure 4.3: Adjustable Keyboard Tilt. This image illustrates the adjustable feet on the keyboard's underside, allowing users to modify the tilt for optimal comfort.
4.1.2 Easy-Switch Buttons
Use the Easy-Switch buttons (1, 2, 3) located on the top right of the keyboard to seamlessly switch between connected devices. Simply press the button corresponding to the device you wish to control.
4.2 マウスの使用
The MX Vertical mouse is designed to reduce muscle strain by promoting a natural handshake position. Grip the mouse comfortably with your hand at a 57-degree vertical angle.
Figure 4.4: MX Vertical Mouse Grip. This image demonstrates the natural handshake grip encouraged by the MX Vertical mouse's design.

Figure 4.5: MX Vertical Mouse Features. This image labels various parts of the MX Vertical mouse, including the scroll wheel, buttons, and sensor.
4.2.1 Cursor Speed Switch
The MX Vertical mouse features a cursor speed switch (DPI button) to instantly adjust the pointer speed and accuracy. This allows for precise control for different tasks.
4.3 Logitech Options Software
Logitechの公式ウェブサイトからLogitech Optionsソフトウェアをダウンロードしてインストールします。 web地点 (www.logitech.com/software/logitech-options.html) to customize your keyboard and mouse settings. This software allows you to:
- ファンクションキーとマウス ボタンを再割り当てします。
- ポインタの速度とスクロール動作を調整します。
- Enable Logitech Flow for seamless multi-computer control (requires compatible Logitech Flow devices).
5. メンテナンス
5.1 クリーニング
- 柔らかく糸くずの出ない布で軽く拭き取ってください。ampキーボードとマウスの表面を水または中性洗浄液で拭いて清掃してください。
- 研磨剤入りの洗剤、溶剤、エアゾールスプレーの使用は避けてください。
- For the keyboard's fabric wrist rest, gently wipe with a damp cloth. The fabric is stain-resistant.
5.2バッテリーケア
- Replace AAA batteries in the keyboard when the battery indicator light turns red.
- Recharge the MX Vertical mouse when its battery indicator is low using the provided USB-C cable. A full charge provides approximately four months of power, and a one-minute quick charge provides three hours of use.
- 長期間使用しない場合は、デバイスを涼しく乾燥した場所に保管してください。
6。 トラブルシューティング
| 問題 | 考えられる原因 | 解決 |
|---|---|---|
| デバイスが接続されていません | Low battery, incorrect pairing, USB receiver issue. |
|
| 遅延または断続的な接続 | Interference, distance from receiver/device. |
|
| キーが応答しない | ソフトウェアの問題、物理的な損傷。 |
|
7. 仕様
| 特徴 | 説明 |
|---|---|
| ブランド | ロジテック |
| モデル | ERGO K860 (Keyboard), MX Vertical (Mouse) |
| 接続性 | Bluetooth、USB Unifyingレシーバー |
| キーボードレイアウト | Ergonomic Split, Full-size with Numpad |
| リストレスト | Integrated Pillowed Wrist Rest (Stain-resistant fabric) |
| 調整可能な傾斜 | 0, -4, -7 degrees |
| Mouse Ergonomics | 57-degree vertical angle for natural handshake position |
| マウスセンサー | 4000 DPI high-precision sensor |
| Battery Life (Keyboard) | Up to 2 years (with AAA batteries) |
| Battery Life (Mouse) | Up to 4 months (rechargeable, 1 min quick charge for 3 hrs) |
| 互換性のあるオペレーティングシステム | Windows, macOS, Chrome OS, Linux, iOS, Android |
8. 保証とサポート
保証情報およびテクニカルサポートについては、ロジクールの公式サポートをご覧ください。 webサイトを参照するか、製品パッケージに同梱されている保証カードを参照してください。
ロジクールサポート: support.logi.com
9. 公式製品ビデオ
提供されたデータに基づいて、このマニュアルに埋め込むことができる販売者からの公式製品ビデオはありません。
関連文書 - K860, MX Vertical
 |
Logitech Ergo K860 エルゴノミック スプリット キーボード ユーザー ガイド 自然な姿勢と快適さを追求したエルゴノミクス設計の分割型キーボード、Logitech Ergo K860についてご紹介します。このガイドでは、製品について以下の項目を網羅しています。viewセットアップ、接続オプション(Bluetooth および Unifying USB レシーバー)、ペアリング、湾曲したキーフレームやパームレストなどの人間工学機能、キーのカスタマイズ、Flow の互換性、アプリ固有の設定、通知、バッテリー情報など。 |
 |
Logitech ERGO K860 ワイヤレス エルゴノミクス キーボード: ユーザーマニュアル、セットアップ、機能 Logitech ERGO K860 ワイヤレスエルゴノミックキーボードの設定と使用に関する詳細情報をご覧ください。エルゴノミクスデザイン、BluetoothおよびUSB接続、Logitech Flow、キーのカスタマイズ、バッテリー寿命などについて詳しく説明します。 |
 |
Logitech の重要な安全性、コンプライアンス、および保証情報 ロジクール製品の包括的な安全性、コンプライアンス、保証の詳細。バッテリーの取り扱い、レーザーの安全性、使用ガイドライン、規制コンプライアンス (FCC、IC、RoHS、WEEE)、保証条件を網羅しています。 |
 |
Logitech LIFT Vertical Ergonomic Mouse: Getting Started Guide Comprehensive guide to setting up and using the Logitech LIFT Vertical Ergonomic Mouse. Learn about Bluetooth and Logi Bolt connections, features like SmartWheel and Logitech Flow, hand size fitting, and software customization with Logitech Options+. |
 |
はじめに - ロジクール MX 垂直エルゴノミクスマウス ロジクールMX Verticalエルゴノミクスマウスの接続と使用方法を説明します。このガイドでは、USBケーブルの接続、Bluetoothのペアリング、Unifying USBレシーバーのセットアップ、製品の交換について説明します。view人間工学に基づいた形状や高精度センサー、電源管理、簡単なスイッチ機能などの高度な機能を備えています。 |
 |
ロジクール MX 垂直型マウス:iPadOS および macOS 接続ガイド 右クリック機能、スクロール方向、Bluetooth ペアリング、一般的な接続の問題のトラブルシューティングなど、Logitech MX Vertical マウスを iPadOS および macOS に接続して使用するための包括的なガイドです。 |
Ask a question about this manual
Ask about setup, troubleshooting, compatibility, parts, safety, or missing instructions. Manuals+ will review the question and use this page’s manual context to help answer it.