1. はじめに
This manual provides essential instructions for the safe and efficient use of your Masterplug Chargepoint Home EV Charging Cable. This Mode 2, Type 2 charging cable is designed for charging electric vehicles equipped with a Type 2 inlet, primarily European models, from a standard 3-pin domestic power supply. Please read this manual thoroughly before first use and retain it for future reference.

Image 1: Masterplug Chargepoint Home EV Charging Cable. This image displays the coiled green charging cable, the white Type 2 connector, the black control box, and the 3-pin UK plug.
1.1 安全情報
- Always ensure the charging cable is fully uncoiled before use to prevent overheating.
- Do not use the cable if it appears damaged, frayed, or has exposed wires.
- Ensure the power outlet is suitable and correctly earthed.
- Keep the control box and connectors dry. The cable has an IP54 rating, making it resistant to water splashes and dust, but it should not be submerged.
- Do not attempt to open or repair the charging cable or control box. Contact qualified personnel for service.
- お子様の手の届かない場所に保管してください。
- Avoid driving over the cable or placing heavy objects on it.
2. パッケージ内容
The Masterplug Chargepoint Home EV Charging Cable package includes:
- 1 x Masterplug Chargepoint Home EV Charging Cable (10 Metre, Type 2, Mode 2, 3-Pin Plug)
3.製品オーバーview
The Masterplug EV charging cable features an inline power controller with an LED display to indicate charging status and built-in power protection. It is equipped with a Type 2 connector for the vehicle and a 13A fused 3-pin plug for connection to a domestic power supply.

Image 2: Product Features Diagram. This diagram highlights the key components: the 10-meter cable, the Type 2 connector, the inline power controller with LED display, and the 13A fused 3-pin plug. It also shows the Mode 2 charging type and IP54 rating.
3.1 主要コンポーネント
- タイプ2コネクタ: Connects to the electric vehicle's charging port. Features 7 pins and a locking mechanism.
- Inline Power Controller: Contains the charging electronics and an LED display for status indication.
- 3-Pin Plug: Connects to a standard domestic 240V AC power outlet.
- 充電ケーブル: 10-meter length, green, designed for outdoor use with IP54 rating.
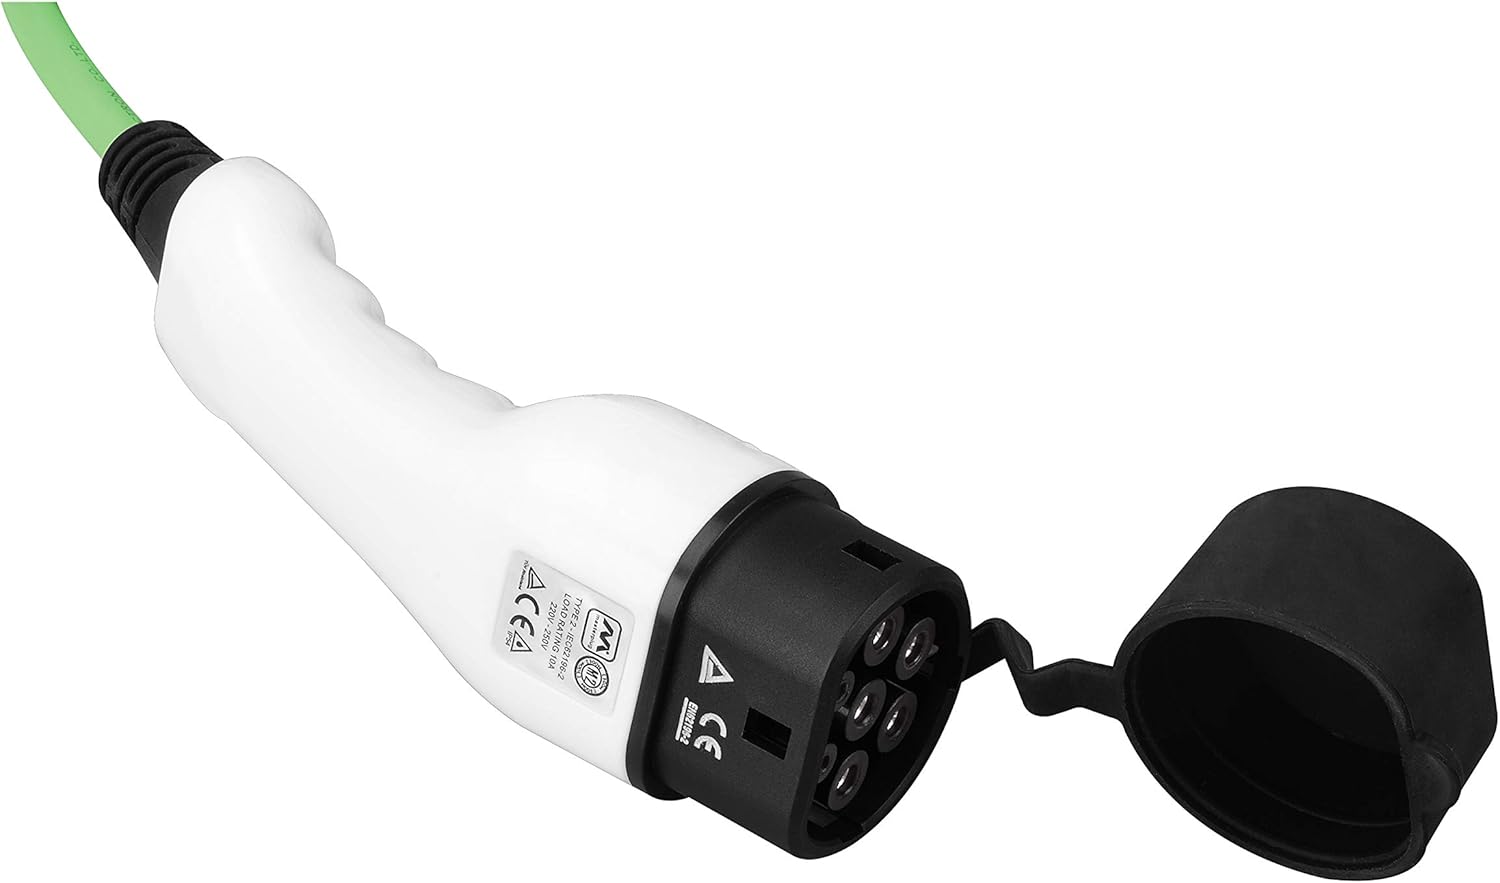
Image 3: Close-up of the Type 2 Connector. This image shows the detailed design of the Type 2 connector, including its pins and the protective cap.
4. セットアップ手順
- ケーブルを解く: Fully uncoil the entire 10-meter charging cable to prevent heat buildup during operation.
- 電源コンセントに接続します。 Insert the 3-pin plug firmly into a standard, earthed 240V AC domestic power outlet. Ensure the outlet is in good condition and not overloaded.
- 車両の準備: Ensure your electric vehicle is turned off and the charging port cover is open.
- 車両に接続: Insert the Type 2 connector into your vehicle's charging inlet. Push firmly until it clicks into place. The vehicle will typically lock the connector in place.

Image 4: Charging Cable Connected to an Electric Vehicle. This image illustrates the Type 2 connector securely plugged into the charging port of a white electric vehicle.
5. 操作手順
Once both ends of the cable are securely connected, the charging process will typically begin automatically. The inline power controller's LED display will indicate the charging status.
- 充電開始: After connecting the cable to both the power source and the vehicle, the control box will perform a self-check, and charging will commence.
- モニター充電: Observe the LED indicator on the control box and your vehicle's dashboard for charging status. The cable charges at 10 A/2.3 kW, providing an average of 8 miles range per charging hour.
- 充電完了: The cable will automatically stop charging when the vehicle's battery is full. The LED indicator will change to reflect this status.
- 切断中:
- First, unlock the Type 2 connector from your vehicle (if applicable, refer to your vehicle's manual).
- Remove the Type 2 connector from the vehicle's charging inlet.
- Unplug the 3-pin plug from the domestic power outlet.
- Carefully coil the cable for storage.
6. LEDインジケーターのステータス
The inline power controller features an LED display to communicate the charging status. Specific indications may vary slightly, but generally follow these patterns:
| LEDステータス | 意味 |
|---|---|
| 緑色 | Power connected, ready to charge. |
| 点滅する緑 | 充電中です。 |
| Solid Blue/Cyan | Charging complete or vehicle fully charged. |
| Solid Red / Flashing Red | Error detected. Refer to the Troubleshooting section. |
Note: Consult your vehicle's manual for specific charging indicators on your dashboard.
7. メンテナンス
- クリーニング: Wipe the cable and connectors with a dry or slightly damp cloth. Do not use harsh chemicals or abrasive cleaners. Ensure connectors are dry before use.
- ストレージ: Store the cable in a dry, cool place, away from direct sunlight and extreme temperatures. Coil the cable neatly to prevent kinks or damage.
- 検査: Regularly inspect the cable, plugs, and control box for any signs of damage, wear, or corrosion. If any damage is found, discontinue use immediately.
8。 トラブルシューティング
充電ケーブルに問題が発生した場合は、次の一般的な問題と解決策を参照してください。
| 問題 | 考えられる原因 | 解決 |
|---|---|---|
| No charging / Red LED indicator |
|
|
| 充電が遅い |
|
|
| Cable or plug feels warm |
|
|
If troubleshooting steps do not resolve the issue, discontinue use and contact Masterplug customer support.
9. 仕様
| 特徴 | 詳細 |
|---|---|
| モデル番号 | EVCP21310SLMP |
| ブランド | マスタープラグ |
| ケーブル長さ | 10メートル |
| コネクタタイプ(車両) | タイプ2 |
| コネクタタイプ(電源) | 3-Pin UK Plug (13A Fused) |
| 充電モード | モード2 |
| 入力ボリュームtage | 240ボルトAC |
| 充電電流/電力 | 10A / 2.3kW |
| IP 定格 | IP54(防水・防塵) |
| 製品寸法 | 14.57 x 14.57 x 3.03 inches (Control Box/Packaged) |
| アイテム重量 | 6.27 ポンド (2.85 キログラム) |
10. 保証とサポート
Masterplug, part of Luceco PLC, guarantees against faulty materials and workmanship. For specific warranty terms and conditions, please refer to the documentation provided with your purchase or visit the official Masterplug webサイト。
For technical support or warranty claims, please contact Masterplug customer service. Ensure you have your product model number (EVCP21310SLMP) and proof of purchase available.
メーカー: マスタープラグ