1. はじめに
Thank you for choosing the ZIPRO Boost Exercise Bike. This manual provides essential information for the safe and effective assembly, operation, and maintenance of your new fitness equipment. Please read this manual thoroughly before first use and keep it for future reference.
2. 安全情報
- 運動プログラムを開始する前に医師に相談してください。
- 使用する前に、すべての部品がしっかりと固定されていることを確認してください。
- 動作中は子供やペットを装置に近づけないでください。
- エクササイズバイクを平らで安定した場所に置きます。
- 適切な運動用の服装と靴を着用してください。
- 使用者最大体重容量120kgを超えないようにしてください。
- 気分が悪くなったり、めまいがしたり、痛みを感じたりした場合は、直ちに運動を中止してください。
3. パッケージ内容
組み立てる前に、すべてのコンポーネントが揃っていて損傷がないことを確認してください。
- メインフレーム
- フロントとリアのスタビライザー
- ペダル(左右)
- シートポストとサドル
- ハンドルバーポストとハンドルバー
- エクササイズコンピュータ
- 組み立て用ハードウェア(ボルト、ワッシャー、ナット)
- 組み立て工具(レンチ、六角レンチ)
- ユーザーマニュアル
4. 組み立て手順
正しく組み立てるために、以下の手順に従ってください。一部の手順では2人で作業することをお勧めします。
- スタビライザーを取り付ける: 付属のボルトとワッシャーを使用して、フロントスタビライザーとリアスタビライザーをメインフレームに固定します。しっかりと締め付けてください。
- ペダルを取り付ける: Identify the left (L) and right (R) pedals. The left pedal screws counter-clockwise, and the right pedal screws clockwise. Tighten securely.
- シートポストとサドルを取り付けます。 Insert the seat post into the main frame and adjust to the desired height. Attach the saddle to the seat post and secure it.
- ハンドルポストを取り付ける: Insert the handlebar post into the main frame.
- Install Handlebars and Computer: Attach the handlebars to the handlebar post. Connect the sensor wires from the main frame to the exercise computer. Mount the computer onto the handlebar post.

Figure 4.1: Detailed assembly diagram for the ZIPRO Boost Exercise Bike.

図 4.2: 分解 view of the exercise bike components, illustrating how parts fit together during assembly.
5. 操作手順
5.1抵抗の調整
The ZIPRO Boost features an 8-level magnetic resistance system. To adjust the resistance, turn the tension control knob located below the computer display. Turn clockwise to increase resistance (harder) and counter-clockwise to decrease resistance (easier).

Figure 5.1: The resistance adjustment knob, showing levels 1 through 8.
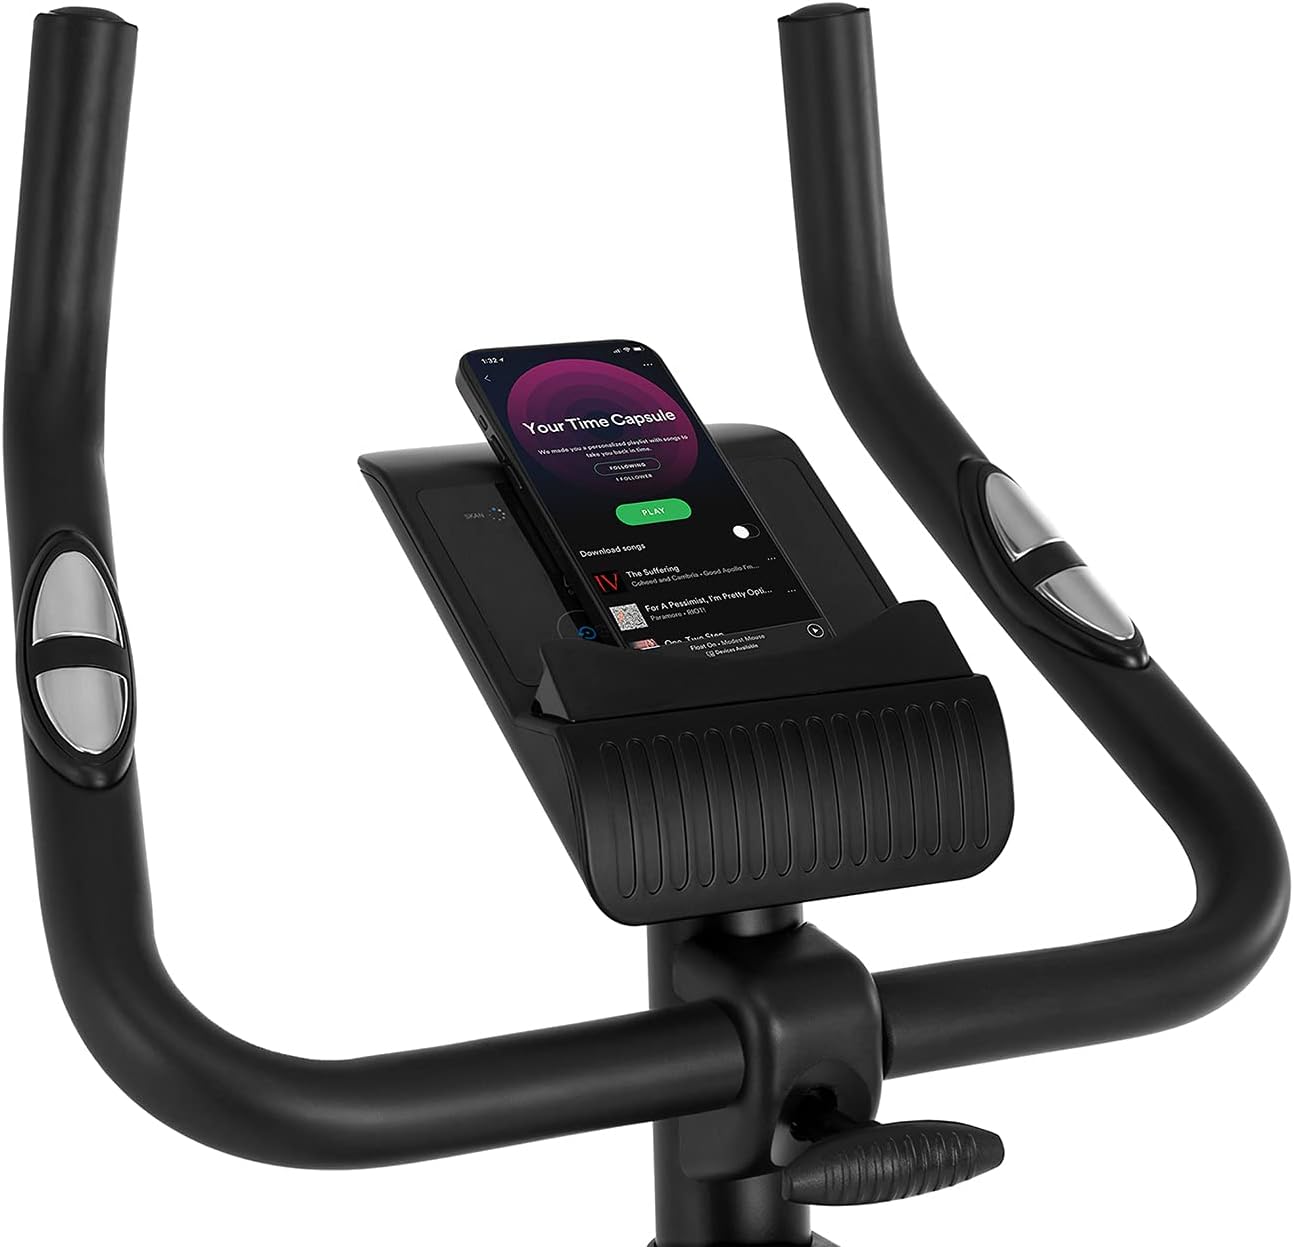
Figure 5.2: Demonstrating how to adjust the magnetic resistance using the tension control knob.
5.2 Saddle and Handlebar Adjustments
Proper adjustment of the saddle and handlebars ensures comfort and effective training.
- サドルの高さ: Loosen the adjustment knob on the seat post, raise or lower the saddle to your desired height (ensure a slight bend in your knee at the bottom of the pedal stroke), and tighten the knob securely.
- サドルの水平位置: Loosen the knob beneath the saddle to slide it forward or backward for optimal positioning relative to the pedals. Tighten securely.
- ハンドルバーの高さ: Loosen the adjustment knob on the handlebar post, raise or lower the handlebars to a comfortable position, and tighten the knob securely.
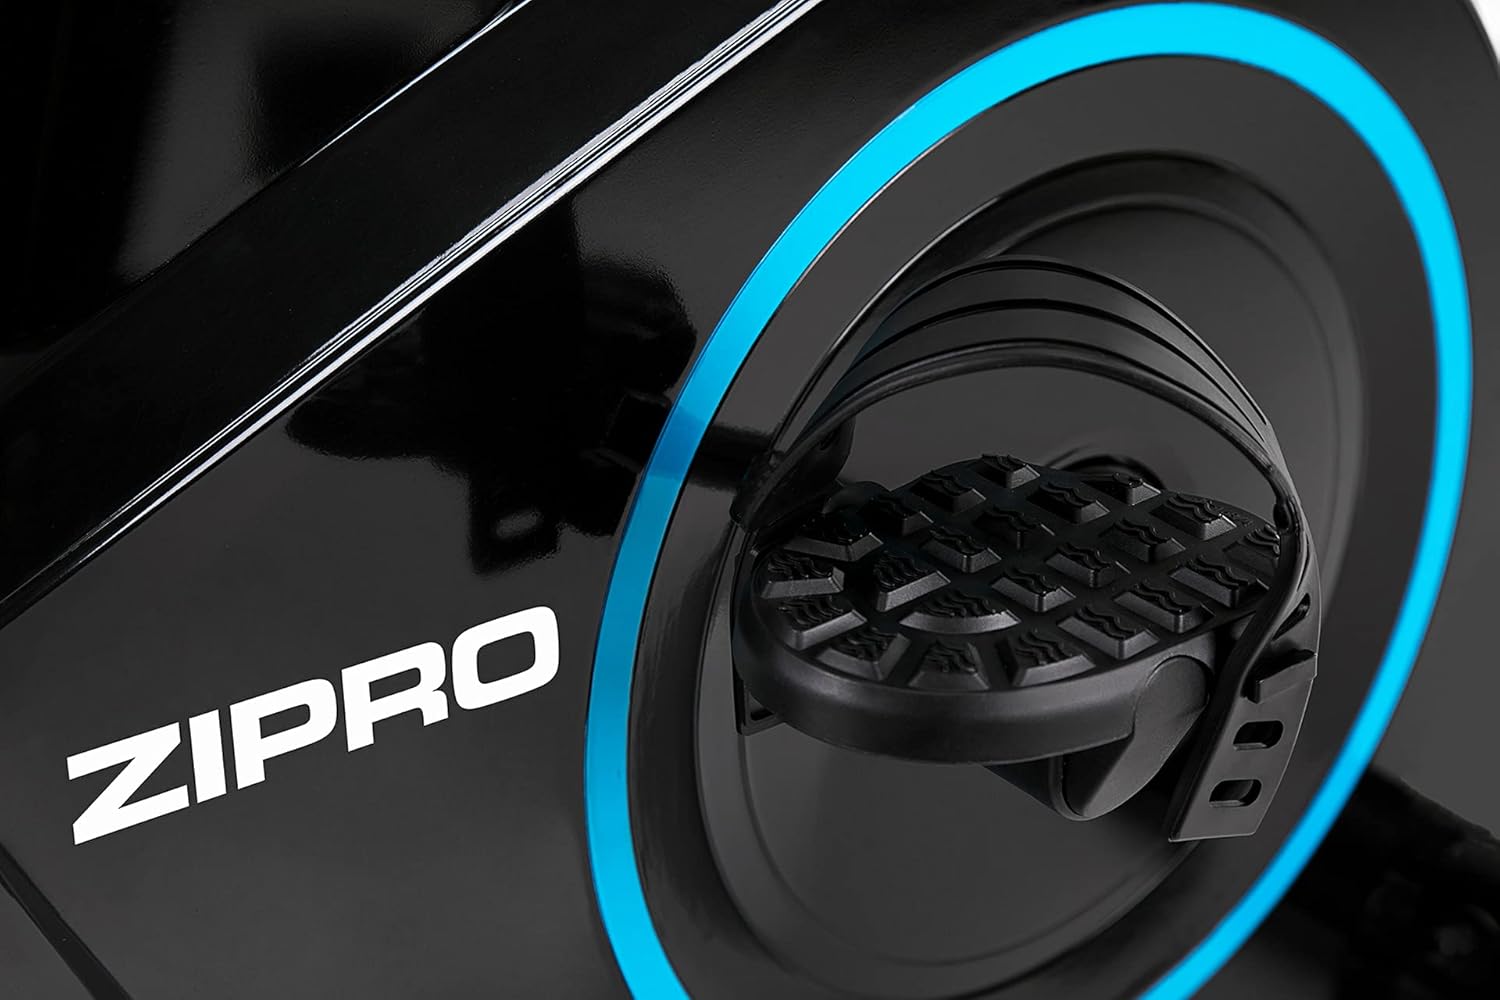
Figure 5.3: Adjusting the saddle's vertical position for user comfort.
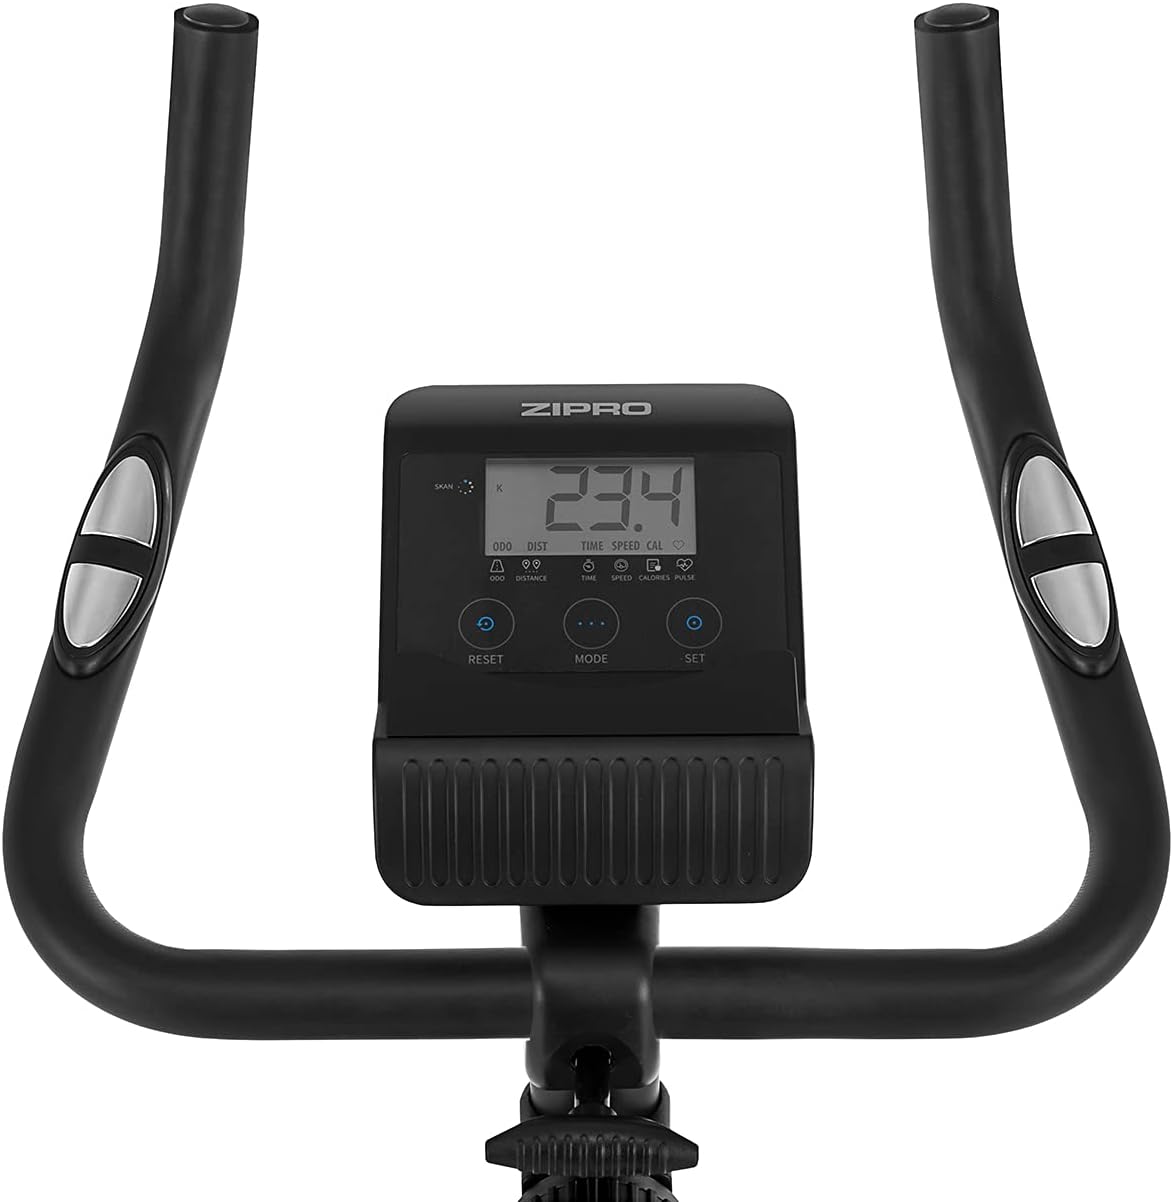
Figure 5.4: Adjusting the saddle's horizontal position for optimal riding posture.
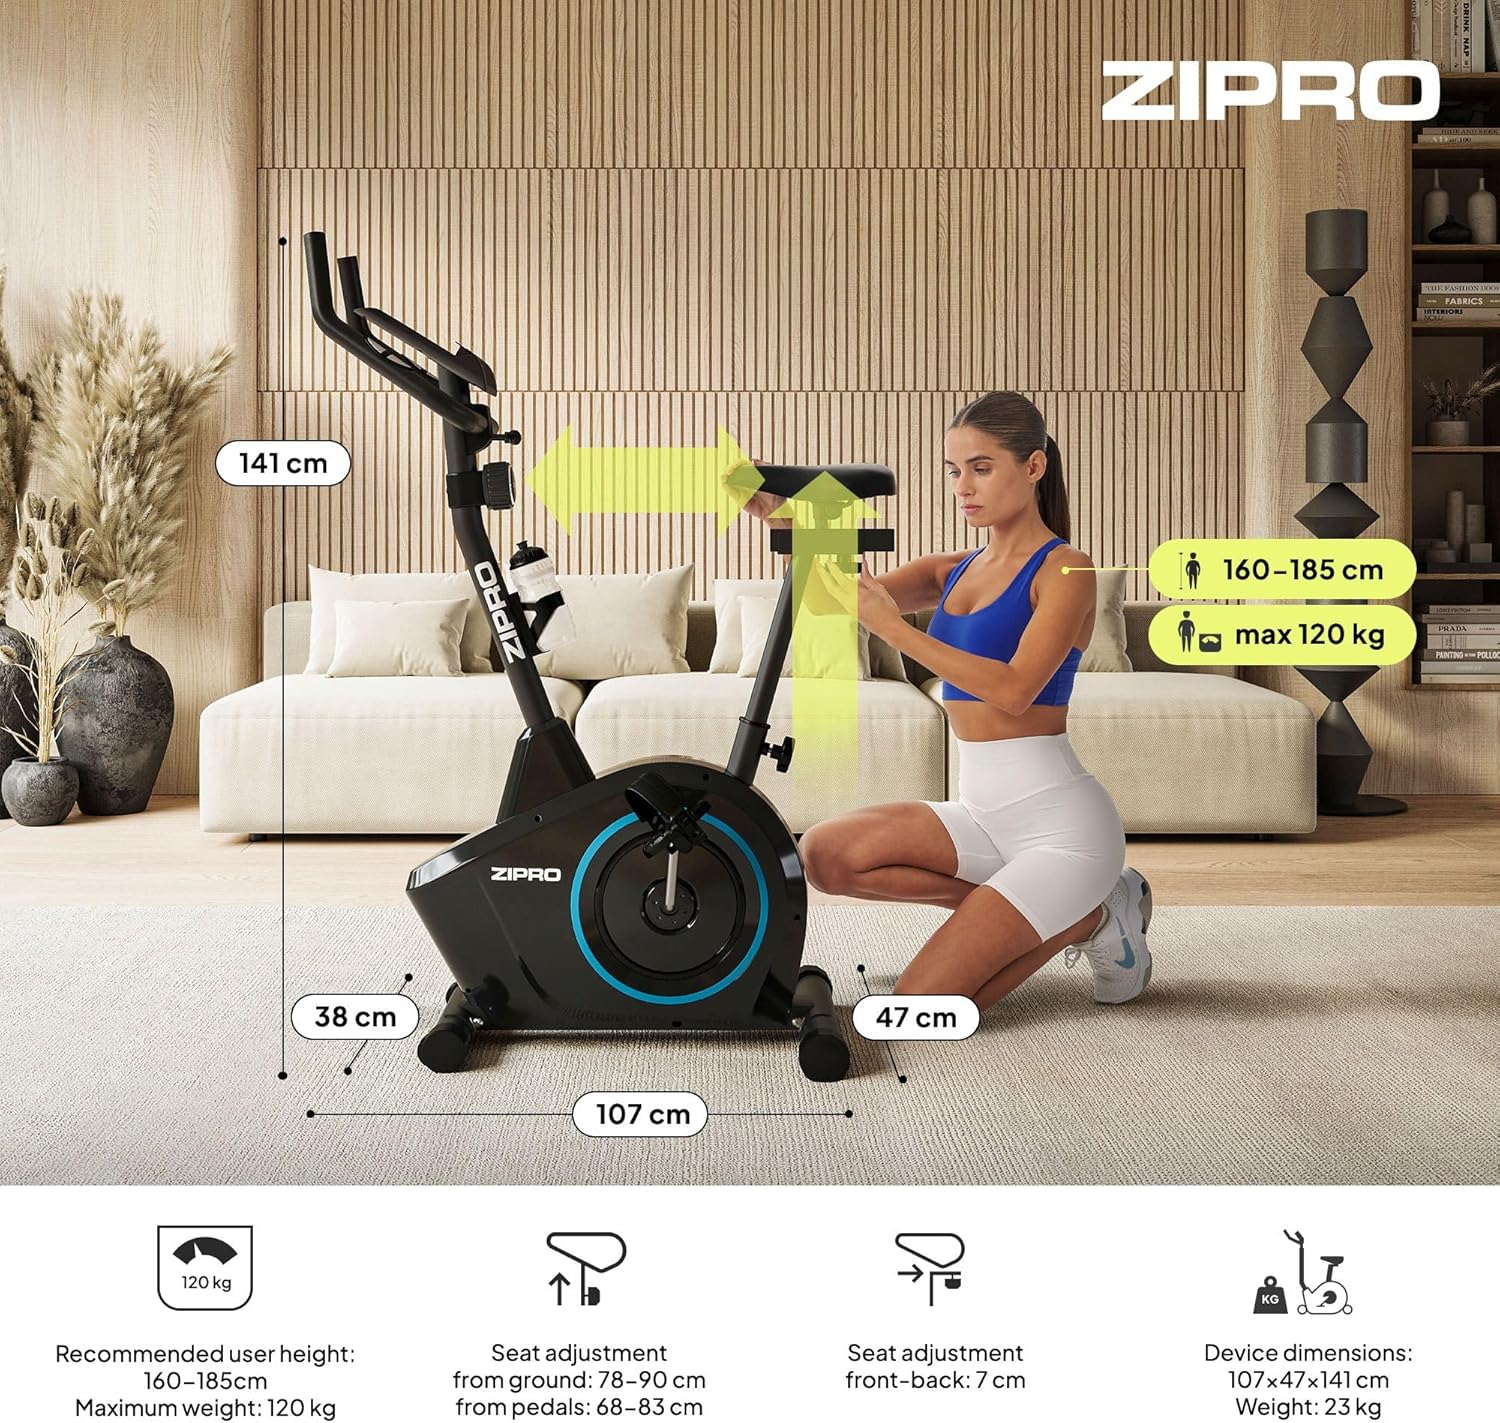
Figure 5.5: Adjusting the handlebar height to suit different user preferences and workout styles.
5.3 Computer Functions
The integrated computer tracks your workout data. It measures time, distance, speed, calories burned, and pulse (via sensors in the handlebar). The SCAN function cycles through all data alternately on the screen.
- モードボタン: Press to select the display function (Time, Speed, Distance, Calories, Odometer, Pulse).
- リセットボタン: Press and hold to clear all current workout data (Time, Distance, Speed, Calories).
- SETボタン: Used to set target values for Time, Distance, or Calories.
- 脈拍センサー: Grip the metal plates on the handlebars to measure your heart rate.
- Mobile Device Shelf: A convenient shelf is provided above the computer for your smartphone or tablet.

Figure 5.6: The exercise computer display with MODE, RESET, and SET buttons.

図5.7:以上view of the computer display and integrated pulse sensors.

Figure 5.8: The integrated shelf designed to hold a mobile device like a tablet during workouts.
6. メンテナンス
定期的なメンテナンスにより、エクササイズバイクの寿命が長くなり、安全に操作できるようになります。
- クリーニング: 広告で自転車を拭くamp 使用後は毎回布で汗やほこりを拭き取ってください。研磨剤入りの洗剤は使用しないでください。
- 接続を確認してください: すべてのボルト、ナット、ネジがしっかりと締まっているか定期的に確認してください。必要に応じて締め直してください。
- 潤滑: The magnetic resistance system is generally maintenance-free. If you notice any squeaking from moving parts (e.g., pedal axles), apply a small amount of silicone-based lubricant.
- ストレージ: When not in use, store the bike in a dry, cool place away from direct sunlight. The integrated transport wheels allow for easy movement.

Figure 6.1: The exercise bike features transport wheels for easy relocation after use.
7。 トラブルシューティング
| 問題 | 考えられる原因 | 解決 |
|---|---|---|
| Computer display not working | Loose cable connection; Dead batteries | Check all cable connections to the computer; Replace batteries (if applicable). |
| 抵抗変化なし | 抵抗ケーブルが外れているか損傷している | Check the resistance cable connection to the tension knob and the main unit. |
| きしみ音や擦れる音 | Loose parts; Lack of lubrication | Check and tighten all bolts and nuts; Apply silicone lubricant to moving parts if necessary. |
| 使用中に不安定になる | Bike not on a level surface; Loose stabilizers | Ensure the bike is on a flat surface; Adjust leveling caps on stabilizers; Tighten stabilizer bolts. |
8. 仕様
| 特徴 | 仕様 |
|---|---|
| モデル | 979536 |
| 寸法(長さ×幅×高さ) | 73 x 48 x 137 cm |
| 製品重量 | 23キロ |
| 最大ユーザー重量 | 120キロ |
| 抵抗システム | Magnetic, 8-level manual adjustment |
| 駆動システム | ベルト |
| コンピュータ機能 | Time, Distance, Speed, Calories, Pulse (Heart Rate) |
| 材質タイプ | プラスチック、金属 |
| 電源(コンピュータ) | 電池駆動 |
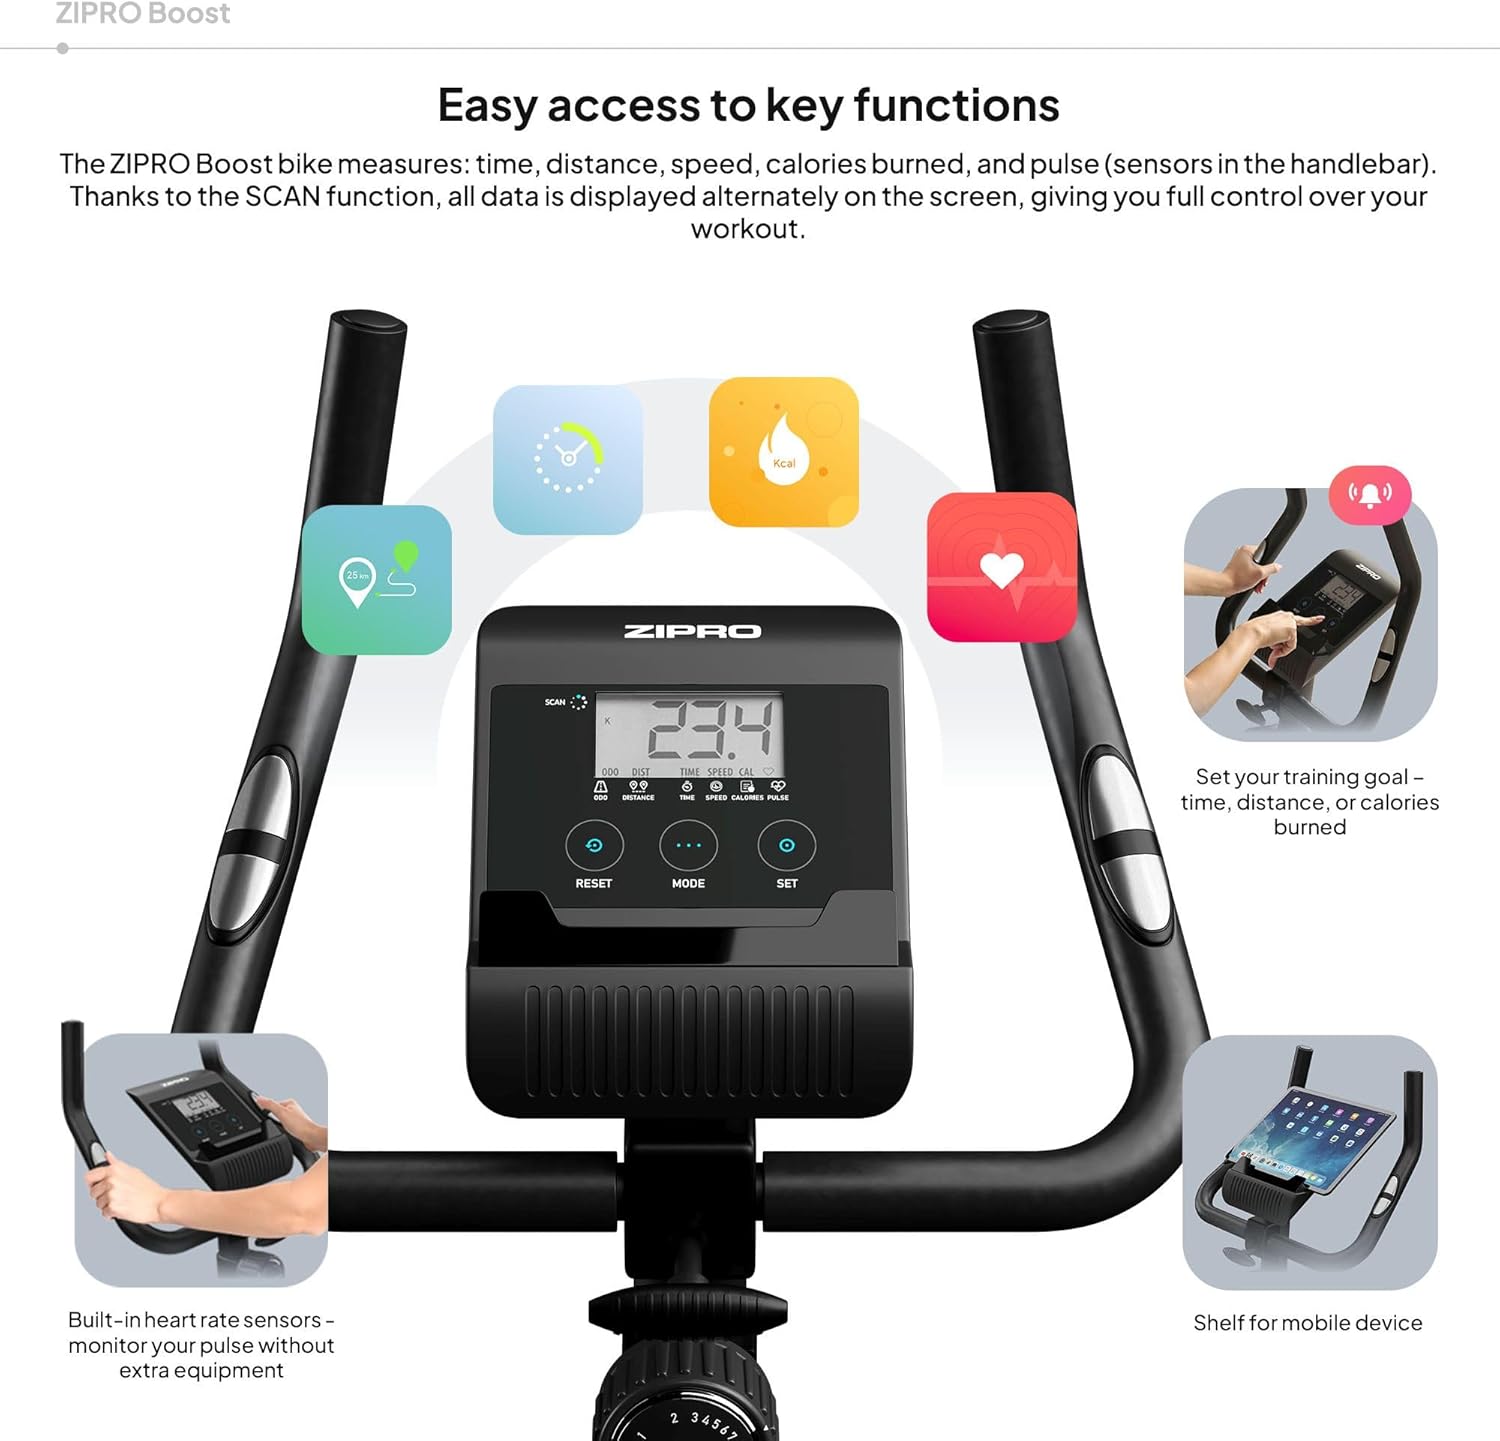
Figure 8.1: Key dimensions and user specifications for the exercise bike.
9. 保証とサポート
Your ZIPRO Boost Exercise Bike comes with a standard manufacturer's warranty. Please refer to the warranty card included in your package for specific terms and conditions. For technical support, spare parts, or any inquiries not covered in this manual, please contact ZIPRO customer service through their official web製品を購入したサイトまたは小売店にお問い合わせください。