導入
This manual provides essential instructions for the safe and effective installation, operation, and maintenance of your Technical Precision replacement lamp and housing for the HITACHI CP-X417 projector. Please read this manual thoroughly before attempting any installation or operation to ensure proper function and to prevent damage to the product or your projector.
安全情報
WARNING: Risk of electric shock and burns. Always disconnect power to the projector before attempting to replace the lamp. Allow the projector and old lamp 取り扱う前に完全に冷ましてください。
- Ensure the projector is unplugged from the power outlet and has been off for at least 30 minutes to allow the lamp 冷やす。
- Do not touch the glass part of the new lamp 素手で直接触れないでください。皮脂は寿命を縮める可能性があります。amp 手袋または清潔な布を使用してください。
- 古いlを処分するamps according to local regulations. They may contain mercury.
- Do not operate the projector with the lamp カバーを外した状態。
セットアップとインストール
Follow these steps carefully to replace the projector lamp.
- プロジェクターを準備します。 Ensure the projector is turned off and unplugged from the power source. Allow it to cool down for at least 30 minutes.
- Lを見つけるamp カバー: Refer to your HITACHI CP-X417 projector's original manual to locate the lamp カバー。通常は1本以上のネジで固定されています。
- Lを削除しますamp カバー: Using an appropriate screwdriver, carefully loosen and remove the screws securing the lamp cover. Set the screws and cover aside in a safe place.
- 古いLを削除するamp: 古いlamp module will have a handle or a set of screws holding it in place. Loosen these screws and gently pull the old lamp module straight out of the projector. Avoid forcing it.
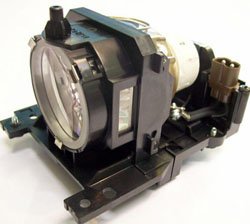
Figure 1: Technical Precision Replacement Lamp and Housing. This image shows the complete lamp module, ready for installation into the projector.
- Install the New Lamp: Carefully insert the new Technical Precision lamp module into the projector slot. Ensure it slides in smoothly and is seated firmly. Do not force it.
- 新しいLを確保するamp: 新しいlを固定するネジを締めますamp モジュールが配置されました。
- Lを交換してくださいamp カバー: lを再度取り付けますamp cover and secure it with the screws removed earlier. Ensure it is properly closed to prevent dust entry and ensure safe operation.
- Lをリセットamp タイマー: lを交換した後amp, it is crucial to reset the lamp timer in your projector's menu. Consult your HITACHI CP-X417 projector's manual for specific instructions on how to access and reset the lamp timer. This ensures accurate tracking of new lamp 人生。
操作手順
Once the new lamp インストールされ、lamp timer is reset, you can resume normal operation of your projector.
- 初回使用: 新しいlamp may appear slightly brighter or have a different color temperature during its initial hours of use. This is normal as the lamp 安定します。
- 最適なパフォーマンス: lを最大化するにはamp life and maintain optimal performance, avoid frequent on/off cycles. Allow the projector to run for at least 15-20 minutes before turning it off.
- クールダウン期間: Always allow the projector to complete its cool-down cycle after turning it off. Do not unplug the projector until the cooling fans have stopped.
メンテナンス
Proper maintenance helps extend the life of your projector and the replacement lamp.
- クリーニング: Periodically clean the projector's air filters according to your projector's manual. Clogged filters can lead to overheating, which shortens lamp 人生。
- Lamp ハウジング: lを開こうとしないでくださいamp housing or replace the bare bulb inside the module. This replacement unit is designed as a complete module.
- ストレージ: If the projector will not be used for an extended period, store it in a cool, dry, dust-free environment.
トラブルシューティング
新しいlをインストールした後に問題が発生した場合amp次の一般的な問題と解決策を参照してください。
| 問題 | 考えられる原因 | 解決 |
|---|---|---|
| Lamp オンになりません。 |
|
|
| Image is dim or poor quality. |
|
|
| プロジェクターはamp エラーメッセージ。 |
|
|
仕様
Key specifications for the Technical Precision Replacement Lamp and Housing for HITACHI CP-X417:
- ブランド: 技術的精度
- モデル名: CP-X417 LAMP & HOUSING
- 部品番号: CP-X417 LAMP & HOUSING
- 材料: ガラス
- 商品パッケージ数量: 1
- 光源の種類: プロジェクターlamps
- ASIN: B07RXR3FD2
保証とサポート
For warranty information or technical support regarding your Technical Precision replacement lamp, please refer to the documentation provided with your purchase or contact Technical Precision customer service directly. Contact details are typically available on the manufacturer's webサイトまたは小売店を通じてご購入いただけます。
For general projector operation or issues unrelated to the lamp, please consult your original HITACHI CP-X417 projector manual or contact HITACHI support.