1. はじめに
Thank you for choosing the BESDER Home Security IP Camera. This wireless smart WiFi camera is designed to provide reliable surveillance, audio recording, and baby monitoring capabilities with high-definition video. This manual will guide you through the setup, operation, and maintenance of your new device to ensure optimal performance and security.
2. 安全情報
- カメラに正しい電源が供給されていることを確認してくださいtage (DC 5V) as specified.
- Do not expose the camera to water or moisture. It is designed for indoor use only.
- カメラを直射日光の当たる場所や熱源の近くに置かないでください。
- カメラをご自身で分解したり修理したりしないでください。修理が必要な場合は、資格のある担当者にご相談ください。
- カメラとその付属品は子供の手の届かないところに保管してください。
- Use only the provided power adapter and cable to prevent damage.
3. パッケージ内容
パッケージをチェックして、すべてのアイテムが揃っていて良好な状態であることを確認してください。
- BESDER Home Security IP Camera
- USB電源ケーブル
- 電源アダプタ(DC 5V)
- 取り付けネジと壁プラグ
- ユーザーマニュアル(このドキュメント)

Image showing the BESDER IP Camera along with its accessories: a USB power cable, a power adapter, and a packet of mounting screws.
4.製品オーバーview
Familiarize yourself with the main components of your BESDER IP Camera:
- カメラレンズ: ビデオ foo をキャプチャしますtage.
- 赤外線LED: 夜間視力用。
- マイクロフォン: 音声入力用。
- スピーカー: 双方向の音声通信用。
- SDカードスロット: ローカルビデオストレージ用(最大 64 GB をサポート)。
- 電源インターフェース(DC 5V): 電源アダプタに接続します。
- リセットボタン: 工場出荷時の設定を復元するために使用されます。

Diagram illustrating the side view of the BESDER IP Camera, highlighting the SD Card slot, Power interface (DC 5V), and Reset button.
5. セットアップ
5.1. 電源を入れる
- Connect the USB power cable to the camera's power interface.
- 電源アダプタを標準のコンセントに差し込みます。
- The camera will power on, and its indicator light will begin to flash, indicating it's ready for setup.
5.2. App Installation (iCSee)
The BESDER IP Camera uses the iCSee application for remote monitoring and control.
- Download the iCSee app from your mobile device's app store (App Store for iOS or Google Play Store for Android).
iOS用にダウンロード | Android 用にダウンロード - 新しいアカウントを登録するか、すでにアカウントをお持ちの場合はログインしてください。
5.3。 Wi-Fi接続
カメラを自宅の Wi-Fi ネットワークに接続するには、次の手順に従います。
- iCSee アプリを開き、「+」アイコンをタップして新しいデバイスを追加します。
- Select "Add My Device" or "Add Camera".
- Choose the "Wi-Fi Camera" option.
- Follow the on-screen prompts to enter your Wi-Fi network name (SSID) and password. Ensure your phone is connected to a 2.4GHz Wi-Fi network, as the camera may not support 5GHz.
- アプリがQRコードを生成します。スマートフォンの画面をカメラレンズの前(約15~20cm)に置き、カメラから確認音が聞こえるまで待ちます。
- Once connected, the camera's indicator light will turn solid blue. You can now name your camera and start monitoring.
5.4. 取り付け
カメラは平らな面に置くことも、壁や天井に取り付けることもできます。
- 明確な基準がある適切な場所を選択してください view Wi-Fi 範囲内であること。
- If mounting, use the provided mounting screws and wall plugs to secure the camera base.
- Adjust the camera's angle as needed within the app after mounting.
6.運用
6.1.ライブ View
Access real-time video feed from your camera through the iCSee app.
- Open the iCSee app and select your camera from the device list.
- The live video feed will appear. You can pan and tilt the camera remotely using the controls in the app.

Screenshot of a multi-camera monitoring interface, likely from the iCSee application, displaying live feeds from multiple cameras and recording controls.
6.2. 記録と保存
The camera supports local storage via a MicroSD card.
- Insert a MicroSD card (up to 64GB, Class 10 recommended) into the SD card slot.
- In the iCSee app settings, navigate to "Storage Settings" to format the SD card and configure recording modes (e.g., continuous, motion-triggered).
- 記録された footagあなたはできる viewアプリから直接ダウンロードできます。
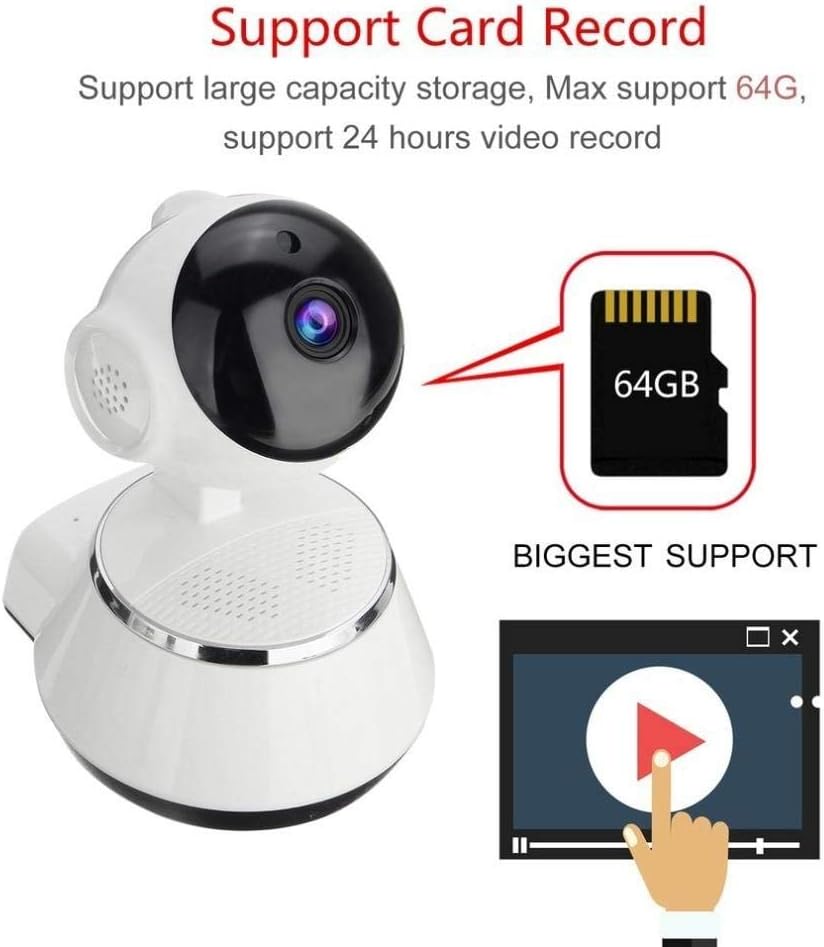
Image demonstrating the camera's support for large capacity storage, specifically showing a 64GB MicroSD card, indicating support for 24-hour video recording.
6.3. モーション検出
Receive alerts when motion is detected in the camera's field of view.
- Enable "Motion Detection" in the camera settings within the iCSee app.
- Adjust sensitivity levels and set up notification preferences (e.g., push notifications, email alerts).
6.4. ナイトビジョン
暗い場所ではカメラは自動的に夜間視力に切り替わります。
- Infrared LEDs provide clear black-and-white video up to 10 meters in complete darkness.
- No manual intervention is required for night vision activation.

Comparison image displayed on a smartphone screen, showing the difference between daytime and nighttime monitoring views, highlighting the infrared night vision capability.
6.5. 双方向オーディオ
内蔵マイクとスピーカーを使用してカメラを通じて通信します。
- ライブ中 view, tap the microphone icon in the iCSee app to speak through the camera.
- スピーカーアイコンをタップすると、カメラの周囲の音声を聞くことができます。
6.6. リモートアクセス
Monitor your property from anywhere with an internet connection.
- As long as your camera is connected to Wi-Fi and your phone has internet access, you can view live feeds and manage settings remotely via the iCSee app.
7. メンテナンス
- クリーニング: カメラのレンズと本体の清掃には、柔らかく乾いた布をご使用ください。液体クリーナーやエアゾールは使用しないでください。
- ファームウェアの更新: Regularly check for firmware updates through the iCSee app to ensure your camera has the latest features and security patches.
- SDカード管理: Periodically back up important recordings and format the SD card to maintain optimal performance.
- ストレージ: 長期間使用しない場合は、カメラを直射日光を避けて涼しく乾燥した場所に保管してください。
8。 トラブルシューティング
| 問題 | 考えられる原因 / 解決策 |
|---|---|
| カメラの電源が入らない | Ensure the power adapter is securely connected to both the camera and the power outlet. Try a different outlet. |
| Wi-Fiに接続できません | Check if your Wi-Fi network is 2.4GHz. Ensure the Wi-Fi password is correct. Move the camera closer to the router. Reset the camera and try again. |
| ライブ view is blurry or dark | Clean the camera lens. Check lighting conditions. Ensure night vision is functioning correctly in low light. |
| SDカードに録画されない | Ensure the SD card is inserted correctly and formatted in the app. Check if the card is full or corrupted. Try a different SD card. |
| 音声が出ない、または音質が悪い | Check microphone and speaker settings in the app. Ensure there are no obstructions blocking the microphone or speaker. |
| カメラが頻繁に切断される | Weak Wi-Fi signal. Move the camera closer to the router or consider a Wi-Fi extender. Reduce network congestion. |
9. 仕様
| 特徴 | 詳細 |
|---|---|
| モデル番号 | BES-MH03 |
| 接続技術 | ワイヤレス(Wi-Fi) |
| 推奨用途 | Baby Monitoring, Home Security |
| 特集 | Motion Sensor, Night Vision (Infrared distance 10m) |
| フォームファクター | ドーム |
| ワットtage | 3ワット |
| ストレージサポート | MicroSD カード (最大 64GB) |
| オーディオ | Two-way audio (Audio Record) |
10. 保証とサポート
BESDER products are manufactured to high-quality standards. For warranty information, please refer to the terms and conditions provided at the point of purchase or contact your retailer. For technical support or further assistance, please refer to the support section within the iCSee application or visit the official BESDER webサイト(利用可能な場合)。