
導入
This manual provides comprehensive instructions for the installation, operation, and maintenance of your A. O. Smith AO-US-200 2-Stage Under Sink Water Filter System. Please read all instructions carefully before beginning installation or use to ensure proper function and safety. This system is designed to provide clean, filtered drinking water directly from a dedicated faucet.
重要な安全情報
Always follow basic safety precautions when installing or maintaining this product to reduce the risk of fire, electric shock, or injury to persons. Keep this manual for future reference.
- 取り付ける前に主給水を停止してください。
- システムを凍結温度にさらされる場所に設置しないでください。
- 漏れを防ぐために、すべての接続が確実に固定されていることを確認してください。
- Use only genuine A. O. Smith replacement filters.
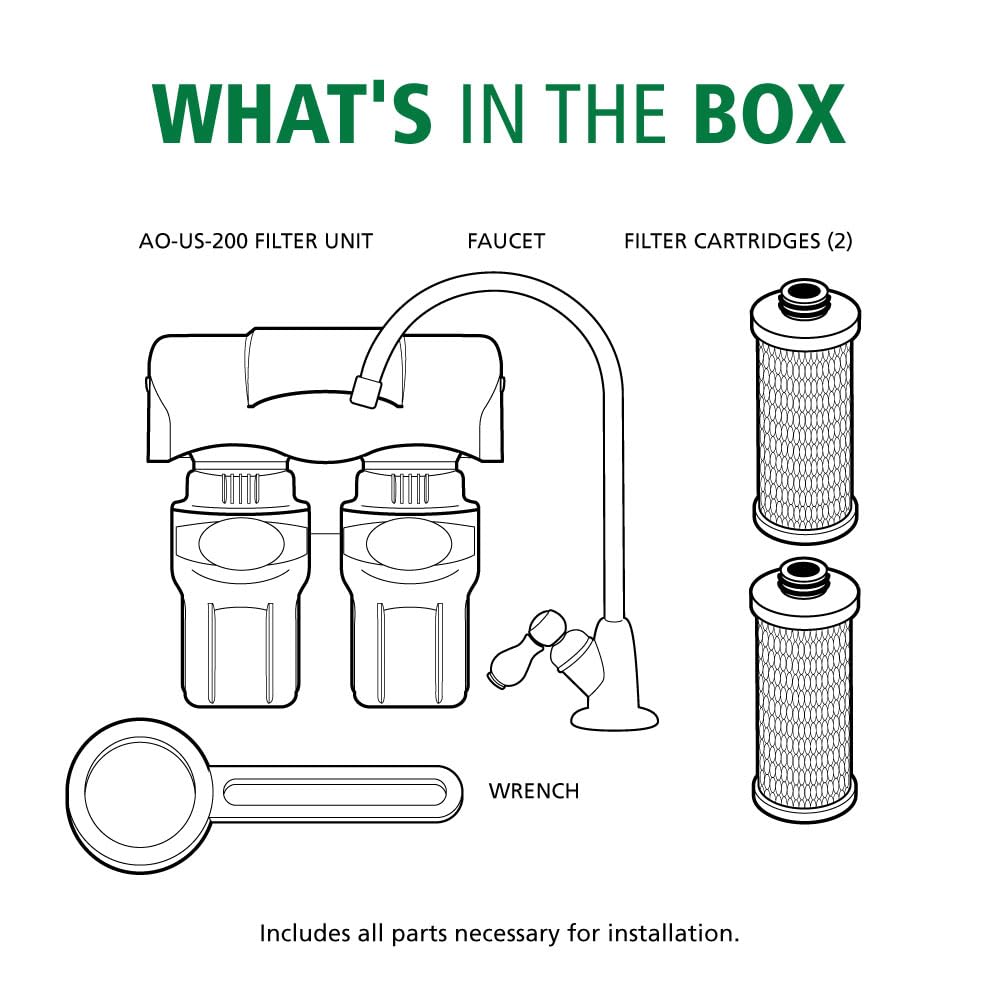
箱の中身
インストールを開始する前に、すべてのコンポーネントが揃っていることを確認してください。
- AO-US-200 Filter Unit
- 蛇口
- Filter Cartridge Set (2 cartridges)
- レンチ
- チューブ
- 1/4" Brass Tee
- Mounting Screws with Anchors
- Faucet Installation Hardware (spacers, nuts, washers)
仕様
| 特徴 | 詳細 |
|---|---|
| モデル番号 | AO-US-200 |
| ろ過Stages | 2-Stage Claryum Filtration |
| フィルター寿命 | 6 months / 500 Gallons |
| 汚染物質の削減 | Reduces up to 99% of 78 contaminants including Lead, PFAS, Chlorine, Mercury, Asbestos, Pharmaceuticals, Chloramine |
| 認定資格 | NSF/ANSI Standards 42, 53, and 401 (WQA Tested & Certified) |
| 流量 | 毎分0.5ガロン |
| 材料 | カーボンブロック |
| 寸法(約) | 高さ: 9 インチ (22.9 cm)、幅: 8.25 インチ (21 cm)、奥行き: 4.25 インチ (10.2 cm) |

セットアップとインストール
1。 インストール前のチェックリスト
- 必要なツール: Adjustable wrench, measuring tape, pencil, Phillips head screwdriver, hammer, variable speed drill with 7/32" bit, level.
- 位置: Select a space under your sink that is at least 12 inches from the bottom of your cabinet and allows for easy access to a cold water supply line.
- 蛇口の配置: The dedicated faucet may be mounted on the sink using an existing hole (e.g., for a sprayer nozzle or soap dispenser) or by drilling a new hole no more than 1/2 inch in diameter. Ensure the faucet's spout extends slightly past the edge of the sink. 注意: 穴あけが必要な場合は、認定または認定された専門家に依頼することをお勧めします。
2. Connecting to Cold Water Supply
- シンクへの冷水の供給を止めます。
- Disconnect the cold water supply line from the shut-off valve.
- Attach the threaded end of the 1/4" brass tee to the cold water shut-off valve.
- Connect the cold water supply line to the top of the brass tee.
- Tighten all connections using an adjustable wrench.
3. 蛇口の取り付け
- Insert the faucet stem through the chosen hole in your sink.
- From underneath the sink, slide the faucet rubber washer, faucet washer, and faucet spacer onto the faucet stem.
- Secure the faucet with the faucet nut, tightening it with a wrench to ensure it is secure to the sink.
4. Mounting the Filter Unit
- Temporarily position the filter unit under the sink in your chosen location.
- 取り付け穴に鉛筆で印を付けます。
- Drill pilot holes at the marked locations. If mounting into drywall, insert the provided drywall anchors.
- Mount the unit to the wall using the provided screws.


5. チューブの接続
- Connect one end of the provided tubing to the open port on the brass tee. Ensure the plastic tube insert and brass nut are correctly installed for a secure, leak-free connection.
- Insert the other end of this tubing completely into the 'IN' port of the filter unit.
- Connect another piece of tubing to the faucet stem. Ensure the chrome nut and plastic collar are correctly installed.
- Insert the other end of this tubing completely into the 'OUT' port of the filter unit.
6. Initial System Flush
- ゆっくりと冷水の供給を開始します。
- Open the dedicated filtered water faucet and allow water to run for 10 minutes to flush the system. This removes air and carbon fines.
- すべての接続部に漏れがないか確認してください。必要に応じて締め直してください。
Video 1: Official A. O. Smith AO-US-200 Installation Guide. This video provides a visual walkthrough of the installation process for the 2-stage under sink water filter system.
システムの操作
Once installed and flushed, your A. O. Smith AO-US-200 system is ready for use. Simply open the dedicated filtered water faucet to dispense clean, filtered water. The system filters water at a rate of 0.5 gallons per minute, suitable for families of 1 to 4 people.
メンテナンス:フィルターの交換
For optimal performance, replace your filter cartridges every 6 months or after 500 gallons of use, whichever comes first. The system is designed for easy, tool-free filter replacement.
濾過技術


フィルター交換手順
- システムへの冷水供給を停止します。
- Open the filtered water faucet to relieve pressure and drain any remaining water.
- Twist the old filter cartridges counter-clockwise to remove them from the unit housing.
- Discard the old filters.
- Insert new filter cartridges into the unit housing, aligning the connection points.
- Push the new filters up and twist clockwise until they are securely locked into place.
- ゆっくりと冷水の供給を開始します。
- Open the filtered water faucet and allow water to run for 10 minutes to flush the new filters.
- 漏れがないか確認してください。

トラブルシューティング
| 問題 | 考えられる原因 | 解決 |
|---|---|---|
| 接続部の漏れ | Loose fittings, missing O-rings, improper tubing insertion. | Ensure all nuts are tightened, check for properly seated O-rings, re-insert tubing fully into quick-connect fittings. Using plumber's tape on threaded connections can help. |
| 蛇口からの水の流れが少ない | Clogged filters, kinked tubing, low incoming water pressure. | Replace filters if they are past their service life. Check tubing for kinks. Verify adequate household water pressure. |
| Unpleasant taste/odor | Filters are exhausted, initial carbon fines not fully flushed. | Replace filters. Flush the system for an extended period (e.g., 15-20 minutes) after filter replacement. |
| Filter change indicator not working | バッテリーを交換する必要があります。 | Replace the battery in the filter unit's indicator. |
保証情報
A. O. Smith provides a limited warranty for this product. Please refer to the warranty card included with your purchase or visit the official A. O. Smith web詳細な利用規約については、ウェブサイトをご覧ください。保証請求のために購入証明書を保管してください。
カスタマーサポート
If you have any questions, require assistance with installation, or need to order replacement parts, please contact A. O. Smith Customer Support:
- Webサイト: 詳しくはこちら
- 電話: Refer to your product packaging or the A. O. Smith web最新の連絡先番号については、サイトをご覧ください。