
1. はじめに
Thank you for choosing the TFA Dostmann CLOCCO 60.2549.08 Radio-Controlled Alarm Clock. This device combines a minimalist wood-look design with precise radio-controlled timekeeping, an indoor temperature display, and an alarm function. This manual provides essential information for the correct setup, operation, and maintenance of your new alarm clock.
主な特徴:
- 電波時計: Automatic synchronization with the atomic clock for high precision, eliminating the need for manual time adjustments.
- 室内温度表示: Integrated sensor accurately displays the current room temperature in Celsius.
- Minimalist Wood Look Design: 美的にasing design suitable for various environments, including bedrooms, living rooms, and offices.
- 変数表示: Shows time, date, day of the week, or indoor temperature. The display can be set to react to sound or touch.
- 自動調光: The display brightness automatically adjusts between 7:00 PM and 6:59 AM for comfortable view暗い場所での使用。
- アラーム機能: Features a reliable alarm with a pre-settable wake-up time.
2. セットアップ
2.1 開梱と同梱コンポーネント
すべての部品をパッケージから慎重に取り出してください。以下のものがすべて揃っていることを確認してください。
- TFA Dostmann CLOCCO 60.2549.08 Alarm Clock
- 電源アダプター
- 1 x CR2 Battery (for settings backup)
- 取扱説明書
2.2 電源
The CLOCCO alarm clock operates primarily via the included power adapter. The CR2 battery serves as a backup to retain settings during power outages。
- Insert the CR2 battery into the designated battery compartment, observing the correct polarity (+/-). This battery ensures your settings are saved if the main power is interrupted.
- Connect the power adapter cable to the DC input port on the back of the alarm clock.
- 電源アダプタを標準の電源コンセントに差し込みます。ディスプレイが点灯します。
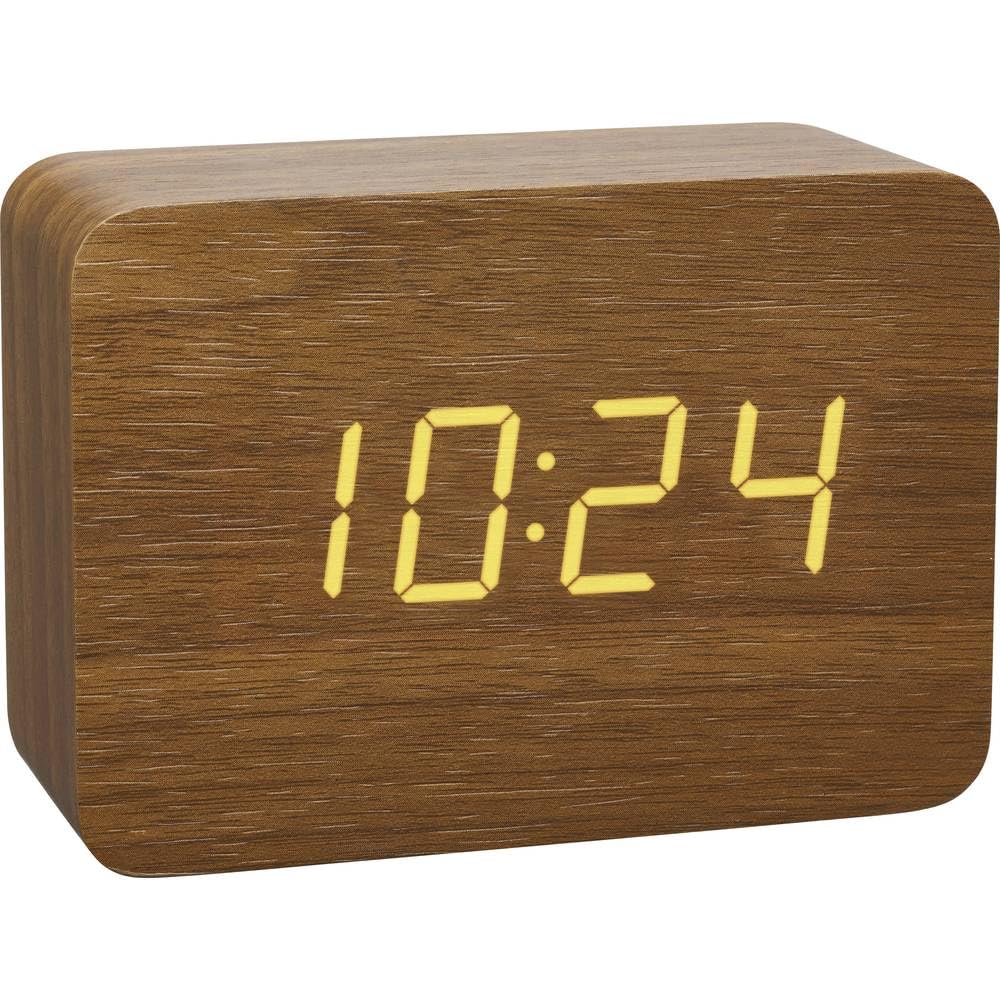
図1: 前面 view of the CLOCCO alarm clock, showing the digital display.
2.3 初期時刻同期
Upon initial power-up, the alarm clock will automatically attempt to synchronize with the DCF77 radio signal (atomic clock in Frankfurt, Germany). This process may take several minutes to a few hours, depending on your location and environmental conditions.
- Place the alarm clock near a window, away from electronic devices that might cause interference.
- A flashing antenna symbol on the display indicates that the clock is searching for the radio signal.
- Once synchronized, the antenna symbol will become solid, and the correct time will be displayed. The clock will automatically check and adjust the time, typically between 2:00 AM and 4:00 AM daily.
- If synchronization fails, you may need to manually set the time (refer to Section 3.1).
3. 操作手順
3.1 Display Modes and Manual Settings
The CLOCCO alarm clock offers various display modes and manual adjustment options:

Figure 2: Feature diagram showing display modes and controls.
- 表示モードの切り替え: Press the "SET" button (usually located on the back or top) to cycle through display modes: Time, Date, Day of the Week, Indoor Temperature, or an automatic cycle between these.
- Manual Time/Date Setting: If radio synchronization is unavailable or undesired, press and hold the "SET" button until the time digits flash. Use the "UP" and "DOWN" buttons to adjust the hour, then press "SET" to confirm and move to minutes, then date, and so on. Press "SET" again to exit manual setting mode.
- 温度単位: The temperature is displayed in Celsius (°C). There is no option to change to Fahrenheit.
3.2アラームの設定
アラーム時刻を設定するには:
- Press the "ALARM" button (usually on the back or top) once to display the current alarm time.
- Press and hold the "ALARM" button until the alarm hour digits flash.
- Use the "UP" and "DOWN" buttons to adjust the desired alarm hour. Press "ALARM" to confirm.
- The minute digits will flash. Use "UP" and "DOWN" to adjust the alarm minutes. Press "ALARM" to confirm.
- To activate or deactivate the alarm, press the "ALARM" button briefly when the alarm time is displayed. An alarm icon will appear/disappear on the display.
3.3 Dimming Function and Sound Activation
- 自動調光: The display brightness automatically reduces between 7:00 PM and 6:59 AM to prevent excessive light during nighttime hours.
- 手動明るさ調整: (If available, typically via a dedicated button or holding a button) Some models allow manual adjustment of brightness levels. Refer to the specific button labels on your device.
- Sound-Activated Display: When operating on battery power (if applicable) or in a specific mode, the display can be set to turn off and only illuminate when a sound is detected (e.g., a clap) or when the clock is touched. This conserves energy and reduces light pollution. Consult your device's specific button for this feature (e.g., "DOWN" button for 5 seconds as mentioned in a review).

Figure 3: The CLOCCO alarm clock in a bedroom setting, highlighting its clear display.
4. メンテナンス
4.1 クリーニング
目覚まし時計の外観と機能を維持するには:
- 表面を柔らかく乾いた布、または軽く乾いた布で拭いてください。amp 布。
- Do not use abrasive cleaners, solvents, or polishing agents, as these can damage the finish and display.
- デバイスの開口部に液体が入らないようにしてください。
4.2 Battery Replacement (CR2 Backup Battery)
The CR2 battery is primarily for backup. If you notice settings are not retained after a power interruption, it may be time to replace this battery.
- Locate the battery compartment on the back or bottom of the device.
- コンパートメントカバーを開きます。
- 古い CR2 電池を取り外し、地域の規制に従って廃棄してください。
- 正しい極性を確認して、新しい CR2 電池を挿入します。
- 電池カバーをしっかりと閉じてください。
5。 トラブルシューティング
| 問題 | 考えられる原因 | 解決 |
|---|---|---|
| ディスプレイが空白または点灯しません。 | No power, power adapter disconnected, or sound-activated display is active. | Ensure the power adapter is securely connected to both the clock and the outlet. If using sound activation, make a sound or touch the clock. |
| Radio-controlled time is not synchronizing. | Poor signal reception due to location, interference, or initial setup. | Move the clock closer to a window and away from other electronic devices. Allow several hours for synchronization. If issues persist, manually set the time. |
| ディスプレイが明るすぎるか暗すぎます。 | Automatic dimming active, or manual brightness setting needs adjustment. | The clock automatically dims between 7 PM and 7 AM. Check if your model has manual brightness adjustment buttons. |
| アラームは鳴りません。 | アラームが作動していないか、または誤って設定されています。 | Verify that the alarm is activated (alarm icon visible) and that the alarm time is set correctly (refer to Section 3.2). |
| 電源を切ると設定は失われます。 | CR2 backup battery is depleted or missing. | Replace the CR2 backup battery (refer to Section 4.2). |
6. 仕様
| ブランド: | TFAドストマン |
| モデル番号: | 60.2549.08 |
| 寸法(長さ×幅×高さ): | 100 x 41 x 70 ミリメートル |
| 重さ: | 128グラム |
| 材料: | Plastic (with wood look finish) |
| 表示タイプ: | デジタルLED |
| 電源: | Power Adapter (included), 1 x CR2 Battery (included for backup) |
| 特別な機能: | Radio-controlled time, Alarm, Large display, Temperature display (°C), Automatic dimming, Sound-activated display |
| 使用法: | 屋内使用のみ |
| スマートホーム互換性: | スマートホームシステムとは互換性がありません |
7.保証とサポート
7.1 保証情報
This product comes with a limited warranty. Please refer to the warranty card included in your packaging or visit the official TFA Dostmann website for detailed warranty terms and conditions. The availability of spare parts in the EU is typically 1 year from the date of purchase.
7.2 カスタマーサポート
Should you encounter any issues not covered in this manual or require further assistance, please contact TFA Dostmann customer support. Contact information can usually be found on the product packaging, the official webサイト、または小売店を通じてご購入いただけます。
詳細については、公式ウェブサイトをご覧ください。 TFA Dostmann Store.