1. はじめに
Thank you for choosing the Walfront LCD Digital Programmable Weekly Timer Switch. This device is designed for automatic control of various electrical appliances based on user-defined schedules. Please read this manual carefully before installation and operation to ensure proper use and to prevent damage.
2. 安全情報
警告: 電気設備の設置は、必ず資格を持った技術者が行ってください。感電を防ぐため、設置やメンテナンスを行う前には必ず電源を切ってください。
- 入力ボリュームを確認するtage matches the timer's specifications (24V for this model).
- Do not exceed the maximum load capacity of 16A 250VAC (resistive load).
- デバイスを水や過度の湿気から遠ざけてください。
- ご自身でユニットを分解したり修理したりしないでください。問題が発生した場合は、サポートにお問い合わせください。
3.製品オーバーview
The Walfront LCD Digital Programmable Weekly Timer Switch is a high-precision device built with durable, moisture-resistant, and corrosion-protected materials. It features a clear LCD display and supports up to 16 ON/OFF programs daily and weekly.
3.1 主な特徴
- High-quality construction for long lifespan.
- 各種電気機器の自動オン/オフ制御。
- Built-in 1.2V/40mA rechargeable battery for memory retention.
- Industrial-grade chip for high precision and strong anti-interference.
- Up to 16 ON and 16 OFF programming settings per day/week.
- LCD display showing real-time, hour, minute, and ON/AUTO/OFF status.
- DIN rail mounting design.
3.2 コンポーネント

画像1: フロント view of the Walfront LCD Digital Programmable Weekly Timer Switch. Shows the LCD display and control buttons.

画像2: 戻る view of the timer switch, illustrating the wiring terminals and basic electrical specifications printed on the unit.
4. セットアップとインストール
This timer is designed for DIN rail mounting. Ensure the DIN rail is securely installed before attaching the timer.
4.1 配線図

画像3: Wiring diagrams showing direct connection (left) and connection with an AC contactor (right). The direct connection illustrates neutral and live wire inputs and load output. The AC contactor diagram shows 220V power input and output to the load device.
直接配線: Connect the neutral and live wires to the designated input terminals (L and N). Connect the load to the output terminals (typically 3 and 4 for normally open, or 3 and 5 for normally closed, as indicated on the device). Refer to the diagram on the device for exact terminal numbering.
Wiring with AC Contactor: For higher loads, connect the timer to control an AC contactor. The timer's output will switch the coil of the contactor, which in turn controls the main power to the load. This setup is shown on the right side of Image 3.
4.2 初回電源投入とバッテリー充電
Upon first use, connect the timer to power. The internal 1.2V/40mA rechargeable battery will begin charging. If the display is blank or shows incorrect time, allow it to charge for a few minutes. Press the "Reset" button (often labeled with a small 'R' or 'C' and requires a pointed object) to clear all settings and start fresh.
5. 操作手順
5.1 現在の時刻の設定
- を押す "CLOCK" button (often labeled with a clock icon) and hold it.
- 保持しながら "CLOCK"、 「D+」 現在の曜日を設定するボタン。
- 保持しながら "CLOCK"、 「H+」 現在の時間を設定するボタン。
- 保持しながら "CLOCK"、 「M+」 現在の分を設定するボタン。
- リリース "CLOCK" ボタンを押します。これで時刻が設定されました。
5.2 Setting 12/24 Hour Mode
By default, the timer operates in 24-hour mode. To switch between 12-hour (AM/PM) and 24-hour modes, press and hold the "CLOCK" button for approximately 5 seconds. The display will show "AM" for 12-hour mode or switch back to 24-hour format.
5.3 オン/オフスケジュールのプログラミング
The timer supports up to 16 ON and 16 OFF programs. Each program consists of an ON time and an OFF time.
- を押す "PROG" ボタンを1回押します。ディスプレイに「1 ON」と表示されます。
- プレス 「D+」 to select the day(s) for this ON program (e.g., Mon-Fri, Sat-Sun, or specific days).
- プレス 「H+」 希望するオン時間を設定します。
- プレス 「M+」 希望するオンの分を設定します。
- プレス "PROG" もう一度押してください。ディスプレイに「1 OFF」と表示されます。
- 手順 2 ~ 4 を繰り返して、最初のプログラムの OFF 時間を設定します。
- 押し続ける "PROG" to cycle through "2 ON", "2 OFF", up to "16 ON", "16 OFF", setting each as needed.
- 必要なプログラムをすべて設定したら、 "CLOCK" button to exit programming mode and return to real-time display.
注記: If you need to cancel a program, press the "PROG" button to select the program, then press the "マニュアル" button until "----" appears on the display for that program's time slot.
5.4 手動オーバーライド(オン/自動/オフ)
を押す "マニュアル" ボタンを押すと動作モードが切り替わります。
- に: すべてのプログラムを無視して、出力は継続的にオンになります。
- 自動: タイマーはプログラムされたオン/オフスケジュールに従って動作します。
- OFF: すべてのプログラムを無視して、出力は継続的にオフになります。
タイマーがオンになっていることを確認してください 「オート」 プログラム操作のモード。
5.5 キーロック機能
To prevent accidental changes to settings, the timer features a key lock function.

画像4: The timer display showing the key lock symbol, indicating that the buttons are locked.
- To lock the keys: Press and hold the 「C/R」 (Cancel/Reset) button for approximately 4 seconds until a lock symbol appears on the LCD.
- To unlock the keys: Press and hold the 「C/R」 button again for approximately 4 seconds until the lock symbol disappears.
6. 仕様
| パラメータ | 価値 |
|---|---|
| 入力ボリュームtage | AC/DC 24V (This model) |
| Contact Rated Voltage | AC 180V~264V (50/60Hz) |
| 耐荷重 | 16A 250VAC (Resistive Load) |
| オン/オフ操作 | 16 ON / 16 OFF (Manual/Auto) |
| 画面 | 液晶 |
| 消費電力 | 4.5VA (Max) |
| エラー | ≤2 seconds/day (at 25℃) |
| 取り付け方法 | DIN Rail (sold separately) |
| タイミング範囲 | 1分~168時間 |
| 最小間隔 | 1分 |
| 動作温度 | -10℃~55℃ |
| 動作湿度 | 35~85% RH |
| 寸法(長さ×幅×高さ) | 86 x 36 x 65mm |
| 内蔵バッテリー | 1.2V/40mA rechargeable, >15 days backup |
| 回路数 | Changeover switch (SPDT) |
| 耐用年数 | Mechanical: 107, Electrical: 105 |
| 重さ | 125グラム |
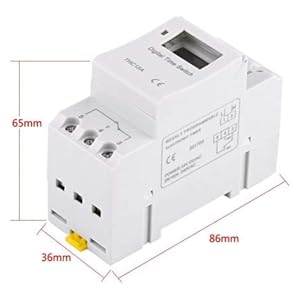
画像5: Diagram illustrating the dimensions of the timer switch: 86mm length, 36mm width, and 65mm height.
7. メンテナンス
- Keep the timer clean and free from dust. Use a dry, soft cloth for cleaning.
- 研磨剤や溶剤は使用しないでください。
- 配線接続が安全であるかどうかを定期的に確認してください。
- The internal battery is designed for long life and typically does not require replacement. If the timer loses settings frequently after power outagバッテリーが故障した場合は、資格を持った技術者による修理が必要になることがあります。
8。 トラブルシューティング
| 問題 | 考えられる原因 | 解決 |
|---|---|---|
| 表示が空白です。 | No power supply or internal battery discharged. | Check power connections. Allow the timer to charge for a few minutes after connecting to power. |
| タイマーがプログラムどおりにオン/オフに切り替わりません。 | Timer is not in "AUTO" mode, programs are incorrect, or key lock is active. | Press "MANUAL" until "AUTO" is displayed. Review and correct programs. Unlock keys if necessary. |
| ボタンが反応しません。 | キーロック機能が有効です。 | Press and hold "C/R" for 4 seconds to unlock the keys. |
| 時間が不正確です。 | Minor drift (within specifications) or internal battery issue. | Reset and re-set the time. If inaccuracy persists or settings are lost frequently, contact support. |
9. 保証とサポート
Walfront strives to provide high-quality products. If you encounter any issues with your product, please contact us for prompt assistance. We offer return and refund services for product defects.
For support, please refer to the contact information provided with your purchase or visit the Walfront store on Amazon: Walfront Amazon Store.