
1. はじめに
This instruction manual provides essential information for the installation, operation, and maintenance of the Hikvision DS-7604NI-K1/4P 4-Channel 4K PoE Network Video Recorder (NVR). Please read this manual thoroughly before using the product to ensure correct and safe operation. Keep this manual for future reference.
2. 安全情報
怪我やデバイスの損傷を防ぐために、次の安全上の注意事項を守ってください。
- 電源: このデバイスに指定された電源アダプタのみを使用してください。電源電圧がtage は安定しており、デバイスの要件を満たしています。
- 換気: 通気口を塞がないでください。過熱を防ぐため、適切な空気の流れを確保してください。
- 環境: Avoid exposing the device to extreme temperatures, humidity, dust, or corrosive environments. Do not place heavy objects on the device.
- インストール: Install the device on a stable surface. Avoid strong vibrations or impacts.
- サービス: 本製品を分解または改造しないでください。修理は必ず資格のある専門家にご依頼ください。
3.製品オーバーview
The Hikvision DS-7604NI-K1/4P is a 4-channel Network Video Recorder designed for surveillance systems. It supports up to 4K resolution for live view, recording, and playback, and features Power-over-Ethernet (PoE) interfaces for direct connection and power supply to compatible IP cameras.
3.1 パッケージ内容
- Hikvision DS-7604NI-K1/4P NVRユニット
- 電源アダプター
- USBマウス
- HDD取り付け用ネジ
- クイックスタートガイド
3.2フロントパネル
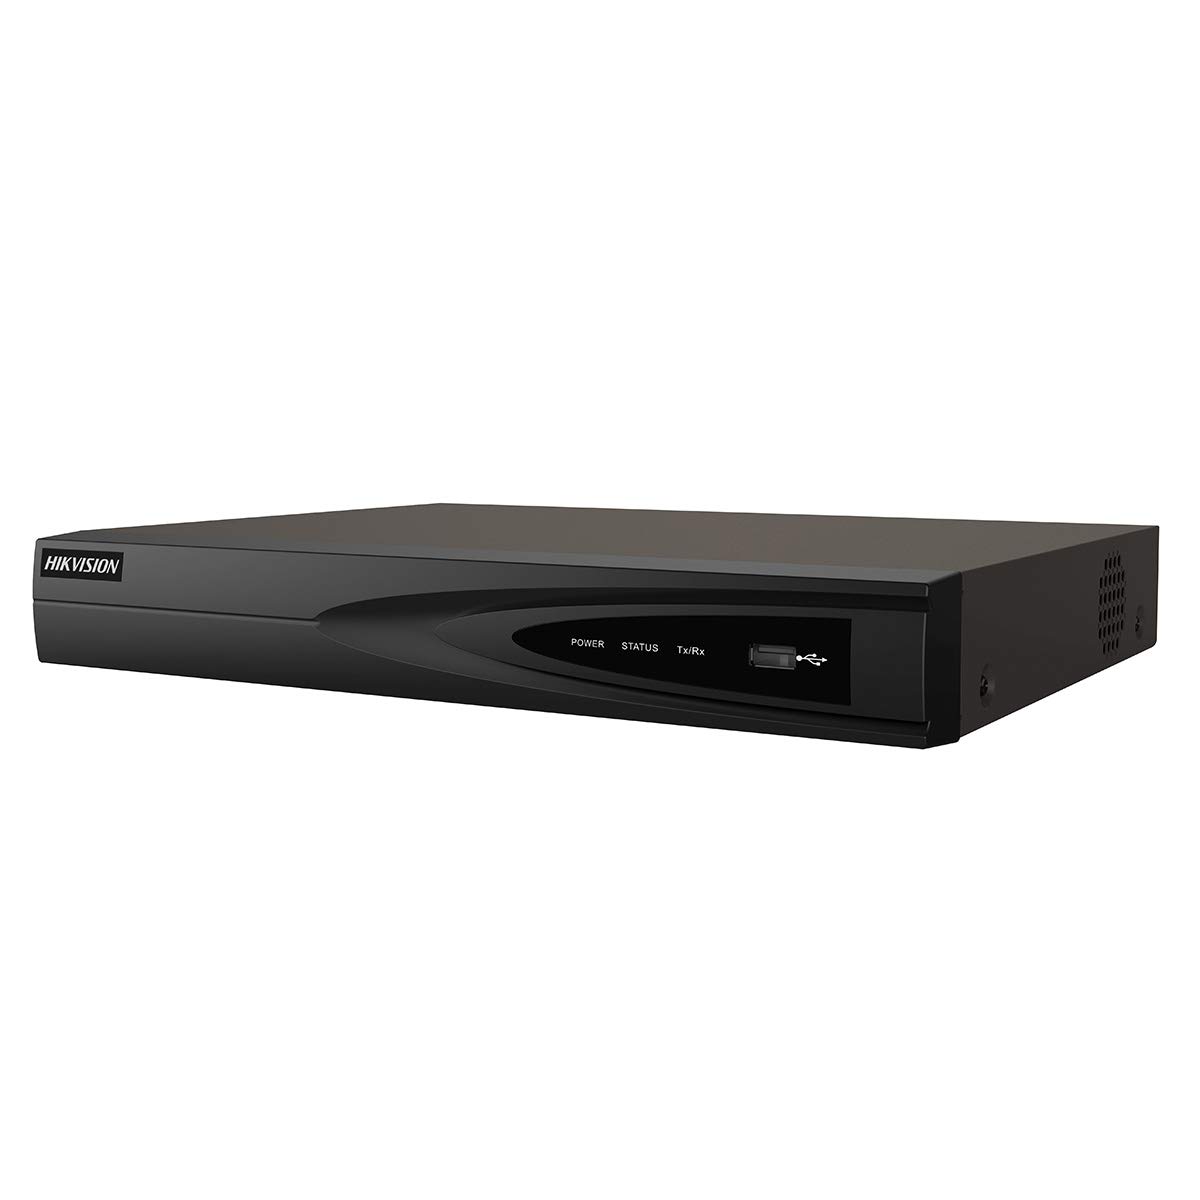
画像1:正面 view of the Hikvision DS-7604NI-K1/4P NVR. This image displays the front panel of the NVR, typically featuring status indicator lights and a USB port for peripheral connections.
3.3 背面パネル
背面パネルには接続用のさまざまなポートがあります。
- PoE ポート (x4): For connecting IP cameras and providing power.
- LANポート: For network connection to a router or switch.
- HDMI出力: For connecting to a monitor or TV for high-definition video output.
- VGA出力: For connecting to a monitor for video output.
- USB Ports (x2 total, typically one front, one rear): マウス、USB ドライブ、その他の周辺機器用。
- オーディオ入力(RCA): For connecting an external audio source.
- 電源入力: 電源アダプタを接続します。
4. セットアップ
4.1 ハードドライブのインストール(オプション)
The NVR supports one internal SATA hard drive for video storage (up to 6 TB). If a hard drive is not pre-installed, follow these steps:
- NVR の上部カバーをネジを外して取り外します。
- SATA データ ケーブルと電源ケーブルをハード ドライブに接続します。
- Align the hard drive with the mounting holes and secure it with the provided screws.
- NVR の上部カバーを取り付け、ネジで固定します。
4.2 周辺機器の接続
- モニター: モニターを NVR の HDMI または VGA 出力ポートに接続します。
- ねずみ: USB マウスを NVR の USB ポートに接続します。
- ネットワーク: イーサネット ケーブルを使用して、NVR の LAN ポートをルーターまたはネットワーク スイッチに接続します。
- カメラ: Connect IP cameras to the NVR's PoE ports. The NVR will automatically power and detect compatible Hikvision PoE cameras.
4.3 電源投入と初期設定
- 電源アダプターを NVR の電源入力に接続し、次に電源コンセントに接続します。
- NVR は自動的に電源がオンになります。
- Upon first boot, the NVR will guide you through an initialization wizard. Follow the on-screen prompts to set up a strong password, network settings, and hard drive formatting (if applicable).
- Ensure the hard drive is formatted before recording can begin.
5. 操作
5.1 ライブ View
After initial setup, the NVR will display the live video feed from connected cameras on the monitor. You can switch between single-camera view マルチカメラグリッド view 画面上のコントロールまたはマウスを使用します。
5.2 録音
NVR はさまざまな録画モードをサポートしています。
- 連続記録: 継続的にビデオを録画します。
- 動き検出記録: カメラの動きが検知されたときのみ録画します view.
- スケジュールされた記録: 事前に定義されたスケジュールに基づいて記録します。
Configure recording settings via the NVR's menu interface (typically accessible by right-clicking on the live view screen and selecting 'Menu').
5.3 再生
再するためにview 記録されたfootage:
- NVR のメイン インターフェイスから「再生」メニューにアクセスします。
- 希望するカメラと日付/時刻の範囲を選択します。
- 再生コントロール(再生、一時停止、早送り、巻き戻し)を使用して、fooをナビゲートします。tage.
5.4 リモートアクセス
リモート用 viewing and management, download the Hik-Connect app on your mobile device or use the Hik-Connect web portal. The NVR must be connected to the internet, and you will need to register the device with your Hik-Connect account. Refer to the Hik-Connect documentation for detailed instructions.
6. メンテナンス
6.1ファームウェアアップデート
定期的にHikvisionの公式をチェックしてください website for firmware updates. Updating the firmware can improve performance, add new features, and enhance security. Follow the instructions provided with the firmware update package carefully.
6.2 ハードドライブ管理
Regularly check the health status of your hard drive through the NVR's menu. If the hard drive shows errors or is nearing its end of life, consider replacing it to prevent data loss. You may also need to format the hard drive periodically, which will erase all recorded data.
6.3 クリーニング
NVRの外装は、柔らかく乾いた布で拭いてください。液体洗剤やエアゾールは使用しないでください。通気口に埃やゴミが付着していないことを確認してください。
7。 トラブルシューティング
| 問題 | 考えられる原因 | 解決 |
|---|---|---|
| モニターにビデオが表示されない | ケーブル接続が緩んでいる、モニターの入力ソースが正しくない、NVR の電源がオンになっていない。 | HDMI/VGAケーブルの接続を確認してください。モニターの入力が正しいことを確認してください。NVRの電源を確認してください。 |
| カメラ画像なし | Camera not powered, network issue, camera not added/activated. | Check PoE cable connection. Ensure camera is powered. Verify camera IP address and add it to the NVR. |
| ビデオを録画できません | No hard drive, hard drive not formatted, hard drive full, recording schedule not set. | Install and format a hard drive. Check hard drive status. Configure recording schedule. |
| リモートアクセスが機能しない | NVR not connected to internet, incorrect network settings, Hik-Connect account issue. | Verify NVR network connection. Check network settings (IP, DNS). Ensure NVR is added to Hik-Connect. |
8. 仕様
| 特徴 | 仕様 |
|---|---|
| モデル番号 | DS-7604NI-K1/4P |
| ブランド | ハイクビジョン |
| 接続技術 | イーサネット |
| 対応デバイス | カメラ |
| 製品寸法(長さ x 幅 x 高さ) | 8.5 x 29.8 x 42.1 cm |
| メモリストレージ容量 | 6TB |
| ハードディスクサイズ | 6TB |
| チャンネル数 | 4 |
| アイテム重量 | 2.2ポンド |
| Digital Video Media Format | ハードディスク |
| オーディオ入力 | RCA |
| USBポート合計 | 2 |
| ビデオ入力 | HDMI、VGA |
| ユニット数 | 1.0 カウント |
| メーカー | ハイクビジョン |
| 世界貿易識別番号 | 06954273652883 |
| 部品番号 | KNVRDS7604NI-K1/4P |
9. 保証とサポート
For warranty information, technical support, and service inquiries, please refer to the official Hikvision webご購入の際は、サイトをご覧いただくか、Hikvision正規販売店にお問い合わせください。保証請求の際は、購入証明としてレシートを保管してください。
オンラインリソース: Visit the official Hikvision support page for FAQs, downloads, and contact information.